Amish White Bread Recipe: There’s something magical about freshly baked bread—especially when it’s Amish white bread. With its soft, fluffy texture and slightly sweet flavor, this bread is a family favorite in many households. Whether you’re making toast, sandwiches, or just want a slice with butter, this bread delivers comfort in every bite.
Unlike store-bought bread, this one is made with love, care, and simple ingredients. Plus, the smell that fills your kitchen while it’s baking? Absolutely irresistible.
Ready to bake the best loaf of your life? Let’s get started.
What Makes Amish White Bread Unique?
Amish white bread isn’t just your average white loaf. What makes it stand out is its slightly sweet taste, pillowy texture, and old-fashioned charm. Made with basic ingredients like flour, sugar, and yeast, it’s the simplicity and heart that go into this bread that make it special.
The Amish are known for their slow, traditional cooking methods. That means no shortcuts, no artificial preservatives, and lots of patience. This bread follows that philosophy. It’s not just food—it’s a tradition passed down through generations.
The History Behind Amish White Bread
Amish white bread comes from a long-standing tradition in Amish communities. Living without modern conveniences, the Amish relied on simple recipes they could make with limited resources. Bread was a staple in every household—served with almost every meal.
Over time, their white bread became popular for its texture and flavor. Families outside the Amish communities began replicating the recipe, and it became a beloved homemade treat across America.
Health Benefits and Nutritional Facts
You might be thinking, “White bread? Healthy?” While Amish white bread isn’t a low-carb health food, it does have its perks—especially when made at home.
- No preservatives: Unlike commercial breads, there are no additives here.
- Control over ingredients: You can adjust sugar and salt to your preference.
- Wholesome calories: Each slice provides a good energy source from carbohydrates.
Still, moderation is key. Homemade bread is definitely healthier than store-bought alternatives packed with chemicals.
Ingredients You’ll Need for Amish White Bread
Basic Pantry Ingredients
Here’s what you’ll need for two soft, fluffy loaves:
- 2 cups warm water (110°F/45°C)
- ⅔ cup white sugar
- 1 ½ tablespoons active dry yeast
- 1 ½ teaspoons salt
- ¼ cup vegetable oil
- 6 cups all-purpose flour
These ingredients are super basic and likely already in your kitchen. That’s the beauty of Amish recipes—no fancy stuff needed.
Optional Add-ins
Want to make it your own? Try these:
- A splash of honey for extra sweetness
- Melted butter for brushing the crust
- Sesame or poppy seeds for texture
- Whole wheat flour for a heartier loaf
Kitchen Tools and Equipment Required
Before we get our hands dirty, gather the following tools:
- Large mixing bowl
- Measuring cups and spoons
- Wooden spoon or dough hook mixer
- Clean kitchen towel
- Loaf pans (9×5 inch)
- Oven mitts
- Wire cooling rack
These tools make the process easier and more efficient, especially if you’re baking regularly.
Before You Begin: Prepping Your Space
Baking bread is like a mini ritual. Clean your countertops, set out your ingredients, and preheat your oven. Make sure your yeast is fresh and your water temperature is just right—too hot and it’ll kill the yeast, too cold and it won’t activate.
Think of it like prepping for a masterpiece. The more organized you are now, the smoother your baking process will go.
Step-by-Step Guide to Making Amish White Bread
Step 1: Activating the Yeast
In a large bowl, mix warm water and sugar. Stir until sugar dissolves. Sprinkle the yeast on top and let it sit for 5–10 minutes.
You’re looking for a foamy, bubbly mixture—that means your yeast is alive and ready to work. No foam? Your yeast might be dead, and it’s best to start over.
This step is crucial—it’s what makes the bread rise and gives it that perfect, fluffy texture.
Step 2: Mixing the Dough
Add salt and oil to the yeast mixture. Gradually stir in the flour, one cup at a time. Stir until the dough starts pulling away from the sides of the bowl.
It will get thick and sticky. That’s your sign it’s time to move to the next step. You don’t want to add all the flour at once or it could get too dry.
Use your hands if needed. Amish recipes are all about getting hands-on.
Step 3: Kneading the Dough
Turn the dough onto a floured surface. Knead it for 8–10 minutes.
How do you knead? Press the dough with the heels of your hands, fold it, turn it, and repeat. You want it smooth, elastic, and slightly tacky.
This step builds gluten—the secret to that soft, airy texture.
Don’t rush it. Good bread takes time.
Step 4: First Rise – Letting It Proof
Place the kneaded dough in a greased bowl. Cover it with a clean towel and let it rise in a warm spot for 1 to 1.5 hours.
It should double in size.
This is where the magic happens. The yeast is doing its thing, creating those tiny air pockets that make the bread soft.
Tip: Preheat your oven to 200°F, then turn it off and place the bowl inside. It creates a warm, draft-free proofing box.
Step 5: Shaping the Loaves
Once the dough has doubled in size, it’s time to punch it down. Yes—literally punch it. Gently press out the air bubbles with your fist. It’s oddly satisfying, and it prepares the dough for shaping.
Now, divide the dough into two equal parts. Roll each piece into a rectangle, then tightly roll it up like a jelly roll. Pinch the seam closed and tuck the ends under.
Place each loaf, seam-side down, into a greased 9×5-inch loaf pan. This shaping method gives you that perfect loaf shape you see in bakeries.
Want extra height in your loaf? Let the shaped dough sit uncovered for 5 minutes before the final rise. That pause helps it “relax” and rise better in the oven.
Step 6: Second Rise – Final Proofing
Cover the pans loosely with a towel and let them rise again for about 30–60 minutes. The dough should rise just above the edge of the pan. Don’t overproof—it could collapse while baking.
You’ll notice the texture of the dough becoming puffier and lighter. That’s exactly what you want before it hits the heat of the oven.
This second rise is where the loaf gets its final volume, so don’t skip it. If your kitchen is cool, place the pans on top of the stove while the oven preheats.
Step 7: Baking the Bread
Preheat your oven to 350°F (175°C).
Once your loaves have fully proofed, place them in the center rack of your oven. Bake for 30 to 35 minutes, or until the tops are golden brown and sound hollow when tapped.
If you want a softer crust, cover the loaves loosely with aluminum foil for the last 10 minutes. For a shinier crust, brush the tops with melted butter as soon as they come out of the oven.
You’ll know they’re done when your kitchen smells like heaven.
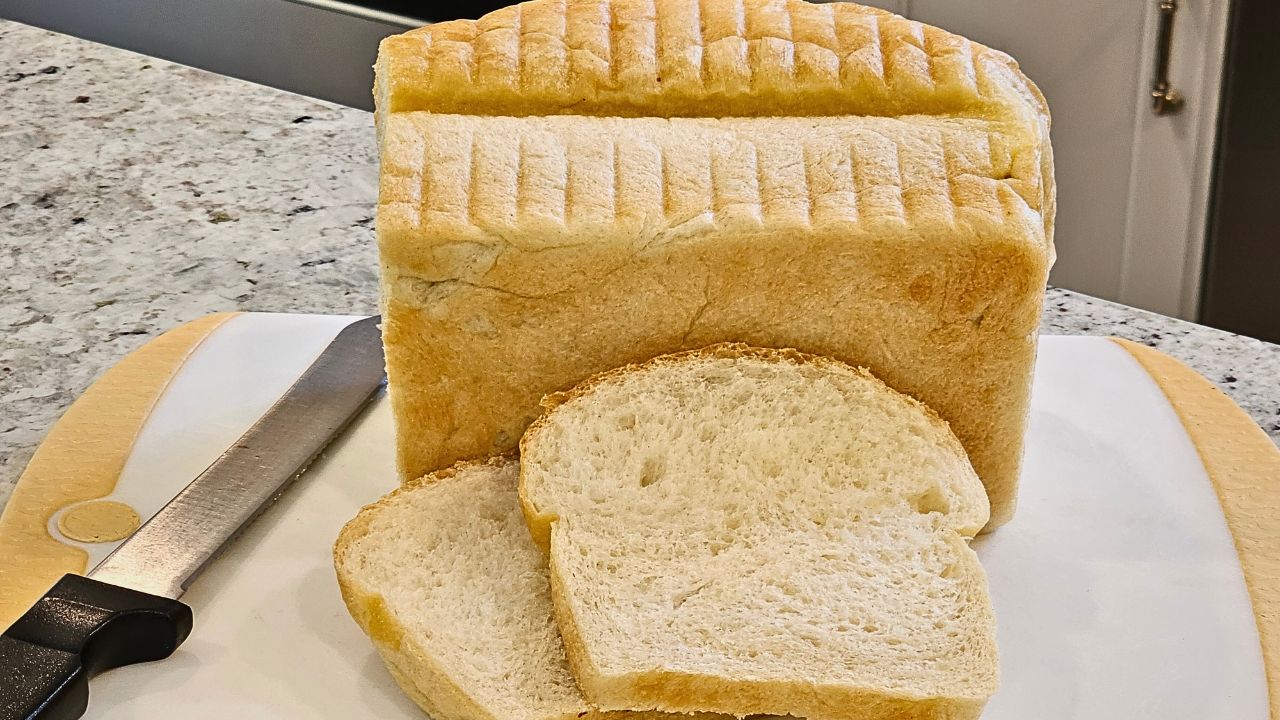
Step 8: Cooling and Slicing
This step is often overlooked—but don’t skip it!
Remove the loaves from the pans and let them cool on a wire rack for at least 20–30 minutes. Slicing too soon can make the bread gummy inside. Cooling allows the steam to settle and gives you clean, soft slices.
Once cooled, slice with a serrated bread knife for perfect, even pieces. Enjoy your hard work—you’ve earned it!
Common Mistakes to Avoid
Even the best bakers slip up. Here are some common mistakes to dodge:
- Using hot water for yeast: Too hot will kill it. Aim for warm (110°F).
- Adding all the flour at once: This can lead to dense, dry bread.
- Under-kneading: If you don’t knead enough, the bread won’t rise well.
- Over-proofing: Letting the dough rise too long can cause it to deflate in the oven.
- Slicing too soon: It’s tempting, but let the bread rest!
Avoid these, and you’ll be a bread master in no time.
Pro Tips for Perfect Amish White Bread Every Time
- Measure accurately: Use proper measuring cups and level off flour.
- Test your yeast: If it doesn’t foam in 10 minutes, start over.
- Warm up your kitchen: Yeast loves warmth. Use the oven trick if needed.
- Brush with butter: Right after baking for a soft, flavorful crust.
- Try bread flour: Want an even fluffier texture? Swap out some all-purpose for bread flour.
These small tweaks can make a big difference in your final loaf.
How to Store Homemade Amish Bread
Homemade bread doesn’t have preservatives, so it won’t last as long as store-bought—but that’s a good thing!
Here’s how to keep it fresh:
- Room temperature: Store in a bread bag or airtight container for up to 3–4 days.
- Fridge: Not recommended—it can dry the bread out.
- Freezer: Wrap tightly in plastic wrap and foil, then freeze for up to 3 months.
When you’re ready to eat, let it thaw on the counter or toast slices straight from the freezer.
Serving Ideas and Pairings
Amish white bread is incredibly versatile. Here are some delicious ways to enjoy it:
- Classic toast: Butter, jam, or honey—simple and delicious.
- French toast: Its soft texture makes it perfect for soaking up eggs.
- Grilled cheese: Pairs beautifully with melty cheddar or mozzarella.
- Sandwiches: Ham, turkey, tuna—you name it.
- Croutons or breadcrumbs: Got stale slices? Cube and toast for salads or soups.
Whether sweet or savory, this bread works with everything.
Can You Freeze Amish White Bread?
Absolutely! Freezing is a great way to preserve extra loaves.
Here’s how:
- Let the bread cool completely.
- Wrap each loaf tightly in plastic wrap.
- Cover with a layer of aluminum foil or place in a zip-top freezer bag.
- Label with the date.
To thaw, leave it on the counter for a few hours or overnight. Avoid microwaving unless you want it warm right away—just don’t overdo it or it’ll dry out.
Variations: Make It Your Own
Want to experiment with the base recipe? Here are some tasty twists:
- Honey white bread: Replace sugar with honey for a richer flavor.
- Garlic herb bread: Mix in minced garlic and dried herbs.
- Cinnamon swirl: Add cinnamon sugar and roll it in the dough before baking.
- Cheddar jalapeño: Fold in shredded cheese and diced jalapeños.
- Whole wheat blend: Swap half the flour for whole wheat.
Once you’ve mastered the basics, the possibilities are endless.
FAQs about Amish White Bread Recipe
1. Can I use instant yeast instead of active dry yeast?
Yes! Just skip the proofing step and mix it directly with your dry ingredients. Adjust rise times as needed.
2. Why is my dough not rising?
Check your yeast—it may be expired or your water was too hot. Also, ensure your kitchen is warm enough.
3. Can I use milk instead of water?
Absolutely. Milk adds richness and a softer crumb. Just warm it to the same temperature as water.
4. How do I make the crust crunchier?
Bake a little longer without covering the loaf, or brush the crust with water before baking.
5. Is Amish white bread gluten-free?
No. This recipe uses all-purpose flour, which contains gluten. For a gluten-free version, you’ll need specialty flour and adjustments.
Final Thoughts
Baking Amish white bread isn’t just about feeding your body—it’s about feeding your soul. There’s a reason this recipe has been passed down through generations. It’s simple, honest, and always satisfying.
Whether you’re a beginner baker or a seasoned pro, this recipe is a reminder of the joy that comes from homemade food. So go ahead, give it a try. Your kitchen will smell amazing, your heart will feel full, and your taste buds? They’ll thank you.