Amish Friendship Bread Starter Recipe: Amish Friendship Bread starter isn’t just a recipe—it’s an experience, a tradition, and in many ways, a symbol of community. Unlike regular bread dough that you knead, bake, and enjoy right away, Amish Friendship Bread starts with a fermented mixture of flour, sugar, and milk. This living mixture grows over 10 days, developing flavor and strength. When it’s ready, it becomes the base for a sweet, moist loaf of bread that has been shared across families and generations.
But what makes it so special? It’s not just about the bread. It’s about sharing the starter with friends, family, or neighbors so they too can enjoy the process and the bread. It’s called “friendship bread” for a reason—you pass it along like a gift, and in return, it continues spreading joy from kitchen to kitchen.
This tradition goes back decades, with its roots often linked to the Amish community, where baking and sharing were acts of kindness and togetherness. Today, even though we live in a fast-paced world where bread can be bought from any store, the act of nurturing a starter and sharing it makes Amish Friendship Bread a timeless ritual.
Think of the starter like a pet you feed and grow. Each day, you either stir, feed, or simply let it rest. By Day 10, it’s bubbly, fragrant, and ready to transform into bread—or to be shared so others can start their own journey. This guide will walk you step by step through the process, from ingredients to daily care, and finally, to the moment when you bake and enjoy your first slice.
Ingredients You’ll Need for the Starter
Before you begin, it’s important to gather all the ingredients and tools. The beauty of Amish Friendship Bread starter is that it uses simple pantry staples, yet what you get at the end is something truly special.
The Core Ingredients
You’ll need just a few items to make the starter:
- All-purpose flour – The base of your starter. Stick to regular flour for best results.
- Granulated sugar – Feeds the natural yeast and helps fermentation.
- Milk – Whole milk works best, but 2% can also be used. Avoid skim milk as it doesn’t provide enough richness.
- Yeast (optional) – Some versions of the starter include a little yeast to kickstart fermentation, though traditional recipes rely on natural yeast from the air.
Optional Additions for Flavor
Although the starter itself usually remains plain, you can enhance it later when baking the bread. Some common mix-ins include:
- Vanilla extract
- Cinnamon
- Nuts (like pecans or walnuts)
- Raisins or dried cranberries
- Chocolate chips
Tools and Equipment to Prepare the Starter
Along with your ingredients, you’ll need the right tools:
- 1-gallon resealable plastic bag OR a large glass or plastic bowl (avoid metal).
- Wooden spoon (metal can react with the starter).
- Measuring cups and spoons.
- Plastic wrap or a lid for covering the bowl if you don’t use a bag.
With these basics ready, you’re set to begin your starter. The next part will walk you through the 10-day cycle step by step.
Step-by-Step Guide to Making Amish Friendship Bread Starter
This process takes 10 days from start to finish. Each day has a simple action: stir, feed, or rest. By the end, you’ll have a living, bubbly starter ready to use.
Day 1 – Mixing the Starter
On the first day, combine:
- 1 cup all-purpose flour
- 1 cup granulated sugar
- 1 cup milk
If you’re using yeast, dissolve 1 packet (about 2 ¼ teaspoons) of active dry yeast in ¼ cup warm water and add it to the mixture. Stir with a wooden spoon until smooth.
Transfer the mixture into your plastic bag or bowl. Seal lightly (don’t make it airtight, as the starter produces gas) and leave it at room temperature. This is the beginning of fermentation, so expect some bubbling within 24 hours.
Day 2 to Day 4 – Stirring the Starter
For the next three days, simply stir the starter once a day if it’s in a bowl, or squeeze the bag to mix if you’re using a resealable bag. Don’t refrigerate it—it needs to stay at room temperature.
You might notice a sour smell, some bubbling, or even a slight separation of liquid. This is perfectly normal. The starter is alive and working!
Day 5 – Feeding the Starter
By the fifth day, your starter is hungry again and needs to be “fed” to keep it strong and active. Feeding simply means giving the mixture fresh flour, sugar, and milk so the natural yeast can continue to grow.
On Day 5, add the following to your starter:
- 1 cup all-purpose flour
- 1 cup granulated sugar
- 1 cup milk
Stir well (or squeeze the bag gently if using a resealable bag) until everything is mixed. You’ll notice after feeding that the starter becomes thicker and creamier. Within a few hours, it should start bubbling again. This is a great sign—it means your yeast is thriving.
During this stage, your kitchen will begin to smell slightly sweet and tangy, like a mix of bread dough and yogurt. This aroma is one of the best indicators that your starter is alive and healthy. If it smells foul or has mold on top, unfortunately, it has gone bad and you’ll need to start over.
A good tip here: use a clean wooden spoon every time you stir the mixture. Any contaminants introduced can spoil the starter. Also, resist the urge to put it in the fridge—the starter needs a warm, cozy environment to ferment properly.
Day 6 to Day 9 – Resting and Stirring
These four days are the “quiet” period, where you mostly let the starter do its own thing. Each day, give it a quick stir or squeeze the bag gently, just to keep it mixed. No feeding is required during this stretch.
What’s happening here is fascinating. The yeast and natural bacteria are actively breaking down the sugars, producing bubbles and a pleasant sour-sweet smell. You may see the mixture rise and fall as gases build up and escape. This is completely normal.
Here’s what to look for during this stage:
- Bubbles on the surface: This shows healthy fermentation.
- Slight separation of liquid: A thin layer of liquid on top (called “hooch”) may appear, which you can stir back in.
- Sour but sweet smell: If it smells pleasant, it’s fine. If it smells rotten or looks moldy, discard it and start over.
By Day 9, your starter should look bubbly, slightly frothy, and ready for its final feeding on Day 10. Think of this stage as a “rest and grow” period before the starter reaches its peak strength.
Day 10 – Feeding, Dividing, and Baking
Day 10 is the most exciting day—it’s when your starter is fully mature and ready to be used for baking. On this day, you’ll feed it again and then divide it into portions.
Add the following to your starter:
- 1 cup all-purpose flour
- 1 cup granulated sugar
- 1 cup milk
Mix everything thoroughly. By now, the starter should be thick, creamy, and filled with bubbles.
After feeding, divide the starter into four 1-cup portions. Here’s what to do with them:
- Keep one portion for yourself – this will continue the cycle if you want to bake again.
- Use one portion for baking bread right away – you can find countless Amish Friendship Bread recipes that transform the starter into delicious loaves, muffins, or cakes.
- Give away the remaining two portions – share them with friends, family, or neighbors along with the 10-day instructions.
This sharing tradition is what makes Amish Friendship Bread so special. You’re not just making bread—you’re passing along a living starter that can continue in someone else’s kitchen. It’s like handing down a gift that keeps giving.
When you bake with your portion, you’ll be amazed at how soft, moist, and flavorful the bread turns out. The starter infuses the loaf with a rich, slightly tangy sweetness that sets it apart from regular quick bread. Cinnamon, vanilla, and even chocolate chips can be added for extra flavor.
How to Use and Share Your Starter
The beauty of Amish Friendship Bread is the act of sharing. Once you’ve divided the starter, you can spread the joy of baking in your community.
Dividing the Starter to Share with Friends
Package each portion (1 cup) into a resealable plastic bag or a clean jar. Along with the starter, include a simple note or printed instructions explaining the 10-day process. Your friends will appreciate the gift and the tradition.
Storing Your Starter Safely
If you’re not ready to bake again immediately, you can refrigerate your portion for up to 10 days. When you’re ready to restart the cycle, let it come to room temperature and begin feeding it again.
For long-term storage, you can even freeze the starter. Simply thaw it on the counter and feed it as usual to revive it.
Restarting the Cycle
If you keep one portion for yourself, the process continues:
- Day 1 starts the moment you feed the starter again.
- Follow the same schedule of stirring, feeding, and dividing every 10 days.
This way, your Amish Friendship Bread starter can last indefinitely, becoming a family tradition passed down through the years.
Tips, Variations, and Troubleshooting
Making Amish Friendship Bread starter is simple, but like any living recipe, it has its quirks. With a little guidance, you can avoid common mistakes and even experiment with different flavors.
Common Mistakes to Avoid
- Using Metal Utensils – Metal can react with the starter, especially if it’s acidic. Always stick to wooden, plastic, or silicone spoons.
- Tightly Sealing the Bag or Bowl – The starter releases gases as it ferments. If sealed too tightly, it can build pressure and even burst. Always leave room for air to escape.
- Refrigerating Too Early – The starter needs room temperature warmth to thrive. Putting it in the fridge before Day 10 slows fermentation and weakens it.
- Skipping a Feeding – Your starter is alive. Forgetting to feed it (especially on Day 5 or Day 10) can cause it to weaken or die.
- Mold or Off Smell – If you see fuzzy mold or smell something rotten (like spoiled milk or garbage), discard it immediately. A healthy starter should smell sweet, yeasty, and slightly tangy.
If something doesn’t look right, don’t worry—just start fresh. The process is simple enough, and each attempt teaches you more about how the starter behaves.
Flavor Variations to Try
Once you’ve mastered the basic starter, the fun really begins with baking variations. Here are some delicious options:
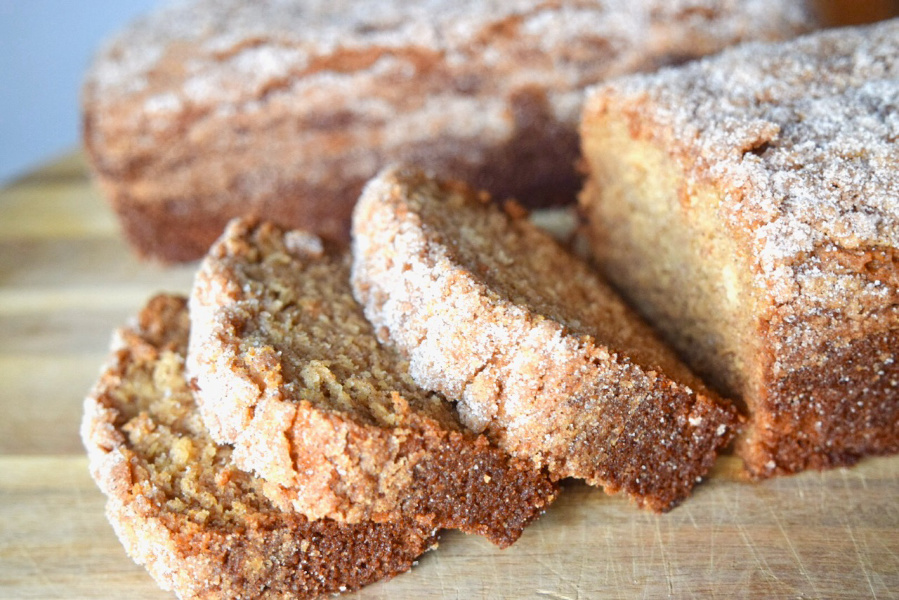
- Classic Cinnamon Sugar Bread – Add 2 teaspoons cinnamon and coat the pan with cinnamon-sugar for a sweet crust.
- Chocolate Chip Bread – Stir in 1 cup of chocolate chips for a dessert-style loaf.
- Banana Nut Bread – Mash 2 ripe bananas and fold in ½ cup chopped walnuts.
- Lemon Poppy Seed Bread – Add lemon zest, 2 tablespoons lemon juice, and 2 tablespoons poppy seeds for a fresh twist.
- Pumpkin Spice Bread – Stir in 1 cup pumpkin purée and 1 teaspoon pumpkin spice for a cozy fall treat.
Each variation keeps the bread soft, moist, and lightly sweet while allowing you to customize the flavors for any occasion.
How to Fix a “Bad” Starter
Even with the best intentions, sometimes your starter might not behave. Here’s how to troubleshoot:
- Starter isn’t bubbling: Try moving it to a warmer spot in the kitchen. Yeast thrives in warmth.
- Too thin or watery: Add a little extra flour when feeding to thicken the consistency.
- Too thick: Add an extra splash of milk to loosen it.
- Smells too sour: Feed it more often, as the yeast may have consumed all the sugar.
With a bit of patience, most starters can bounce back unless mold has taken over. In that case, it’s best to toss it and start again.
FAQs about Amish Friendship Bread Starter Recipe
1. What happens if I miss a feeding day?
If you miss a feeding by a few hours, don’t panic—just feed it as soon as possible. Missing by a full day may weaken the starter, but often it can be revived with extra care.
2. Can I freeze Amish Friendship Bread starter?
Yes! Place 1-cup portions in freezer bags, label them, and freeze for up to 3 months. Thaw at room temperature and feed before using.
3. How do I know if my starter has gone bad?
If you see mold, discoloration, or smell something foul (like rotten eggs), discard it immediately. A healthy starter should smell sweet, tangy, and slightly yeasty.
4. Can I use whole wheat flour for the starter?
Yes, though the texture and flavor will change. Whole wheat adds a nutty flavor but may make the bread denser. Many bakers like to mix half all-purpose and half whole wheat.
5. How long can I keep the starter going?
Indefinitely! As long as you keep feeding it every 5–10 days, your starter can live for years. Some families have kept theirs going for generations.
Conclusion
At the end of the cycle, you bake a soft, sweet loaf of bread and share portions of the starter with friends and family. This sharing is what makes it truly special—it turns a simple recipe into a chain of generosity, warmth, and connection.
Whether you stick to the classic cinnamon loaf or experiment with chocolate chips, lemon, or pumpkin, Amish Friendship Bread always delivers comfort. It’s one of those recipes that isn’t just about eating—it’s about creating memories and passing along something meaningful.
So the next time you’re looking for a recipe that goes beyond the kitchen, start an Amish Friendship Bread starter. Not only will your home smell amazing, but you’ll also be part of a tradition that has stood the test of time.


