American Butter Icing Recipe: Let’s face it: no cake is complete without that rich, velvety layer of butter icing. Whether you’re frosting cupcakes, layering a birthday cake, or just need an excuse to lick the spoon, American butter icing is the go-to classic. It’s easy, customizable, and incredibly indulgent. If you’ve never made it before or if your past attempts ended up too runny, too stiff, or just not quite right, this guide has your back.
We’re going to walk through every single step—no guesswork, no fluff—just a reliable, foolproof recipe that results in a fluffy, sweet, and creamy icing every time. Grab your mixer and let’s get into it.
What Is American Butter Icing?
American butter icing, also known as American buttercream, is a simple yet incredibly delicious frosting made primarily from butter and icing sugar (powdered sugar). It’s thicker, sweeter, and more stable than other types of buttercream like Swiss or Italian meringue, which makes it perfect for piping, decorating, and filling cakes.
Unlike meringue-based buttercreams that can be a bit tricky or temperature-sensitive, American butter icing is no-fuss. No need to heat egg whites or master candy thermometers. This is the people’s buttercream—easy to whip up with pantry staples and a handheld mixer. The result? A light, sweet, buttery frosting that holds its shape and adds that rich, creamy finish to any baked treat.
Why You’ll Love This Icing
Here’s why American butter icing is a must-have in your baking toolkit:
- Ridiculously easy: You don’t need culinary school skills. Just beat, mix, and frost.
- Super versatile: Want chocolate? Add cocoa. Lemon? Squeeze it in. You can make endless flavor variations.
- Perfect for decorating: It’s stable, pipeable, and holds up well at room temp.
- Sweet tooth approved: That sugary hit is exactly what many people look for in a traditional cake frosting.
- Budget-friendly: No need for fancy ingredients or expensive equipment.
It’s the buttercream you make when you need it fast, but still want something that tastes—and looks—amazing.
List of Ingredients You’ll Need
Butter – The Star of the Show
Start with unsalted butter, and make sure it’s softened to room temperature. Using unsalted butter gives you control over the final taste. You want the butter to be soft enough to blend smoothly, but not melty. If you press your finger into it and it leaves a dent without sinking through completely, it’s ready to go.
Icing Sugar (Powdered Sugar) – The Sweet Element
Also called confectioners’ sugar or powdered sugar, this ingredient brings the sweetness and helps form the structure of the icing. It’s best to sift it to avoid lumps and create a smooth finish.
Use about 4 cups (500g) of icing sugar for every cup (225g) of butter. Yes, it sounds like a lot—but this is a sweet, fluffy frosting, and the sugar is what helps it set and hold its shape.
Vanilla Extract – For Flavor
A teaspoon or two of pure vanilla extract adds warmth and depth to the icing. It rounds out the buttery sweetness beautifully. Want a twist? Try almond, coconut, or even orange extract instead.
Milk or Cream – For Texture
To loosen up the consistency and make it spreadable or pipeable, add a splash of milk, heavy cream, or even half-and-half. Start with 1 tablespoon at a time until it’s just right. Heavy cream gives a richer texture, while milk keeps it light.
Optional Add-Ins
Want to elevate your butter icing? Try these:
- Pinch of salt – balances sweetness
- Food coloring – for custom cake designs
- Cocoa powder – for chocolate lovers
- Citrus zest – adds a fresh twist
Kitchen Tools You’ll Need
You don’t need a fancy kitchen setup, but having the right tools makes life easier:
- Electric hand or stand mixer
- Large mixing bowl
- Rubber spatula
- Measuring cups and spoons
- Fine mesh sieve (for sifting sugar)
- Piping bags and tips (optional, for decorating)
Set everything up before you start, and you’ll be good to go.
Before You Begin: Pro Tips for Perfect Butter Icing
Want your icing to turn out bakery-level good? Follow these tips before you even turn on the mixer:
- Room temperature butter is crucial. Cold butter won’t whip properly, and melted butter makes the icing soupy.
- Sift your icing sugar. Trust me—this one step prevents lumpy, grainy frosting.
- Use high-quality vanilla extract. It makes a surprising difference in the final flavor.
- Don’t overdo the liquid. Add milk or cream gradually, so you don’t end up with runny icing.
- Beat it long enough. You want to whip in air to get a fluffy, light texture—don’t rush the process.
Step-by-Step Guide to Making American Butter Icing
Step 1: Softening the Butter
Take your butter out of the fridge at least 30-60 minutes before you plan to start. You want it to be soft but not greasy. If you’re in a rush, cut the butter into small cubes to speed up the softening process.
Still in a time crunch? Microwave it in 5-second bursts, flipping sides in between, but be extremely careful not to melt it.
Step 2: Beating the Butter Until Light & Fluffy
Place the softened butter in a mixing bowl. Using your electric mixer on medium-high speed, beat it for about 3-5 minutes, or until it turns pale and fluffy. This step incorporates air, which gives your frosting a light texture.
You’re looking for a visibly lighter color and a silky texture. If you skip this step or rush it, the icing can end up heavy and greasy.
Step 3: Adding the Icing Sugar Gradually
Sift your icing sugar into a separate bowl to remove lumps. Then, with your mixer on low speed, add the sugar a little at a time. Start with about 1 cup at a time, mixing well after each addition.
This keeps your kitchen from turning into a sugar storm and helps the sugar blend smoothly into the butter. After all the sugar is in, crank the mixer up to medium-high and beat for another 2-3 minutes.
Step 4: Adding Vanilla Extract
Once your butter and sugar are fully combined and starting to look like frosting, it’s time to stir in the vanilla extract. Add 1 to 2 teaspoons, depending on how much flavor you want. Mix on medium speed until fully incorporated.
This is a great moment to taste-test. Want more depth? Add another drop. Don’t be afraid to experiment here—vanilla is classic, but if you want to change things up, try almond, coconut, or even peppermint extracts for a unique spin.
The vanilla does more than just taste good—it enhances the richness of the butter and cuts through the sweetness of the sugar. It brings balance to the entire frosting.
Step 5: Adjusting Consistency with Milk or Cream
At this point, your frosting might look a bit thick or dry. No problem! Slowly add in 1 tablespoon at a time of milk, heavy cream, or half-and-half. Mix between each addition until you reach the consistency you want.
Here’s a little guide to help:
- Thicker for piping? Use less liquid.
- Softer for spreading? Add a bit more.
If you accidentally add too much and the icing becomes runny, add a few more tablespoons of icing sugar to thicken it back up.
Cream will make your icing richer and silkier, while milk gives it a lighter texture. Both work—choose based on your preference or what you have on hand.
Step 6: Whipping Until Smooth and Creamy
Now crank your mixer up one last time and beat the frosting on medium-high speed for 3-5 more minutes. This final whip makes the icing ultra-smooth, light, and fluffy.
You’re aiming for a texture that holds its shape but still spreads like a dream. Dip your spatula in—if the frosting creates a peak that softly folds over, it’s perfect.
Don’t skimp on this step. It’s where the magic really happens.
Coloring Your Butter Icing
Want to add a splash of fun to your frosting? Coloring butter icing is super easy and great for themed cakes, holidays, or celebrations.
Tips for Best Results:
- Use gel food coloring – It’s more concentrated than liquid food coloring and won’t mess with your icing’s consistency.
- Start small – Add just a toothpick tip of color at a time and build up gradually.
- Divide and conquer – Separate your frosting into bowls if you’re using multiple colors.
Mix in your chosen colors after the final whip for the brightest results. Stir them gently to maintain that fluffy texture.
Flavor Variations You Can Try
Bored with plain vanilla? Good news—American butter icing is a blank canvas for flavor creativity. Here are a few delicious twists:
Chocolate Butter Icing
Add ½ cup unsweetened cocoa powder to the icing sugar before mixing, or melt 100g of dark chocolate, cool it slightly, and beat it in at the end. This gives a deep, rich chocolate flavor.
Want mocha? Add a teaspoon of instant espresso powder with the cocoa!
Lemon Butter Icing
Add 2 tablespoons of fresh lemon juice and a teaspoon of lemon zest in place of some of the milk. This creates a bright, tangy flavor that pairs perfectly with vanilla or berry cakes.
Optional: A drop of yellow food coloring gives it a vibrant look.
Coffee Butter Icing
Dissolve 1 tablespoon of instant coffee in 1 tablespoon of warm water. Let it cool, then mix it in along with your vanilla. It’s creamy, caffeinated, and a match made in heaven for chocolate cake.
How to Store Butter Icing
Finished making your frosting but not using it right away? Here’s how to store it:
- At room temperature: Up to 2 days in an airtight container (if your kitchen isn’t too hot).
- In the fridge: Lasts up to 7 days. Let it come to room temp and re-whip before using.
- In the freezer: Store for up to 3 months. Thaw in the fridge overnight, then beat again to restore texture.
Always cover with plastic wrap pressed directly onto the surface to prevent it from drying out.
How to Use American Butter Icing
Here’s where the fun begins. American butter icing is incredibly versatile:
- Frosting cakes – Use a palette knife or offset spatula for smooth finishes.
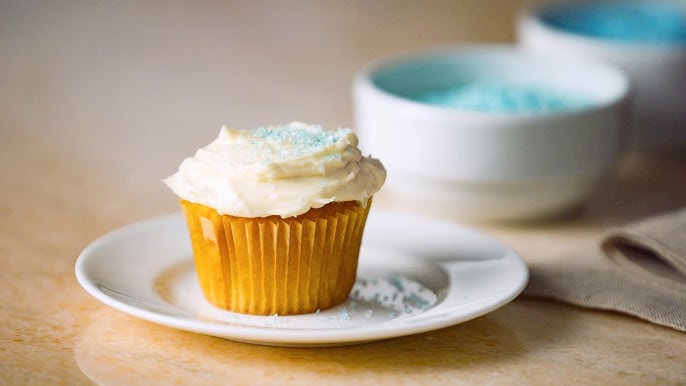
- Piping cupcakes – Fill a piping bag fitted with your favorite tip for bakery-style swirls.
- Filling layer cakes – It’s thick enough to hold shape between layers.
- Cookie sandwiches – Smear between two cookies for a sweet surprise.
- Decorations – Tint different colors and pipe roses, stars, borders, and more.
Let your creativity shine—you can go as simple or as extra as you like!
Troubleshooting Common Problems
Even simple recipes can go sideways sometimes. Don’t worry—here are fixes for the most common butter icing issues:
Too Runny
Problem: The icing won’t hold its shape or drips off your cake.
Fix:
- Add more icing sugar a tablespoon at a time.
- Check if your butter was too soft or melted—next time, chill it slightly before starting.
- Refrigerate the finished frosting for 15–30 minutes to firm it up.
Too Stiff
Problem: The frosting is hard to spread or pipe.
Fix:
- Add a bit more milk or cream (just a teaspoon at a time).
- Beat it longer—it might just need more whipping to soften up.
Grainy Texture
Problem: The icing feels gritty or sandy.
Fix:
- Sift the icing sugar thoroughly before mixing.
- Beat the frosting longer to fully dissolve the sugar.
- Add a tiny splash of milk or cream and re-whip.
Nutritional Information (Per Serving)
| Nutrient | Amount (Approx.) |
|---|---|
| Calories | 210 kcal |
| Total Fat | 12g |
| Saturated Fat | 7g |
| Sugar | 25g |
| Carbohydrates | 28g |
| Protein | 0g |
| Sodium | 5mg |
Note: Based on a 2-tablespoon serving. Values may vary depending on ingredients used.
FAQs about American Butter Icing Recipe
1. Can I make butter icing without a mixer?
Yes! Use a wooden spoon and a lot of elbow grease. It’ll take longer and be a bit less fluffy, but it works in a pinch.
2. Is salted butter okay to use?
Yes, but skip any added salt. Be aware that the flavor may differ slightly depending on how much salt is in your butter.
3. Can I color butter icing with natural ingredients?
Absolutely. Try beet juice (pink), matcha (green), turmeric (yellow), or blueberry powder (purple). Just be aware that liquids can affect texture.
4. How long can I leave a cake with butter icing out?
If your room isn’t hot, about 2 days is fine. For longer storage or warm climates, refrigerate the cake.
5. Can I reduce the sugar without ruining the texture?
A little, yes. But too much reduction and the icing won’t hold up. If you want a less sweet frosting, try adding cream cheese or using a different buttercream style like Swiss or Italian.
Conclusion
There’s a reason American butter icing is the most popular frosting out there. It’s quick, simple, delicious, and endlessly customizable. Whether you’re a total beginner or a seasoned baker, this is one recipe that will never let you down.
Once you master the basic version, you can go wild with flavors, colors, and designs. It’s the kind of frosting that makes birthdays sweeter, holidays brighter, and everyday cupcakes just a little more magical.
So grab that spatula, turn up your mixer, and let the frosting fun begin. Your cakes will never be the same.