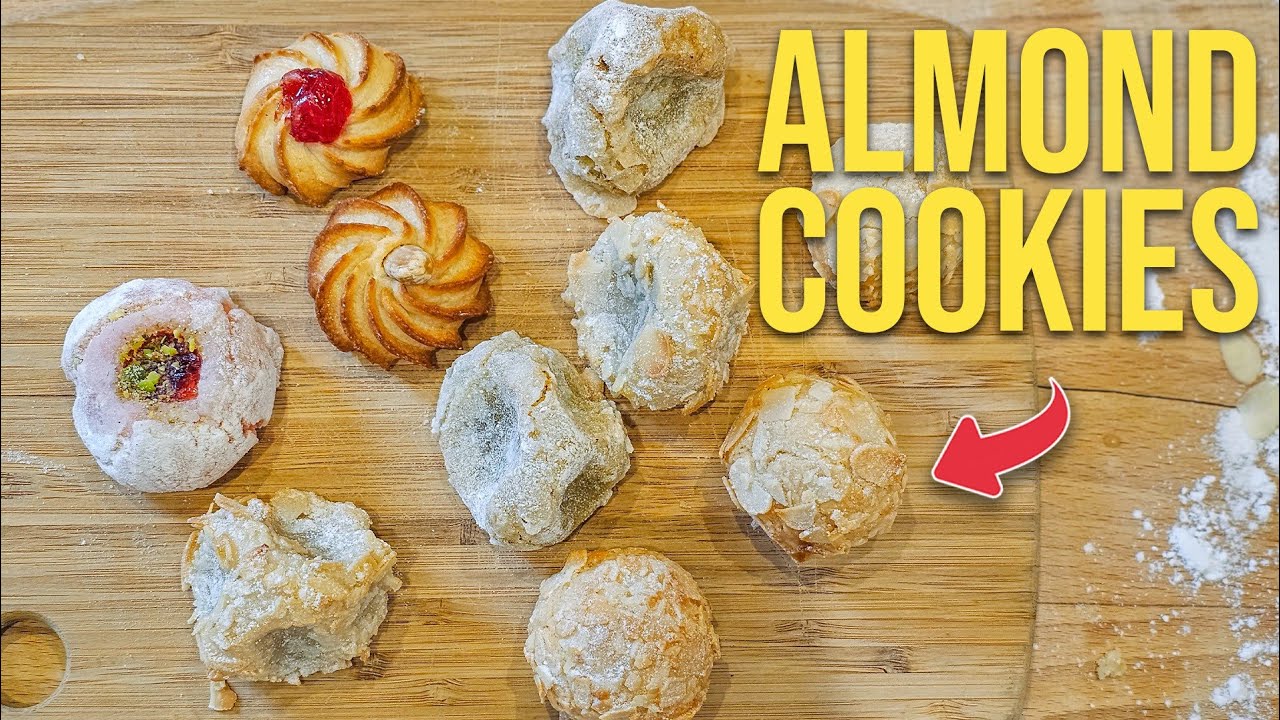
Almond Cookie Recipe: Almond cookies are those classic treats that instantly bring a touch of elegance to any cookie platter. What’s not to love about them? They’re nutty, slightly sweet, and have a delicate crumb that just melts in your mouth. Whether you’re baking for the holidays, a casual get-together, or just because you’re craving something delightful, almond cookies fit the bill perfectly.
These cookies have stood the test of time and have roots in various cultures around the world. In Chinese cuisine, almond cookies are traditionally served during Lunar New Year celebrations as a symbol of good fortune. Meanwhile, in Italian kitchens, the famous “Amaretti” cookie showcases the beauty of almonds in a chewy and aromatic form.
But you don’t need a special occasion or a culinary passport to make these at home. With a few pantry staples and a little love, you’ll have a batch of homemade almond cookies that taste even better than the store-bought ones. Let’s dive in and explore how you can whip up a fresh batch of these mouthwatering morsels, step by step.
Ingredients Needed
Before you get started, let’s round up all the ingredients you’ll need. Here’s the great news: the list is short and sweet—literally!
Basic Ingredients:
- 1 cup almond flour – This is your star ingredient. Make sure it’s finely ground for the best texture.
- ½ cup unsalted butter (softened) – Adds richness and helps with that soft, melt-in-your-mouth feel.
- ½ cup powdered sugar – Gives a smooth sweetness and blends well with the butter.
- 1 tsp vanilla extract – For that warm, fragrant base flavor.
- Pinch of salt – Just enough to balance the sweetness and enhance the almond taste.
Optional Add-ins for Extra Flavor:
- Almond extract (½ tsp) – If you want to boost the almond flavor.
- Chopped almonds or almond slivers – For a crunchy texture.
- Mini chocolate chips or white chocolate chunks – Because chocolate and almonds are a dreamy combo.
- Orange zest or lemon zest – Adds a refreshing twist.
Don’t have almond flour? No worries. You can make your own by blending blanched almonds until fine, but make sure not to over-process or you’ll end up with almond butter!
Kitchen Tools You’ll Need
Even though this recipe is beginner-friendly, having the right tools can make a world of difference.
Must-Have Tools:
- Mixing bowls – One large and one medium should be enough.
- Hand or stand mixer – Helps cream the butter and sugar smoothly.
- Measuring cups and spoons – Accuracy is key in baking.
- Spatula – For folding and scraping the bowl clean.
- Baking sheet – Line it with parchment paper to prevent sticking.
- Cooling rack – For crisping up the cookies after baking.
Nice-to-Have Tools:
- Cookie scoop – Ensures evenly sized cookies.
- Sifter – Useful for powdered sugar, especially if it’s clumpy.
- Silicone baking mat – An eco-friendly alternative to parchment paper.
Once you’ve got everything laid out, you’re halfway to enjoying a batch of golden almond cookies fresh out of the oven.
Preparing for Baking
Here’s where many bakers go wrong—they rush through the prep. But trust me, spending an extra 10 minutes organizing your ingredients and preheating the oven is a game-changer.
Measuring Your Ingredients Correctly:
Always spoon the flour into your measuring cup and level it off with a flat edge. Scooping directly from the bag can pack too much flour and result in dry cookies. The same goes for powdered sugar—if it’s lumpy, sift it before adding.
Use room-temperature butter. It should be soft to the touch but not melty. This helps it cream better with the sugar and makes the dough smooth and fluffy.
Preheating and Setting Up:
Preheat your oven to 350°F (175°C). This is the sweet spot for most cookies—it gives you that golden edge without burning the bottoms.
Line your baking sheet with parchment paper or a silicone mat and clear some space in your fridge if you plan to chill the dough (optional, but helps if your kitchen is warm).
This early stage sets the tone for the rest of your baking experience. Get everything measured, laid out, and ready to go before you even touch the mixer. A smooth prep equals a stress-free bake.
Step-by-Step Almond Cookie Recipe
This is where the magic happens. Follow along with these easy steps, and you’ll have a batch of almond cookies that look bakery-quality and taste even better.
Step 1: Creaming Butter and Sugar
In a large bowl, cream together the softened butter and powdered sugar until light and fluffy. This should take about 2-3 minutes with a hand mixer on medium speed. Don’t skip this step—it creates the base for your cookie dough and helps with that soft, tender bite.
Add in the vanilla extract (and almond extract if using) and mix until combined. Your mixture should be pale and creamy.
Step 2: Adding the Almond Flour and Vanilla
Now it’s time to incorporate that nutty almond flavor. Slowly add the almond flour into the creamed butter mixture, one-third at a time. Mixing gradually ensures a smooth dough without lumps. If you’re adding a little extra almond extract for more flavor depth, toss that in at this stage too.
Keep your mixer on low speed or switch to a spatula if the dough starts to get too thick. You don’t want to overmix, just blend until all the flour is combined. The dough will be soft and slightly sticky—that’s perfectly normal. If you’re using add-ins like chopped almonds or chocolate chips, gently fold them in now.
At this point, you can cover the bowl and chill the dough in the fridge for 20–30 minutes. This helps the cookies hold their shape during baking, especially if your kitchen is warm.
Step 3: Mixing the Dough to Perfection
You want your dough to be soft, pliable, and not too dry. After chilling, give it a quick stir with a spatula to bring it back to life. If the dough feels too firm, let it sit at room temperature for a few minutes.
This dough doesn’t require rolling or cutting—just scoop and shape with your hands. If you’re aiming for uniform cookies, a cookie scoop will make life easier and ensure even baking. Each scoop should be about 1 to 1½ tablespoons of dough.
Roll each portion into a smooth ball and place them onto your prepared baking sheet. Leave about 2 inches between each cookie—they’ll spread just a little during baking.
If you like, gently press each ball down slightly with your fingers or the bottom of a glass. For a fancier finish, press a whole almond or a few almond slivers into the center of each cookie.
Step 4: Shaping and Placing on the Baking Sheet
Shape matters in cookies. Even if you’re not going for picture-perfect rounds, consistency helps them bake evenly. So whether you hand-roll or use a scoop, try to keep them close in size.
This is also the perfect time to get creative. Want to make thumbprint almond cookies? Press your thumb gently into the center of each ball and fill the indent with a tiny dollop of jam—raspberry, apricot, or even a bit of chocolate spread.
Fancy a festive look? Sprinkle the tops with coarse sugar or powdered sugar before baking. You can also dip half of each cooled cookie in melted dark chocolate for an elegant, bakery-style finish.
Remember to line the baking tray properly with parchment or a silicone mat. This helps prevent sticking and gives the cookies a nice bottom texture. Don’t overcrowd your baking sheet—bake in batches if needed.
Step 5: Baking Time and Temperature Tips
Now, for the big moment—baking! Pop your tray into the preheated oven at 350°F (175°C). Bake for 12–15 minutes, depending on your oven and the size of your cookies.
Keep a close eye around the 12-minute mark. The cookies should be lightly golden around the edges and set in the center. If they’re browning too fast, your oven might run hot, so reduce the temperature slightly or move the tray to a middle rack.
Resist the urge to overbake. Almond cookies are meant to be tender and delicate, not hard or crunchy (unless that’s what you’re going for). Once done, remove the tray from the oven and let the cookies cool for 5–10 minutes before transferring them to a wire rack.
The cookies will continue to firm up as they cool, so don’t panic if they seem soft straight out of the oven. Once completely cooled, you’ll get that perfect bite—slightly crisp on the outside and melt-in-your-mouth soft inside.
Cooling and Storing Your Cookies
After all that baking excitement, you might be tempted to dive right into those fresh cookies. But here’s a tip from seasoned bakers—cooling is just as important as baking. Let your almond cookies rest on the baking sheet for 5 to 10 minutes before moving them. This brief rest helps them set without crumbling.
Next, transfer the cookies to a wire rack. This allows air to circulate underneath, preventing soggy bottoms and helping them cool evenly. Give them a good 20–30 minutes to cool completely. During this time, the texture develops, and the flavors mellow out into something truly delightful.
Now, let’s talk storage. Almond cookies, like many butter-based cookies, stay fresh for several days if stored correctly. Use an airtight container and layer the cookies with parchment paper to prevent sticking. Keep them at room temperature for up to 5 days.
Want to keep them even longer? No problem—these cookies freeze beautifully. Just place them in a freezer-safe bag or container, separating layers with parchment paper. They’ll stay fresh for up to 2 months. When you’re ready to enjoy them, just let them thaw at room temp or pop them in a low oven (around 250°F or 120°C) for 5 minutes to bring them back to life.
Tips and Tricks for Perfect Almond Cookies
Baking is part science, part art—and almond cookies are no exception. Here are some tried-and-true tips to make your cookies turn out flawless every time:
- Use high-quality almond flour. The fresher and finer the flour, the better your cookies will taste and feel. Some brands can be gritty or oily, so pick one with good reviews.
- Don’t overmix the dough. Once you add almond flour, mix just until combined. Overworking the dough makes the cookies tough instead of tender.
- Chill the dough. Especially if your kitchen is warm. A chilled dough helps the cookies keep their shape and prevents excessive spreading.
- Line your trays. Silicone baking mats or parchment paper prevent sticking and create a nice, evenly browned bottom.
- Use a cookie scoop. If you want professional-looking cookies, this simple tool ensures every one is the same size.
- Add a pinch of salt. Even if it’s not in your original recipe, salt balances out the sweetness and enhances all the flavors.
- Taste your dough. Since there are no raw eggs in many almond cookie recipes, it’s safe to taste the dough. Adjust the sweetness, salt, or extract before baking.
Every oven is a little different, so don’t walk away while baking. Once you find your perfect baking time, write it down—it’s the key to consistent results.
Gluten-Free and Vegan Variations
One of the best things about almond cookies is how easy they are to adapt for different diets. Almond flour is naturally gluten-free, so you’re already halfway there for anyone avoiding wheat.
For Gluten-Free Almond Cookies:
- Make sure your powdered sugar and any add-ins (like chocolate or flavorings) are certified gluten-free.
- You don’t need to swap the flour—almond flour is naturally GF and works beautifully.
For Vegan Almond Cookies:
- Butter Substitute: Use a plant-based butter or coconut oil. Note that coconut oil may result in a slightly different texture and flavor.
- Egg Substitute (if your recipe uses one): Try a flax egg (1 tbsp ground flaxseed + 3 tbsp water, let sit 10 minutes) or 2 tbsp of unsweetened applesauce.
- Watch the sugar: Some white sugars are processed using bone char, so opt for an organic or vegan-certified sugar.
These substitutions will tweak the flavor and texture slightly, but the results are still absolutely delicious. The cookies may be a bit more delicate, so handle with care while transferring them from tray to rack.
Being inclusive of dietary needs doesn’t mean compromising on taste—these almond cookies prove that in every bite.
Pairing and Serving Ideas
Now that you’ve got your golden, buttery almond cookies fresh and ready, let’s talk about how to serve them. Whether you’re going for cozy comfort or fancy presentation, these cookies are versatile enough to shine in any setting.
Perfect Pairings:
- Coffee or espresso – The nutty richness of almond cookies makes them a heavenly companion for a strong cup of coffee.
- Herbal teas – Chamomile, mint, or a fruity rooibos blend pair beautifully without overpowering the cookie’s delicate flavor.
- Milk (dairy or plant-based) – For that nostalgic cookie-and-milk moment, especially great for kids or midnight snacking.
Serving Tips:
- Stack them on a tiered dessert stand for a tea party feel.
- Dust with powdered sugar right before serving for a soft, snowy look.
- Dip halfway in dark or white chocolate and let cool for a sophisticated upgrade.
- Sandwich two cookies together with a bit of raspberry jam or Nutella in the middle for an extra treat.
Hosting a party? Add these cookies to a charcuterie-style dessert board with nuts, dried fruit, and chocolate pieces. Simple, elegant, and so delicious.
Fun Additions and Decoration Ideas
Want to make your almond cookies even more special? Let’s spice things up with some creative decoration and flavor upgrades. These cookies are like a blank canvas—perfect for experimenting with colors, textures, and added flavors.
Fun Additions:
- Almond Slivers or Whole Almonds: Press a few almond slivers into the top before baking, or crown each cookie with a whole almond for a classic look.
- Jam Centers: Make a small indent in the center of each cookie with your thumb or a spoon and fill it with your favorite jam. Raspberry, apricot, or cherry jam add both color and sweetness.
- Spices: A pinch of cinnamon, nutmeg, or cardamom can introduce a warm, cozy twist. Perfect for holiday baking.
- Zest It Up: Orange or lemon zest adds a refreshing citrusy layer that balances the richness of the almonds.
Decoration Ideas:
- Chocolate Drizzle: Melt dark, milk, or white chocolate and drizzle it over the cooled cookies using a spoon or piping bag. Let it harden for 20 minutes before serving.
- Icing Sugar Dusting: Lightly dust with powdered sugar right before serving for an elegant, snow-dusted appearance.
- Festive Colors: Use colored sugar or sprinkles to match the season—red and green for Christmas, pastels for Easter, or gold for a fancy dinner party.
- Dipped Edges: Dip half the cookie in melted chocolate and roll it in crushed nuts, coconut flakes, or toffee bits.
Let your creativity run wild! These small touches don’t just boost presentation—they enhance flavor and texture, making your cookies stand out on any table.
Troubleshooting Guide
Even the best bakers have cookie mishaps. Don’t worry if things don’t go perfectly the first time—here’s how to fix common almond cookie problems:
Cookies Spread Too Much:
- Your butter was too soft or melted. Try chilling the dough before baking.
- Too little almond flour. Double-check your measurements next time.
- Oven temperature too low—cookies can spread if they bake too slowly. Use an oven thermometer to verify.
Cookies Are Too Crumbly:
- The dough may be too dry. Add a teaspoon of milk or plant-based milk if needed.
- Overbaked cookies can get brittle. Next time, remove them when edges are just lightly golden.
Dough Is Too Sticky to Handle:
- Chill it! Even just 20 minutes in the fridge can make a huge difference.
- Dust your hands lightly with almond flour or wear food-safe gloves.
Cookies Too Soft or Undercooked in the Center:
- They might just need more time. Bake for 1-2 extra minutes, but keep an eye to prevent browning too much.
- Let them cool completely—they firm up as they sit.
Don’t toss a “failed” batch too quickly. Crumbly cookies can become toppings for yogurt or ice cream, and over-spread cookies still taste amazing!
Nutritional Information
Curious about what’s inside these little delights? Here’s a rough breakdown per average-sized cookie (based on a batch of 20 cookies):
| Nutrient | Approximate Amount per Cookie |
|---|---|
| Calories | 90–110 kcal |
| Fat | 8g (mostly from almonds and butter) |
| Protein | 2g |
| Carbohydrates | 4–6g |
| Sugar | 3–4g |
| Fiber | 1g |
Health Benefits of Almonds:
- Rich in Healthy Fats: Almonds are full of heart-healthy monounsaturated fats.
- Packed with Vitamin E: Great for skin and immune support.
- Good Source of Protein & Fiber: Helps keep you full longer.
While almond cookies aren’t “diet” food, they’re definitely a more wholesome treat when compared to refined flour-based options. You get flavor, crunch, and some nutritional goodness in every bite.
Storing and Freezing Tips
Got leftovers (unlikely, but just in case)? Let’s make sure your almond cookies stay fresh and tasty.
Room Temperature Storage:
- Store in an airtight container.
- Keep in a cool, dry place for up to 5–6 days.
- Layer with parchment paper to prevent sticking.
Freezing Baked Cookies:
- Cool cookies completely before freezing.
- Use a freezer-safe container or zip-top bag.
- Layer with parchment to prevent sticking together.
- Freeze for up to 2 months.
Freezing Cookie Dough:
- Scoop dough into balls and place on a tray.
- Freeze for 1–2 hours, then transfer to a freezer bag.
- Bake directly from frozen—just add 2–3 minutes to baking time.
Reheating Instructions:
- Let thaw at room temp for 10–15 minutes.
- Or warm in the oven at 250°F (120°C) for 4–5 minutes to restore crispness.
This flexibility makes almond cookies a fantastic make-ahead treat for holidays, parties, or just to have on hand when cravings strike.
Why You’ll Love This Almond Cookie Recipe
There’s something magical about almond cookies—they’re simple, but far from boring. This recipe nails that delicate balance between nutty richness and soft sweetness. With just a handful of ingredients, you get a bakery-quality cookie that tastes like it took hours to make.
Whether you like your cookies plain and buttery or jazzed up with chocolate and spices, this base recipe can be tweaked to match your mood or the season. Plus, it’s naturally gluten-free and super easy to veganize.
Reviewers and home bakers alike rave about the soft, crumbly texture, the toasty almond flavor, and how effortlessly the recipe comes together. It’s a favorite for good reason—and once you bake a batch, you’ll understand why.
FAQs about Almond Cookie Recipe
Q1. Can I use almond flour instead of regular flour?
Absolutely! Almond flour adds a rich, nutty flavor and makes the cookies gluten-free. Just note: the texture will be a bit softer and more crumbly.
Q2. Do I need to toast the almonds first?
It’s not a must, but toasting brings out a deeper flavor. Just a few minutes in the oven can make a big difference.
Q3. How long do almond cookies last?
Stored in an airtight container, they’ll stay fresh for up to 7 days at room temp—or 2 weeks in the fridge. But honestly, they rarely last that long before getting devoured.
Q4. Can I freeze almond cookies?
Yes! Freeze the dough or the baked cookies for up to 3 months. Just thaw and enjoy—or reheat slightly for that fresh-baked warmth.
Q5. Are almond cookies healthy?
Depends on the recipe, but generally, they’re lower in carbs and higher in healthy fats—especially if you skip refined sugar and use almond flour. So yes, you can snack without guilt (in moderation!).
Q6. Can I make them vegan?
Totally. Just swap out the egg for a flax egg or unsweetened applesauce, and use plant-based butter. Still delicious, still almond-packed.
Q7. Why are my almond cookies too hard or dry?
Overbaking is the usual suspect. Pull them out when the edges are just golden—they’ll firm up as they cool. Also, don’t skimp on fat; it keeps them moist.
Q8. What’s the best almond extract to use?
Go for pure almond extract—it’s strong, so a little goes a long way. Skip the imitation stuff unless you want a chemical aftertaste.
Conclusion
Baking almond cookies is more than just a kitchen task—it’s a little act of joy. With this step-by-step guide, you’ve got everything you need to make a batch of cookies that’s perfect for gifting, serving, or sneaking one-by-one from the cookie jar. Whether you’re a seasoned baker or just starting out, these cookies will make you look like a pro. So grab your almond flour, preheat that oven, and treat yourself to a warm, nutty bite of goodness today.