Aebleskiver Recipe: If you’ve never heard of Aebleskiver before, prepare to fall in love with this charming Danish treat. Pronounced “ay-bluh-skee-vuhr,” these delightful, spherical pancakes are soft, fluffy, and slightly crispy on the outside. Traditionally cooked in a special cast-iron pan with round wells, Aebleskivers are a staple in Danish cuisine and often enjoyed during holidays or cozy family gatherings.
Despite their unfamiliar name, Aebleskivers are surprisingly easy to make and share characteristics with other familiar foods like donuts, pancakes, or even popovers. While their exterior boasts a golden-brown finish, the interior remains tender and light. Whether you’re aiming for a simple brunch or a festive dessert, Aebleskivers bring a little magic to the table.
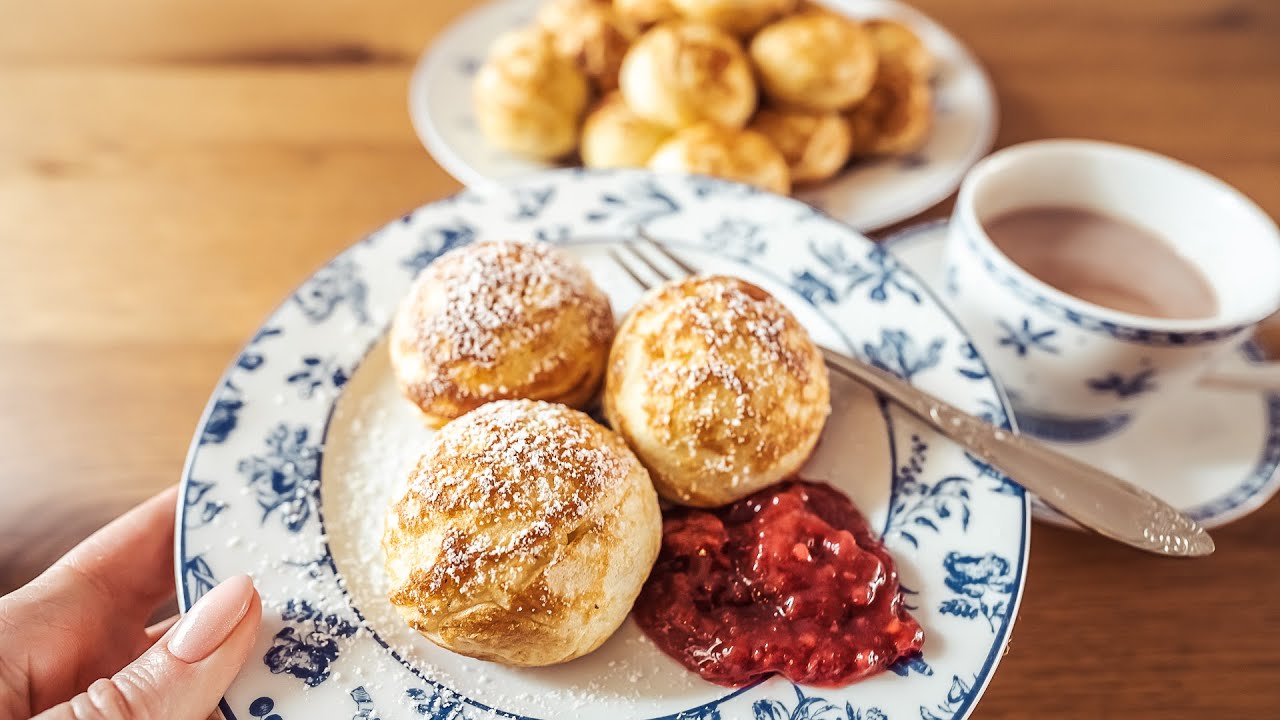
You can enjoy them plain, dusted with powdered sugar, or jazzed up with creative fillings like jam, chocolate, or fruit. In essence, Aebleskivers are a sweet canvas just waiting for your personal touch.
History and Origin of Aebleskiver
Aebleskivers date back centuries in Denmark, where they were originally filled with slices of apples—hence the name “Aebleskiver,” which literally translates to “apple slices” in Danish. Back in the day, Danish grandmothers would whip up these little pancakes during the winter months, often served with gløgg (spiced mulled wine) during Christmas festivities.
While modern recipes rarely include apples, the essence of tradition still lingers. Aebleskivers are a holiday staple in Denmark, often associated with warmth, family, and celebration. Over time, their popularity has grown beyond Danish borders, with people all over the world experimenting with their own versions of the treat.
They’ve evolved into a beloved comfort food, with recipes passed down through generations. Whether you’re honoring heritage or just looking for a delicious bite, Aebleskivers offer a tasty way to connect with a rich culinary history.
Ingredients Needed for Aebleskiver
Basic Ingredients
To make authentic and fluffy Aebleskivers, you’ll need a short list of pantry staples. Here’s what you’ll typically use for a classic version:
- 2 cups all-purpose flour
- 1 tablespoon granulated sugar
- 2 teaspoons baking powder
- ½ teaspoon baking soda
- ½ teaspoon salt
- 2 large eggs, separated
- 2 cups buttermilk
- 4 tablespoons unsalted butter, melted
These ingredients combine to create a light, airy batter that puffs up perfectly in the unique Aebleskiver pan. The combination of buttermilk and baking soda gives a mild tang and helps with rising, while the whipped egg whites ensure a tender interior texture.
And yes, using real buttermilk makes a big difference—don’t skip it unless you absolutely must!
Optional Fillings and Toppings
One of the best parts about Aebleskivers? You can customize them to your heart’s content. Add a surprise filling or go wild with toppings. Here are some popular ideas:
Fillings:
- Strawberry or raspberry jam
- Nutella or chocolate chips
- Apple or pear compote
- Cream cheese
- Peanut butter
Toppings:
- Powdered sugar
- Maple syrup
- Whipped cream
- Fresh berries
- Cinnamon sugar
With endless combinations, you can tailor your Aebleskivers to suit any season, mood, or crowd. Want a decadent dessert? Stuff them with Nutella and top with whipped cream. Craving something fruity and light? Add a dollop of jam and sprinkle powdered sugar. The possibilities are practically infinite.
Essential Tools and Equipment
Aebleskiver Pan
The most important tool you’ll need is an Aebleskiver pan. This specialized pan features several deep, round wells and is typically made from cast iron. Its design allows the batter to form into perfect little spheres as it cooks.
Traditional Danish Aebleskiver pans are stovetop-friendly and often passed down through generations. Cast iron is preferred for its ability to retain heat evenly, which ensures every Aebleskiver is cooked to golden perfection. However, nonstick versions are also available and work well for beginners.
No Aebleskiver pan? Don’t worry—we’ll touch on alternatives later, but for authentic results, investing in one is totally worth it.
Other Helpful Kitchen Tools
While the pan is crucial, a few additional kitchen tools make the process even smoother:
- Wooden skewers or knitting needles: These help with flipping the Aebleskivers as they cook.
- Mixing bowls: Separate ones for dry ingredients, wet ingredients, and egg whites.
- Hand mixer or whisk: For beating the egg whites until stiff peaks form.
- Measuring cups and spoons: To ensure you get the proportions just right.
- Small ladle or tablespoon: For adding batter into the wells evenly.
These tools help streamline the cooking process and ensure your Aebleskivers come out just the way they should—round, golden, and totally delicious.
Step-by-Step Instructions for Making Aebleskiver
Step 1 – Preparing the Batter
Start by separating your egg yolks and whites into two different bowls. This will allow you to whip the egg whites separately, which is key to getting that perfect fluffy texture.
In a large mixing bowl, whisk together the flour, sugar, baking powder, baking soda, and salt. In another bowl, combine the egg yolks, buttermilk, and melted butter. Pour the wet mixture into the dry ingredients and stir until just combined—don’t overmix, or you’ll lose the fluffiness.
Next, beat the egg whites until stiff peaks form. This might take a couple of minutes if using a hand mixer. Gently fold the whipped egg whites into the batter. This final step makes all the difference in creating light, airy Aebleskivers that puff up beautifully in the pan.
Once your batter is smooth and fluffy, you’re ready to cook!
Step 2 – Heating the Aebleskiver Pan
Before pouring the batter, preheat your Aebleskiver pan over medium heat. A well-heated pan ensures even cooking and helps prevent sticking. If you’re using a cast-iron pan, give it a few extra minutes to warm thoroughly—it holds heat well but takes time to get there.
Lightly grease each well with butter or a neutral oil using a pastry brush or a paper towel. You want enough fat to prevent sticking, but not so much that it causes splattering. You’ll know the pan is ready when a tiny drop of batter sizzles gently upon contact.
A common mistake is pouring batter into a cold or overly hot pan, which leads to uneven cooking. Patience pays off—wait until the pan is just right.
If you’re new to Aebleskivers, consider doing a test round with a single scoop of batter to check your heat level and timing. Once confident, move forward with a full batch.
Step 3 – Filling the Pan and Cooking
Now comes the fun part—filling the pan! Using a tablespoon or a small ladle, spoon the batter into each well until they are about ¾ full. Don’t overfill, as the batter will puff up while cooking.
If you want to add a filling, this is the moment to do it. Drop a small spoonful of jam, Nutella, or fruit into the center of the batter in each well, then cover it with a bit more batter to seal it in. Be careful not to add too much filling—it should stay contained in the center.
Let the Aebleskivers cook for about 1–2 minutes, or until the edges start to look firm and bubbles form on the surface. Resist the urge to turn them too soon—if they’re not ready, they’ll fall apart.
The goal is to let the bottom set just enough that you can rotate the ball and cook the remaining sides gradually.
Step 4 – Turning the Aebleskivers
Turning Aebleskivers is part technique, part art. Once the edges look set and the bottoms are golden brown, use a wooden skewer, knitting needle, or chopstick to gently rotate each Aebleskiver about a quarter turn.
As they cook, continue to rotate every few seconds to form a fully round shape. This method ensures the batter inside has time to set evenly and results in a perfectly spherical treat. Total cooking time per batch should be about 5–7 minutes.
Don’t worry if your first few tries aren’t perfect—there’s a learning curve, and even slightly wonky Aebleskivers still taste amazing.
If you notice the outsides browning too quickly before the insides cook through, reduce your heat slightly. Slow and steady is better than fast and burnt.
Once they’re golden and puffed up, remove them from the pan and place them on a paper towel-lined plate.
Step 5 – Serving and Garnishing
Freshly made Aebleskivers are best served warm—soft, slightly crispy, and full of flavor. Traditional Danish style means a generous dusting of powdered sugar and maybe a side of berry jam or syrup.
But don’t stop there. Try these delicious serving ideas:
- With Maple Syrup: Classic and comforting.
- With Whipped Cream and Berries: Great for brunch or a dessert platter.
- With Chocolate Sauce: Perfect for chocoholics.
- With Cinnamon Sugar: Adds a warm, spiced touch.
- With Savory Dips: If you made a savory version, pair with sour cream, cheese dip, or chutney.
If you’re hosting guests, serve them in a basket lined with a cloth napkin to keep them warm. Aebleskivers are bite-sized perfection, and their pillowy texture makes them a crowd-pleaser.
Whether it’s breakfast, brunch, or dessert, Aebleskivers shine on any table.
Tips and Tricks for Perfect Aebleskivers
Common Mistakes to Avoid
Even with a solid recipe, there are a few common missteps you’ll want to avoid:
- Overmixing the Batter: This leads to dense Aebleskivers. Fold gently and stop once combined.
- Cold Pan: A pan that isn’t properly heated results in sticking or undercooked centers.
- Too Much Filling: A little goes a long way—too much filling can cause overflow or make flipping difficult.
- High Heat: Cooking too fast results in burnt outsides and raw insides. Keep it medium and steady.
- Not Greasing the Wells: This is a must—even with nonstick pans.
Aebleskivers may look tricky at first, but once you get the hang of it, they’re a breeze to make. Practice makes perfect.
Flavor Variations and Creative Twists
While traditional Aebleskivers are amazing on their own, experimenting with different flavors can take them to the next level. Here are a few ideas:
- Cinnamon Roll Aebleskivers: Add cinnamon sugar to the batter and serve with cream cheese glaze.
- Lemon Blueberry Aebleskivers: Stir lemon zest into the batter and add a few blueberries as filling.
- Pumpkin Spice Aebleskivers: Perfect for fall—use pumpkin puree and warm spices.
- Savory Cheese and Herb Aebleskivers: Skip the sugar, add shredded cheese, herbs, and even bacon bits.
- Coconut and Pineapple Aebleskivers: A tropical twist—try with coconut flakes and pineapple chunks.
Whether you’re sticking to tradition or going wild with fillings, these little pancake balls offer something for everyone.
FAQs about Aebleskiver Recipe
Can I make Aebleskivers without a special pan?
Yes, but it won’t be quite the same. You can try using a cake pop maker or mini muffin tin, though the texture may differ. For the authentic round shape and fluffy interior, an Aebleskiver pan is your best bet.
How do I store leftover Aebleskivers?
Store them in an airtight container in the fridge for up to 3 days. Reheat in a toaster oven or skillet to regain their crispy texture. Avoid microwaving, as it may make them soggy.
Can Aebleskivers be made gluten-free?
Absolutely! Substitute the all-purpose flour with a 1:1 gluten-free flour blend. Just be sure the mix includes xanthan gum or a binder for proper structure.
What are the best fillings for Aebleskivers?
Classic fruit jams like raspberry or strawberry are traditional, but chocolate chips, cream cheese, and apple compote are also popular. The key is not to overfill—just a teaspoon does the trick.
Can I freeze Aebleskivers for later use?
Yes! Let them cool completely, then place in a freezer-safe bag. Freeze for up to 2 months. To reheat, bake in the oven at 350°F for 10 minutes or until warmed through.
Conclusion
What makes Aebleskivers truly special is their versatility. From sweet to savory, classic to creative, they’re a blank canvas for your culinary imagination. Want a quick breakfast option? Go classic with powdered sugar. Craving dessert? Fill them with Nutella or jam. Hosting a brunch party? Set up a toppings bar and let guests customize their own.
And don’t forget, practice makes perfect. Your first batch might not be picture-perfect, but they’ll still be delicious—and your technique will only get better with time. So grab that pan, whip up some batter, and treat yourself to a piece of Denmark’s culinary heritage.
Now that you’ve got a step-by-step guide, there’s nothing stopping you from becoming the Aebleskiver master of your kitchen.

