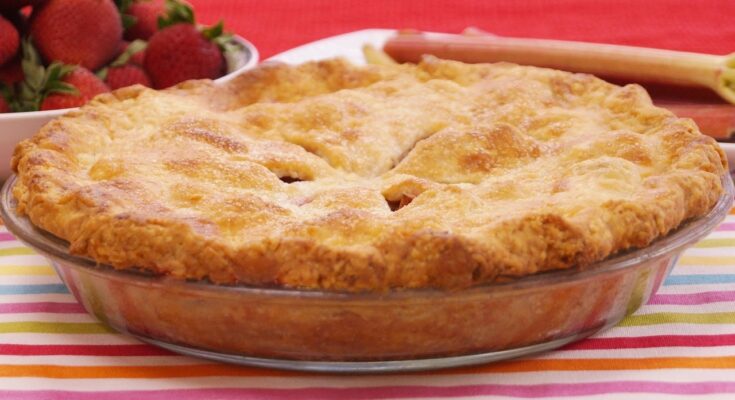
Easy Pie Crust Recipe: Making a pie crust from scratch is one of the most rewarding kitchen skills you can master. While store-bought options might be convenient, they simply can’t compare to the buttery, flaky goodness of a homemade pie crust. Plus, making your own allows you to control the ingredients and tailor the crust to your taste and dietary needs.
Whether you’re baking an apple pie, quiche, or savory pot pie, a homemade crust can elevate your dish to a new level. Don’t worry if you’re a beginner—this guide will walk you through every step of the process, ensuring you get it right on the first try.
Ingredients You’ll Need
Primary Ingredients
To make a basic pie crust, you’ll need just a few pantry staples:
- All-purpose flour: The base of your crust, providing structure.
- Unsalted butter or shortening: For that buttery flavor and flakiness.
- Cold water: Helps bind the dough.
- Salt: Enhances the flavor.
Optional Ingredients
For extra flavor and texture, consider these add-ins:
- Sugar: A touch of sweetness for dessert pies.
- Vinegar or lemon juice: Prevents gluten overdevelopment, keeping the crust tender.
- Egg yolk: Adds richness (optional).
Tools Required for Making Pie Crust
Must-Have Tools
- Mixing bowl: To combine your ingredients.
- Pastry cutter or forks: For cutting butter into the flour.
- Rolling pin: To roll out the dough evenly.
- Pie pan: To bake your crust.
Optional Tools for Perfection
- Food processor: Speeds up mixing for even results.
- Parchment paper: Helps with rolling and transferring dough.
- Pie weights: For blind baking.
Step-by-Step Instructions to Make Pie Crust
Step 1: Prepare Your Ingredients
Start by gathering all your ingredients. Make sure your butter or shortening is chilled—cold ingredients are crucial for a flaky crust. Measure out your flour, salt, and any optional sugar or additives.
Step 2: Mixing the Dough
In a mixing bowl, combine the flour and salt. Cut the butter into small cubes and add it to the bowl. Using a pastry cutter or your fingertips, blend the butter into the flour until the mixture resembles coarse crumbs. Gradually add cold water, one tablespoon at a time, until the dough starts to come together. Be cautious not to overwork the dough.
Step 3: Resting the Dough
Once the dough comes together, shape it into a disc, wrap it in plastic wrap, and refrigerate for at least 30 minutes. This step is essential for the gluten to relax and the butter to firm up, making the dough easier to roll out.
Step 4: Rolling Out the Dough
Lightly flour your work surface and rolling pin. Roll the dough from the center outward, rotating it slightly after every roll, to maintain an even thickness. Aim for a circle about 2 inches larger than your pie pan.
Step 5: Fitting the Dough into the Pie Pan
Carefully transfer the rolled-out dough to your pie pan. Press it gently into the corners and trim the edges, leaving about an inch of overhang. Fold the overhang under and crimp the edges as desired. Chill the crust for another 15-20 minutes before baking.
Troubleshooting Common Pie Crust Problems
Crumbly Dough
If your dough is falling apart while rolling, it’s likely too dry. Add a small amount of cold water, one teaspoon at a time, and gently knead the dough until it comes together. Overworking the dough can also make it crumbly, so handle it with care.
Tough Crust
A tough crust occurs when the dough has been overworked or too much water was added. To avoid this, mix the dough just until it holds together and don’t over-handle it. Always chill the dough before rolling to make it easier to work with.
Soggy Bottoms
No one wants a soggy pie crust. This usually happens when the filling releases too much liquid. To prevent this, blind bake your crust by baking it partially before adding the filling. Using a layer of egg wash or sprinkling breadcrumbs can also help create a barrier.
Tips and Tricks for a Perfect Pie Crust
- Keep Everything Cold: From the butter to the water to the mixing bowl, cold ingredients are the key to flaky layers.
- Use Your Hands Sparingly: Warm hands can melt the butter, so use a pastry cutter or food processor for mixing.
- Don’t Overmix: Overworking the dough can activate gluten and result in a tough crust. Stop as soon as the dough holds together.
- Chill Before Baking: Refrigerating the crust before baking helps it hold its shape and prevents shrinkage.
Variations on Pie Crust Recipes
Gluten-Free Pie Crust
Substitute all-purpose flour with a gluten-free flour blend. Ensure your blend contains xanthan gum or add a small amount for structure. Gluten-free dough can be more fragile, so handle it gently.
Vegan Pie Crust
Replace butter with vegan butter or coconut oil. Use cold water or a plant-based milk to bind the dough. Vegan crusts can be just as flaky and delicious as traditional ones with the right ingredients.
Whole Wheat Pie Crust
Swap out some or all of the all-purpose flour with whole wheat flour for a nuttier flavor. You may need to add a bit more water, as whole wheat flour absorbs more moisture.
Storing and Freezing Pie Crust
Storing in the Fridge
If you’re making the crust ahead of time, wrap the dough tightly in plastic wrap and store it in the refrigerator for up to 3 days. Let it come to room temperature for 10-15 minutes before rolling.
Freezing for Later Use
For longer storage, freeze the dough. Wrap it in plastic wrap and place it in an airtight freezer bag. It will keep for up to 3 months. When ready to use, thaw the dough in the fridge overnight. You can also freeze a pre-rolled crust in its pie pan for even more convenience.
FAQs about Easy Pie Crust Recipe
1. What ingredients do I need for an easy pie crust?
To make a simple pie crust, you typically need all-purpose flour, salt, cold butter or shortening, and ice water. These basic ingredients can be adjusted for flavor or dietary needs, such as using gluten-free flour or vegan butter.
2. How do I make sure my pie crust is flaky?
For a flaky pie crust, ensure your butter or shortening is very cold and handle the dough as little as possible to keep the fat from melting. Chilling the dough before rolling and baking also helps maintain those distinct layers of fat that puff up during baking.
3. Can I make pie crust ahead of time?
Yes, you can prepare pie crust ahead of time. Wrap the dough tightly in plastic wrap and store it in the refrigerator for up to three days, or freeze it for up to three months. Thaw in the refrigerator overnight before using.
4. Is it necessary to pre-bake the crust for all pies?
Pre-baking, or blind baking, the pie crust is not necessary for all pies but is recommended for custard-based or very wet fillings to prevent a soggy bottom. Pies with longer baking times or firmer fillings may not need a pre-baked crust.
5. How do I prevent my pie crust from shrinking while baking?
To prevent your pie crust from shrinking, avoid stretching the dough when placing it in the pie dish. Instead, gently lay it in the dish and trim excess edges. Additionally, chilling the shaped dough in the pie dish before baking can help minimize shrinkage.
6. What can I use if I don’t have a pie weight for blind baking?
If you don’t have pie weights for blind baking, you can use alternatives like dried beans, rice, or even sugar. Line the crust with parchment paper and fill it with your choice of weight to help the crust hold its shape during baking.
7. Can I use this pie crust recipe for both sweet and savory pies?
Absolutely! A basic pie crust is versatile and can be used for both sweet and savory pies. Adjust the sugar level according to your recipe needs—omit it for savory dishes and increase it slightly for sweet pies.
Conclusion
Making a homemade pie crust is easier than you think, and the results are well worth the effort. By following this step-by-step guide, you can create a crust that’s flaky, buttery, and perfect for any pie recipe. Whether you’re a seasoned baker or just starting out, this recipe will become a staple in your kitchen. Experiment with variations, troubleshoot issues confidently, and savor the satisfaction of crafting the perfect pie crust.


