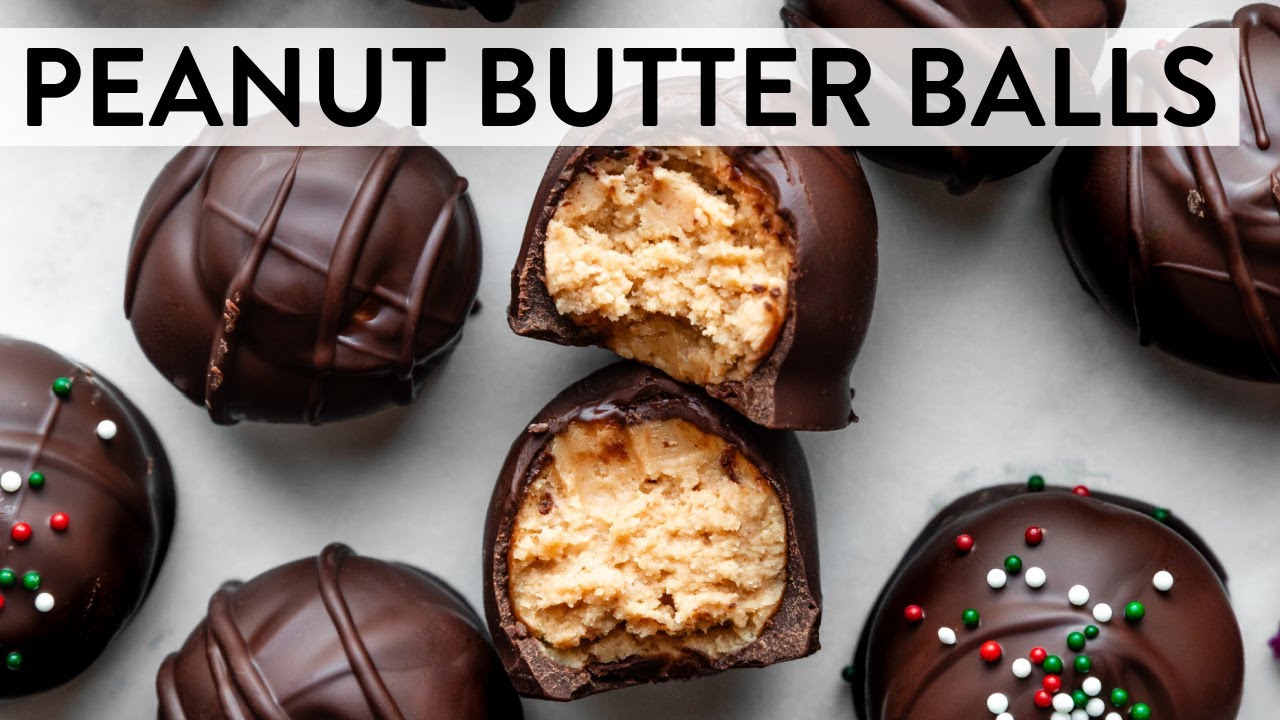
Peanut Butter Balls Recipe: Peanut butter balls are a delicious, no-bake dessert that combines the rich flavors of creamy peanut butter and smooth chocolate. Perfect for holidays, parties, or simply as a sweet treat, these bite-sized delights are incredibly easy to make.
Why do people love peanut butter balls? Their irresistible taste, quick preparation, and customizable options make them a favorite for both adults and kids. Plus, they’re ideal for gifting during festive seasons!
This guide provides a detailed, step-by-step recipe to ensure you create perfect peanut butter balls every time.
Ingredients for Peanut Butter Balls
Main Ingredients:
- 1 cup creamy peanut butter – Smooth and rich flavor.
- 1/4 cup unsalted butter – Adds softness and flavor.
- 2 cups powdered sugar – Provides sweetness and structure.
- 1 teaspoon vanilla extract – Enhances flavor.
- 2 cups semi-sweet chocolate chips – For the chocolate coating.
- 1 tablespoon coconut oil – Helps smooth out the chocolate coating.
Optional Add-ons for Flavor:
- Sea salt flakes – For a sweet and salty twist.
- Crushed pretzels or nuts – Adds crunch.
- Sprinkles or edible glitter – Perfect for decoration.
- Mini chocolate chips – Mixed into the peanut butter for added texture.
Essential Tools and Equipment
Tools You Need for Preparation:
- Mixing bowls (medium and large)
- Electric mixer or whisk
- Baking sheet
- Parchment paper
- Melting pot or microwave-safe bowl
- Toothpicks or forks (for dipping)
- Measuring cups and spoons
Pro Tips for Smooth Cooking:
- Use high-quality peanut butter for the best flavor.
- Keep your hands slightly greased to prevent sticking when rolling balls.
- Chill the peanut butter mixture before shaping to make it easier to handle.
Step 1: Preparing the Peanut Butter Mixture
- Combine Ingredients: Start by adding peanut butter and softened butter into a large mixing bowl. Use an electric mixer or whisk to blend them until smooth and creamy.
- Add Sweetness and Flavor: Gradually mix in the powdered sugar and vanilla extract. Stir until you achieve a thick and slightly crumbly dough.
- Test Consistency: If the dough feels too dry, add a teaspoon of peanut butter. If too sticky, sprinkle a little more powdered sugar.
Pro Tip: Refrigerate the mixture for about 20–30 minutes. This step ensures the dough firms up, making it easier to shape.
Step 2: Shaping the Peanut Butter Balls
- Scoop Even Portions: Use a small cookie scoop or tablespoon to portion out the dough. This ensures uniform-sized balls.
- Roll Smooth Balls: Roll the portions between your palms to create smooth, round balls.
- Place on Tray: Arrange the balls on a parchment-lined baking sheet, leaving space between them.
Pro Tip: Lightly grease your hands with butter or coconut oil to prevent sticking.
- Chill Again: Place the tray in the freezer for 30–40 minutes to firm up the balls before dipping. This prevents them from melting in the chocolate coating.
Step 3: Melting the Chocolate Coating
- Microwave Method: Add chocolate chips and coconut oil to a microwave-safe bowl. Heat in 20-second intervals, stirring after each until smooth.
- Double Boiler Method: Melt chocolate over simmering water in a heatproof bowl for a more controlled temperature.
Pro Tip: Avoid overheating the chocolate. Stir continuously to ensure a silky consistency.
- Keep Warm: If the chocolate begins to harden while dipping, reheat it gently for a few seconds.
Step 4: Dipping the Peanut Butter Balls in Chocolate
- Prepare for Dipping: Remove the chilled peanut butter balls from the freezer.
- Dip Carefully: Insert a toothpick or fork into each ball, then dip it into the melted chocolate. Swirl it to coat evenly.
- Drip Off Excess Chocolate: Gently tap the tool against the bowl to remove excess chocolate before placing the ball back on the parchment paper.
- Decorate Immediately: Add sprinkles, crushed nuts, or sea salt while the chocolate is still wet.
Pro Tip: If you want a “Buckeye” look, leave a small portion of the peanut butter exposed at the top.
Step 5: Chilling and Setting the Balls
- Cool Completely: Place the tray back into the refrigerator for at least 1 hour to allow the chocolate to set.
- Store Properly: Once set, transfer the peanut butter balls to an airtight container. They can be refrigerated for up to 2 weeks or frozen for up to 3 months.
Serving Suggestions and Pairing Ideas
Peanut butter balls are versatile treats that can be served on various occasions. Whether you’re hosting a party, celebrating holidays, or simply craving a quick dessert, these bite-sized sweets are sure to impress.
Ideal Serving Occasions:
- Holiday Platters: Arrange them alongside cookies and brownies for festive dessert trays.
- Gift Boxes: Package them in decorative tins or jars for birthdays, Christmas, or Valentine’s Day.
- Snack Time Treats: Pair with coffee, tea, or a glass of milk for a mid-day pick-me-up.
- Celebrations: Use colorful sprinkles or edible glitter to match themes for birthdays or weddings.
Beverage Pairings:
- Hot Chocolate or Coffee: Complements the creamy peanut butter and rich chocolate coating.
- Milkshakes or Smoothies: Adds an extra layer of indulgence.
- Wine or Dessert Liquors: Pair with sweet wines like port or cream-based liquors for an adult treat.
Common Variations and Flavor Enhancements
One of the best things about peanut butter balls is their versatility. You can tweak the recipe to suit your preferences, dietary restrictions, or flavor cravings.
Adding Crunchy Textures:
- Chopped Nuts: Almonds, walnuts, or pecans can be mixed into the dough for a crunchy texture.
- Crushed Pretzels: Offers a salty twist that contrasts the sweetness.
- Rice Krispies or Granola: Adds a crispy texture without altering the flavor profile.
Vegan and Gluten-Free Alternatives:
- Vegan Peanut Butter Balls: Use plant-based butter and dairy-free chocolate chips.
- Gluten-Free Option: Ensure all ingredients are labeled gluten-free, especially the chocolate coating.
Flavor Add-Ins:
- Coconut Flakes: Blend into the dough for a tropical taste.
- Spices: Add cinnamon or nutmeg for a warm, seasonal flavor.
- Extracts: Try almond or coconut extract for a unique flavor twist.
Health Benefits of Peanut Butter Balls
Although peanut butter balls are indulgent, they also offer some nutritional benefits when made with healthier ingredients.
Nutritional Overview:
- Protein-Rich Snack: Peanut butter provides a good source of protein, which helps in muscle repair and energy boosts.
- Healthy Fats: Natural peanut butter contains heart-healthy monounsaturated fats.
- Antioxidants in Chocolate: Dark chocolate, when used, is rich in antioxidants that support heart health.
Healthy Ingredient Substitutes:
- Natural Peanut Butter: Opt for versions without added sugars or hydrogenated oils.
- Dark Chocolate: Use at least 70% cocoa for a healthier coating.
- Honey or Maple Syrup: Replace powdered sugar with these natural sweeteners for a refined sugar-free option.
- Almond Butter: Substitute for peanut butter for a different flavor and added nutrients.
Troubleshooting and Common Mistakes
Even simple recipes can sometimes face challenges. Here’s how to fix common peanut butter ball issues:
Fixing Sticky Dough:
- Add more powdered sugar if the mixture is too soft to roll.
- Refrigerate the dough longer to firm it up before shaping.
Avoiding Chocolate Cracks:
- Allow the chocolate coating to cool slightly before dipping to avoid sudden temperature changes.
- Ensure the peanut butter balls are not frozen solid when dipping; they should be firm but not rock hard.
Chocolate Too Thick for Dipping?
- Stir in 1–2 teaspoons of coconut oil to thin out the chocolate for easier dipping.
Balls Falling Apart During Dipping?
- Ensure the dough is well-chilled and firm before dipping in chocolate.
- Use a fork or toothpick carefully to support the balls while dipping.
Tips for Large Batches and Gifting Ideas
Making in Bulk for Holidays:
- Prepare the dough and shape the balls in advance. Freeze them in airtight containers until you’re ready to dip in chocolate.
- Melt chocolate in larger batches using a double boiler for smooth consistency.
Packaging for Gifts:
- Place balls in mini cupcake liners for presentation.
- Use decorative tins, mason jars, or cellophane bags tied with ribbons.
- Add handwritten recipe cards to personalize gifts.
Long-Term Storage:
- Refrigerate in airtight containers for up to 2 weeks.
- Freeze in sealed bags for up to 3 months. Thaw before serving.
FAQs about Peanut Butter Balls Recipe
1. What ingredients do I need for peanut butter balls?
To make peanut butter balls, you’ll need peanut butter, powdered sugar, butter, and chocolate for coating. Some recipes may include vanilla extract or crushed graham crackers for added flavor and texture.
2. Are peanut butter balls gluten-free?
Peanut butter balls can be gluten-free if you ensure that all the ingredients used, such as peanut butter and chocolate, are free of gluten. Always check the labels if you need to avoid gluten.
3. How do I store peanut butter balls?
Peanut butter balls should be stored in an airtight container in the refrigerator. They can last for up to two weeks when properly stored. For longer storage, you can freeze them for up to three months.
4. Can I use natural peanut butter in this recipe?
Yes, you can use natural peanut butter in peanut butter balls. Keep in mind that natural peanut butter may make the mixture a bit oilier, so you might need to adjust the amount of powdered sugar or butter to achieve the right consistency.
5. Are there any variations I can try?
Absolutely! Consider adding mini chocolate chips, crushed nuts, or coconut flakes to the peanut butter mixture for a delightful crunch. You can also experiment with different types of chocolate for coating, like milk chocolate, dark chocolate, or white chocolate.
Conclusion
Peanut butter balls are a classic dessert that’s perfect for any occasion. Whether you’re making them for holidays, as gifts, or for personal enjoyment, they’re easy to customize and fun to prepare. With this step-by-step guide, you’ll master the art of making peanut butter balls that taste as good as they look.
Get creative with decorations, experiment with flavors, and enjoy sharing these delightful treats with friends and family.


