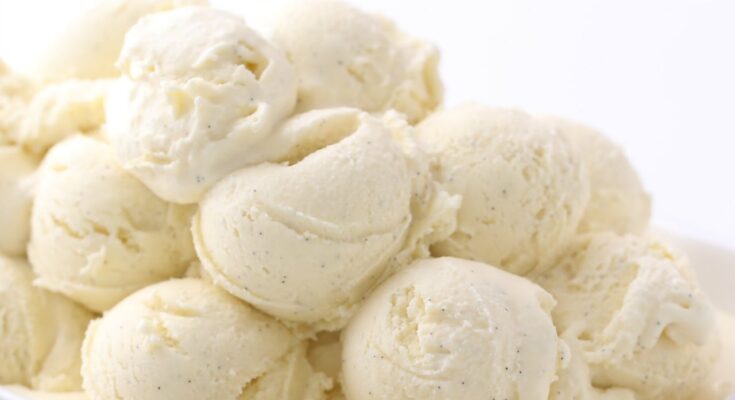
Vanilla Ice Cream Recipe: Who doesn’t love a creamy, rich bowl of vanilla ice cream? It’s the ultimate classic dessert that pairs well with almost anything—chocolate brownies, fresh fruit, pies, or just on its own. While store-bought ice cream is convenient, making it at home brings a special joy. You can control the ingredients, adjust the sweetness, and create a flavor far better than anything in a tub.
Homemade vanilla ice cream doesn’t require complicated skills or tools. With just a few high-quality ingredients and patience, you’ll have an ice cream that’s smooth, creamy, and utterly delicious.
Ready to dive in? Let’s begin!
Ingredients for Vanilla Ice Cream
Before you begin, gather the following ingredients:
- 2 cups heavy cream (high-fat content is key)
- 1 cup whole milk
- ¾ cup granulated sugar
- 1 tablespoon pure vanilla extract or 1 vanilla bean
- 4 large egg yolks
- Pinch of salt
Tips for Choosing Ingredients
- Use fresh, high-quality cream and milk for the creamiest texture.
- Vanilla beans provide the richest flavor, but vanilla extract works well too.
- Eggs add richness and smoothness—don’t skip them!
Equipment Needed for the Recipe
You don’t need a professional kitchen setup for this recipe. Here’s what you’ll need:
- A medium saucepan
- A whisk and heatproof spatula
- A mixing bowl
- A fine sieve or strainer
- An ice cream maker (optional but recommended)
- A freezer-safe container with a lid
- A thermometer (optional for precise cooking)
Optional Tools
If you don’t have an ice cream maker, a hand mixer or manual whisk can help churn the ice cream.
How to Make Vanilla Ice Cream – Step by Step Guide
Step 1: Prepare the Ice Cream Base
Start by creating the base for your ice cream:
- In a medium saucepan, combine 2 cups heavy cream, 1 cup whole milk, and ¾ cup sugar.
- Stir the mixture over medium heat until the sugar completely dissolves. This takes about 5 minutes. Avoid boiling; you just need gentle heating.
- Add a pinch of salt to balance the flavors.
Tip: Gently heating the cream and milk prevents curdling later when adding eggs.
Step 2: Heat the Mixture and Temper the Egg Yolks
Tempering the egg yolks is a crucial step:
- In a separate bowl, whisk 4 large egg yolks until smooth and pale.
- Slowly pour about ½ cup of the heated cream mixture into the egg yolks while whisking constantly. This warms the eggs without scrambling them.
- Gradually add the egg mixture back into the saucepan with the rest of the cream.
Why temper the eggs? Adding hot cream directly to the yolks would cook them, creating lumps. Tempering gently raises their temperature.
Step 3: Cook the Custard to the Right Thickness
Now it’s time to cook your custard to the perfect consistency:
- Cook the mixture over low heat, stirring constantly with a spatula.
- Continue cooking until the custard thickens slightly and coats the back of a spoon. This usually takes 8–10 minutes.
- Avoid boiling! If you notice small lumps, remove the mixture immediately and strain it.
How to Test: Run your finger across the back of the spoon. If the line stays, the custard is ready.
Tip: Use a thermometer; the custard should reach 170–175°F (77–80°C).
Step 4: Cool the Custard Mixture
Once the custard is ready, it’s time to cool it:
- Pour the mixture through a fine sieve into a clean bowl. This removes any tiny lumps.
- Let it cool to room temperature. You can speed this up by placing the bowl in an ice water bath.
- Cover the bowl with plastic wrap, ensuring it touches the surface of the custard. This prevents a skin from forming.
Tip: Never skip the cooling process—churning warm custard will ruin the texture.
Step 5: Add Vanilla Flavoring
After the custard cools, add the star ingredient:
- For vanilla extract: Stir in 1 tablespoon of pure vanilla extract.
- For vanilla beans: Split the bean lengthwise, scrape the seeds, and mix them into the custard. The tiny black specks add visual appeal and flavor.
Tip: Vanilla paste combines the convenience of extract with the richness of beans. Use 1 tablespoon of paste as an alternative.
Step 6: Chilling the Mixture Before Churning
Before you churn, ensure the custard is completely chilled:
- Place the bowl in the refrigerator for at least 4 hours or preferably overnight.
- Chilling enhances the flavor and ensures a smoother texture during churning.
Shortcut: If time is tight, place the custard in the freezer for 1 hour, stirring every 20 minutes.
Step 7: Churn the Ice Cream in a Machine
Now for the fun part—churning:
- Pour the chilled custard into your ice cream maker.
- Follow the manufacturer’s instructions. Churning usually takes 20–30 minutes.
- Watch as the mixture thickens and transforms into creamy ice cream.
No machine? Place the custard in a shallow container and freeze it. Stir the mixture vigorously every 30 minutes for 3–4 hours to break up ice crystals.
Step 8: Transfer to a Container and Freeze
After churning, your ice cream will have a soft-serve consistency. To firm it up, follow these steps:
- Transfer the ice cream to a freezer-safe container. Use a spatula to evenly spread it.
- Cover the surface of the ice cream with plastic wrap before sealing the container with a lid. This prevents ice crystals from forming on top.
- Place the container in the freezer for at least 2-4 hours. For the best texture, allow it to firm up overnight.
Tips for Freezing:
- Use an airtight container to avoid freezer burn.
- A metal container helps the ice cream freeze more evenly and quickly.
- Avoid repeatedly thawing and refreezing your ice cream, as it can alter the texture.
Once the ice cream is firm, it’s ready to scoop and enjoy!
How Long Does Homemade Vanilla Ice Cream Last?
While homemade ice cream doesn’t have the preservatives of store-bought versions, proper storage ensures it stays fresh for longer.
- Shelf Life: Homemade vanilla ice cream stays fresh for 2 weeks in the freezer.
- Storage Tip: Keep the ice cream in an airtight container to prevent freezer burn and maintain flavor.
Pro Tip: Label your container with the date to track freshness.
Common Mistakes to Avoid
Even simple recipes can go wrong. Here are some mistakes to watch out for:
- Skipping the tempering step: Adding hot cream directly to egg yolks will scramble the eggs. Tempering is essential for a smooth custard.
- Not cooling the custard properly: Churning a warm mixture can result in an icy texture instead of creamy ice cream.
- Over-churning the ice cream: Follow the machine’s instructions. Over-churning can lead to a grainy texture.
- Using low-fat milk or cream: Fat gives ice cream its signature creaminess. Substituting low-fat alternatives will affect the texture.
- Improper storage: Freezer burn can ruin the flavor. Always cover the ice cream’s surface with plastic wrap and store it in an airtight container.
By avoiding these mistakes, you’ll achieve a flawless, creamy vanilla ice cream every time.
Serving Suggestions for Vanilla Ice Cream
Homemade vanilla ice cream is delicious on its own, but it pairs beautifully with other desserts and toppings. Here are some ideas to enhance your treat:
Classic Pairings:
- Warm chocolate brownies or molten lava cake
- Fresh strawberries, raspberries, or sliced bananas
- Drizzle of hot fudge, caramel sauce, or honey
Unique Topping Ideas:
- Chopped nuts (almonds, pecans, or walnuts) for added crunch
- A sprinkle of cinnamon or nutmeg for warmth
- Crushed cookies like Oreos, ginger snaps, or graham crackers
Special Occasions:
- Serve with slices of homemade apple pie or peach cobbler.
- Make an ice cream sundae bar for gatherings. Provide toppings like sprinkles, sauces, and whipped cream.
- Create an ice cream sandwich with homemade cookies.
Vanilla ice cream is the perfect canvas for creativity—don’t hesitate to mix and match flavors!
FAQs about Vanilla Ice Cream Recipe
What ingredients are needed for a homemade vanilla ice cream recipe?
To make homemade vanilla ice cream, you will typically need heavy cream, whole milk, sugar, salt, vanilla extract, and egg yolks. The use of egg yolks is optional but helps create a richer texture.
How long does it take to make vanilla ice cream at home?
The preparation time for mixing the ingredients can take about 15-20 minutes. After preparing the mixture, it typically needs to chill for several hours or overnight before being churned in an ice cream maker, which can take an additional 20-30 minutes.
Can I make vanilla ice cream without an ice cream maker?
Yes, you can make vanilla ice cream without an ice cream maker. One common method is to freeze the ice cream mixture in a deep pan and stir it every 30 minutes until it’s firm and creamy. This process can take about 3-4 hours.
What is the best vanilla extract to use?
For the best flavor, use pure vanilla extract. It provides a more authentic and robust vanilla taste compared to synthetic vanillin or lower-quality extracts.
How can I store homemade vanilla ice cream?
Homemade vanilla ice cream should be stored in an airtight container in the freezer. It is best consumed within two weeks for optimal texture and flavor, although it can be kept for up to two months.
Why is my homemade ice cream too hard?
Homemade ice cream can sometimes freeze too hard, mainly if the freezer is set to a very low temperature. To prevent this, ensure your ice cream mixture is well-chilled before churning, and consider adding a tablespoon of alcohol, like vodka, to the mixture as it can lower the freezing point.
Can I add mix-ins to my vanilla ice cream?
Absolutely! Vanilla ice cream is versatile and pairs well with a variety of mix-ins like chocolate chips, cookie dough, fruits, nuts, or caramel swirls. Add these at the last few minutes of churning or layer them in when transferring the churned ice cream to the storage container.
Conclusion
Making vanilla ice cream at home is easier than you think and well worth the effort. By following this step-by-step guide, you’ll create a creamy, delicious dessert that tastes far superior to store-bought versions. Plus, you can take pride in knowing exactly what goes into your ice cream—no artificial additives or preservatives.
Whether enjoyed alone or paired with other desserts, this classic vanilla ice cream is guaranteed to impress family and friends. Give it a try and savor the pure, rich flavor of homemade goodness.


