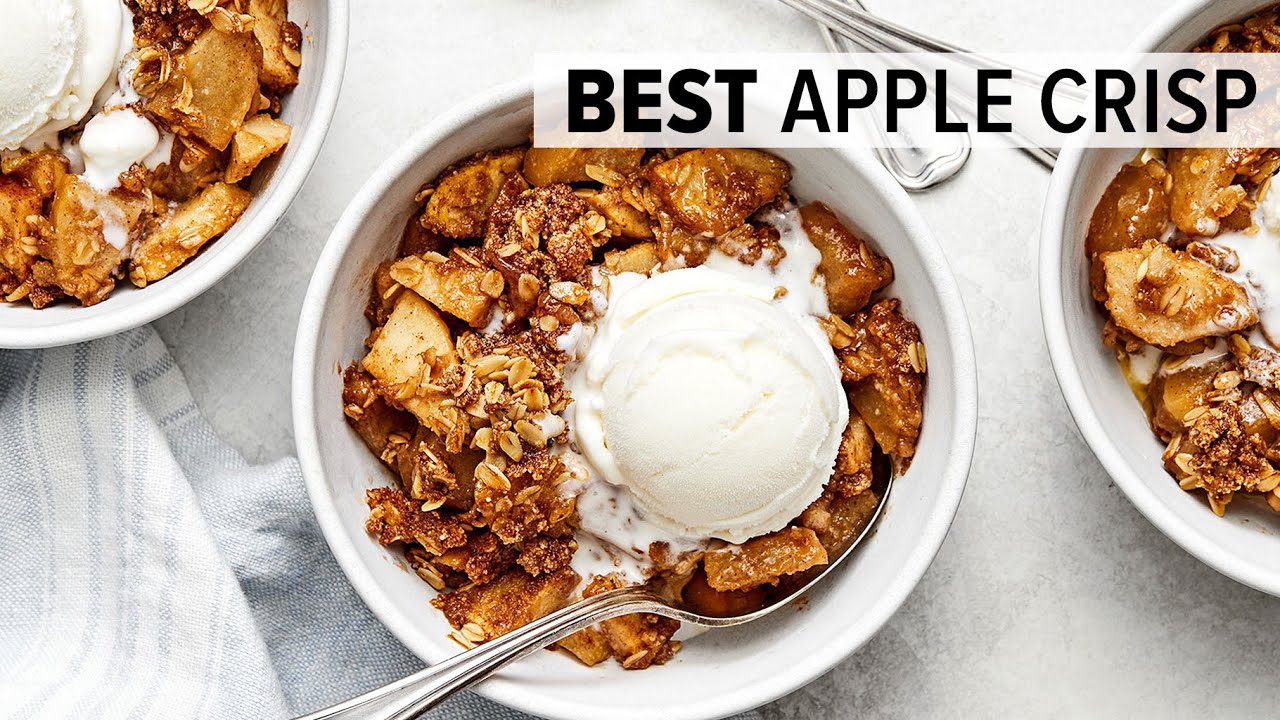
Apple Crisp Recipe: Apple Crisp is one of those classic, cozy desserts that never goes out of style. It’s the perfect blend of tender, juicy apples and a crunchy, buttery topping.
Whether it’s served warm with a scoop of vanilla ice cream or enjoyed on its own, there’s no doubt that apple crisp is a dessert that brings comfort to any table.
But what makes this recipe so great? It’s simple to make, adaptable, and a crowd-pleaser for all ages. So, grab your apples, and let’s get started with this step-by-step guide!
What is Apple Crisp?
Apple crisp is a baked dessert made with a fruit filling (most commonly apples) and a crisp, crumbly topping. The topping usually consists of flour, butter, and sugar, though oats and nuts are often added for extra texture. It’s similar to an apple crumble but differs mainly in that the topping for a crumble tends to be more cake-like or dense, while a crisp has a chunkier, crunchier texture.
History and Origins of Apple Crisp:
Apple crisp became popular in the United States and Canada in the early 20th century. It’s believed that this dessert originated as a simpler, more rustic alternative to apple pie. Today, it’s loved worldwide for its ease of preparation and deliciously homey flavor.
Ingredients Needed for Apple Crisp
One of the great things about apple crisp is that it uses simple, readily available ingredients. Here’s what you’ll need:
For the Filling:
- 6-7 medium-sized apples (Granny Smith, Honeycrisp, or a mix)
- 1/4 cup granulated sugar
- 1 teaspoon cinnamon
- 1 tablespoon lemon juice (optional, for added tartness)
For the Topping:
- 1 cup all-purpose flour
- 1 cup rolled oats (optional, but adds great texture)
- 1/2 cup brown sugar
- 1/2 cup unsalted butter, softened
- 1 teaspoon vanilla extract
- 1/2 teaspoon salt
- Optional: 1/2 cup chopped nuts (walnuts, pecans)
Choosing the Right Apples
Choosing the right apples is crucial for a perfect apple crisp. Ideally, you want apples that are both sweet and tart and hold their shape when baked.
Best Apple Varieties for Apple Crisp:
- Granny Smith: Known for their tartness, they provide a nice balance to the sweet topping.
- Honeycrisp: Sweet and juicy, they complement the crispy topping well.
- Braeburn or Jonagold: These apples have a firm texture and are excellent for baking.
Mixing a couple of varieties adds depth to the flavor.
Tools You’ll Need
- Peeler and Knife: For peeling and slicing apples.
- Mixing Bowls: One for the apple filling and one for the topping.
- 9×13 Baking Dish: A standard size works well for this recipe.
- Pastry Blender or Fork: To mix the topping ingredients into a crumble.
How to Prepare Your Apples
- Peel the Apples: Use a vegetable peeler to remove the skin. Peeling helps achieve that soft texture in the filling.
- Slice the Apples: Cut the apples into 1/4-inch slices or bite-sized chunks, depending on your preference. Thinner slices will cook faster, while thicker ones will give more texture.
- Prevent Browning: If you’re prepping apples in advance, toss them in a little lemon juice to keep them from browning.
Step-by-Step Apple Crisp Recipe
1. Preheat the Oven: Preheat your oven to 350°F (175°C) to ensure even baking.
2. Make the Apple Filling:
- In a large bowl, combine sliced apples, sugar, cinnamon, and lemon juice. Toss until the apples are well coated.
- Spread the apple mixture evenly into a greased 9×13-inch baking dish.
3. Prepare the Crisp Topping:
- In another bowl, combine flour, oats (if using), brown sugar, and salt.
- Cut in the butter using a fork or pastry blender until the mixture resembles coarse crumbs.
- Stir in the vanilla extract for a boost of flavor.
4. Assemble the Crisp: Sprinkle the crisp topping evenly over the apples, making sure to cover them completely.
Baking Your Apple Crisp
- Bake Time: Place your assembled crisp in the preheated oven and bake for 40-45 minutes, or until the topping is golden brown and the apples are tender when pierced with a fork.
- Checking for Doneness: The apple filling should be bubbling up around the edges, and the topping should have a nice crunch. If the top is browning too quickly, cover it loosely with foil.
Serving Suggestions
Apple crisp is best served warm, straight out of the oven. For a truly decadent experience, top it with:
- Vanilla ice cream
- Whipped cream
- Caramel sauce for an extra sweet touch.
Variations of Apple Crisp
- Gluten-Free Apple Crisp: Substitute the all-purpose flour with a gluten-free flour blend.
- Vegan Apple Crisp: Use a plant-based butter and ensure your oats and sugar are vegan-friendly.
- Extra Flavors: Add a pinch of nutmeg, allspice, or even ginger to the filling for a warming spice blend.
Tips for the Perfect Apple Crisp
- Crisp Topping: Don’t overwork the butter into the flour. You want a crumbly, chunky texture for the perfect crisp.
- Soggy Bottom Prevention: Always bake your crisp uncovered to avoid steam buildup, which can make the apples too mushy.
- Balance Sweetness and Tartness: Taste your apples before adding sugar. If they’re already sweet, you can reduce the sugar in the filling.
Storing Apple Crisp
If you have leftovers, store them in an airtight container in the fridge for up to 3 days. To reheat, pop it back in the oven at 350°F until warmed through, or microwave individual portions.
Can You Freeze Apple Crisp?
Yes! You can freeze apple crisp either before or after baking:
- Before Baking: Assemble the crisp, cover tightly with plastic wrap and foil, and freeze for up to 3 months. Bake directly from frozen, adding an extra 15-20 minutes to the baking time.
- After Baking: Let the crisp cool completely, then cover and freeze. Reheat in the oven at 350°F until warmed through.
Common Mistakes to Avoid
- Overbaking or Undercooking: Keep an eye on the topping; it should be golden brown but not burnt.
- Using the Wrong Apples: Avoid using soft apples like Red Delicious, as they’ll turn mushy when baked.
- Skipping the Topping: The crisp topping is essential—don’t skimp on it!
FAQs about Apple Crisp Recipe
Here are some frequently asked questions about making the perfect Apple Crisp:
What are the best apples to use for Apple Crisp?
The best apples for Apple Crisp are firm, tart varieties like Granny Smith or Honeycrisp. They hold their shape well during baking and balance the sweetness of the crisp topping.
Can I make Apple Crisp ahead of time?
Yes, you can prepare Apple Crisp ahead of time. Simply assemble the dish, cover it tightly, and store it in the refrigerator for up to 24 hours before baking.
Can I freeze Apple Crisp?
Absolutely! Apple Crisp can be frozen before or after baking. If freezing before baking, wrap the dish well and store it in the freezer for up to 3 months. Thaw overnight in the fridge before baking.
How do I know when Apple Crisp is done?
Apple Crisp is done when the topping is golden brown and the apples are tender when pierced with a fork. This usually takes about 40-45 minutes in the oven at 350°F (175°C).
Can I make Apple Crisp without oats?
Yes, you can make Apple Crisp without oats. Simply replace the oats with an equal amount of flour for a more traditional crumble topping.
Conclusion
Apple crisp is more than just a dessert; it’s the ultimate comfort food. With its warm, cinnamon-spiced apples and crunchy, buttery topping, this classic treat brings a sense of coziness to every bite.
Whether you’re gathering with family or treating yourself after a long day, apple crisp hits the spot every time. It’s easy to make, versatile, and perfect for any season, making it a go-to for home bakers.
So, if you’re looking for the perfect dessert to indulge in, apple crisp is the answer—delicious, satisfying, and heartwarming!


