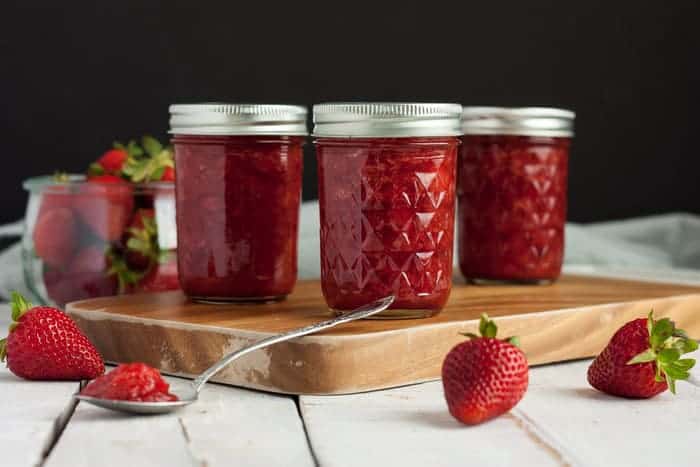
Strawberry Jam Canning Recipe: Homemade strawberry jam canning is one of the most rewarding ways we can preserve the fresh, bright flavor of ripe strawberries. With the right balance of fruit, sugar, pectin, lemon juice, and proper boiling-water processing, we can create jars of beautiful jam that are sweet, glossy, spreadable, and shelf-stable when sealed correctly.
This strawberry jam canning recipe follows a classic cooked jam method using powdered pectin. The jam is made with crushed strawberries, brought to a full rolling boil, sweetened, cooked briefly, then packed into hot jars and processed in a boiling-water canner. Tested guidance from the National Center for Home Food Preservation recommends leaving ¼ inch headspace and processing hot-packed strawberry jam in half-pint or pint jars in a boiling-water canner, with processing time adjusted by altitude.
Ingredients You’ll Need
To make a traditional strawberry jam suitable for canning, we will need simple ingredients, but each one plays an important role in texture, flavor, and preservation.
Main Ingredients
- 5 cups crushed strawberries
- 7 cups granulated sugar
- 1 box powdered fruit pectin
- ¼ cup bottled lemon juice
Canning Supplies
- Half-pint or pint canning jars
- Two-piece canning lids and bands
- Boiling-water canner
- Jar lifter
- Canning funnel
- Ladle
- Clean damp towel or paper towel
- Large heavy-bottomed pot
- Potato masher
- Bubble remover or clean spatula
- Cooling rack or towel
Choosing the Best Strawberries for Jam
For the best homemade strawberry jam, we should use ripe, fresh, flavorful strawberries. The berries should be red, fragrant, and naturally sweet, but not mushy or fermented. Overripe fruit can create a weaker set and dull flavor, while underripe berries may taste sharp and lack the natural strawberry aroma that makes jam so appealing.
We should remove the green caps, rinse the berries gently under cool running water, and drain them well before crushing. Excess water can thin the jam, so it is better to wash the strawberries before hulling rather than soaking them for a long time.
Preparing the Canning Jars
Clean jars are essential for successful strawberry jam canning. Before we begin cooking the jam, we should wash the jars, lids, and bands in hot soapy water, then rinse well. The jars should be kept hot until filling so they do not crack when hot jam is added.
If the processing time is less than 10 minutes, jars should be sterile before filling. Since the standard strawberry jam processing time at 0–1,000 feet is 5 minutes, using sterile hot jars is important for safe canning at lower elevations. The National Center for Home Food Preservation directs that hot jam should be filled immediately into hot, sterile jars, leaving ¼ inch headspace.
To keep jars hot, we can place them in simmering water until ready to fill. Lids should be prepared according to the manufacturer’s instructions. Bands do not need to be boiled; they only need to be clean and ready for use.
Preparing the Strawberries
After washing and hulling the strawberries, we should crush them one layer at a time using a potato masher. For a classic jam texture, the berries should be crushed rather than blended. Blending can make the fruit too smooth, introduce air, and change the final consistency.
Measure exactly 5 cups of crushed strawberries after crushing. Accurate measuring matters because jam depends on the correct ratio of fruit, sugar, acid, and pectin. Too much fruit can prevent the jam from setting properly, while too little fruit can make the jam overly sweet and stiff.
Step-by-Step Guide to Making Strawberry Jam for Canning
Step 1: Prepare the Canner
Fill the boiling-water canner with enough water to cover the filled jars by at least 1 to 2 inches. Begin heating the water while preparing the jam. The canner should be hot and ready when the jars are filled.
Place the canning rack inside the canner. Jars should not sit directly on the bottom of the pot because direct heat can cause breakage.
Step 2: Measure the Ingredients Before Cooking
Before turning on the stove, measure all ingredients and keep them nearby. Jam cooks quickly, and once the boiling stage begins, we need to work without delay.
Place the 7 cups of sugar in a separate bowl. Do not reduce the sugar in this type of traditional pectin jam because the sugar helps with gel formation, flavor, color, and preservation. Reduced-sugar jam requires a different tested recipe and low-sugar pectin.
Step 3: Combine Strawberries and Pectin
Pour the 5 cups crushed strawberries into a large, heavy-bottomed pot. Add the powdered pectin and stir very well until the pectin is evenly distributed.
Add the bottled lemon juice and stir again. Bottled lemon juice is preferred in canning because it has consistent acidity, while fresh lemons can vary in acid strength.
Step 4: Bring the Strawberry Mixture to a Full Rolling Boil
Place the pot over high heat and stir constantly. Bring the strawberry and pectin mixture to a full rolling boil, meaning the mixture continues boiling even when stirred.
Stirring is important because fruit and sugar mixtures can scorch quickly. A heavy pot helps distribute heat evenly, but constant stirring gives the jam a smoother texture and prevents burning at the bottom.
Step 5: Add the Sugar All at Once
Once the fruit mixture reaches a full rolling boil, add the measured sugar all at once. Stir until the sugar dissolves completely.
Continue cooking over high heat while stirring constantly. The mixture will loosen at first, then return to a full bubbling boil.
Step 6: Boil Hard for 1 Minute
When the jam returns to a full rolling boil, boil it hard for 1 full minute, stirring constantly. The National Center for Home Food Preservation’s strawberry jam method with pectin directs bringing the fruit and pectin to a full boil, adding sugar, returning to a full bubbling boil, and boiling hard for 1 minute.
After 1 minute, remove the pot from the heat. Skim off foam if needed using a clean spoon. A small amount of foam is normal and does not harm the jam, but removing it gives the finished jars a cleaner appearance.
Step 7: Fill the Hot Jars
Using a canning funnel and ladle, fill the hot sterile jars with hot strawberry jam. Leave ¼ inch headspace at the top of each jar. Headspace is the empty space between the surface of the jam and the rim of the jar.
Do not overfill the jars. Too little headspace can cause jam to leak during processing, while too much headspace can interfere with sealing.
Step 8: Wipe the Rims and Apply Lids
Wipe each jar rim with a clean damp towel or paper towel. Any jam residue on the rim may prevent a proper seal.
Place the lid flat on the jar, then screw on the band until it is fingertip-tight. The band should be secure but not overly tight. Air needs to escape during processing so the jar can seal properly as it cools.
Step 9: Process the Jam in a Boiling-Water Canner
Place the filled jars on the rack in the boiling-water canner. Make sure the jars are covered by at least 1 to 2 inches of water. Cover the canner and bring the water back to a full boil.
Start timing only after the water returns to a full boil.
Recommended Processing Times
For hot-packed strawberry jam in half-pint or pint jars, recommended boiling-water processing times are:
| Altitude | Processing Time |
|---|---|
| 0–1,000 feet | 5 minutes |
| 1,001–6,000 feet | 10 minutes |
| Above 6,000 feet | 15 minutes |
These altitude-adjusted times match the National Center for Home Food Preservation guidance for strawberry jam in a boiling-water canner.
Step 10: Cool the Jars Properly
When processing time is complete, turn off the heat and carefully remove the jars using a jar lifter. Place them upright on a towel or cooling rack, leaving space between jars.
Do not tilt the jars. Do not tighten the bands. Do not press the lids while they are cooling. Let the jars cool undisturbed for 12 to 24 hours.
As the jars cool, the lids should seal. We may hear a popping sound, but the sound alone is not the only way to confirm sealing.
Step 11: Check the Seals
After the jars have cooled completely, check the seals. The center of each lid should be pulled down and should not flex when pressed.
Remove the bands and gently lift each jar by the edge of the lid to confirm the seal is secure. Any unsealed jar should be refrigerated and used first.
Step 12: Label and Store the Strawberry Jam
Label each sealed jar with the recipe name and date. Store the jars in a cool, dark, dry place. For best quality, use homemade canned jam within about one year.
Once opened, refrigerate the jam and use it within a reasonable time. Always use a clean spoon or knife when serving to prevent contamination.
How to Know When Strawberry Jam Is Properly Set
Strawberry jam made with powdered pectin usually sets as it cools. It may look slightly loose when poured into jars, but the texture becomes thicker after resting.
A good strawberry jam should be glossy, spoonable, and spreadable. It should not be rubbery or runny. If the jam seems soft after 24 hours, wait a few more days before deciding it failed. Sometimes pectin jams take longer to reach their final texture.
Common Strawberry Jam Canning Mistakes to Avoid
Using Too Much or Too Little Fruit
The fruit must be measured after crushing. Whole strawberries and crushed strawberries do not measure the same. For this recipe, use exactly 5 cups crushed strawberries.
Reducing the Sugar
Traditional pectin jam depends on the correct amount of sugar. Reducing sugar can prevent the jam from setting and may affect the finished quality. For less-sweet jam, use a tested low-sugar pectin recipe instead.
Skipping Bottled Lemon Juice
Lemon juice supports acidity and flavor. Bottled lemon juice is more consistent than fresh lemon juice, making it the better choice for canning.
Not Adjusting for Altitude
Canning time must increase at higher elevations because water boils at a lower temperature as altitude rises. For strawberry jam, the processing time increases from 5 minutes at 0–1,000 feet to 10 minutes at 1,001–6,000 feet and 15 minutes above 6,000 feet.
Overtightening the Bands
Bands should be fingertip-tight only. Overtightening can prevent air from escaping and may cause sealing problems.
Moving Jars Too Soon
Freshly processed jars need time to seal and stabilize. Moving, tilting, or tightening the jars immediately after processing can interfere with the seal.
Best Ways to Use Homemade Strawberry Jam
Homemade canned strawberry jam is one of the most versatile preserves we can keep in the pantry. Its bright fruit flavor works beautifully in breakfast dishes, desserts, snacks, and baked goods.
We can use it on:
- Toast, biscuits, and scones
- Pancakes, waffles, and French toast
- Yogurt parfaits
- Cheesecake topping
- Thumbprint cookies
- Layer cakes
- Peanut butter and jam sandwiches
- Ice cream topping
- Oatmeal or overnight oats
- Pastry fillings
For a smoother finish, warm the jam gently before drizzling it over desserts. For baking, use a thick-set jar so the jam holds its shape better.
How to Make Strawberry Jam Taste Better
For the best flavor, start with strawberries at peak ripeness. The fruit should smell sweet before cooking. If the strawberries are bland, the jam will taste flat even with sugar and lemon juice.
A small amount of butter is sometimes used by home cooks to reduce foam, but it is optional. The cleanest traditional method is simply to skim foam after boiling.
For a deeper strawberry flavor, choose smaller ripe strawberries when available. They often have a stronger aroma than very large watery berries.
Troubleshooting Strawberry Jam
Why Is My Strawberry Jam Runny?
Runny jam can happen when fruit is not measured accurately, sugar is reduced, pectin is old, the mixture does not reach a full rolling boil, or the jam is not boiled hard for the required time.
Why Is My Strawberry Jam Too Thick?
Jam may become too thick if it is overcooked, if too little fruit is used, or if the boiling time is extended beyond the recipe. A hard 1-minute boil is enough for this powdered pectin method.
Why Did My Jars Not Seal?
Jars may fail to seal if the rims were not wiped clean, lids were not centered properly, bands were too tight or too loose, headspace was incorrect, or the processing time was not completed correctly.
Why Did Fruit Float in My Jam?
Fruit floating can happen when the jam is poured too quickly, the fruit pieces are too large, or the jam has not thickened enough before filling. Crushing the strawberries evenly and following the correct boil helps improve fruit distribution.
Strawberry Jam Canning Recipe Card
Ingredients
- 5 cups crushed strawberries
- 7 cups granulated sugar
- 1 box powdered fruit pectin
- ¼ cup bottled lemon juice
Instructions
- Wash, hull, and crush strawberries one layer at a time.
- Measure 5 cups crushed strawberries into a large heavy-bottomed pot.
- Add powdered pectin and stir well.
- Add bottled lemon juice and mix thoroughly.
- Bring the mixture to a full rolling boil over high heat, stirring constantly.
- Add sugar all at once and stir until dissolved.
- Return to a full rolling boil and boil hard for 1 minute, stirring constantly.
- Remove from heat and skim foam.
- Ladle hot jam into hot sterile jars, leaving ¼ inch headspace.
- Wipe rims, apply lids, and adjust bands fingertip-tight.
- Process in a boiling-water canner according to altitude.
- Cool jars undisturbed for 12 to 24 hours.
- Check seals, label, and store in a cool, dark, dry place.
FAQs about Strawberry Jam Canning Recipe
1. Do we need pectin to make strawberry jam for canning?
No, but pectin helps the jam set faster and gives it a thicker texture. Strawberries are naturally low in pectin, so many recipes use added pectin for a reliable result. Without pectin, we may need to cook the jam longer.
2. How long should we process strawberry jam in a water bath canner?
Most strawberry jam recipes are processed in a boiling water bath for about 10 minutes, depending on jar size and altitude. Always follow the timing in a tested canning recipe for safety.
3. Why did my strawberry jam not set properly?
Jam may fail to set if there was too little pectin, not enough sugar, undercooking, or incorrect measurements. It can also take up to 24–48 hours after canning for jam to fully firm up.
4. Can we reduce the sugar in strawberry jam?
Only reduce sugar if using a low-sugar or no-sugar pectin recipe. Regular jam recipes need the correct sugar amount for texture, preservation, and flavor balance.
5. How long does canned strawberry jam last?
Properly canned and sealed strawberry jam can last about 12 to 18 months in a cool, dark pantry. After opening, we should store it in the refrigerator and use it within a few weeks.
Final Thoughts
A well-made strawberry jam canning recipe gives us a bright, sweet, homemade preserve that captures the flavor of ripe strawberries in every jar. By using accurately measured fruit, the right amount of sugar, bottled lemon juice, powdered pectin, hot sterile jars, proper headspace, and altitude-adjusted boiling-water processing, we can create strawberry jam that looks beautiful, tastes fresh, and stores well.
This recipe is simple enough for beginners yet reliable enough for anyone who wants consistent homemade jam. With careful preparation and proper canning technique, each jar becomes a pantry-ready spread for breakfasts, desserts, baking, gifting, and everyday use.