Pista Paste Recipe: Pista paste, also known as pistachio paste, is a rich, smooth, flavorful nut paste made from premium pistachios blended into a creamy consistency. It is widely used in Indian sweets, Middle Eastern desserts, bakery fillings, ice creams, milkshakes, cakes, pastries, cookies, halwa, kulfi, burfi, laddoo, macarons, and gourmet spreads. A good pista paste should have a naturally nutty aroma, a smooth texture, a fresh green tone, and a deep pistachio flavor without tasting overly sweet or artificial.
When we prepare homemade pista paste, we control the freshness, sweetness, texture, and quality of the ingredients. Unlike many store-bought versions that may contain artificial colors, excess sugar, preservatives, or low-quality nuts, this recipe gives us a pure and luxurious paste that can be used for both traditional and modern desserts.
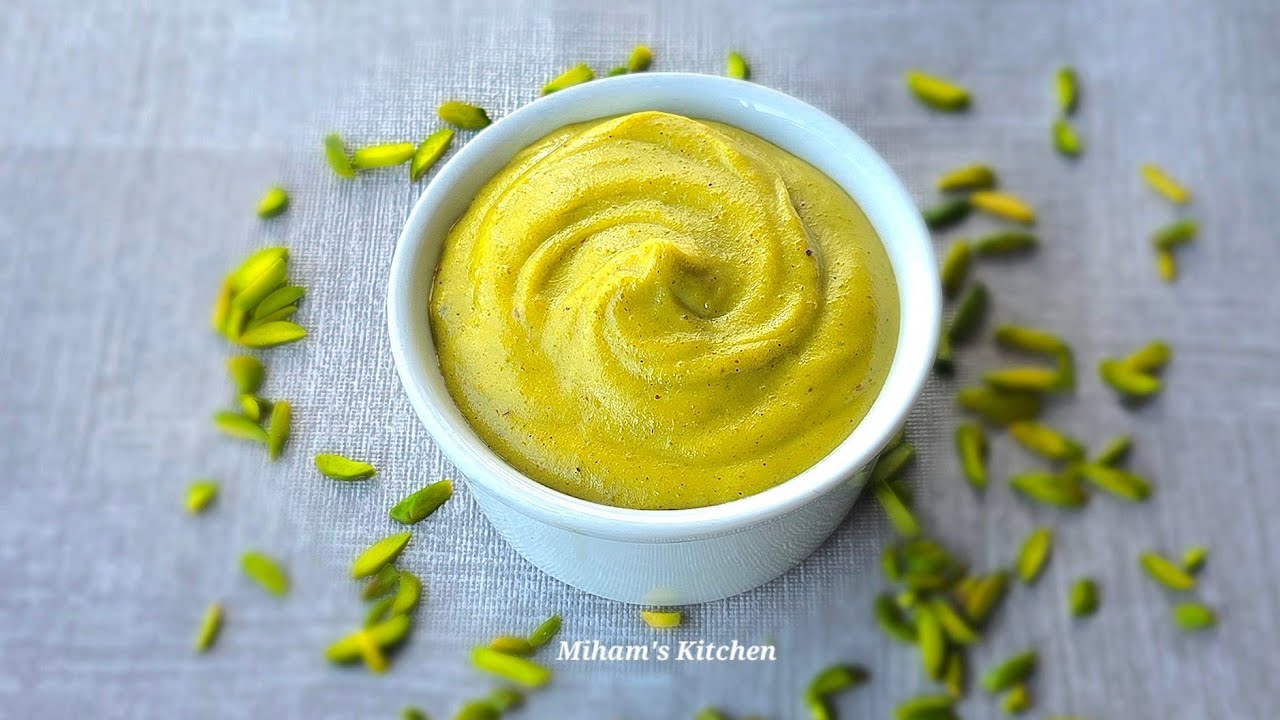
What Is Pista Paste?
Pista paste is a thick, smooth paste made by grinding pistachios with a small amount of liquid, sweetener, and sometimes fat. It can be made in two main styles: sweet pista paste and unsweetened pistachio paste.
The sweet version is commonly used in Indian desserts such as pista kulfi, pista barfi, pista milkshake, pista peda, pista ice cream, and pista cake fillings. The unsweetened version is more common in professional baking and pastry work, where we want to control the sweetness separately.
A well-made pista paste has a balanced flavor: nutty, creamy, slightly sweet, and aromatic. It should not taste bitter, oily, watery, or grainy. The secret is using good pistachios, blanching them properly, removing the skin, drying them well, and grinding them carefully.
Ingredients You’ll Need
To make a smooth and flavorful pista paste recipe, we need simple ingredients that allow the pistachio flavor to shine.
Main Ingredients
- 1 cup shelled pistachios
- 2 to 3 tablespoons powdered sugar
- 2 to 4 tablespoons warm milk or water
- 1 tablespoon neutral oil or melted ghee
- ¼ teaspoon cardamom powder
- A small pinch of salt
Optional Ingredients
- 2 to 3 drops rose water
- 2 to 3 drops kewra water
- A few strands of saffron soaked in warm milk
- 1 teaspoon honey
- A tiny drop of natural green food color
The optional ingredients depend on how we plan to use the paste. For Indian sweets, cardamom, saffron, rose water, and kewra water add a traditional aroma. For cakes, cookies, macarons, and pastries, we may keep the flavor cleaner by using only pistachios, sugar, salt, and a little oil.
Best Pistachios for Making Pista Paste
The quality of pistachios directly affects the final taste, color, and aroma of the paste. We should use fresh, unsalted, shelled pistachios for the best result. Salted pistachios can make the paste too salty, while roasted pistachios may give a darker color and stronger roasted flavor.
For a bright green pista paste, we should choose pistachios that are naturally green inside. Some pistachios are pale yellow or brownish, and they will produce a dull paste. This does not mean they are bad, but the final color will be less vibrant.
If we want a professional-looking paste for desserts, we should blanch the pistachios and remove the skin. The thin brownish skin around pistachios can make the paste darker and slightly coarse. Removing the skin gives a smoother texture and a cleaner green color.
Step-by-Step Guide to Make Pista Paste
Step 1: Measure the Pistachios
We start by measuring 1 cup of shelled pistachios. The pistachios should be clean, fresh, and free from shells. Any hard shell pieces should be removed because they can damage the blender and ruin the texture of the paste.
If the pistachios smell stale, bitter, or oily, they should not be used. Fresh pistachios have a sweet, nutty aroma and a pleasant taste.
Step 2: Blanch the Pistachios
Bring a small pot of water to a gentle boil. Add the pistachios and let them boil for 1 to 2 minutes. This softens the skin and makes it easier to remove.
After boiling, immediately drain the pistachios and transfer them into a bowl of cold water. This stops the cooking process and helps preserve the natural green color.
Blanching is an important step when we want a smoother and brighter pista paste. It also helps reduce any slight bitterness from the skin.
Step 3: Remove the Pistachio Skin
Drain the cooled pistachios and place them on a clean kitchen towel. Rub them gently between the towel until the skins begin to loosen. Peel off the remaining skins with your fingers.
This step may take a few minutes, but it makes a big difference in the final result. Skinless pistachios produce a silky, elegant, and brighter green paste.
If we are making a quick homemade version and color is not important, we may skip peeling. However, for premium desserts, removing the skin is highly recommended.
Step 4: Dry the Pistachios Properly
After peeling, spread the pistachios on a clean towel and allow them to dry completely. They should not be wet when added to the blender.
For faster drying, we can place them in a warm pan on very low heat for 2 to 3 minutes. We should not roast them deeply unless we want a roasted pistachio flavor. The goal is only to remove moisture.
Excess water can make the paste thin, spoil faster, or become less flavorful. Proper drying gives us a thicker, richer paste.
Step 5: Grind the Pistachios
Transfer the dried pistachios to a high-speed blender, food processor, or grinder. Pulse a few times until the pistachios become coarse crumbs.
Continue grinding in short intervals. Scrape down the sides of the jar regularly so the mixture blends evenly. At first, it will look like pistachio powder. As we continue blending, the natural oils from the pistachios begin to release, and the mixture starts becoming pasty.
We should avoid running the blender continuously for too long because heat can affect the flavor and color of the pistachios.
Step 6: Add Sugar and Flavoring
Add 2 to 3 tablespoons powdered sugar, ¼ teaspoon cardamom powder, and a small pinch of salt. Blend again until combined.
The sugar adds mild sweetness and helps balance the natural nutty flavor. Salt is important because it enhances the pistachio taste without making the paste salty.
If we are using the paste for Indian sweets, we can add rose water, kewra water, or saffron milk at this stage. If we are using it for baking, we may keep the flavor simple and neutral.
Step 7: Add Liquid Slowly
Add warm milk or water, one tablespoon at a time. Blend after each addition until the paste reaches the desired consistency.
For desserts like kulfi, milkshakes, and ice cream, a softer paste works well. For fillings, cookies, cakes, and barfi, a thicker paste is better.
We should not add too much liquid at once. Pistachio paste can quickly become runny, and it is easier to thin it later than to thicken it again.
Step 8: Add Oil or Ghee for Smoothness
Add 1 tablespoon neutral oil or melted ghee and blend again. This helps create a smoother, glossier paste.
For a clean pistachio flavor, we can use neutral oil. For Indian sweets, ghee adds richness and a traditional aroma. Both options work well, but the choice depends on the final dish.
If the paste still feels grainy, we can continue blending in short bursts until it becomes smoother.
Step 9: Adjust the Texture
Check the texture of the pista paste. If it is too thick, add a little more warm milk or water. If it is too thin, add a small amount of pistachio powder or almond flour and blend again.
The perfect texture should be thick, creamy, spreadable, and smooth. It should hold its shape slightly but still be easy to stir.
Step 10: Store the Pista Paste
Transfer the pista paste into a clean, dry, airtight glass jar. Store it in the refrigerator and use it within 5 to 7 days if made with milk. If made with water or oil only, it may last slightly longer.
For longer storage, freeze the paste in small portions. Ice cube trays work well because we can remove only the amount needed for recipes.
How to Make Unsweetened Pista Paste
For an unsweetened version, we use only pistachios, a pinch of salt, and a little oil or water. This version is ideal for professional baking because it allows us to control the sweetness in the final recipe.
Unsweetened Pista Paste Ingredients
- 1 cup blanched pistachios
- 1 tablespoon neutral oil
- 1 to 2 tablespoons warm water
- A pinch of salt
Blend everything until smooth. This paste works beautifully in pistachio cream, mousse, ganache, buttercream, cakes, pastries, and cookies.
How to Make Sweet Pista Paste for Indian Sweets
For Indian-style pista paste, we use sugar, cardamom, saffron, and milk. This version is perfect for traditional recipes.
Sweet Pista Paste Ingredients
- 1 cup blanched pistachios
- 3 tablespoons powdered sugar
- 3 tablespoons warm milk
- 1 tablespoon ghee
- ¼ teaspoon cardamom powder
- A few saffron strands
- 2 drops rose water
Blend until thick and creamy. This paste can be used in pista kulfi, pista peda, pista burfi, pista halwa, pista kheer, and pista milk.
Tips for a Smooth Pista Paste
For the smoothest pista paste, we should always use a powerful blender or food processor. A small grinder may work, but it often needs more scraping and blending time.
We should also avoid adding too much liquid too early. The pistachios need time to release their natural oils. If we add liquid immediately, the paste may become wet instead of creamy.
Blanching and peeling the pistachios improves both texture and color. Drying them properly prevents the paste from becoming watery. Blending in short intervals protects the paste from overheating.
For an extra-fine texture, we can pass the paste through a sieve, although this is optional. In professional kitchens, pistachio paste is often processed until extremely smooth, but a slightly rustic texture is also acceptable for homemade sweets.
Common Mistakes to Avoid
One common mistake is using salted pistachios. Salted nuts can overpower the recipe and make the paste unsuitable for desserts.
Another mistake is adding too much milk or water. This makes the paste thin and reduces its shelf life. We should always add liquid gradually.
Overheating the pistachios while blending can also affect the taste and color. If the blender jar becomes warm, we should pause for a few minutes before continuing.
Using old pistachios is another problem. Stale nuts can make the paste taste bitter or flat. Fresh pistachios give the best flavor.
How to Use Pista Paste
Pista paste is extremely versatile. We can use it in both traditional and modern recipes.
It can be stirred into warm milk to make pista milk. It can be blended with cream and condensed milk to make pista kulfi. It can be added to cake batter, frosting, buttercream, whipped cream, mousse, custard, or pastry cream.
We can also mix it into cookie dough, brownie batter, cheesecake filling, or ice cream base. For Indian sweets, it works beautifully in barfi, peda, laddoo, halwa, kheer, rabri, and phirni.
A spoonful of pista paste can also be spread over toast, pancakes, waffles, or crepes. It gives a rich pistachio flavor without needing artificial syrups or flavoring.
Pista Paste for Cakes and Pastries
When using pista paste for cakes, we should keep the paste slightly thick and not too watery. A thick paste blends better into buttercream, whipped cream, ganache, and cake batter.
For pistachio cake, we can add a few tablespoons of paste directly into the batter. For frosting, we can mix it into buttercream or cream cheese frosting. For pastries, we can fold it into custard, mascarpone cream, or white chocolate ganache.
The paste gives desserts a natural nutty flavor and a beautiful pistachio aroma.
Pista Paste for Ice Cream and Kulfi
Pista paste is one of the best ingredients for homemade pistachio ice cream and pista kulfi. It blends smoothly into milk, cream, condensed milk, or evaporated milk.
For kulfi, we can mix pista paste with reduced milk, sugar, cardamom, and saffron. For ice cream, we can blend it with heavy cream, milk, sugar, and vanilla. The paste gives a concentrated flavor that makes the dessert taste rich and authentic.
Storage Instructions
Store pista paste in a clean, airtight jar in the refrigerator. Always use a dry spoon to remove the paste. Moisture can reduce freshness and cause spoilage.
If the paste contains milk, use it within 5 to 7 days. If it is made without milk, it may last up to 2 weeks when refrigerated properly.
For long-term storage, freeze it in small portions for up to 2 months. Thaw only the amount needed and stir well before using.
How to Fix Thick or Thin Pista Paste
If the paste is too thick, add warm milk, warm water, or neutral oil one teaspoon at a time. Blend until smooth.
If the paste is too thin, add more ground pistachios, almond flour, or cashew powder. Blend again until the texture becomes thicker.
If the paste is grainy, continue blending in short bursts. A little oil can help smooth it out.
If the paste tastes flat, add a small pinch of salt or a little more sugar. If using it for Indian sweets, cardamom and saffron can improve the aroma.
Homemade Pista Paste Recipe Card
Ingredients
- 1 cup shelled unsalted pistachios
- 2 to 3 tablespoons powdered sugar
- 2 to 4 tablespoons warm milk or water
- 1 tablespoon neutral oil or melted ghee
- ¼ teaspoon cardamom powder
- A pinch of salt
- Rose water, saffron, or kewra water, optional
Instructions
- Boil water in a small pot and add the pistachios.
- Blanch for 1 to 2 minutes, then drain and transfer to cold water.
- Peel the pistachio skins by rubbing them in a clean towel.
- Dry the pistachios completely before grinding.
- Add the pistachios to a blender and pulse until finely ground.
- Add powdered sugar, salt, and cardamom powder.
- Add warm milk or water slowly, one tablespoon at a time.
- Add oil or ghee and blend until smooth.
- Adjust the consistency as needed.
- Store in an airtight jar in the refrigerator.
FAQs about Pista Paste Recipe
1. What is pista paste made of?
Pista paste is made mainly from pistachios, also known as pista. The nuts are usually soaked or blanched, peeled, and blended into a smooth paste. Some recipes add a little milk, water, sugar, cardamom, or ghee depending on whether the paste will be used for sweets, drinks, desserts, or savory dishes.
2. How do we make pista paste smooth?
To make smooth pista paste, we should soak the pistachios in hot water for a few minutes, remove the skins, and blend them with a small amount of liquid. Adding the liquid slowly helps control the texture and prevents the paste from becoming too runny.
3. Can we make pista paste without sugar?
Yes, we can make pista paste without sugar. An unsweetened version is ideal when we want to use it in different recipes such as ice cream, kulfi, cakes, sauces, or milkshakes. Sugar can always be added later based on the final dish.
4. How long does homemade pista paste last?
Homemade pista paste can usually last for 5 to 7 days in the refrigerator when stored in a clean, airtight container. For longer storage, we can freeze it in small portions and thaw only the amount needed.
5. Where can we use pista paste?
We can use pista paste in many recipes, including pista kulfi, pistachio ice cream, milkshakes, cakes, cookies, pastries, halwa, barfi, and flavored cream fillings. It adds a rich nutty taste, natural green color, and creamy texture to desserts.
Final Thoughts
A homemade pista paste recipe gives us a fresh, flavorful, and versatile ingredient that can transform simple desserts into rich, premium creations. With good-quality pistachios, proper blanching, careful grinding, and balanced flavoring, we can make a smooth paste suitable for Indian sweets, bakery recipes, ice cream, kulfi, cakes, cookies, pastries, milkshakes, and festive desserts.
The best part of making pista paste at home is control. We can make it sweet or unsweetened, thick or soft, traditional or modern, depending on the recipe we are preparing. Once we master this simple method, pista paste becomes an essential homemade ingredient for creating luxurious pistachio-flavored desserts with fresh taste and natural richness.


