A fruit crisp recipe is one of the most dependable and rewarding desserts we can make in any kitchen. It is simple, comforting, rich in flavor, and wonderfully adaptable to the fruit we have on hand. With a bubbling fruit base and a golden, buttery topping, this dessert delivers everything we want from a homemade baked treat: warm texture, balanced sweetness, and a crisp finish in every spoonful.
Whether we are preparing dessert for a family dinner, a holiday table, or a casual weekend meal, a well-made fruit crisp offers the perfect combination of elegance and ease. It requires no complicated pastry work, no advanced baking skills, and no hard-to-find ingredients. Instead, it relies on fresh or frozen fruit, pantry staples, and the right method to create a dessert that tastes deeply homemade and consistently satisfying.
In this complete guide, we will cover the ingredients you’ll need, how to prepare the fruit filling, how to make a crisp topping with the right texture, and the exact steps required to bake a beautiful, flavorful dessert every time.
What Is a Fruit Crisp?
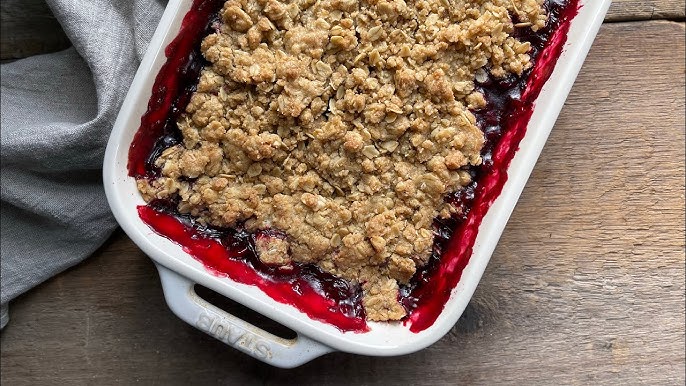
A fruit crisp is a baked dessert made with a layer of sweetened fruit topped with a crumbly mixture, usually prepared from flour, oats, butter, sugar, and spices. As it bakes, the fruit softens and releases juices while the topping turns golden and crisp. The result is a dessert with a soft, jammy base and a crunchy top.
Unlike pies, crisps do not require rolling dough or shaping crusts. Unlike cobblers, they do not use biscuit-like toppings. A true crisp focuses on the contrast between tender baked fruit and a crumbly, toasted topping. That balance is what makes this dessert so memorable and so widely loved.
Ingredients You’ll Need
The beauty of a fruit crisp recipe is that the ingredient list is straightforward and flexible. We can use apples, berries, peaches, pears, plums, or a mix of seasonal fruits depending on preference and availability.
For the Fruit Filling
- 6 cups fresh fruit such as apples, peaches, berries, pears, or mixed fruit
- 1/2 cup granulated sugar
- 2 tablespoons brown sugar
- 2 tablespoons all-purpose flour or cornstarch
- 1 tablespoon lemon juice
- 1 teaspoon vanilla extract
- 1/2 teaspoon ground cinnamon
- 1/4 teaspoon nutmeg optional
- Pinch of salt
For the Crisp Topping
- 1 cup all-purpose flour
- 1 cup old-fashioned oats
- 3/4 cup brown sugar
- 1/2 teaspoon ground cinnamon
- 1/4 teaspoon salt
- 1/2 cup cold unsalted butter, cubed
These measurements create a balanced crisp with a generous topping and a rich fruit layer. If we want a thicker topping, we can slightly increase the oats and flour. If we prefer a fruit-forward dessert, we can reduce the topping just a little and let the filling shine.
Best Fruits for a Fruit Crisp Recipe
One reason the fruit crisp recipe remains so popular is its versatility. Different fruits create different textures and flavor profiles, but the method stays beautifully similar.
Apple Fruit Crisp
Apples are one of the most traditional options. They hold their shape well during baking and develop a soft but not mushy texture. A mix of sweet and tart apples creates a deeper flavor.
Berry Fruit Crisp
Berries such as blueberries, strawberries, raspberries, and blackberries bake down into a juicy, vibrant filling. They produce a softer consistency and often need a little more thickener to manage the juices.
Peach Fruit Crisp
Peaches create a fragrant, tender dessert with natural sweetness. Their soft texture pairs especially well with cinnamon and vanilla.
Pear Fruit Crisp
Pears offer a delicate sweetness and smooth texture. They work very well with warming spices and a slightly richer topping.
Mixed Fruit Crisp
Combining fruits creates complexity. Apple and berry, peach and plum, or pear and cranberry combinations can make the dessert more layered and distinctive.
How to Prepare the Fruit Filling Properly
The fruit filling is the foundation of the dessert. If it is too watery, the crisp becomes loose and soggy. If it is under-seasoned, the dessert tastes flat. The goal is to create a filling that is lightly sweetened, gently spiced, and properly thickened.
We begin by washing, peeling if necessary, and cutting the fruit into even pieces. Uniform slices or chunks help the fruit cook evenly. Apples and pears should usually be peeled, while berries and peaches can often be used with their skins depending on preference.
Next, we toss the fruit with granulated sugar, brown sugar, flour or cornstarch, lemon juice, vanilla, cinnamon, nutmeg, and a pinch of salt. The sugar enhances natural sweetness, the lemon juice brightens the flavor, and the thickener helps create a luscious filling rather than a watery one.
It is important not to over-sugar the fruit. Many fruits already contain natural sweetness, and too much sugar can overwhelm the fresh flavor. A well-balanced crisp should taste like baked fruit first, with sweetness supporting rather than dominating the dish.
How to Make a Crisp Topping with the Perfect Texture
The topping is what defines the dessert. A great crisp topping should be crumbly, golden, buttery, and slightly chewy from the oats, while still delivering that signature crisp bite.
In a mixing bowl, we combine the flour, oats, brown sugar, cinnamon, and salt. Then we cut in the cold butter using a pastry cutter, fork, or fingertips until the mixture resembles coarse crumbs. Some small butter pieces should remain. These melt in the oven and create the rich, crisp texture we want.
Using cold butter matters because it helps the topping hold its crumb structure. Melted or overly soft butter can make the topping dense instead of crisp. The oats add texture and heartiness, while the brown sugar contributes caramel-like depth.
If we want extra texture, we can add chopped nuts such as pecans or walnuts. If we want a warmer flavor, a touch more cinnamon or a tiny amount of ginger can deepen the topping without taking over the dessert.
Step-by-Step Guide for Fruit Crisp
Step 1 – Preheat the Oven
Preheat the oven to 375°F (190°C). A properly heated oven ensures even baking and helps the topping crisp up beautifully from the start.
Step 2 – Prepare the Baking Dish
Lightly grease an 8×8-inch or similar baking dish with butter or nonstick spray. This helps prevent sticking and makes serving easier.
Step 3 – Prepare the Fruit
Wash, peel if needed, and slice or chop the fruit into evenly sized pieces. Place the fruit in a large mixing bowl.
Step 4 – Season the Filling
Add the granulated sugar, brown sugar, flour or cornstarch, lemon juice, vanilla extract, cinnamon, nutmeg, and salt to the fruit. Toss thoroughly until every piece is evenly coated.
Step 5 – Transfer the Filling
Pour the fruit mixture into the prepared baking dish and spread it evenly. Make sure the fruit sits in an even layer so it bakes uniformly.
Step 6 – Make the Crisp Topping
In another bowl, mix the flour, oats, brown sugar, cinnamon, and salt. Add the cold cubed butter and work it into the dry ingredients until the mixture becomes crumbly.
Step 7 – Add the Topping
Sprinkle the topping evenly over the fruit. Do not press it down too firmly. Keeping the topping loose allows it to brown and crisp more effectively.
Step 8 – Bake the Fruit Crisp
Place the dish in the oven and bake for 35 to 45 minutes, depending on the fruit used. The crisp is ready when the topping is golden brown and the fruit filling is bubbling around the edges.
Step 9 – Cool Slightly Before Serving
Let the crisp rest for 10 to 15 minutes after baking. This brief cooling time helps the filling set slightly and makes serving easier.
Step 10 – Serve Warm
Serve the fruit crisp warm on its own or with vanilla ice cream, whipped cream, or a spoonful of cream. The contrast between warm fruit and cool topping additions makes the dessert even more satisfying.
Tips for the Best Fruit Crisp Every Time
A few simple techniques can make the difference between a good crisp and an exceptional one.
Use fruit that is ripe but still firm enough to hold some structure during baking. If the fruit is too soft, the filling may become overly loose. If it is underripe, the flavor may not develop fully in the oven.
Always use some form of thickener in the filling. Even fruits that seem dry release moisture as they bake. A small amount of flour or cornstarch helps transform those juices into a rich, spoonable consistency.
Do not skip the salt. Even a small pinch in both the filling and topping improves sweetness, deepens flavor, and prevents the dessert from tasting one-dimensional.
Bake until the fruit is actively bubbling. A golden topping alone is not enough. The bubbling filling indicates the fruit has cooked properly and the thickener has activated.
Common Mistakes to Avoid
One common mistake is using too much liquid in the filling. Fruit crisp should not be soupy. Avoid adding water or unnecessary juice unless a specific fruit mixture requires it.
Another mistake is overmixing the topping. The topping should remain crumbly rather than smooth. Overworked butter can create a dense layer instead of a crisp one.
Using the wrong baking dish can also affect the final result. If the dish is too deep and narrow, the topping may brown before the fruit finishes cooking. A moderately sized baking dish with even depth usually works best.
Finally, serving the crisp immediately from the oven can cause the filling to appear too runny. A short resting time helps the juices settle and improves the final texture.
How to Store and Reheat Fruit Crisp
A baked fruit crisp recipe stores well, which makes it ideal for make-ahead desserts. Once cooled, cover the dish and refrigerate for up to 3 to 4 days. To reheat, place it in the oven at 350°F (175°C) until warmed through and the topping becomes crisp again.
Microwaving works for convenience, but the topping may soften. For the best texture, reheating in the oven is the better option. If we want to prepare the dish ahead of time, we can assemble it before baking and refrigerate it briefly, then bake when needed.
Why This Fruit Crisp Recipe Works So Well
This recipe succeeds because it focuses on balance. The fruit layer is flavorful without becoming overly sweet. The topping is buttery and crisp without turning heavy. The spices support the fruit rather than hiding it. Every part of the dish contributes to a dessert that feels comforting, rich, and complete.
It is also reliable. We can adapt it for different seasons, different fruits, and different occasions without losing the core qualities that make it special. That is the strength of a classic fruit crisp recipe: it remains simple, but it never feels ordinary.
Serving Ideas for a More Impressive Dessert
A warm fruit crisp is already excellent on its own, but a few serving additions can make it even more memorable. A scoop of vanilla ice cream melts into the topping and fruit juices, creating a creamy contrast. Lightly sweetened whipped cream adds softness without overwhelming the dessert. For a richer finish, a drizzle of heavy cream can be enough.
For gatherings, we can serve it in individual bowls or ramekins for a more polished presentation. A light dusting of cinnamon on top just before serving can also enhance its warm, inviting aroma.
FAQs about Fruit Crisp Recipe
1. What is a fruit crisp?
A fruit crisp is a baked dessert made with sweetened fruit and a crumbly topping, usually prepared with flour, butter, sugar, and oats. It is known for its warm filling and crunchy top layer.
2. What fruits work best in a fruit crisp?
Apples, peaches, berries, pears, plums, and cherries are all excellent choices. We can use one fruit or combine several for a richer flavor.
3. What is the difference between a fruit crisp and a fruit crumble?
They are very similar, but a crisp often includes oats in the topping, which makes it crunchier. A crumble usually has a softer, streusel-like topping.
4. Why is my fruit crisp too watery?
Some fruits release a lot of juice during baking. Adding a little cornstarch or flour to the fruit filling helps thicken the juices and improve the texture.
5. How do we keep the topping crispy?
Use cold butter and avoid overmixing the topping. Baking until the top is golden brown also helps create a crisp texture.
6. Can we make fruit crisp ahead of time?
Yes. We can prepare it in advance and bake it later, or bake it ahead and reheat before serving. It is best enjoyed warm for the finest texture and flavor.
7. Can we use frozen fruit?
Yes, frozen fruit works well. It is best to thaw and drain it slightly first to prevent excess moisture in the filling.
8. What should we serve with fruit crisp?
Fruit crisp tastes wonderful with vanilla ice cream, whipped cream, or custard. These toppings pair beautifully with the warm fruit and crunchy topping.
Final Thoughts
A well-made fruit crisp recipe proves that great baking does not need to be complicated. With fresh fruit, a crisp oat topping, and a careful baking method, we can create a dessert that is deeply flavorful, visually inviting, and consistently satisfying. It is one of the easiest ways to turn simple ingredients into something truly special.
From apple fruit crisp to berry crisp, peach crisp, or a seasonal mixed-fruit version, this dessert gives us endless room to adapt while still delivering the warm, buttery, crisp texture everyone loves. When we want a dessert that is easy to prepare, beautiful to serve, and rich in homemade flavor, fruit crisp remains one of the best choices we can make.


