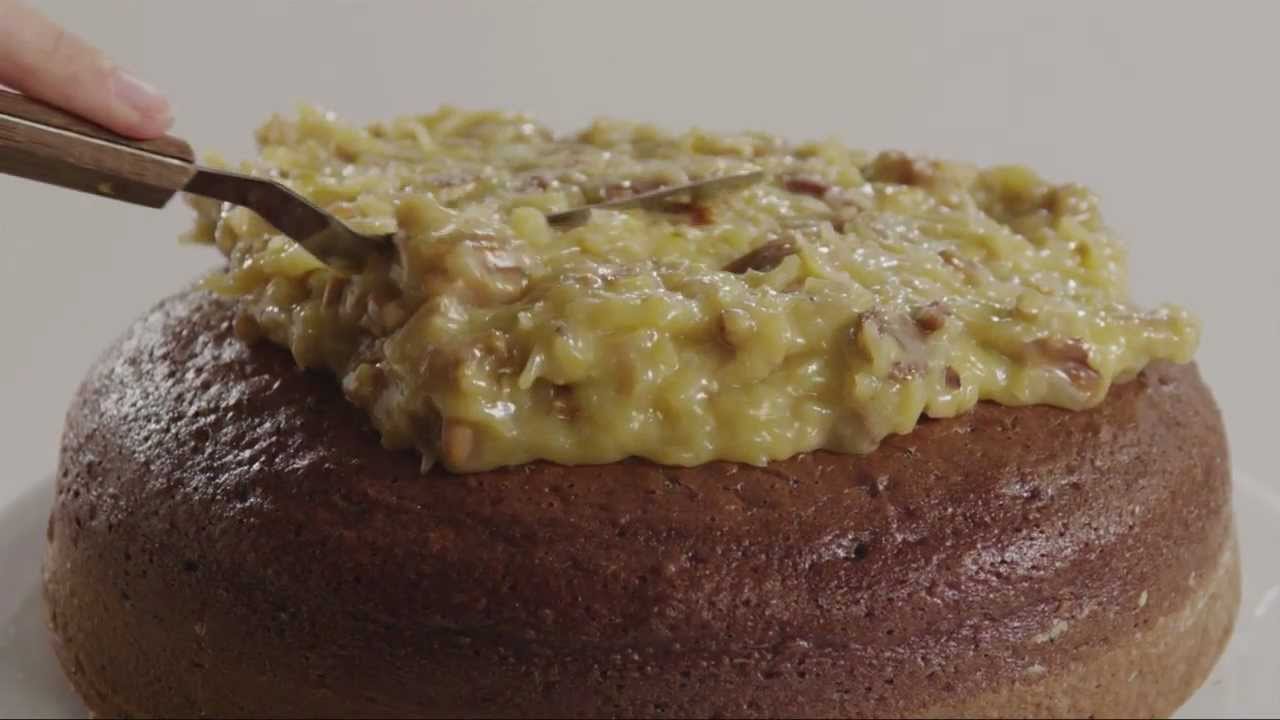
Chocolate Cake Frosting Recipe: A cake can be soft, rich, and beautifully baked, but the frosting is often the part people remember most. Think of frosting as the finishing touch that turns a simple cake into something people talk about after the plates are cleared. A good chocolate cake frosting recipe should be smooth, rich, easy to spread, and balanced in sweetness. It should not taste like plain sugar with a little cocoa hiding in the background. It should taste boldly chocolatey, creamy, and satisfying from the first bite to the last.
This guide walks you through everything in a clear and practical way. You will get a complete Ingredients You’ll Need list, a full step-by-step guide, and extra tips that help your frosting taste bakery-quality without making the process feel complicated. Whether you are frosting a birthday cake, cupcakes, a layer cake, or just sneaking a spoonful for quality control, this recipe is designed to give you dependable results. It is simple enough for beginners but polished enough to feel professional.
Ingredients You’ll Need
Below is the full list of ingredients you will need for a classic homemade chocolate cake frosting. This recipe is ideal for frosting one two-layer 8-inch or 9-inch cake, or about 18 to 24 cupcakes depending on how heavily you frost them. If you want a thicker decorative finish, you can scale it up a bit. Having your ingredients measured in advance makes the process smoother and helps you avoid last-minute guesswork.
Core Ingredients
- 1 cup unsalted butter, softened
- 3 1/2 cups powdered sugar, sifted
- 3/4 cup unsweetened cocoa powder, sifted
- 1/3 cup heavy cream or milk
- 2 teaspoons vanilla extract
- 1 pinch salt
These core ingredients form the base of a classic buttercream-style chocolate frosting. The butter gives the frosting its creamy body and richness. The powdered sugar brings sweetness while also helping create structure. Cocoa powder delivers the chocolate flavor, and cream loosens the mixture enough to make it fluffy and spreadable. Vanilla adds warmth and depth, and salt sharpens the chocolate flavor so it tastes fuller and less flat.
Optional Add-Ins for Flavor and Texture
- 2 ounces melted dark chocolate for extra richness
- 1 teaspoon espresso powder to deepen the chocolate flavor
- 1 tablespoon sour cream for a slight tang and creamier finish
- Extra cream, 1 teaspoon at a time, if you need thinner frosting
- Extra powdered sugar, a few tablespoons at a time, if you need thicker frosting
These optional additions are like little upgrades. They are not required, but they can take the frosting in a slightly more luxurious direction. Espresso powder does not make the frosting taste like coffee. It simply boosts the chocolate flavor and makes it taste more intense, almost like turning up the contrast on a photo. Melted dark chocolate adds extra depth and a fudgier feel, while sour cream gives a subtle tang that balances sweetness beautifully.
Kitchen Tools That Make the Job Easier
Making chocolate frosting does not require a kitchen full of fancy equipment, but a few basic tools can make the process much easier and help you get a smoother result. The most useful tool is an electric hand mixer or stand mixer. Technically, you can mix frosting by hand, but it takes much longer and requires a lot more effort. If you want fluffy, light frosting with a smooth finish, a mixer is your best friend. It beats air into the butter and blends everything more evenly, which helps avoid lumps and uneven texture.
You will also need a large mixing bowl if you are using a hand mixer. A medium bowl can be handy for sifting together the powdered sugar and cocoa powder before adding them to the butter. A fine mesh sieve is especially useful because both cocoa powder and powdered sugar tend to clump. If you skip sifting, those little dry pockets can sneak into your frosting and make it look or feel grainy. It is a small extra step, but it makes a noticeable difference.
A rubber spatula is another must-have. It helps scrape down the sides of the bowl so no unmixed butter or sugar gets left behind. Measuring cups and measuring spoons are important too, because frosting is more forgiving than cake batter, but not so forgiving that random amounts will always work out. If you plan to decorate with swirls or borders, piping bags and tips can help you get a more polished finish. Even so, a simple offset spatula or butter knife is enough for spreading the frosting beautifully over a cake.
Choosing the Right Chocolate Base
Chocolate frosting might sound straightforward, but the kind of chocolate element you use can change the final result in a big way. Most classic frosting recipes rely on unsweetened cocoa powder, which gives a strong chocolate flavor without adding extra liquid or fat. Cocoa powder is convenient, widely available, and easy to blend into buttercream. It is the reliable everyday option, like the dependable pair of shoes you keep reaching for because they always work. When paired with butter, sugar, cream, and vanilla, it creates a smooth frosting with a rich chocolate taste.
Some recipes also use melted chocolate, either on its own or alongside cocoa powder. Melted dark chocolate can create a deeper, more luxurious flavor and a slightly denser texture. It gives the frosting a fudgier feel, which some people absolutely love. The trade-off is that you need to pay more attention to temperature. If the melted chocolate is too hot when added, it can affect the butter. If it cools too much, it may harden in streaks before blending properly. That does not make it difficult, but it does add one more thing to manage.
For a dependable and professional-style frosting, cocoa powder is the easiest base to start with. You can always add a small amount of melted dark chocolate later if you want more richness. That way you get the best of both worlds: the easy mixability of cocoa and the intense flavor of real chocolate. A recipe built around cocoa powder also tends to be more stable for spreading and piping, which is especially useful if you are decorating a cake for an event or special occasion.
Cocoa Powder vs Melted Chocolate
If you are choosing between cocoa powder and melted chocolate, it helps to think about texture, flavor, and convenience. Cocoa powder gives a strong, clean chocolate taste and keeps the frosting lighter and easier to whip. It also blends quickly into softened butter, especially when sifted first. That makes it ideal for a fluffy buttercream texture. You get a frosting that spreads easily, pipes well, and holds its shape nicely without feeling too heavy.
Melted chocolate, on the other hand, adds more body and richness. The flavor can feel rounder and more decadent, almost like the difference between hot cocoa and a chocolate truffle. It is wonderful when you want a more indulgent frosting, but it can also make the mixture denser. If your goal is a classic birthday cake frosting with a soft, cloud-like texture, cocoa powder is usually the easier winner. If you want something bordering on ganache-buttercream territory, melted chocolate can help you get there.
A smart approach is using cocoa powder as the foundation and melted chocolate as an optional boost. That keeps the recipe stable while adding depth. It is a little like layering flavors in a soup or sauce. One ingredient forms the backbone, and the other adds complexity. For this recipe, cocoa powder does the heavy lifting, which is why it remains the primary chocolate ingredient in the guide.
Sweetened vs Unsweetened Options
When making frosting, unsweetened cocoa powder is usually the best choice because it gives you full control over sweetness. Since powdered sugar is already doing the job of sweetening the frosting, using sweetened cocoa or chocolate drink mix can throw off the balance. The result can turn out overly sugary and lacking that true chocolate depth. Good frosting should taste rich first and sweet second, not the other way around.
Unsweetened cocoa also gives you flexibility. You can keep the frosting classic, make it darker and more intense, or slightly mellow it out depending on what you pair it with. If the cake itself is very sweet, a stronger unsweetened cocoa frosting creates a better contrast. This balance matters more than many people realize. A frosting that is too sweet can bury the cake flavor and make the whole dessert feel heavy after a few bites.
If you use melted chocolate, the same rule applies. Dark or semi-sweet chocolate tends to work better than milk chocolate in frosting because it keeps the final result from becoming overly sweet. It also gives a more mature chocolate flavor. So when in doubt, lean toward unsweetened cocoa powder and darker chocolate options. They build a better foundation for a frosting that tastes professional rather than one-dimensional.
Understanding the Role of Each Ingredient
A good frosting recipe becomes much easier once you know what each ingredient actually does. Butter is not there only for richness. It creates the structure and creamy base that makes buttercream-style frosting possible. When beaten properly, softened butter traps air, which is what gives frosting a lighter and fluffier texture. That means butter temperature matters a lot. If it is too cold, the frosting stays lumpy. If it is too warm, the frosting can become greasy and loose.
Powdered sugar does more than sweeten. It helps thicken the frosting and gives it body. Since it contains a little starch, it also helps stabilize the mixture. Cocoa powder is the flavor star, but it also acts like a dry ingredient, so adding too much without enough liquid can make the frosting stiff. Heavy cream or milk balances that dryness and makes the frosting spreadable. Cream gives a richer result, while milk works fine if that is what you have. Vanilla extract rounds out the flavor, making the chocolate taste warmer and more complete.
Then there is salt, the tiny ingredient that makes a huge difference. Without a pinch of salt, chocolate frosting can taste flat and overly sweet. Salt brightens the cocoa and helps cut through the sugar so the whole frosting tastes more balanced. Once you understand these roles, adjusting the recipe becomes much easier. Need softer frosting? Add a bit more cream. Too loose? A little more powdered sugar helps. It stops feeling like guesswork and starts feeling like you are in control.
How to Prepare Before You Start
Preparation is one of those things that sounds boring until it saves your recipe. Before you begin mixing, make sure the butter is softened properly. Softened butter should yield slightly when pressed, but it should not look shiny or melted. If the butter is too firm, it will not cream smoothly. If it is too warm, the frosting can lose structure and become too soft. Room-temperature butter is the sweet spot, and it makes a major difference in texture.
Next, measure all your ingredients ahead of time. This may seem like a small habit, but it keeps the process calm and organized. Frosting comes together fast once you start mixing, so having everything ready prevents mistakes. Sift the cocoa powder and powdered sugar into a bowl before they go into the butter. This step helps break up clumps and makes the final frosting much smoother. Nobody wants little dry lumps hiding in what should be a silky spread.
Also decide early how you plan to use the frosting. Are you spreading it casually over a sheet cake, piping swirls on cupcakes, or frosting a layered cake with smooth sides? The answer affects the consistency you want. For spreading, slightly softer frosting works beautifully. For piping, a thicker texture usually holds shape better. This small bit of planning helps you fine-tune the frosting at the end instead of scrambling to fix it after it is already on the cake.
Step-by-Step Guide for Chocolate Cake Frosting
When you follow the right sequence, the ingredients blend properly, the texture stays smooth, and the final frosting becomes easy to spread and delicious to eat. Here is the full step-by-step method for making classic homemade chocolate cake frosting.
Step 1: Soften the Butter Properly
Take the butter out of the refrigerator and let it sit at room temperature until soft but not melted. Soft butter blends more easily and creates a smoother frosting. This step is important for a light and creamy texture.
Step 2: Sift the Dry Ingredients
Sift the powdered sugar and cocoa powder into a bowl. Sifting removes lumps and helps the frosting turn out smooth and even. It also makes mixing easier later.
Step 3: Beat the Butter Until Creamy
Place the softened butter in a mixing bowl and beat it with a mixer until it becomes pale and creamy. This adds air and helps create a fluffy frosting base. Scrape down the sides of the bowl as needed.
Step 4: Add Cocoa and Sugar Gradually
Add the sifted cocoa powder and powdered sugar a little at a time while mixing on low speed. Gradual mixing helps prevent a messy cloud of dry ingredients and allows everything to combine more evenly.
Step 5: Pour in Cream and Vanilla
Add the cream or milk along with the vanilla extract. These ingredients help smooth out the frosting and add flavor. Mix until everything starts to come together into a rich chocolate mixture.
Step 6: Whip Until Smooth and Fluffy
Increase the mixer speed and beat the frosting until it becomes smooth, fluffy, and spreadable. This usually takes a few minutes. The frosting should look creamy and hold its shape well.
Step 7: Adjust the Consistency
If the frosting is too thick, add a little more cream or milk, one small spoonful at a time. If it is too thin, add a bit more powdered sugar. Once the texture is just right, it is ready to spread or pipe onto your cake or cupcakes.
Common Mistakes to Avoid
Even a simple frosting recipe can go sideways if a few small things are overlooked. One common mistake is using butter that is either too cold or too warm. Cold butter refuses to mix smoothly, which leads to lumps, while overly soft or melted butter can make frosting feel greasy and unstable. Another frequent issue is skipping the sifting step. Powdered sugar and cocoa clumps may seem harmless, but they can create texture problems that become difficult to smooth out later.
Adding all the dry ingredients at once is another trap. It often creates a dusty mess and makes it harder for the ingredients to blend evenly. Mixing too quickly at the beginning can do the same thing. Then there is the problem of over-thinning the frosting. Once too much liquid goes in, you have to compensate with more sugar, which can push the sweetness too far. That is why small adjustments are so important. Add liquid slowly and check the texture often.
A final mistake is frosting a warm cake. Even perfect frosting can slide and melt if the cake has not cooled completely. It is frustrating because the frosting itself is not the issue, but the timing is. Let the cake cool fully before spreading the frosting, and your work will look much cleaner. These small details are the difference between a rushed result and one that looks polished and tastes fantastic.
Tips for Frosting a Cake Like a Pro
Once the frosting is ready, applying it well makes the whole dessert feel more finished and appealing. Start with a completely cooled cake. If you are working with layers, place a small dab of frosting on the cake plate before setting down the first layer. This acts like glue and keeps the cake from sliding around. Add frosting between layers, then apply a thin crumb coat around the outside. This first thin layer traps loose crumbs and gives you a smoother final finish.
After the crumb coat, chill the cake briefly if possible, then add the final layer of frosting. Use an offset spatula for the smoothest result, or the back of a spoon if you want a more rustic texture. For cupcakes, a piping bag with a star tip creates bakery-style swirls, but a simple spoonful spread in a circular motion works just fine too. The frosting is versatile enough to look elegant or casual depending on how you apply it.
The real secret to professional-looking frosting is not perfection. It is confidence and texture. If the frosting is made properly, it will cooperate with you. Smooth it, swirl it, pipe it, or pile it high. A few decorative touches like chocolate shavings, sprinkles, or a light dusting of cocoa powder can make it look even more special. Sometimes the best cakes are not the perfectly polished ones, but the ones that look generous, rich, and clearly homemade.
How to Store Chocolate Frosting
Homemade chocolate frosting stores well, which makes it great for planning ahead. If you are using it within a day or two, keep it in an airtight container in the refrigerator. Before using it again, let it come to room temperature and beat it briefly to restore its fluffy texture. Cold frosting tends to firm up, so this quick remix helps bring it back to life. It is a little like fluffing a pillow after it has been pressed flat.
If you need to store it longer, you can freeze it in a freezer-safe airtight container for up to a couple of months. When ready to use, thaw it in the refrigerator overnight and then let it come to room temperature before re-whipping. This helps return the smooth consistency and keeps it from feeling dense. Be sure to use a well-sealed container so the frosting does not absorb freezer odors.
Once the frosting is on a cake, storage depends on the cake itself and the room temperature. In cooler conditions, a frosted cake can often sit covered for several hours. For longer storage, refrigerating is safer. Just remember that butter-based frosting tastes best when not ice-cold, so let the cake sit at room temperature a bit before serving. That brings back the creamy texture and fuller chocolate flavor.
FAQs about Chocolate Cake Frosting Recipe
1. What is the best butter to use for chocolate cake frosting?
Unsalted butter is usually the best choice because it lets you control the salt level. It should be softened at room temperature so it blends smoothly and creates a creamy texture.
2. Why should I sift the cocoa powder and powdered sugar?
Sifting helps remove lumps and makes the frosting smoother. It also helps the dry ingredients mix evenly into the butter.
3. Can I use milk instead of cream?
Yes, milk can be used instead of cream. Cream gives a richer texture, while milk still works well for a lighter frosting.
4. How do I make the frosting thicker?
Add more powdered sugar, a little at a time, until the frosting reaches your desired consistency. Chilling it briefly can also help it firm up.
5. How do I make the frosting thinner?
Add a small amount of milk or cream, one spoonful at a time, and mix well. This helps loosen the frosting without making it too runny.
6. Can I use this frosting for piping?
Yes, if the frosting is thick enough, it works very well for piping onto cakes and cupcakes. Adjust the consistency as needed before using.
7. How do I store chocolate cake frosting?
Store it in an airtight container in the refrigerator for up to 5 days. Let it come to room temperature and re-whip before using for the best texture.
8. Can I freeze chocolate frosting?
Yes, chocolate frosting can be frozen in a sealed container for up to 2 months. Thaw it in the refrigerator, then whip it again before use.
9. Why is my frosting grainy?
Grainy frosting can happen if the sugar was not sifted or fully mixed in. Beating the frosting longer usually helps make it smoother.
Conclusion
This recipe works because it balances simplicity with quality. The butter creates a creamy base, the cocoa powder brings depth, the powdered sugar gives structure, and the cream pulls everything together into a spreadable, pipeable frosting. Small details like sifting, gradual mixing, and adjusting consistency at the end help turn basic pantry ingredients into something that looks and tastes polished. It is the kind of homemade recipe that feels dependable, not fussy.
Once you try it, you may stop seeing frosting as an afterthought. It becomes part of the cake’s personality, the rich final layer that completes the whole dessert. Whether you spread it in casual swirls or smooth it into neat layers, this chocolate frosting delivers the flavor and texture people hope for when they hear the words chocolate cake. And that is exactly what makes it worth mastering.


