Chicken Paws Recipe: If you have never cooked chicken paws before, you might be surprised by how flavorful and satisfying they can be. In many parts of the world, chicken paws are not seen as unusual at all.
They are treasured for their rich texture, ability to absorb sauces beautifully, and the deep savory flavor they bring to the table. Think of them as one of those humble ingredients that can turn into something incredibly memorable when cooked with care.
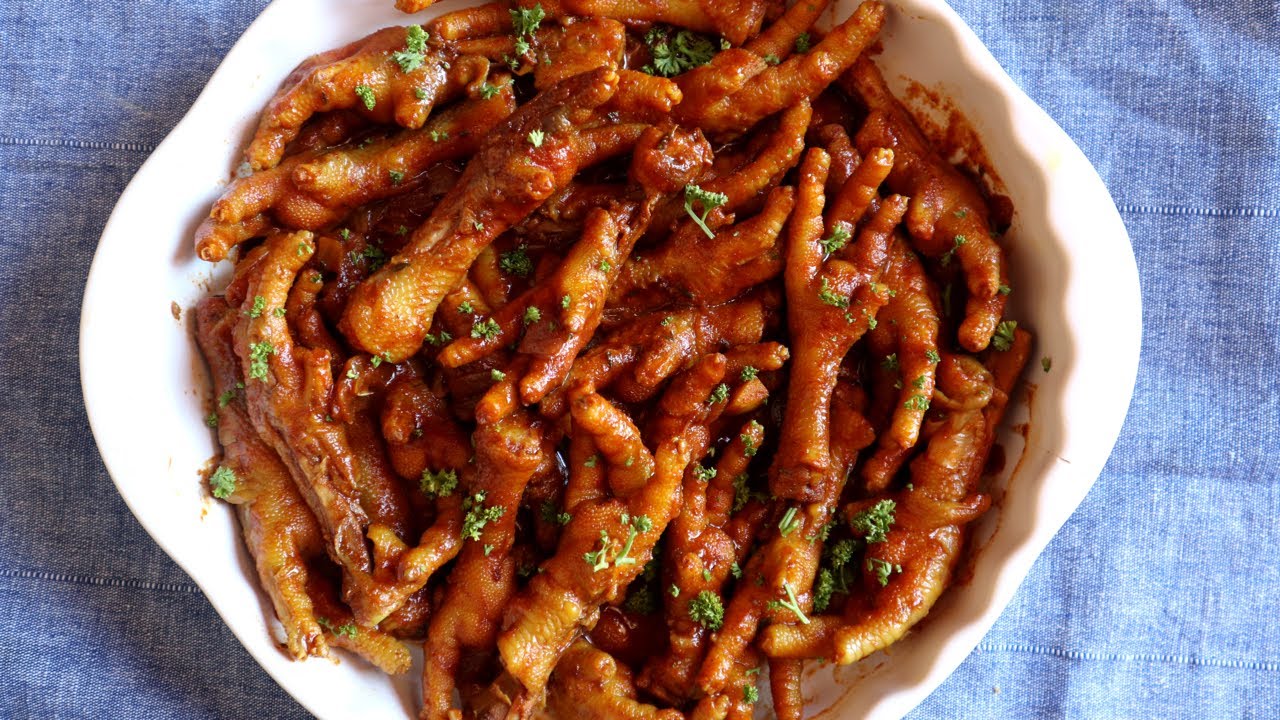
However, they may not look glamorous at first glance, but once they are cleaned, simmered, and coated in a delicious sauce, they become a dish people crave again and again.
Why Chicken Paws Are Loved in Many Cuisines
Chicken paws have a strong place in many food cultures, and that is no accident. They are often used in Asian, African, Caribbean, and Latin American cooking because they bring a rich, sticky quality to dishes that few other cuts can match. In some kitchens, they are braised in soy-based sauces. In others, they are simmered in spicy broths, deep-fried, or steamed with bold seasonings. Their popularity comes from the way they soak up flavor like a sponge while still holding their distinct texture. It is a bit like how bread absorbs soup, except here the chicken paws absorb garlic, ginger, soy sauce, pepper, and spices in a deeply satisfying way.
Another reason they are appreciated is that they reflect a smart and respectful approach to cooking. Many traditional cuisines focus on using every edible part of the animal, not only because it is economical, but because it creates dishes with character. Chicken paws are a perfect example of that mindset. They may be inexpensive, but the eating experience feels rich and special when they are prepared well. There is also a sense of culinary pride in transforming something simple into something impressive. That is where the real charm of this recipe lives.
For many people, chicken paws are also nostalgic. They remind them of family meals, street food stalls, holiday gatherings, or slow weekend cooking. Food like this often carries stories with it. One bite can feel like a memory. Even if you did not grow up eating them, the appeal becomes obvious once you try a well-made batch. They are flavorful, comforting, and surprisingly addictive in the best way.
What Chicken Paws Taste Like
A lot of first-time cooks ask the same question: what do chicken paws actually taste like? The truth is that the flavor itself is fairly mild, much like chicken skin and connective tissue with a subtle savory note. On their own, they are not overpowering, and that is exactly why they work so well in strong, aromatic recipes. They act like a blank canvas, ready to take on the flavor of whatever sauce or broth you cook them in. That means your garlic, ginger, soy sauce, onions, chili, black pepper, and spices become the stars, while the paws provide a rich and satisfying texture underneath it all.
Texture is where chicken paws really shine. Once simmered properly, they become soft, tender, and slightly sticky because of the natural collagen. If you have ever enjoyed braised oxtail, bone broth, or slow-cooked wings for that silky, lip-coating richness, you will understand the appeal. Chicken paws are not chewy in a bad way when cooked correctly. They should be tender enough to bite through comfortably while still holding their shape. The skin becomes glossy, the tendons soften, and the sauce clings beautifully to every curve.
The overall experience is more about mouthfeel and seasoning than about chunks of meat. That is why people who enjoy richly braised dishes often love chicken paws. Every bite delivers sauce, softness, and depth. They are especially delicious when cooked with sweet, salty, spicy, and aromatic ingredients working together. In that sense, chicken paws are like little flavor carriers. They may seem modest, but on the plate, they are bold, comforting, and full of personality.
Ingredients You’ll Need
Here is the full ingredient list you will need:
Main Ingredients
- 1 kg chicken paws
- 1 medium onion, chopped
- 6 cloves garlic, minced
- 1 thumb-sized ginger, sliced or minced
- 3 tablespoons soy sauce
- 1 tablespoon oyster sauce
- 1 tablespoon cooking oil
- 1 teaspoon black pepper
- 1 teaspoon salt
- 1 tablespoon brown sugar
- 2 to 3 cups water or chicken stock
- 2 bay leaves
Optional Ingredients for Extra Flavor
- 2 dried chilies or 1 fresh red chili
- 1 tablespoon vinegar
- 1 teaspoon paprika
- 2 spring onions, chopped for garnish
- 1 tablespoon sesame oil
- 1 star anise for deeper aroma
These ingredients create a balanced flavor profile that is savory, slightly sweet, and deeply aromatic. The soy sauce and oyster sauce work together to create depth, while the garlic and ginger cut through the richness and keep the dish lively. A little sugar helps round out the sauce, which is especially useful if you want that glossy, restaurant-style finish. You can keep the seasoning simple or layer in extra spices depending on the flavor direction you prefer. Either way, the ingredient list stays approachable and practical for home cooking.
Kitchen Tools You Need
One of the best things about this recipe is that you do not need fancy equipment. A few basic kitchen tools are enough to make a delicious batch of chicken paws. That said, the right tools can make the cooking process smoother and less messy. Since chicken paws need cleaning, trimming, blanching, and simmering, it helps to have everything ready before you start. Cooking becomes much more relaxed when you are not scrambling to find scissors or a pot halfway through the recipe. Good prep is like laying tracks before a train moves; once the route is clear, everything flows more easily.
You will need a sharp kitchen knife or sturdy kitchen scissors for trimming the nails. A cutting board is essential for safe prep. A large mixing bowl helps when washing the chicken paws thoroughly. For blanching and simmering, use a medium to large pot with enough space for the paws to cook evenly. A strainer or colander is useful for draining them after blanching. You will also want a wooden spoon or spatula for sautéing the aromatics and stirring the sauce. If you prefer a thicker sauce, a pot with a wide surface area can help reduce the liquid more efficiently toward the end.
None of these tools are expensive or specialized, which makes the recipe accessible even for beginners. What matters most is cleanliness and control. Since chicken paws require a little more prep than standard chicken cuts, using the right tools makes the task feel manageable rather than intimidating. Once that prep work is done, the rest is straightforward. After all, great cooking is not always about high-end gadgets. Often, it is simply about knowing what to do with simple tools and using them well.
How to Choose Fresh Chicken Paws
Buying fresh chicken paws is one of those steps that can quietly determine the success of the entire recipe. You can season a dish beautifully, simmer it patiently, and reduce the sauce perfectly, but if the chicken paws were not fresh to begin with, the final result will never reach its full potential. Fresh chicken paws should look clean, plump, and naturally pale or slightly pinkish, depending on how they were processed. They should not have a strong smell. In fact, they should smell mild and neutral, much like fresh raw chicken. If the odor is sharp, sour, or unpleasant, that is a clear sign to skip them.
Texture matters too. Fresh chicken paws should feel firm and moist, not slimy or sticky. A little surface moisture is normal, but anything excessively slippery can point to age or improper handling. Check the skin carefully. It should be intact without too many dark spots or bruised-looking patches. If the nails are still attached, that is normal, since many markets sell them that way. You will trim them later during cleaning. Frozen chicken paws can also work well, especially if fresh ones are not easy to find, but make sure the package is properly sealed and free from heavy ice crystals, which may suggest repeated thawing and refreezing.
The best places to buy chicken paws are butcher shops, Asian markets, international grocery stores, and some larger supermarkets. If possible, buy from a source that handles poultry regularly and has a reputation for freshness. Quality ingredients make home cooking feel easier because they give you a stronger starting point. With chicken paws, freshness is not just a detail. It is the foundation that allows the flavor and texture of the final dish to shine.
How to Clean Chicken Paws Properly
Cleaning chicken paws is the step that makes many people hesitate, but once you know the method, it becomes very manageable. The process is important because proper cleaning improves both the appearance and texture of the final dish. Think of it like polishing a stone before turning it into jewelry. The potential is already there, but the preparation reveals it. Chicken paws often come with nails attached and may still have an outer yellowish skin layer that needs to be removed. Taking the time to clean them thoroughly gives you a more pleasant and professional result.
Start by rinsing the chicken paws under cold running water. Rub them well to remove any loose debris. Then trim off the nails using a sharp knife or sturdy kitchen scissors. This part is quick, and once you get into a rhythm, it goes faster than you might expect. After trimming, place the paws in hot water for a few minutes. The water should be very hot but not aggressively boiling if you are only loosening the outer skin. Once they have soaked briefly, you can peel away the outer yellowish layer more easily. Some chicken paws sold in stores are already cleaned, so inspect them first before doing extra work you may not need.
After peeling, rinse them again thoroughly. At this stage, they should look much cleaner, smoother, and more appetizing. Good cleaning does more than improve looks. It also helps the sauce cling better and ensures a cleaner flavor in the finished dish. This prep step can feel a little tedious the first time, but it is one of those tasks that pays off later when the chicken paws come out glossy, tender, and ready to impress.
Trimming the Nails
Trimming the nails is simple but necessary. Use kitchen scissors or a sharp knife to cut just above the joint where the nail begins. Be careful not to remove too much. You only want to trim the hard nail tip, not chop away usable parts of the paw. This improves presentation and makes the dish easier to eat. It is a small detail, but details like this are often what separate a rough homemade dish from one that feels polished and restaurant-worthy.
Removing the Outer Skin
Once the paws have been soaked or briefly blanched in hot water, the outer skin becomes easier to peel. Pull it away gently with your fingers, starting from the thicker parts and working toward the toes. Some pieces may come off in larger strips, while others may need a little patience. Do not rush it too much. A careful peel gives the chicken paws a cleaner appearance and smoother texture after cooking. That little extra effort makes the final dish look far more inviting.
Step-by-Step Guide for Chicken Paws
Below, each stage is broken down clearly so you can follow it with confidence. From the first rinse to the final reduction of the sauce, every step matters. Take your time, keep the heat controlled, and trust the process. Cooking chicken paws is not about flashy techniques. It is about simple steps done well.
Step 1: Wash and Prep the Chicken Paws
Rinse the chicken paws thoroughly under cold water and trim off the nails if they are still attached. Remove any rough outer skin if needed and pat them clean. Proper cleaning is important because it improves both the texture and appearance of the final dish.
Step 2: Blanch the Chicken Paws
Place the chicken paws in a pot of boiling water and blanch them for a few minutes. This helps remove impurities and gives them a cleaner taste. Drain and rinse them again after blanching, then set aside.
Step 3: Make the Flavor Base
In a pot or deep pan, heat a little oil and sauté garlic, ginger, and onion until fragrant. Add soy sauce, a little oyster sauce if desired, pepper, and enough water or broth to create a flavorful cooking liquid. You can also add chili or spices depending on the style you want.
Step 4: Simmer Until Tender
Add the blanched chicken paws to the pot and stir to coat them in the seasonings. Cover and simmer over low heat until they become soft and tender. This may take some time, but slow cooking helps the collagen break down and gives the paws their rich, silky texture.
Step 5: Reduce the Sauce and Serve
Once the chicken paws are tender, uncover the pot and let the sauce reduce slightly until it becomes richer and more flavorful. Taste and adjust the seasoning if needed. Serve hot as a snack, appetizer, or side dish, garnished with chopped herbs or chili if desired.
Tips for the Best Chicken Paws Recipe
A few small techniques can turn a decent batch of chicken paws into a truly memorable one. First, do not skip the cleaning and blanching process. That step lays the groundwork for everything that follows. It keeps the flavor cleaner, improves appearance, and gives your sauce a better chance to shine. Another important tip is to use fresh aromatics. Fresh garlic and ginger have a brightness and punch that dried versions simply cannot match in a recipe like this. Since chicken paws themselves have a mild taste, the supporting ingredients need to carry real character.
Heat control is also important. Keep the simmer gentle rather than aggressive. A furious boil can make the paws break apart too much and reduce the sauce too quickly before the texture fully develops. Slow simmering gives the collagen time to soften and the seasonings time to settle in. Taste as you go, especially near the end. Soy sauce brands vary in saltiness, and stock can also change the flavor balance. That means small adjustments can make a big difference. A pinch of sugar, an extra splash of soy sauce, or a little vinegar can help you find the perfect balance.
One more tip is to let the dish rest for a few minutes before serving. That pause allows the sauce to settle and cling more evenly. It is a small trick, but one that often improves braised dishes. Cooking is a little like music. The notes matter, but timing matters too. Give the dish a little space at the end, and the final flavor will often feel rounder and more complete.
Common Mistakes to Avoid
Chicken paws are not difficult to cook, but there are a few common mistakes that can make the final dish disappointing. One of the biggest is under-cleaning them. If the nails are not trimmed properly or the outer skin is left on in patches, the texture and presentation can suffer. Another common issue is skipping the blanching step. Some people do this to save time, but the result can be a murkier sauce and a less polished flavor. That extra few minutes at the beginning can save the whole dish from tasting rough around the edges.
Another mistake is underseasoning the cooking liquid. Since chicken paws do not have a lot of meat, the flavor mainly comes from the sauce and aromatics. If the broth is bland, the finished dish will feel flat no matter how tender the texture becomes. At the same time, going too heavy on salt early can backfire because the sauce reduces later. A smarter approach is to season in layers, then make your final adjustments near the end. That gives you better control over the finished flavor.
Rushing the simmer is another problem. If you stop too early, the chicken paws may still feel too firm and not fully infused with flavor. If you cook them too aggressively, the texture can turn messy rather than tender. The sweet spot is a gentle simmer and regular checking. Think of it like steeping tea. Too little time and it tastes weak. Too much force and the balance is thrown off. Patience is what transforms chicken paws from a simple ingredient into a dish with real depth.
Serving Suggestions
Chicken paws are wonderfully versatile when it comes to serving. One of the most popular ways is with a bowl of steamed white rice, which balances the richness of the sauce and makes the meal feel complete. The rice acts like a quiet partner, letting the chicken paws stay center stage while also soaking up every drop of the savory liquid. That pairing is simple, comforting, and hard to beat. If you prefer something more substantial, chicken paws can also be served alongside noodles, especially lightly seasoned egg noodles or rice noodles that do not compete too much with the sauce.
They also work well as part of a larger spread. You can serve them with stir-fried vegetables, pickled sides, or a light soup to create contrast. Since chicken paws are rich in texture, adding something fresh or crisp on the side helps balance the meal. Chopped cucumbers, sautéed greens, or even a sharp chili dip can brighten the plate beautifully. For gatherings, chicken paws can be served as a shared dish in the center of the table, where everyone takes a few pieces and enjoys them slowly. That style suits the dish perfectly because it invites conversation and a more relaxed pace of eating.
Presentation matters too. A little garnish goes a long way. Chopped spring onions, sesame seeds, or sliced red chili can make the dish look vibrant and appealing. Food often tastes better when it looks loved, and chicken paws are no exception. With the right pairing and a good final touch, this humble dish can feel both comforting and special at the same time.
How to Store and Reheat Chicken Paws
If you have leftovers, chicken paws store surprisingly well, and some people even think they taste better the next day. That is because the sauce has more time to settle into the skin and connective tissue, creating a deeper flavor after resting. To store them, let the dish cool to room temperature first, then transfer it to an airtight container. Keep it in the refrigerator for up to 3 days. Make sure the chicken paws are stored with some sauce, since that helps prevent them from drying out and keeps the texture more pleasant during reheating.
When it is time to reheat, the stovetop is usually the best method. Place the chicken paws and sauce in a small pot over low to medium heat. Add a splash of water or stock if the sauce has become too thick in the fridge. Heat gently until warmed through. Avoid blasting them over high heat because that can tighten the texture and reduce the sauce too much. A microwave works in a pinch, but it is less gentle and can heat unevenly. If you do use one, cover the dish loosely and heat in short intervals, stirring or repositioning as needed.
Freezing is possible, though the texture may change slightly after thawing. If you plan to freeze them, do so in a sealed container for up to 1 month. Thaw in the refrigerator before reheating. Good storage habits keep the dish enjoyable beyond the first meal, and with a recipe this flavorful, that is a very good thing.
FAQs about Chicken Paws Recipe
1. What are chicken paws?
Chicken paws are the feet of the chicken, usually cleaned and cooked until tender. They are popular in many cuisines and are valued for their soft, gelatin-rich texture.
2. Are chicken paws the same as chicken feet?
Yes, the terms are often used interchangeably. In some places, “chicken paws” may refer to cleaned chicken feet with the outer skin removed.
3. Why are chicken paws blanched first?
Blanching helps remove impurities, cleans the paws more thoroughly, and improves the final texture. It also prepares them for simmering in sauce or broth.
4. How long do chicken paws take to cook?
They usually need a long simmer to become tender because they contain a lot of collagen and connective tissue. Cooking time depends on the method used and how soft you want them.
5. What do chicken paws taste like?
Chicken paws have a mild flavor on their own, so they absorb the taste of the sauce or broth they are cooked in. The texture is soft, sticky, and rich rather than meaty.
6. What sauces go well with chicken paws?
Soy sauce, garlic sauce, oyster sauce, chili sauce, and ginger-based sauces all work very well. Spicy or savory braised styles are especially popular.
7. Are chicken paws nutritious?
Chicken paws contain collagen, protein, and some minerals. They are often enjoyed for their rich texture as much as for their nutritional value.
8. Can I store leftovers?
Yes, store leftover chicken paws in an airtight container in the refrigerator for up to 3 days. Reheat gently before serving.
Conclusion
This step-by-step guide makes the process approachable from start to finish. From choosing fresh chicken paws to cleaning, blanching, simmering, and reducing the sauce, every stage contributes to the final result. None of the steps are difficult on their own, but together they create a dish with real depth. That is part of the magic. What begins as a modest ingredient becomes a glossy, savory plate that feels both homey and impressive. It is the kind of cooking that rewards care more than speed.
Whether you are making this dish for family, exploring a new cuisine, or simply trying something different in the kitchen, chicken paws can absolutely earn a place on your table. Once you understand how to prepare them and what flavors bring them to life, they stop feeling unfamiliar and start feeling like a hidden gem. And honestly, that is often where the best recipes are found.


