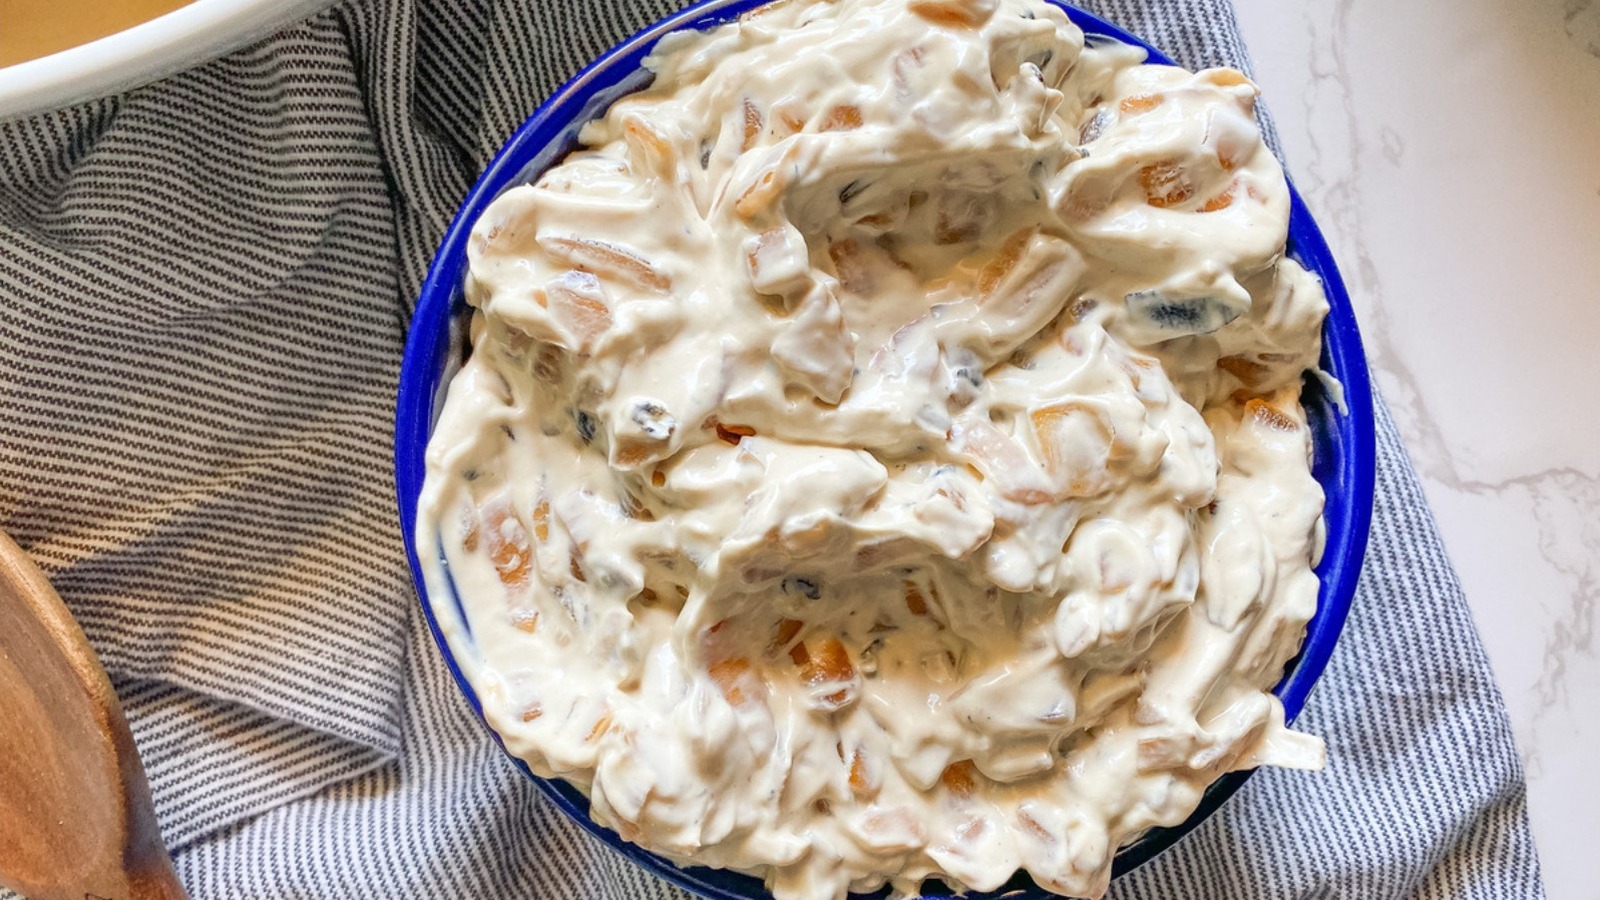
Caramelized Onion Dip Recipe: There’s something magical about a bowl of caramelized onion dip sitting at the center of a table. It’s simple, humble, and yet somehow irresistible. You scoop it once, then twice, and before you know it, you’re hovering near the bowl like it holds a secret treasure. That’s the power of this classic appetizer. It transforms basic pantry ingredients into a rich, creamy, deeply savory masterpiece that feels both comforting and gourmet.
This step-by-step caramelized onion dip recipe is designed to guide you professionally through every stage, from selecting the right onions to achieving that golden-brown caramelization that defines the dish. Whether you’re preparing it for a game night, holiday gathering, or casual snack session, mastering this recipe gives you a go-to appetizer that never disappoints.
And here’s the best part: you don’t need fancy culinary training. With patience, attention to detail, and a little understanding of the process, you’ll create a dip that tastes like it came straight from a high-end kitchen. Ready to dive in? Let’s start by understanding why this classic never goes out of style.
Why This Classic Dip Never Goes Out of Style
Food trends come and go. One year it’s whipped feta; the next it’s spicy chili crisp everything. But caramelized onion dip? It remains a staple decade after decade. Why? Because it hits all the right flavor notes—sweet, savory, creamy, and slightly tangy—all at once.
Historically, onion dip gained popularity in the United States in the 1950s when packaged soup mixes made it easy to whip up a quick party snack. But homemade caramelized onion dip elevates that concept entirely. Instead of relying on dehydrated onion powders, you’re building real flavor from scratch. That depth of flavor is what keeps people coming back.
The beauty of this dip is its versatility. It pairs perfectly with potato chips, toasted baguette slices, crackers, fresh vegetables, or even as a spread on sandwiches and burgers. It adapts to different occasions effortlessly—casual or elegant. That flexibility ensures it never feels outdated.
Another reason for its longevity is emotional connection. Many people associate onion dip with family gatherings, celebrations, or childhood memories. It’s comfort food disguised as an appetizer. In a world of complicated recipes and over-the-top presentations, something simple and deeply satisfying always wins.
And let’s not forget the sensory appeal. The aroma of onions slowly cooking in butter fills your kitchen with warmth. It’s inviting. It signals that something good is happening. When food smells this good before it even reaches the table, you know you’re creating something timeless.
Now that you understand why this dip has stood the test of time, let’s uncover the true secret behind its unforgettable flavor: perfectly caramelized onions.
The Secret Behind Perfectly Caramelized Onions
If caramelized onion dip had a heartbeat, it would be the onions themselves. Everything depends on how well you cook them. Rush this step, and the dip falls flat. Take your time, and you unlock layers of flavor that feel almost luxurious.
Caramelizing onions isn’t just about cooking them until soft. It’s about transformation. Raw onions are sharp, pungent, and slightly spicy. But when cooked slowly over low to medium heat, their natural sugars break down and intensify. The result? A rich golden-brown color and a flavor that’s sweet, savory, and deeply complex.
This process typically takes between 30 to 45 minutes. Yes, that long. Patience is your most important ingredient here. High heat might seem tempting, especially when you’re hungry, but it leads to burning rather than caramelizing. Burnt onions taste bitter, and bitterness can overpower the entire dip.
A heavy-bottomed skillet works best because it distributes heat evenly. Butter adds richness, while a touch of oil prevents it from burning too quickly. Stir occasionally, not constantly. You want the onions to develop color, not steam.
Many professional chefs describe caramelization as a “slow dance.” You can’t rush it. You have to let it develop naturally. As culinary expert Julia Child once said, “The only time to eat diet food is while you’re waiting for the steak to cook.” The same philosophy applies here—good flavor takes time.
Once your onions reach a deep amber color and taste sweet with a hint of savory depth, you’ve nailed it. That’s when your dip moves from good to unforgettable.
Understanding the Science of Caramelization
Let’s get a little nerdy—but in a delicious way. Caramelization is a chemical reaction that occurs when sugar is heated. Onions naturally contain sugars, and as they cook, those sugars break down and brown, creating new flavor compounds.
It’s different from simply sautéing. When you sauté onions quickly over high heat, you soften them but don’t fully develop their sweetness. Caramelization, on the other hand, requires lower heat and more time, allowing the Maillard reaction to occur. This reaction creates hundreds of new flavor molecules, which is why caramelized onions taste far more complex than raw ones.
Water content also plays a role. Onions are about 89% water. In the early stages of cooking, that water evaporates. Only after most of the moisture is gone can true browning begin. That’s why patience matters so much. If you try to speed things up, you end up with steamed onions instead of caramelized ones.
Adding a small pinch of salt early on helps draw out moisture, speeding up the initial phase without compromising flavor. Some cooks add a tiny splash of balsamic vinegar or sugar near the end to enhance sweetness, but this should be done carefully. The goal is natural depth, not artificial sweetness.
Understanding this science gives you control. Instead of guessing, you’ll know exactly what’s happening in the pan. And when you understand the process, you’re far more likely to get consistent, professional-level results every time.
Now that you’ve mastered the foundation, let’s talk about the ingredients you’ll need to bring this dip to life.
Ingredients You’ll Need
Great recipes start with great ingredients. The beauty of caramelized onion dip is that it relies on simple, accessible items—but each one plays a crucial role in the final flavor.
Here’s what you’ll need:
- 3 large yellow onions, thinly sliced
- 2 tablespoons unsalted butter
- 1 tablespoon olive oil
- 1 cup sour cream
- 8 oz cream cheese, softened
- ½ cup mayonnaise
- 1 teaspoon salt (adjust to taste)
- ½ teaspoon freshly ground black pepper
- ½ teaspoon garlic powder
- 1 teaspoon fresh thyme leaves (optional)
- 1 teaspoon Worcestershire sauce (optional but recommended)
These ingredients create balance. The onions provide sweetness and depth. The dairy components deliver creaminess and tang. Seasonings enhance and round out the flavors.
Using fresh, high-quality dairy makes a noticeable difference. Full-fat sour cream and cream cheese yield the richest texture. While low-fat options can work, they may produce a thinner consistency and less satisfying mouthfeel.
Fresh herbs like thyme add a subtle earthiness that complements the sweetness of the onions. Worcestershire sauce introduces umami—a savory depth that quietly boosts the overall flavor profile without overpowering it.
Each ingredient might seem simple on its own, but together they create harmony. Think of it like a band. The onions are the lead singer, but the dairy and seasonings are the instruments supporting the performance.
Next, let’s take a closer look at choosing the best onions for maximum flavor.
Choosing the Best Onions
When it comes to making a truly exceptional caramelized onion dip, the type of onion you choose can subtly shape the final flavor. Not all onions are created equal, and while most grocery stores carry several varieties, understanding their differences gives you a professional edge in the kitchen.
Yellow onions are the gold standard for caramelization. They strike the perfect balance between sweetness and sharpness, and they contain enough natural sugar to develop deep, rich flavor during slow cooking. As they caramelize, they transform into a golden-brown, jammy consistency with a slightly sweet and savory complexity that defines this dip. If you want that classic, nostalgic onion dip taste, yellow onions are your safest and most reliable choice.
Sweet onions, such as Vidalia or Walla Walla, can also work beautifully. They contain higher sugar content, which means they caramelize slightly faster and taste noticeably sweeter. If you prefer a dip with a pronounced sweetness and milder onion bite, this is a great option. However, some professionals find that sweet onions lack the savory depth of yellow onions, so balance becomes especially important when seasoning.
Red onions are less ideal for this specific recipe. While they caramelize well, they bring a sharper flavor and slightly different sweetness profile. They also produce a darker hue that can alter the visual appearance of the dip. That doesn’t make them wrong—it just means they create a slightly different experience.
Freshness matters too. Look for onions that feel heavy for their size, with tight, dry skins and no soft spots. Avoid onions that are sprouting or have a strong, overly pungent smell. Fresh onions will caramelize more evenly and produce a cleaner, sweeter flavor.
Choosing the right onion is like selecting the foundation for a house. Get it right, and everything built on top becomes stronger. Now that you’ve selected your star ingredient, let’s explore the creamy components that bring this dip together.
Dairy Components for Creamy Texture
The caramelized onions provide bold flavor, but the creamy base is what transforms them into a luxurious dip. Texture matters just as much as taste. You want something smooth, rich, and scoopable—not runny, not overly thick, but perfectly balanced.
The backbone of this dip is cream cheese. It adds structure and body, ensuring the dip holds its shape and clings beautifully to chips or vegetables. For best results, allow the cream cheese to soften at room temperature before mixing. Cold cream cheese can create lumps, and no one wants a dip with uneven texture. Full-fat cream cheese delivers the creamiest, most satisfying result. Reduced-fat versions may work, but they can compromise richness.
Next comes sour cream, which introduces tanginess. That subtle acidity cuts through the sweetness of the caramelized onions and keeps the dip from feeling heavy. Sour cream also contributes to a lighter, smoother consistency. Think of it as the balancing act that prevents the dip from becoming overly dense.
Mayonnaise plays a supporting but crucial role. It enhances creaminess and adds a slight savory undertone. Some people skip mayonnaise, but professionally speaking, it provides a silky texture and depth that’s hard to replicate. Use a high-quality brand with a neutral flavor to avoid overpowering the onions.
The ratio between these three ingredients determines your dip’s final consistency. Too much cream cheese makes it stiff. Too much sour cream can make it thin. The balance listed in this recipe creates a harmonious blend—rich yet airy, creamy yet structured.
When combined properly, these dairy components don’t just hold the onions—they elevate them. Together, they create a velvety base that feels indulgent without being overwhelming. Now, let’s enhance that base with carefully selected seasonings.
Seasonings and Flavor Enhancers
Seasoning is where a good dip becomes unforgettable. Even perfectly caramelized onions and a creamy base need thoughtful enhancement. The goal isn’t to overpower the natural flavor—it’s to amplify it.
Salt is your first and most important tool. It draws out sweetness from the onions and sharpens the tanginess of the dairy. Start conservatively, then adjust after mixing. Remember, chips and crackers often contain salt, so the dip should complement—not compete with—your serving choice.
Freshly ground black pepper adds gentle heat and subtle complexity. It shouldn’t dominate, but it should provide a slight kick that lingers at the end of each bite.
Garlic powder is often underestimated. While fresh garlic can be overpowering in a cold dip, garlic powder distributes evenly and blends seamlessly. It deepens the savory notes without distracting from the onions.
For an extra layer of sophistication, consider fresh thyme. Its earthy aroma pairs beautifully with caramelized onions, giving the dip a gourmet feel. Just a small amount goes a long way.
Finally, a splash of Worcestershire sauce introduces umami—the savory depth that makes people say, “What is that amazing flavor?” without being able to pinpoint it. It’s subtle but transformative.
Professional chefs often describe seasoning as adjusting the volume knobs on a sound system. Each element needs to be balanced. Nothing should scream; everything should harmonize.
With ingredients fully understood and prepped, it’s time to walk through the kitchen tools that make this process smooth and efficient.
Kitchen Tools Required
You don’t need a professional kitchen to create a professional-quality caramelized onion dip, but having the right tools makes a noticeable difference in both efficiency and results. Think of your tools as silent partners in the cooking process—they support you every step of the way.
First and most important is a heavy-bottomed skillet or sauté pan. Even heat distribution is crucial for caramelizing onions properly. Thin pans create hot spots, which can burn parts of the onions while leaving others undercooked. A stainless steel or cast-iron skillet works exceptionally well because it retains and distributes heat evenly.
A sharp chef’s knife is equally important. Thin, uniform slices of onion cook more evenly and caramelize consistently. Dull knives crush onion fibers rather than slicing cleanly, which can release excess moisture and affect texture.
You’ll also need a cutting board, preferably stable and spacious enough to handle multiple onions comfortably. Safety and efficiency go hand in hand here.
For mixing the dip, use a medium to large mixing bowl and either a sturdy spatula, wooden spoon, or hand mixer. A hand mixer creates an ultra-smooth texture, while a spatula allows more control if you prefer a slightly rustic consistency.
Measuring spoons and cups ensure precise balance, especially when incorporating seasonings. While experienced cooks sometimes eyeball ingredients, consistency is key for repeatable results.
Having the right tools doesn’t just make cooking easier—it improves the final dish. When preparation feels smooth and organized, the cooking process becomes more enjoyable, and that confidence often shows in the food itself.
Now comes the exciting part: bringing everything together step by step.
Step-by-Step Guide to Making Caramelized Onion Dip
Step 1 – Preparing and Slicing the Onions
Start by peeling the onions and slicing them thinly and evenly. Uniform slices help the onions cook at the same rate, which is important for getting that soft, golden texture. Yellow onions are a popular choice because they become sweet and rich as they cook.
Step 2 – Slowly Caramelizing the Onions
Heat a little butter or oil in a pan over low to medium-low heat. Add the sliced onions and cook them slowly, stirring often, until they turn soft, deep golden, and sweet. This process takes time, so do not rush it. Proper caramelization gives the dip its signature flavor.
Step 3 – Cooling the Onions Properly
Once the onions are beautifully caramelized, remove them from the heat and let them cool completely. This step matters because hot onions can make the dip too loose and affect the creamy texture. Cooling also helps the flavors settle.
Step 4 – Mixing the Creamy Base
In a bowl, combine your creamy ingredients such as sour cream, cream cheese, mayonnaise, or Greek yogurt, depending on the style you want. Stir until the mixture is smooth and well blended. You can also add salt, pepper, garlic powder, or a little onion powder for extra flavor.
Step 5 – Combining and Adjusting Flavors
Fold the cooled caramelized onions into the creamy base and mix well. Taste the dip and adjust the seasoning if needed. For the best flavor, chill it for a little while before serving so everything blends together nicely.
Tips for Achieving Deep, Rich Flavor
If you’ve followed the step-by-step guide, you already have a fantastic caramelized onion dip. But if you want to elevate it from great to unforgettable, a few professional techniques can make all the difference. Flavor isn’t just about ingredients—it’s about timing, layering, and subtle adjustments that build complexity.
First, give the onions your full attention during caramelization. Many people stop cooking too soon, settling for light golden onions instead of deep amber strands. The darker the caramelization (without burning), the richer and more intense the flavor becomes. Those deep brown bits at the bottom of the pan? That’s pure flavor. Deglaze gently with a splash of water to lift those bits and reincorporate them into the onions.
Second, season in layers. Add a small pinch of salt at the beginning to draw out moisture, then adjust again after mixing the dip. Layered seasoning ensures balanced flavor rather than a salty aftertaste. A tiny splash of lemon juice at the end can also brighten the dip if it feels too heavy.
Temperature matters more than most realize. Serving the dip slightly chilled—but not ice-cold—allows the flavors to shine. If it’s too cold, the dairy mutes the sweetness of the onions. Let it sit at room temperature for about 15 minutes before serving for optimal taste.
Finally, let time work its magic. Preparing the dip a day ahead allows flavors to meld deeply. The onions infuse the creamy base, creating a unified, well-rounded taste. Many chefs agree that dips like this are even better the next day.
Deep flavor isn’t about adding more ingredients. It’s about maximizing what you already have. Now, let’s look at common mistakes that can sabotage your results—and how to avoid them.
Common Mistakes to Avoid
Even a simple recipe like caramelized onion dip has potential pitfalls. Avoiding a few common mistakes ensures consistent, professional-quality results every time you make it.
One of the biggest errors is cooking onions over high heat. It’s tempting to speed things up, especially when you’re short on time. But high heat leads to burning rather than caramelization. Burnt onions taste bitter and can ruin the entire dip. Remember, slow and steady wins here.
Another mistake is overcrowding the pan. If the onions are piled too high, they steam instead of caramelize. Use a wide skillet so they have space to cook evenly. If necessary, caramelize in batches.
Skipping the cooling step is another frequent issue. Mixing hot onions directly into dairy can cause separation, resulting in a runny or oily texture. Always allow onions to cool completely before combining.
Over-seasoning can also throw off the balance. Because chips and crackers are often salty, an overly salted dip becomes overwhelming. Taste gradually and adjust carefully.
Finally, underestimating resting time reduces flavor development. Serving immediately after mixing doesn’t allow the ingredients to fully blend. A minimum of one hour in the refrigerator makes a noticeable difference.
Avoiding these mistakes transforms your dip from average to exceptional. Now let’s explore how to serve it in ways that impress guests and enhance the experience.
Serving Suggestions and Pairings
Presentation and pairing can elevate your caramelized onion dip from casual snack to centerpiece appetizer. While it’s delicious straight from the bowl, thoughtful serving choices enhance both flavor and visual appeal.
Classic pairing begins with potato chips. Their salty crunch contrasts perfectly with the creamy dip. Thick-cut or kettle-cooked chips hold up best and provide a satisfying bite. If you want something lighter, try crisp vegetable sticks—carrots, celery, bell peppers, or cucumber slices. The freshness balances the richness beautifully.
For a more elevated approach, serve the dip with toasted baguette slices or crostini. Lightly brush the bread with olive oil and toast until golden. The slight crunch and warm bread amplify the dip’s savory notes. Crackers also work well, especially sturdy varieties that won’t crumble under the dip’s weight.
Caramelized onion dip can double as a spread. Try it on burgers, grilled chicken sandwiches, or wraps. It also pairs surprisingly well with roasted meats as a creamy side condiment.
For gatherings, garnish with fresh thyme leaves or a drizzle of olive oil. A sprinkle of cracked black pepper adds a professional finishing touch.
Pair it with beverages like sparkling water, light white wine, or even a crisp lager. The acidity and carbonation help cut through the creaminess, keeping each bite refreshing.
Thoughtful pairings turn a simple dip into a memorable food experience. Now, let’s discuss how to store it properly and make it ahead for convenience.
How to Store and Make Ahead
One of the best qualities of homemade caramelized onion dip is its make-ahead potential. In fact, preparing it in advance often improves the flavor.
Store the dip in an airtight container in the refrigerator. It will stay fresh for up to 4–5 days when properly sealed. Because it contains dairy, always keep it chilled and avoid leaving it out at room temperature for extended periods during serving.
If the dip thickens too much after refrigeration, stir in a tablespoon of sour cream or a small splash of milk to loosen it slightly. Always taste and adjust seasoning after making texture changes.
Making it a day in advance is highly recommended. The resting period allows the caramelized onions to fully infuse the creamy base. Many people notice the flavor is richer and more cohesive the next day.
Freezing is not recommended. Dairy-based dips can separate and lose their smooth texture after thawing.
When planning for events, prepare the onions up to two days ahead and refrigerate them separately. Then mix the dip fresh for optimal texture and presentation.
With proper storage, this dip becomes a reliable, stress-free appetizer option that’s ready whenever you need it.
FAQs about Caramelized Onion Dip Recipe
1. What kind of onions are best for caramelized onion dip?
Yellow onions are usually the best choice because they become sweet and deeply flavorful as they cook. Sweet onions also work well if you want a milder taste.
2. How long does it take to caramelize onions properly?
It usually takes about 25 to 40 minutes over low to medium-low heat. Slow cooking is important because it brings out the onions’ natural sweetness without burning them.
3. Can I make caramelized onion dip ahead of time?
Yes, this dip is actually even better when made ahead. Chilling it for a few hours gives the flavors more time to blend, making the dip richer and more balanced.
4. What can I serve with caramelized onion dip?
You can serve it with chips, crackers, toasted bread, pretzels, or fresh vegetables like carrots and celery. It also works well as a spread for sandwiches.
5. How should I store leftover caramelized onion dip?
Store it in an airtight container in the refrigerator. It usually stays fresh for about 3 to 4 days. Stir it before serving again for the best texture.
Conclusion
Mastering a caramelized onion dip recipe isn’t about complexity—it’s about patience, balance, and understanding flavor. From selecting the right onions to slowly caramelizing them into golden perfection, every step builds toward a creamy, savory result that feels both comforting and refined.
Once you’ve made it from scratch, it’s hard to return to store-bought versions. The depth, freshness, and authenticity of homemade caramelized onion dip simply can’t be matched.
Now that you have the professional step-by-step guide, you’re ready to create a dip that’s not only delicious but memorable.