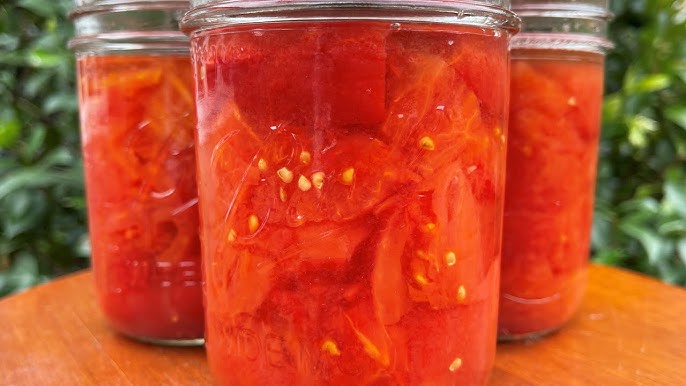
Canned Tomatoes Recipe: There’s something deeply satisfying about lining up jars of bright red, home-canned tomatoes on your pantry shelf. It feels like bottling up summer sunshine and saving it for a cold winter evening.
If you’ve ever tasted homemade canned tomatoes, you already know they’re miles ahead of most store-bought versions. The flavor is fresher, richer, and more vibrant. But beyond taste, learning how to can tomatoes is also about control—you know exactly what’s inside each jar.
We’ll cover ingredients, equipment, preparation methods, and safe processing techniques. By the end, you’ll not only know how to can tomatoes but also understand why each step matters. That’s what separates a casual recipe from a professional approach. Ready to get started? Let’s dive in.
Why Canning Tomatoes at Home Is Worth It
Canning tomatoes at home isn’t just a trendy homesteading hobby—it’s a smart and practical kitchen skill. When tomato season hits its peak, markets overflow with ripe, juicy varieties at affordable prices. Instead of letting that abundance go to waste, you can preserve it for months to come. Imagine making pasta sauce in January with tomatoes that were perfectly ripe in August. That’s the magic of home canning.
Many people assume store-bought canned tomatoes are just as good. But here’s the thing: commercial tomatoes are often picked before they’re fully ripe so they can survive transportation. That affects both taste and nutrition. When you can tomatoes at home, you’re preserving them at peak ripeness. The result? Better flavor, better texture, and better overall quality.
There’s also the peace of mind factor. You control the ingredients—no unnecessary preservatives, no excess sodium unless you choose to add it. For families watching their diet or managing allergies, this control is invaluable. According to the USDA, home canning done properly can safely preserve foods for up to a year or more, making it both economical and practical.
And let’s not ignore the emotional satisfaction. There’s pride in self-sufficiency. Each jar represents effort, care, and intention. It’s like building a small food security system right in your kitchen. Once you try it, you may wonder why you didn’t start sooner.
Flavor and Nutritional Benefits
When tomatoes are allowed to ripen naturally on the vine, their sugar content increases and their acidity balances out beautifully. That’s why home-canned tomatoes often taste sweeter and more complex than mass-produced versions. You’re capturing tomatoes at their flavor peak, not after weeks in storage.
Nutritionally, tomatoes are rich in vitamin C, potassium, folate, and lycopene—a powerful antioxidant linked to heart health and reduced cancer risk. Interestingly, studies show that cooked or processed tomatoes can actually increase the bioavailability of lycopene. That means your body can absorb it more easily from canned tomatoes than from raw ones.
When you control the canning process, you also control sodium levels. Many commercial canned tomatoes contain added salt for flavor and preservation. By canning at home, you can keep them low-sodium or completely salt-free, making them healthier for those managing blood pressure.
The texture is another big advantage. Home-canned tomatoes maintain a more natural structure, especially when processed correctly. They’re perfect for sauces, soups, stews, and casseroles. Once you cook with your own preserved tomatoes, you’ll notice the difference immediately.
Cost Savings and Long-Term Storage Advantages
Buying canned tomatoes every week adds up. But purchasing fresh tomatoes in bulk during peak season can significantly cut costs. Farmers’ markets often offer discounts for bulk purchases, especially toward the end of the day. That’s your opportunity to stock up.
Let’s break it down practically. If you buy tomatoes in season at a lower price and preserve them yourself, the cost per jar is often lower than premium organic canned tomatoes from the store. Over time, those savings become substantial, especially for large families or frequent home cooks.
Storage is another benefit. Properly canned tomatoes can last 12–18 months when stored in a cool, dark place. That means fewer emergency grocery runs and more meal flexibility. You’ve essentially created your own pantry reserve.
In uncertain times, having preserved food on hand provides comfort and security. It’s like having a backup plan sitting quietly on your shelf. And honestly, there’s something incredibly reassuring about that.
Ingredients You’ll Need for Canned Tomatoes
Before you roll up your sleeves, let’s talk ingredients. The beauty of canned tomatoes lies in their simplicity. You don’t need a long grocery list or exotic additives. In fact, keeping it simple ensures the best flavor and safest preservation.
List of Ingredients You’ll Need
- Fresh ripe tomatoes
- Bottled lemon juice or citric acid
- Canning salt (optional)
- Water (for boiling and processing)
That’s it. Simple, right? But each ingredient plays a crucial role, especially when it comes to food safety.
Choosing the Right Tomatoes
Not all tomatoes are created equal when it comes to canning. Roma tomatoes, also known as plum tomatoes, are a popular choice because they’re meatier and contain less water. This makes them ideal for sauces and crushed tomatoes. However, you can use other varieties if they’re fully ripe and free from blemishes.
Look for tomatoes that are firm but not hard. Avoid any with cracks, mold, or soft spots. Overripe tomatoes can affect both flavor and safety. If possible, choose locally grown, vine-ripened tomatoes. They’ll deliver superior taste and better texture after processing.
Quality in equals quality out. Think of your tomatoes as the foundation of a building. If the base isn’t solid, the entire structure suffers.
Essential Additional Ingredients
While tomatoes are the star of the show, a few supporting ingredients ensure safety and flavor balance.
Salt Options
Salt in canning is optional but recommended for flavor. Use canning salt or pickling salt because it doesn’t contain anti-caking agents that can cloud the liquid. Avoid iodized table salt, as it may alter the taste and appearance.
Acidification Ingredients (Lemon Juice or Citric Acid)
Tomatoes are naturally acidic, but modern varieties sometimes have lower acidity levels than older ones. That’s why adding bottled lemon juice or citric acid is crucial. It ensures the pH is low enough to prevent harmful bacteria growth during storage.
Typically, you’ll add 2 tablespoons of bottled lemon juice per quart jar or 1 tablespoon per pint jar. This small step makes a huge difference in safety. It’s non-negotiable in professional canning.
Understanding why you add acid makes you more confident in the process. You’re not just following instructions—you’re mastering food preservation science.
Equipment Required for Safe Canning
Before you start filling jars with those beautiful red tomatoes, let’s talk about equipment. Having the right tools isn’t just about convenience—it’s about food safety. Canning is a precise process, and small details matter. Think of it like building a house: you wouldn’t use a hammer when you need a wrench. The right equipment ensures your canned tomatoes are safe, properly sealed, and shelf-stable for months.
At the very minimum, you’ll need canning jars, lids, rings, a large pot (or water bath canner), a jar lifter, and a funnel. These tools make the process smoother and prevent contamination. Mason jars are specifically designed to withstand high temperatures during processing. Regular glass jars may crack under heat, which is the last thing you want after hours of preparation.
A jar lifter is another essential tool. Trying to remove hot jars with kitchen towels or bare hands is not only risky but dangerous. Boiling water can cause serious burns. A proper jar lifter grips the jar securely and gives you control when lifting it out of hot water. Small investments in proper tools make a big difference in safety and efficiency.
You’ll also want a bubble remover or a non-metallic spatula to release trapped air before sealing the jars. Air pockets can interfere with proper sealing and reduce shelf life. A wide-mouth funnel helps you fill jars neatly, preventing spills that could compromise the seal.
When everything is laid out in front of you, the process feels organized and manageable. Preparation eliminates stress. Once you gather your tools, you’re already halfway to success.
Basic Tools for Beginners
If you’re just starting out, you don’t need fancy or expensive equipment. A simple water bath canner kit often includes a large pot with a rack, jar lifter, funnel, and lid magnet. These starter kits are affordable and perfect for beginners.
The rack inside the pot is important. It keeps jars from sitting directly on the bottom, allowing water to circulate evenly. Even heat distribution ensures proper processing. Without it, jars may crack due to direct heat contact.
You’ll also need clean kitchen towels, measuring spoons for lemon juice or citric acid, and a timer. Timing is not something you can estimate casually. Proper processing time ensures bacteria are destroyed and jars seal correctly.
Starting simple is perfectly fine. Once you gain confidence, you can expand your setup. But remember—precision beats complexity every time.
Water Bath Canner vs. Pressure Canner
For tomatoes, a water bath canner is typically sufficient, especially when you add lemon juice or citric acid for acidification. High-acid foods like properly acidified tomatoes can be safely processed in boiling water.
A pressure canner, on the other hand, is used for low-acid foods such as meats and vegetables. While you can pressure-can tomatoes, it’s not mandatory when acid is added.
Here’s a quick comparison:
| Feature | Water Bath Canner | Pressure Canner |
|---|---|---|
| Best For | High-acid foods (tomatoes, fruits) | Low-acid foods (meat, beans) |
| Temperature | 212°F (100°C) | 240–250°F (116–121°C) |
| Complexity | Beginner-friendly | More advanced |
| Cost | Lower | Higher |
For most home cooks following this canned tomatoes recipe, a water bath canner is more than enough. It’s simple, reliable, and effective when used correctly.
Preparing Tomatoes for Canning
Preparation is where the magic begins. You can’t rush this stage. Proper preparation affects flavor, texture, and safety. Think of it as laying the groundwork before sealing everything in glass.
Washing and Sorting
Start by washing your tomatoes thoroughly under running water. Even if they look clean, they may carry dirt or bacteria from the field. Gently rub the surface to remove debris. Avoid using soap—plain water is sufficient.
As you wash, sort your tomatoes carefully. Discard any that show signs of mold, bruising, cracks, or soft spots. One spoiled tomato can compromise the flavor of the entire batch. Choose only firm, ripe tomatoes for canning.
Uniform ripeness matters too. Mixing underripe and overripe tomatoes can lead to inconsistent taste and texture. When you process tomatoes at peak ripeness, the final product tastes naturally balanced—slightly sweet, slightly tangy, and rich.
Taking your time during sorting might feel tedious, but it pays off. High-quality input guarantees high-quality output.
Blanching and Peeling Process
Peeling tomatoes may sound like extra work, but it’s highly recommended. Tomato skins can become tough during processing and may separate in the jar, affecting texture.
Here’s how to peel them efficiently:
- Bring a large pot of water to a rolling boil.
- Score a small “X” at the bottom of each tomato.
- Submerge tomatoes in boiling water for 30–60 seconds.
- Immediately transfer them to an ice water bath.
The skins will loosen and slide off easily. It’s almost satisfying to watch. Once peeled, core the tomatoes and remove any tough white sections.
This blanching method not only makes peeling easier but also reduces surface bacteria. It’s a simple technique that significantly improves your final result.
Step-by-Step Guide to Canning Tomatoes
Now we reach the heart of this professional guide—the step-by-step process. Follow each step carefully, and you’ll achieve safe, flavorful canned tomatoes every time.
Step 1 – Choose and Wash the Tomatoes
Select ripe, firm, and fresh tomatoes without bruises or spoilage. Wash them thoroughly under running water to remove dirt and debris.
Step 2 – Peel and Prepare
Score a small X on the bottom of each tomato, then blanch them in boiling water for about 30 to 60 seconds. Transfer them to cold water, peel off the skins, remove the cores, and cut them if needed.
Step 3 – Sterilize the Jars
Wash jars, lids, and bands with hot soapy water. Sterilize the jars by boiling them and keep them hot until ready to fill. Clean equipment helps support safe canning.
Step 4 – Fill the Jars
Pack the prepared tomatoes into the hot jars. Add bottled lemon juice or citric acid if required for safe acidity levels. Leave proper headspace, then wipe the rims clean and place the lids on securely.
Step 5 – Process and Store
Process the jars in a boiling water bath or pressure canner, depending on the canning method you are using. Once processed, let the jars cool completely, check the seals, and store them in a cool, dark place.
Processing and Sealing the Jars
Once filled, place jars in your water bath canner. Water should cover jars by at least 1–2 inches. Bring to a rolling boil.
Water Bath Processing Time
Processing time depends on altitude and jar size. At sea level:
- Pints: 40 minutes
- Quarts: 45 minutes
Higher altitudes require longer processing times. Always check altitude guidelines from trusted sources like the USDA.
Start timing only when water reaches a full rolling boil. Consistency ensures safe preservation.
Checking the Seal
After processing, turn off heat and let jars sit for 5 minutes before removing. Place them on a towel and allow them to cool undisturbed for 12–24 hours.
You’ll hear a satisfying “pop” as jars seal. After cooling, press the center of each lid. If it doesn’t flex, the seal is secure.
Remove the rings for storage and label jars with the date. Properly sealed jars can last 12–18 months in a cool, dark place.
Storage, Shelf Life, and Safety Tips
Proper Storage Conditions
Store canned tomatoes in a cool (50–70°F), dark place. Avoid direct sunlight or humidity. Basements and pantry shelves work well.
Signs of Spoilage to Watch For
Before opening any jar, check for:
- Bulging lids
- Leaking seals
- Mold
- Unusual odor
If anything seems off, discard the jar immediately. Never taste questionable food.
FAQs about Canned Tomatoes Recipe
1. Do I need to add lemon juice when canning tomatoes?
Yes. Tomatoes are now treated as a borderline-acid food for home canning, so safe recipes call for added acid. The current guidance is 1 tablespoon bottled lemon juice or 1/4 teaspoon citric acid per pint, or 2 tablespoons bottled lemon juice or 1/2 teaspoon citric acid per quart.
2. Can I water-bath can tomatoes?
Yes, but only when you follow a tested recipe and the tomatoes are properly acidified. Current guidance also notes that acidification is still required even when a recipe gives a pressure-canning option.
3. How long do canned tomatoes last?
For best quality, home-canned tomatoes are generally best used within 1 year when stored in a cool, dark place. Quality may drop after that even if the seal remains intact.
4. Should I peel tomatoes before canning?
Yes, peeling is recommended in standard home-canning directions. The usual method is to dip tomatoes in boiling water for 30 to 60 seconds, then cool them so the skins slip off easily.
5. Can I use vinegar instead of lemon juice?
Yes, a 5% acidity vinegar can be used, but it may change the flavor. The recommended amount is 2 tablespoons per pint or 4 tablespoons per quart.
Conclusion
Canning tomatoes at home is more than just a recipe—it’s a practical life skill that brings flavor, savings, and satisfaction into your kitchen. By following proper preparation, acidification, and processing steps, you ensure safety and quality in every jar. Once you master the technique, you’ll always have rich, vibrant tomatoes ready for sauces, soups, and stews. The process may take time, but the reward is worth every minute.