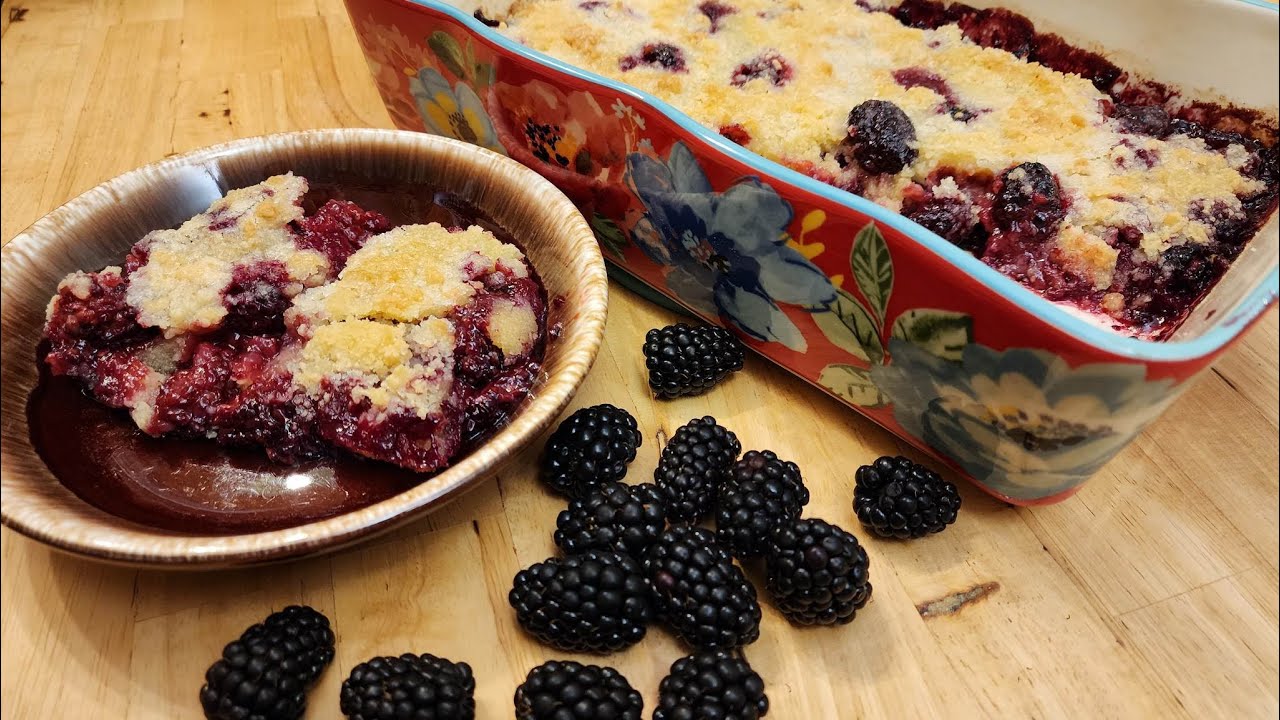
Best Blackberry Cobbler Recipe: Blackberry cobbler is comfort food at its finest. Imagine juicy blackberries bubbling beneath a golden, buttery crust. It’s rustic. It’s simple. And honestly? It tastes like summer in every bite.
Unlike pies, cobblers don’t require perfect crusts or fancy techniques. They’re meant to look a little “cobbled” together—that’s where the name comes from.
Why This Is the Best Recipe You’ll Ever Try
This isn’t just another dessert. This recipe balances sweet and tart perfectly. The topping bakes up crisp on the outside yet soft inside. The filling thickens beautifully without turning gummy.
It’s the kind of dessert that makes people ask for seconds.
The History of Blackberry Cobbler
Origins of Cobbler in Early America
Cobbler traces back to early American settlers who couldn’t make traditional puddings due to limited ingredients. Instead, they layered fruit with biscuit dough and baked it over open fires.
Simple ingredients. Big flavor.
Why Blackberries Became a Classic Choice
Blackberries grew wild across America. They were easy to harvest and packed with flavor. Their natural tartness made them ideal for desserts.
And so, blackberry cobbler became a Southern staple.
Ingredients You’ll Need
For the Blackberry Filling
- 6 cups fresh blackberries (or frozen, thawed)
- 1 cup granulated sugar
- 1 tablespoon lemon juice
- 1 teaspoon lemon zest
- 1 teaspoon vanilla extract
- 2 tablespoons cornstarch
- ¼ teaspoon salt
For the Cobbler Topping
- 1 cup all-purpose flour
- 1 cup granulated sugar
- 1 teaspoon baking powder
- ¼ teaspoon salt
- 1 cup milk
- ½ cup unsalted butter (melted)
Optional Flavor Enhancers
- ½ teaspoon cinnamon
- Pinch of nutmeg
- 1 tablespoon brown sugar for topping
Choosing the Best Blackberries
Fresh vs Frozen
Fresh blackberries provide vibrant flavor and texture. Frozen works just as well—just thaw and drain excess liquid.
How to Tell If Blackberries Are Ripe
Look for deep black color and plump shape. Avoid berries that are red or mushy.
Essential Kitchen Tools
- 9×13-inch baking dish
- Mixing bowls
- Whisk
- Spatula
- Measuring cups and spoons
No fancy equipment needed.
Step-by-Step Guide to Making Blackberry Cobbler
Step 1 – Preheat and Prepare
Preheat your oven to 375°F (190°C). Lightly grease a baking dish with butter or cooking spray. Gather fresh or thawed blackberries, sugar, flour, baking powder, milk, butter, and vanilla extract.
Step 2 – Prepare the Blackberry Filling
In a mixing bowl, combine blackberries with sugar, a squeeze of lemon juice, and a tablespoon of flour or cornstarch to help thicken the juices. Gently toss until evenly coated. Pour the mixture into the prepared baking dish and spread evenly.
Step 3 – Make the Cobbler Batter
In a separate bowl, whisk together flour, sugar, baking powder, and a pinch of salt. Stir in milk, melted butter, and vanilla extract until just combined. Do not overmix; a slightly lumpy batter is fine.
Step 4 – Assemble the Cobbler
Spoon the batter evenly over the blackberry filling. You can spread it gently or drop it in dollops for a rustic look. As it bakes, the batter will rise and create a golden topping.
Step 5 – Bake to Perfection
Place the dish in the preheated oven and bake for 35–45 minutes, or until the topping is golden brown and the blackberry filling is bubbling around the edges.
Step 6 – Cool and Set
Remove from the oven and let the cobbler cool for at least 15–20 minutes. This allows the filling to thicken slightly and makes serving easier.
Step 7 – Serve and Enjoy
Serve warm, topped with vanilla ice cream or whipped cream. Enjoy the sweet, juicy blackberries paired with the soft, buttery cobbler crust.
Pro Tips for the Perfect Cobbler
- Don’t overmix the batter.
- Use room-temperature milk.
- Let it cool before serving.
- Sprinkle sugar on top for crunch.
Common Mistakes to Avoid
- Too much liquid in berries.
- Overbaking.
- Not using enough thickener.
Variations and Customizations
Southern-Style Cobbler
Use self-rising flour and add extra butter.
Gluten-Free Option
Substitute with gluten-free flour blend.
Vegan Option
Use plant milk and vegan butter.
Mixed Berry Cobbler
Add raspberries or blueberries.
What to Serve with Blackberry Cobbler
- Vanilla ice cream
- Whipped cream
- Custard sauce
How to Store and Reheat
Store covered in refrigerator up to 4 days.
Reheat in oven at 325°F for 15 minutes.
Can You Freeze Blackberry Cobbler?
Yes. Freeze tightly wrapped for up to 3 months. Thaw overnight before reheating.
Nutritional Information
Approximate per serving:
- Calories: 320
- Carbs: 55g
- Fat: 12g
- Protein: 3g
Why This Recipe Works Every Time
The balance of acid, sugar, and thickener ensures consistency. The butter-rich topping browns beautifully.
It’s simple chemistry—delicious results.
FAQs about Blackberry Cobbler Recipe
1. Can I reduce the sugar?
Yes, you can reduce the sugar by about ¼ cup without affecting the texture of the cobbler. Keep in mind that blackberries can be naturally tart, so adjusting the sugar may slightly change the overall sweetness.
2. Why is my cobbler runny?
A runny cobbler usually means it needs more cooling time. The filling thickens as it cools. It may also need a bit more cornstarch or flour in the fruit mixture to properly set during baking.
3. Can I use other fruits?
Absolutely. This cobbler base works beautifully with peaches, cherries, apples, blueberries, or even mixed berries. Adjust sugar levels depending on the sweetness of the fruit you choose.
4. Should I cover it while baking?
No, leave the cobbler uncovered while baking. This allows the topping to brown properly and develop a golden, slightly crisp surface.
5. Can I make it ahead?
Yes, blackberry cobbler can be baked earlier in the day. Simply reheat gently in the oven before serving to restore warmth and texture.
Conclusion
Blackberry cobbler is more than dessert—it’s comfort, nostalgia, and pure joy baked into one dish. This recipe is simple enough for beginners yet impressive enough for guests. Follow these steps, and you’ll have a golden, bubbling masterpiece every time.
Now tell me—are you serving it with ice cream?


