Almond Nut Milk Recipe: Almond nut milk is one of those kitchen staples that feels fancy but is surprisingly simple. Once you make it yourself, it’s hard to go back to store-bought cartons. Homemade almond milk is creamier, fresher, cleaner, and fully customizable. No gums. No preservatives. No weird aftertaste. Just almonds, water, and a little love.
In this guide, we’ll walk through everything—from choosing the right almonds to blending, straining, flavoring, storing, and even using the leftover almond pulp. Whether you’re dairy-free, vegan, lactose-intolerant, or just trying to eat cleaner, this is your complete, professional, ready almond nut milk recipe.
Let’s get into it.
What Is Almond Nut Milk?
Almond nut milk is a plant-based milk alternative made by blending soaked almonds with water and straining the mixture. The result is a smooth, milky liquid that looks like dairy milk but comes entirely from nuts.
Think of it as almond essence suspended in water. Simple. Elegant. Powerful.
Unlike dairy milk, almond milk contains no lactose, no cholesterol, and no animal products. That’s why it has become a go-to for vegans, paleo followers, keto eaters (unsweetened), and health-conscious households.
Why Make Almond Milk at Home?
Let’s be honest—store-bought almond milk is convenient. But flip the carton around and read the label. You’ll often see:
- Carrageenan
- Gellan gum
- Sunflower lecithin
- Added sugars
- Artificial flavors
Homemade almond nut milk gives you full control. You decide:
- How thick or thin it is
- How sweet it is
- What flavors go in
- What stays out
And the taste? Night and day.
Health Benefits of Almond Nut Milk
Almond milk isn’t just trendy—it’s nutritionally impressive.
Key Benefits
- Naturally lactose-free
- Low in calories (unsweetened)
- Rich in vitamin E
- Supports heart health
- Gentle on digestion
Almonds are packed with antioxidants, healthy fats, and minerals. When you turn them into milk, you get hydration plus nourishment—like a smoothie’s quieter cousin.
Ingredients You’ll Need
Here’s the beauty of this recipe: minimal ingredients, maximum results.
Basic Ingredients
- 1 cup raw almonds
- 3–4 cups filtered water
Optional Add-Ins
- 1–2 pitted dates (for sweetness)
- ½ teaspoon vanilla extract
- Pinch of sea salt
- 1 teaspoon honey or maple syrup
Tools & Equipment Required
You don’t need fancy gear. Just a few kitchen basics:
- High-speed blender
- Large bowl (for soaking)
- Fine mesh strainer or nut milk bag
- Glass jar or bottle for storage
If you make almond milk often, a nut milk bag is worth it. Think of it as a reusable tea bag for nuts.
Choosing the Best Almonds
Always go for raw, unsalted almonds.
Why Raw Almonds Matter
Roasted almonds change the flavor and can make your milk bitter. Raw almonds blend cleaner and taste neutral—perfect for milk.
Organic is ideal, but not mandatory. If possible, choose almonds with skins intact for maximum nutrients.
Raw vs Roasted Almonds
Let’s clear this up.
- Raw almonds: Best for milk
- Roasted almonds: Strong flavor, less creamy
- Salted almonds: Avoid completely
Milk made from roasted almonds tastes more like almond butter water. Not bad—but not classic almond milk.
Water Ratios Explained
The almond-to-water ratio determines thickness.
- 1 cup almonds : 3 cups water → Extra creamy
- 1 cup almonds : 4 cups water → Regular milk
- 1 cup almonds : 5 cups water → Light milk
If this is your first time, start with 1:4. You can always adjust.
Step-by-Step Almond Nut Milk Recipe
Now the fun part. Follow these steps carefully and you’ll get perfect almond milk every time.
Step 1: Soaking the Almonds
Place raw almonds in a bowl and cover with plenty of water. Soak for 8–12 hours or overnight. Soaking softens the almonds and improves blending and digestion.
Step 2: Rinsing & Prepping
Drain and rinse the soaked almonds thoroughly under clean water. Discard the soaking water—it contains enzymes you don’t want in the milk.
Step 3: Blending Almond Milk
Add the almonds to a blender with fresh water (about 3–4 cups water per 1 cup almonds). Blend on high for 30–60 seconds until smooth and milky.
Step 4: Straining the Milk
Pour the blended mixture through a nut milk bag, cheesecloth, or fine sieve into a bowl. Squeeze or press to extract as much liquid as possible. The leftover pulp can be saved for baking.
Step 5: Flavoring the Milk
Return the strained milk to the blender if desired. Add vanilla extract, a pinch of salt, or a natural sweetener like dates or honey. Blend briefly to combine.
Step 6: Storing Almond Milk
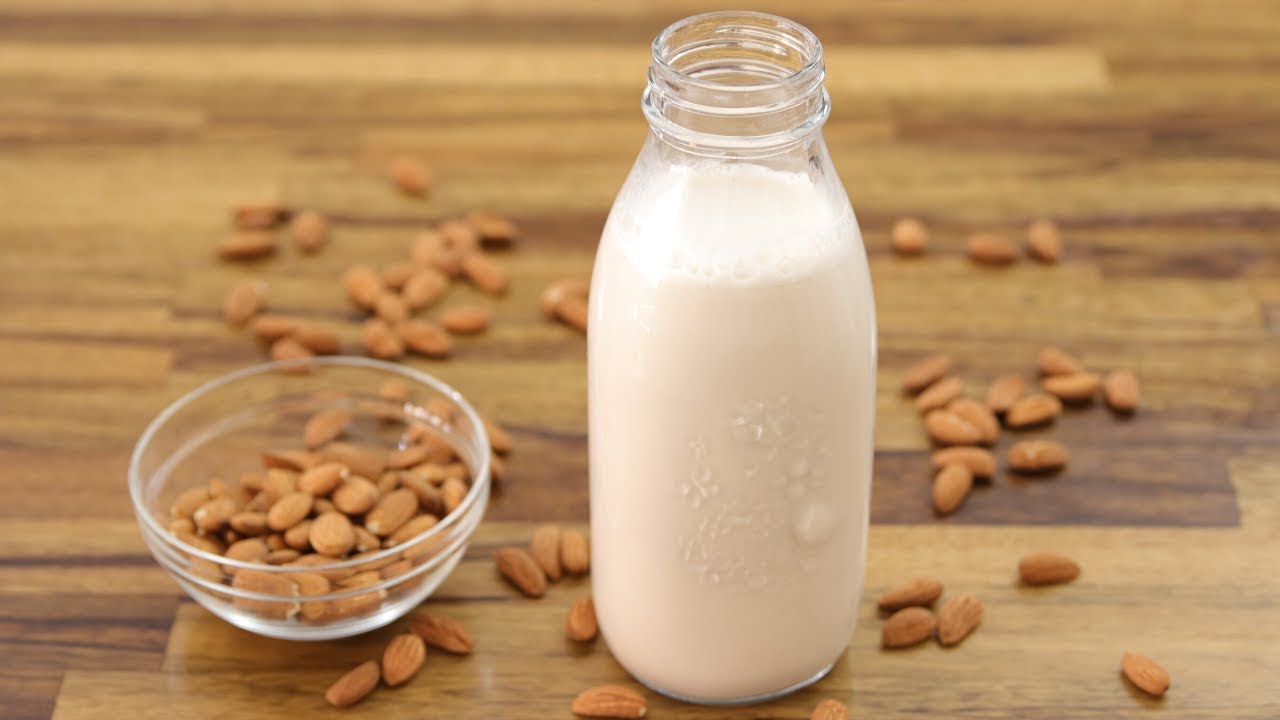
Transfer almond milk to a sealed glass jar or bottle. Store in the refrigerator for up to 3–4 days. Shake well before using.
Homemade almond milk is clean, customizable, and far fresher than store-bought versions—perfect for smoothies, coffee, or cereal. 🥛🌰
Common Blending Mistakes
Even simple recipes have traps.
Avoid These Errors
- Not soaking almonds long enough
- Using hot water
- Over-sweetening
- Skipping straining
If your milk tastes chalky, it’s usually under-blended or under-strained.
How to Fix Bitter Almond Milk
Bitter almond milk happens when:
- Almonds are old
- Skins are too thick
- Water ratio is off
Fix it by:
- Adding more water
- Adding a date
- Straining again
Almond Milk Variations
One recipe. Endless options.
Sweetened vs Unsweetened Almond Milk
- Unsweetened: Best for cooking, coffee, keto
- Sweetened: Best for cereal, smoothies, kids
Always start unsweetened—you can add sweetness later.
Vanilla Almond Milk
Add:
- ½–1 teaspoon pure vanilla extract
Classic. Comforting. Café-style.
Chocolate Almond Milk
Add during blending:
- 1 tablespoon cocoa powder
- 1–2 dates
Now you’ve got a healthy chocolate milk.
Date-Sweetened Almond Milk
Dates are nature’s candy.
- No sugar spikes
- Rich, caramel flavor
- Kid-friendly
Soak dates with almonds for extra smoothness.
Uses for Almond Nut Milk
Almond milk isn’t just for drinking.
Popular Uses
- Smoothies
- Coffee & lattes
- Oatmeal
- Baking
- Pancakes
- Soups & sauces
Anywhere you use dairy milk, almond milk can step in.
Almond Milk Nutrition Breakdown
Approximate values (unsweetened, homemade):
- Calories: 30–50 per cup
- Fat: 2–3g
- Protein: 1–2g
- Carbs: 1–2g
Homemade almond milk is lighter than store-bought and free from fillers.
How Long Almond Milk Lasts
- Refrigerated: 3–4 days
- Frozen: Up to 3 months
Always smell before using. Fresh almond milk smells clean and nutty—not sour.
Freezing Almond Milk (Yes or No?)
Yes, you can freeze it—but texture may change.
Freezing Tips
- Freeze in ice cube trays
- Use for smoothies after thawing
- Shake well after defrosting
What to Do With Leftover Almond Pulp
Don’t waste it.
Pulp Uses
- Add to oatmeal
- Bake into muffins
- Blend into smoothies
- Dry and grind into almond flour
It’s fiber-rich and still nutritious.
FAQs about Almond Nut Milk Recipe
1. Do I have to soak almonds overnight?
Yes. Soaking is strongly recommended because it improves texture, enhances flavor, and makes the almonds easier to blend and digest. Shortcuts usually result in thinner, lower-quality milk.
2. Can I use almond milk without straining?
You can, but the texture will be thick and gritty. Straining removes the pulp and gives almond milk its classic smooth, drinkable consistency.
3. Is homemade almond milk healthier than store-bought?
Absolutely. Homemade almond milk contains no preservatives, no gums, and no hidden sugars—just clean, simple ingredients you control.
4. Why is my almond milk separating?
This is completely normal. Homemade almond milk has no emulsifiers, so separation happens naturally. Just shake well before using.
5. Can I heat almond milk?
Yes. Almond milk can be gently heated for tea or coffee. Avoid boiling, as high heat can cause separation or graininess.
These tips will help you enjoy fresh, smooth, and natural almond milk every time. 🥛🌰
Conclusion
Making almond nut milk at home is one of those small kitchen upgrades that pays off daily. It’s cleaner, healthier, cheaper in the long run, and endlessly customizable. Once you master this step-by-step process, almond milk becomes less of a recipe and more of a habit.
Simple ingredients. Real nutrition. Zero compromise.


