Venison Summer Sausage Recipe: Venison summer sausage is one of those recipes that feels timeless. It’s rustic, deeply flavorful, and incredibly satisfying—like bottling up the essence of a successful hunting season and turning it into something you can enjoy all year long. Whether you’re new to working with venison or you’ve processed wild game for years, mastering summer sausage is a skill that pays off again and again.
This guide is designed to be professional, detailed, and complete. We’ll go far beyond a quick recipe. You’ll learn why each step matters, how to avoid common mistakes, how to customize flavor, and how to get consistent, safe, delicious results every single time.
If you’ve ever wondered:
- Why some summer sausage is dry and crumbly
- Why others are juicy and perfectly sliceable
- How to get that classic tang without overpowering the meat
You’re in the right place.
What Is Venison Summer Sausage?
Venison summer sausage is a semi-dry, cured sausage traditionally made from a blend of venison and pork (or beef fat), seasoned with salt, spices, curing agents, and often fermented or acidified for tang. It’s usually smoked or slow-cooked at low temperatures, then cooled and stored for long periods.
Unlike fresh sausage:
- It’s not cooked immediately and eaten hot
- It’s designed to slice cleanly
- It has a firm texture and slightly tangy flavor
- It keeps well when refrigerated or vacuum-sealed
The word “summer” doesn’t mean it’s made in summer—it refers to its ability to last longer before modern refrigeration, making it ideal for warmer months.
Why Venison Is Perfect for Summer Sausage
Venison is lean, flavorful, and protein-dense. That leanness is both a strength and a challenge.
Advantages
- Clean, rich flavor
- Lower fat than beef or pork
- Excellent protein content
- Takes seasoning very well
The Challenge
Venison alone is too lean for good sausage texture. Without added fat, you’ll end up with:
- Dry sausage
- Crumbly slices
- Poor mouthfeel
That’s why fat management is one of the most important themes you’ll see repeated throughout this guide.
Ingredients You’ll Need (Core List)
This recipe is built for 10 pounds of finished sausage, which is a practical batch size for home processors.
Meat & Fat
- 7 pounds venison (well-trimmed, chilled)
- 3 pounds pork fat or fatty pork trim
(pork shoulder or pork butt works perfectly)
Why pork? Pork fat stays juicy when cooked low and slow and blends beautifully with venison flavor.
Curing & Binding Ingredients
- 5 teaspoons Prague Powder #1 (curing salt)
- 2 cups ice-cold water
- 2 tablespoons mustard seed
- 2 tablespoons coarse black pepper
- 2 tablespoons garlic powder
- 2 tablespoons onion powder
- 3 tablespoons kosher salt
- 1 tablespoon sugar
- 2 tablespoons dextrose (or substitute sugar)
- 2 tablespoons non-fat dry milk powder (binder)
Optional Flavor Enhancers
- 1 tablespoon coriander
- 1 tablespoon crushed red pepper
- 1 tablespoon smoked paprika
- 1 teaspoon ground cloves
- 1 teaspoon nutmeg
These are optional, but they add depth and complexity if you want a more traditional or European-style profile.
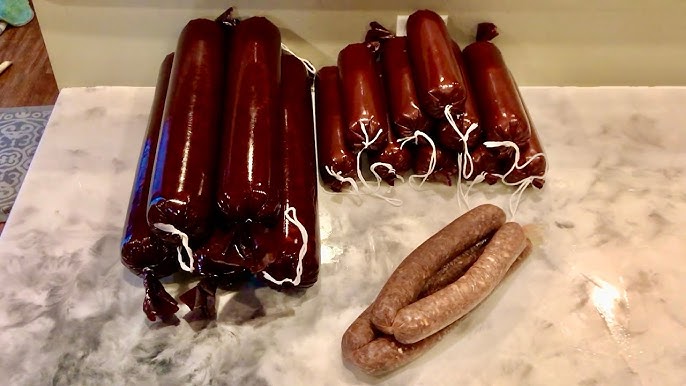
Casings
- Fibrous sausage casings (2–2.5 inch diameter)
- Butcher’s twine or hog rings
Fibrous casings are preferred because:
- They hold shape
- They’re smoke-permeable
- They peel cleanly after cooking
Equipment You’ll Need
Professional results require proper tools. You don’t need an industrial setup—but precision matters.
Essential Equipment
- Meat grinder (coarse and fine plates)
- Large food-grade mixing tub
- Sausage stuffer
- Accurate digital scale
- Meat thermometer (probe style)
- Smoker or oven with temperature control
- Sharp boning knife
Optional but Helpful Tools
- Stand mixer with paddle attachment (for mixing)
- Vacuum sealer
- Ice packs or freezer trays
- Smoke generator (cold smoke capability)
Step-by-Step Venison Summer Sausage Guide
This is where technique separates average sausage from excellent sausage.
Step 1: Prepare and Chill the Meat
Trim all sinew, silver skin, and connective tissue from the venison. Cut meat and fat into 1-inch cubes, spread on trays, and chill until firm but not frozen (28–32°F / −2–0°C). Cold meat grinds cleaner and mixes better.
Step 2: Grind the Meat
Grind venison and fat separately—first through a coarse plate, then again through a medium plate. This creates even fat distribution, better texture, and a professional consistency. Keep everything cold.
Step 3: Mix Seasonings and Cure
In a bowl, combine curing salt #1, regular salt, sugar or dextrose, and all dry spices. Add ice-cold water and stir until dissolved. This liquid seasoning ensures even distribution.
Step 4: Mix the Sausage Thoroughly
Combine ground meat with the seasoning mixture. Mix until the meat becomes sticky and binds—evidence of proper protein extraction. Under-mixing leads to crumbly sausage.
Step 5: Rest and Cure
Cover tightly and refrigerate 12–24 hours. This allows the cure to work, deepens flavor, and improves texture. Don’t skip it.
Step 6: Prepare the Casings
Soak fibrous casings in warm water 30–45 minutes until flexible. Tie one end securely.
Step 7: Stuff the Sausage
Stuff firmly, avoiding air pockets. Pack tight (not overstuffed), prick bubbles with a pin, and tie off the end. Uniform stuffing ensures even cooking.
Step 8: Dry Before Smoking
Hang or rack sausages at room temperature 1–2 hours until the surface feels tacky, not wet—this helps smoke adhere.
Step 9: Smoke the Sausage (Professional Schedule)
- 120°F (49°C) – 1 hour (no smoke)
- 140°F (60°C) – 1 hour (light smoke)
- 160°F (71°C) – 1–2 hours
- 180°F (82°C) – until internal temp reaches 152°F (67°C)
Use hickory, apple, or oak. Increase heat slowly to prevent fat separation.
Step 10: Ice Bath & Bloom
Ice bath 10–15 minutes, then hang at room temp 2–3 hours to set color and aroma.
Step 11: Cool and Store
Refrigerate overnight. Peel casings before serving. Store refrigerated up to 3 weeks, or vacuum-seal and freeze up to 1 year.
Texture, Flavor & Safety Explained
Why Cure Is Essential
Curing salt:
- Prevents botulism
- Preserves color
- Adds classic cured flavor
Never substitute curing salt incorrectly.
Why Temperature Control Matters
Too hot:
- Fat melts out
- Sausage becomes dry
Too cold:
- Undercooked interior
- Unsafe product
Flavor Variations You Can Try
Garlic Lover’s Version
- Double garlic powder
- Add roasted garlic paste
Spicy Venison Summer Sausage
- Cayenne
- Crushed red pepper
- Smoked chili powder
Cheese-Filled Version
- Add high-temp cheddar cubes
- Fold gently during final mix
Common Mistakes (And How to Avoid Them)
Dry Sausage
- Not enough fat
- Overcooking
- Too high smoker temperature
Crumbly Texture
- Under-mixing
- Poor protein bind
- Skipping rest time
Greasy Sausage
- Too much fat
- Temperature spikes
Storage and Shelf Life
Refrigerated
- 2–3 weeks wrapped
- 2–3 months vacuum-sealed
Frozen
- Up to 1 year without quality loss
Always label with date.
Serving Ideas
- Slice thin for charcuterie boards
- Pair with sharp cheese and mustard
- Dice into omelets or pasta
- Serve with crackers and pickles
Venison summer sausage shines when kept simple.
Nutritional Overview (Approximate)
Per 2-oz serving:
- High protein
- Moderate fat
- Low carbohydrate
- Naturally gluten-free (check binders)
Why Homemade Venison Summer Sausage Beats Store-Bought
- You control ingredients
- No fillers or mystery meat
- Custom seasoning
- Cleaner flavor
- Better value per pound
Once you make it yourself, it’s hard to go back.
FAQs about Venison Summer Sausage Recipe
1. Can I make venison summer sausage without pork?
Yes. However, you must add beef fat or another stable fat source. Venison is very lean on its own and will produce a dry sausage without added fat.
2. Can I bake instead of smoke?
Yes. You can bake at low temperatures (no higher than 170°F / 77°C) until the internal temperature reaches 152°F / 67°C. Keep in mind you’ll miss the traditional smoky flavor.
3. Is curing salt absolutely required?
Yes. Curing salt is essential for food safety, proper color, flavor development, and the classic texture expected in summer sausage.
4. How long should I let it rest before slicing?
At least 24 hours in the refrigerator. Resting allows flavors to mature and the texture to firm up significantly.
5. Can I scale this recipe up or down?
Absolutely. Just be precise with ratios and always measure curing salt by weight to ensure both safety and consistent results.
Conclusion
Venison summer sausage isn’t just a recipe—it’s a craft. When done right, it transforms lean wild game into something rich, balanced, and deeply satisfying. By controlling fat ratio, temperature, seasoning, and cure time, you create a product that rivals professional smokehouses.
Take your time. Respect the process. And enjoy every slice—because this is one of the most rewarding ways to honor venison.


