Vegan Marshmallow Recipe: There’s something almost magical about marshmallows. They’re soft, fluffy, pillowy little clouds that melt in your mouth and turn gooey over a campfire. But here’s the catch—traditional marshmallows aren’t vegan. If you’ve ever flipped the package over and scanned the ingredient list, you’ve probably noticed gelatin sitting there quietly. That single ingredient changes everything.
So what if you’re vegan? Or maybe you’re just looking to reduce animal-based ingredients in your diet? Good news: vegan marshmallows are not only possible, they’re incredibly delicious. And yes—they still have that bounce, stretch, and melt you love.
In this guide, you’ll learn exactly how to make vegan marshmallows from scratch. No complicated culinary school tricks. No mysterious ingredients you can’t pronounce. Just simple, accessible steps that lead to perfectly fluffy results.
We’ll break down the science behind the texture, go over every ingredient in detail, and then walk through a foolproof, step-by-step method. By the end, you’ll have homemade vegan marshmallows that are soft, airy, and honestly—better than store-bought.
Ready to create edible clouds in your kitchen? Let’s dive in.
What Makes Marshmallows Non-Vegan?
At first glance, marshmallows seem harmless. Sugar, water, flavoring—what could possibly be non-vegan about that? The answer lies in gelatin.
Gelatin is the backbone of traditional marshmallows. It’s what gives them that stretchy, elastic structure. Without it, marshmallows would just be sweet syrup. But here’s the reality: gelatin is derived from animal collagen, typically from cows or pigs. It’s made by boiling skin, bones, and connective tissue to extract proteins that form a gel when cooled.
Not exactly appetizing when you think about it, right?
Gelatin acts like a structural net. When whipped with hot sugar syrup, it traps air bubbles and solidifies as it cools, creating that iconic fluffy texture. That’s why it’s so hard to simply “leave it out” of a recipe. You need a plant-based alternative that behaves in a similar way.
That’s where agar-agar comes in. Agar-agar is derived from red seaweed and has powerful gelling properties. It sets firmer than gelatin and works differently, but with the right technique, it creates that same marshmallow magic.
Understanding this difference is key. You’re not just swapping ingredients—you’re adjusting the entire structure of the recipe. But don’t worry. Once you grasp the basics, it becomes surprisingly simple.
Why Choose Vegan Marshmallows?
Maybe you follow a plant-based diet. Maybe you have dietary restrictions. Or maybe you’re just curious. Whatever the reason, vegan marshmallows offer more than just an ethical alternative.
First, they’re completely free from animal-derived ingredients. That means they align with vegan and vegetarian lifestyles. But beyond that, they can also feel lighter and cleaner compared to traditional marshmallows.
There’s also something deeply satisfying about making them yourself. Store-bought vegan marshmallows exist, sure—but they’re often expensive and harder to find. Homemade versions allow you to control:
- The sweetness level
- The flavor intensity
- The texture
- The shape and size
Plus, let’s be honest—there’s bragging rights involved. When someone bites into your homemade vegan marshmallow and says, “Wait… this is vegan?” you’ll know you nailed it.
Another bonus? You can experiment. Want lavender marshmallows? Go for it. Chocolate-dipped? Absolutely. Homemade means creative freedom.
Choosing vegan marshmallows isn’t about sacrifice. It’s about innovation. It’s about recreating a classic treat in a way that aligns with your values and still tastes amazing.
Understanding the Science Behind Vegan Marshmallows
Before we jump into the mixing bowl, let’s talk about texture. Because marshmallows aren’t just candy—they’re chemistry.
At their core, marshmallows are a whipped sugar foam stabilized by a gelling agent. Think of them like edible sponges made of sugar and air. When hot syrup is whipped, it traps microscopic air bubbles. The stabilizer—gelatin or agar—locks those bubbles in place as the mixture cools.
But here’s where things get interesting.
Gelatin sets slowly and remains flexible. Agar, on the other hand, sets quickly and firmly. That means timing is everything. You can’t casually mix and walk away. You need to move with purpose.
Agar activates when boiled. It must reach a certain temperature to dissolve properly. If undercooked, it won’t set. If overcooked without enough liquid, it can become too stiff.
Sugar temperature also matters. When heated to the right stage (usually soft-ball stage around 240°F or 115°C), it forms the correct structure once whipped.
In short, vegan marshmallows are about balance:
- Correct agar activation
- Proper sugar temperature
- Strong whipping technique
- Quick transfer to the pan
Once you understand this balance, the recipe becomes less intimidating and more empowering.
You’re not just following instructions—you’re controlling a delicious chemical reaction.
Ingredients You’ll Need
Let’s get into the essentials. Vegan marshmallows don’t require a long grocery list, but each ingredient plays a specific role. Skipping or substituting randomly can affect the final texture.
Core Ingredients
Here’s what you absolutely need:
- Granulated sugar – The main sweetener and structure builder.
- Light corn syrup or glucose syrup – Prevents crystallization and keeps texture smooth.
- Water – Activates agar and dissolves sugar.
- Agar-agar powder – The plant-based gelling agent.
- Vanilla extract – Classic marshmallow flavor.
- Powdered sugar + cornstarch – For dusting and preventing stickiness.
Each ingredient has a job. Sugar provides body. Corn syrup adds elasticity. Agar locks in the air. Vanilla brings warmth and depth.
Optional Flavor Enhancers
Want to elevate things? Consider:
- Almond extract
- Peppermint extract
- Cocoa powder
- Fruit puree (concentrated)
- Natural food coloring
Keep liquids minimal to avoid disrupting the gel structure.
Tools and Equipment Required
You’ll need:
- Stand mixer (highly recommended)
- Candy thermometer
- Saucepan
- Whisk
- Spatula
- 8×8-inch baking pan
- Parchment paper
Having everything ready before you start is crucial. Marshmallow-making moves fast once the syrup hits temperature.
Step-by-Step Guide to Making Vegan Marshmallows
Now for the exciting part. This is where science meets sugar and transforms into fluffy perfection.
Step 1: Preparing Your Pan and Workspace
Line a square pan with parchment paper and lightly dust it with powdered sugar or cornstarch. Clear your workspace and have all ingredients measured and ready, as timing is important.
Step 2: Blooming the Agar-Agar
In a small bowl, whisk agar-agar powder with water. Let it sit for a few minutes to hydrate fully. Agar-agar is the plant-based setting agent that replaces gelatin.
Step 3: Cooking the Sugar Syrup
In a saucepan, combine sugar, corn syrup (or glucose), and water. Cook over medium heat, stirring until the sugar dissolves. Add the bloomed agar-agar and simmer gently for a few minutes until fully activated and slightly thickened.
Step 4: Whipping the Mixture to Perfection
Transfer the hot syrup to a heat-safe mixing bowl. Using a stand or hand mixer, whip on high speed for 8–10 minutes until the mixture becomes thick, glossy, and fluffy. Add vanilla extract toward the end of whipping.
Step 5: Setting the Marshmallows
Quickly pour the whipped mixture into the prepared pan. Smooth the top with a spatula. Let it set at room temperature for 1–2 hours until firm. Do not refrigerate, as this can affect texture.
Step 6: Cutting and Coating
Once set, remove from the pan and cut into cubes using a sharp knife dusted with powdered sugar. Toss marshmallows in more powdered sugar or cornstarch to prevent sticking.
These vegan marshmallows are light, fluffy, and perfect for snacking, hot chocolate, or desserts.
Common Mistakes and How to Avoid Them
Even experienced bakers sometimes struggle with marshmallows. Let’s troubleshoot.
Why Your Marshmallows Didn’t Set
Possible reasons:
- Agar wasn’t boiled long enough.
- Sugar syrup didn’t reach 240°F.
- Mixture cooled too quickly before whipping.
- Incorrect agar measurement.
Precision is everything here. Measuring carefully and watching temperature solves most problems.
Fixing Grainy or Sticky Texture
Grainy texture usually comes from sugar crystallization. Avoid stirring syrup after it starts boiling.
Too sticky? You may need more coating powder—or humidity might be high. Marshmallows dislike moisture in the air.
Remember, every batch teaches you something.
Flavor Variations to Try
Once you master the base recipe, creativity opens up.
Vanilla Bean Marshmallows
Use real vanilla bean seeds instead of extract. The tiny specks add gourmet appeal and deeper flavor.
Chocolate Swirl Marshmallows
Fold melted dairy-free chocolate into the whipped mixture just before pouring. Swirl gently for a marbled effect.
Strawberry or Fruit-Infused Marshmallows
Use concentrated fruit puree (reduced to remove excess moisture). Add during whipping for natural flavor and color.
Think beyond basic. Marshmallows can become elegant, playful, or seasonal.
Storage Tips and Shelf Life
Store vegan marshmallows in an airtight container at room temperature.
Avoid refrigeration—it can cause sweating and texture changes.
They typically last:
- 1 week at room temperature
- Up to 2 weeks if kept dry
If they start sticking, dust with more powdered sugar mixture.
Humidity is your biggest enemy. Keep them cool and dry.
Creative Ways to Use Vegan Marshmallows
Don’t just eat them plain—though that’s tempting.
Hot Chocolate Topping
Drop one into steaming cocoa and watch it melt into creamy sweetness.
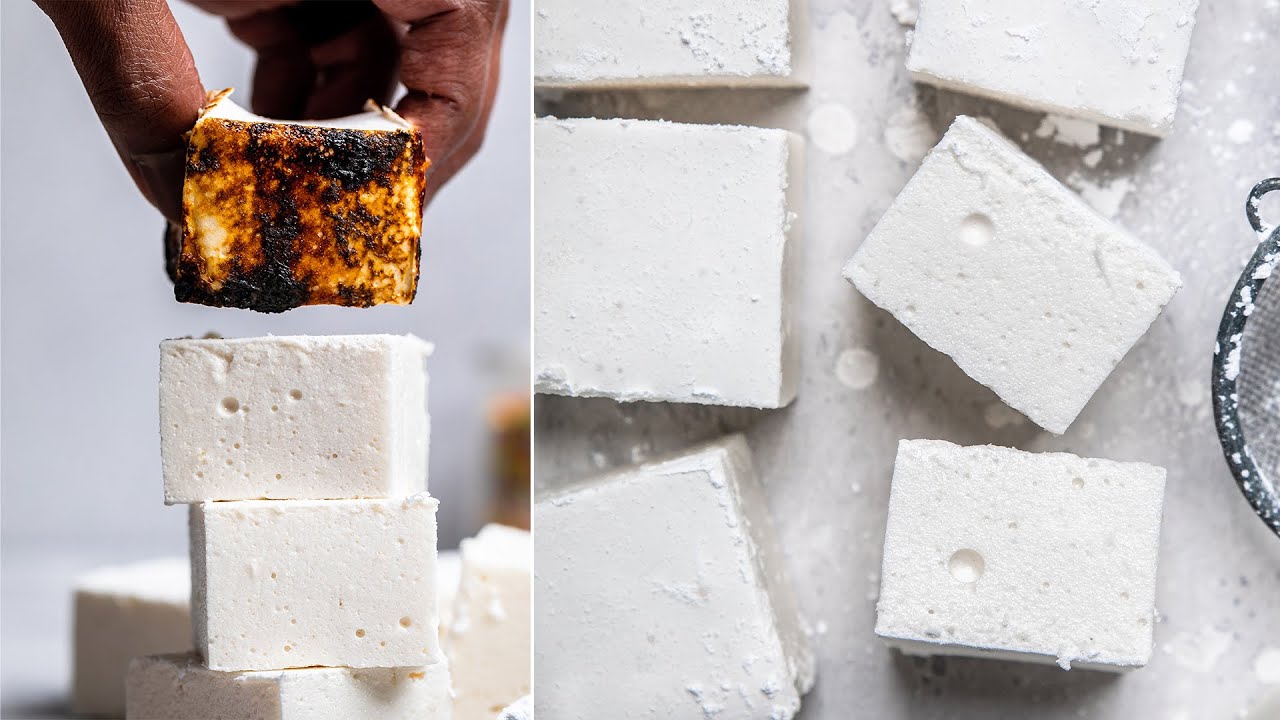
S’mores
Yes, they toast! Agar-based marshmallows brown slightly faster, so watch carefully.
Homemade Marshmallow Fluff
Whip slightly less and store as spreadable fluff.
The possibilities are endless.
Nutritional Overview
Vegan marshmallows are primarily sugar-based, just like traditional ones.
They contain:
- No gelatin
- No dairy
- No eggs
Calories are similar to regular marshmallows. The difference lies in the plant-based structure.
They’re a treat—meant to be enjoyed mindfully.
FAQs about Vegan Marshmallow Recipe
1. Can I use agar flakes instead of agar powder?
Yes, but you’ll need more of it, and it must boil longer to dissolve fully. Powder is more reliable for marshmallows.
2. Why are my marshmallows too firm?
You may have used too much agar or cooked the sugar syrup too high. Precision matters.
3. Can vegan marshmallows be toasted?
Yes! They toast slightly differently but still brown beautifully over heat.
4. Can I reduce the sugar in this recipe?
Reducing sugar significantly will affect texture. Marshmallows rely heavily on sugar for structure.
5. How do I prevent marshmallows from sticking together?
Coat them generously in powdered sugar and cornstarch and store in an airtight container.
Conclusion
From activating agar properly to whipping the mixture into fluffy peaks, each step builds toward that soft, airy bite we all love. And the best part? No gelatin. No animal products. Just pure, pillowy sweetness made entirely from plants.
The first batch may feel like a science experiment. The second? Confidence. By the third, you’ll be customizing flavors and cutting perfect squares like a pro.
Homemade vegan marshmallows prove something powerful: plant-based treats don’t require compromise. They can be just as indulgent, nostalgic, and satisfying.
Now it’s your turn. Grab your mixer, heat that syrup, and turn your kitchen into a marshmallow factory.


