Turtle Candy Recipe: If you’ve ever taken a bite of turtle candy, you already know it’s not just candy—it’s an experience. That first crunch of toasted pecans, followed by the soft, buttery caramel, all wrapped in a smooth blanket of chocolate… it’s the kind of treat that makes you close your eyes for a second. Yes, it’s that good.
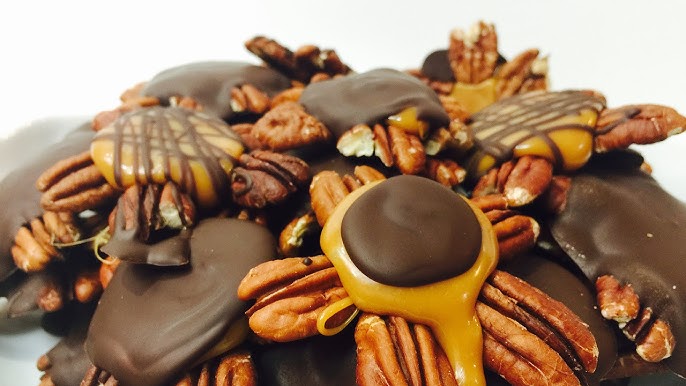
Turtle candy gets its name from its unique shape. When pecans are arranged in clusters and topped with caramel and chocolate, they resemble tiny turtles—the pecans acting as little legs and the chocolate dome forming the shell. It’s simple, clever, and undeniably charming.
Making turtle candy at home might sound intimidating, but trust me—it’s surprisingly simple. With just a few ingredients and a little patience, you can create bakery-quality candies in your own kitchen. Whether you’re preparing holiday gifts, party treats, or just satisfying a sweet craving, this step-by-step turtle candy recipe will guide you through every detail.
Ready to turn your kitchen into a mini chocolate shop? Let’s dive in.
The History and Origin of Turtle Candy
Turtle candy has a fascinating backstory that dates back to the early 20th century. The original “Turtles” were first introduced by a candy company in the United States in 1918. According to candy folklore, a traveling salesman presented a sample of chocolate, caramel, and pecan clusters to a confectioner. When someone noticed that the shape looked like a turtle, the name stuck—and history was made.
From there, turtle candy quickly became a beloved classic. Its appeal was universal: crunchy, chewy, and creamy textures combined into one irresistible bite. Unlike hard candies or simple chocolate bars, turtle candy offered layers of flavor and complexity. It felt indulgent, luxurious—even special.
Over the decades, turtle candy became a staple during holidays like Christmas, Thanksgiving, and Valentine’s Day. Candy shops featured them prominently in gift boxes, and home bakers started recreating their own versions. The recipe evolved, but the core trio—pecans, caramel, and chocolate—remained unchanged.
Today, turtle candy continues to hold a nostalgic charm. It reminds many people of childhood holidays, homemade dessert trays, and beautifully wrapped gift tins. Despite the rise of gourmet desserts and modern candy trends, turtle candy remains timeless.
Why? Because simplicity wins. Three main ingredients. Endless satisfaction. And now, you get to carry on that sweet tradition in your own kitchen.
Why You’ll Love This Homemade Turtle Candy Recipe
Let’s be honest—there’s something incredibly satisfying about making candy from scratch. It feels almost magical. And this homemade turtle candy recipe delivers both simplicity and wow-factor.
First, the flavor. You get toasted pecans that bring warmth and nuttiness. Then comes rich, buttery caramel that melts in your mouth. Finally, everything is coated in silky chocolate that ties it all together. It’s sweet, but not overwhelmingly so. Nutty, but balanced. Soft and crunchy at the same time. Every bite hits multiple flavor notes.
Second, the texture combination is unbeatable. Think of it like a symphony: the pecans provide the crunch, the caramel adds chewiness, and the chocolate creates a smooth finish. It’s contrast done right.
Third, this recipe is incredibly versatile. Hosting a holiday party? Turtle candy looks elegant on dessert platters. Need a thoughtful homemade gift? Wrap them in clear bags with ribbon, and you’ve got a professional-looking treat. Craving something sweet on a random Tuesday? They’re perfect for that too.
And here’s the best part—you don’t need to be a professional chocolatier. This step-by-step guide breaks everything down so clearly that even beginners can achieve stunning results.
Once you try homemade turtle candy, store-bought versions simply won’t compare.
Ingredients You’ll Need
Before diving into the process, let’s talk ingredients. The beauty of turtle candy lies in its simplicity. You only need a handful of high-quality ingredients to create something extraordinary.
Core Ingredients
- 2 cups pecan halves (fresh and raw)
- 1 cup soft caramels (store-bought or homemade)
- 2 tablespoons heavy cream
- 2 cups semi-sweet or milk chocolate chips
- 1 teaspoon vanilla extract (optional)
That’s it. Simple, right?
Optional Add-Ins
Want to elevate your turtle candy? Consider adding:
- A sprinkle of sea salt for a sweet-and-salty twist
- A dash of espresso powder in melted chocolate
- A drizzle of white chocolate for decorative flair
Ingredient Substitutions
- Swap pecans with cashews or almonds
- Use dark chocolate for a richer taste
- Try sugar-free caramel and chocolate for a low-carb version
The key is quality. Because this recipe uses minimal ingredients, each one plays a major role. Fresh pecans, smooth caramel, and premium chocolate make all the difference between good and unforgettable.
Kitchen Tools Required
You don’t need fancy equipment to make turtle candy, but having the right tools makes the process smooth and stress-free.
Essential Tools
- Baking sheet
- Parchment paper or silicone mat
- Microwave-safe bowls
- Saucepan (if melting caramel on stovetop)
- Spoon or cookie scoop
- Spatula
Optional Tools for Professional Results
- Candy thermometer
- Double boiler
- Offset spatula
- Cooling rack
The parchment paper is especially important—it prevents sticking and makes cleanup effortless. A double boiler helps melt chocolate gently, reducing the risk of burning.
Preparation is half the battle in candy-making. Once your tools are ready and ingredients measured, everything flows seamlessly.
Step-by-Step Guide to Making Turtle Candy
Step 1: Preparing Your Workspace
Begin by lining a baking sheet with parchment paper or a silicone mat. Set out all ingredients and tools, including pecans, caramel, and chocolate. Having everything ready ensures smooth assembly and prevents the caramel or chocolate from hardening too quickly.
Step 2: Toasting the Pecans
Place pecans in a dry skillet over medium heat or on a baking tray in the oven. Toast for 5–7 minutes, stirring occasionally, until fragrant. Toasting enhances flavor and adds a richer, nuttier taste to the candy. Let them cool slightly before handling.
Step 3: Melting the Caramel
Unwrap store-bought caramels and melt them gently in a saucepan over low heat or in the microwave in short intervals. Stir frequently until smooth. Add a splash of cream or milk if needed to achieve a pourable consistency.
Step 4: Forming the Base
Arrange small clusters of toasted pecans on the prepared baking sheet, forming a loose “turtle” shape with an open center. This creates the crunchy base and helps hold the caramel in place.
Step 5: Adding the Caramel Layer
Spoon warm caramel over the center of each pecan cluster. Be careful not to overflow. Allow the caramel to settle and cool slightly so it firms up before adding chocolate.
Step 6: Melting and Tempering Chocolate
Melt chocolate slowly using a double boiler or microwave, stirring until smooth. If tempering, let the chocolate cool slightly, then rewarm gently. This gives the turtles a glossy finish and firm snap.
Step 7: Coating the Turtles
Spoon melted chocolate over each caramel-covered cluster, ensuring the caramel is fully covered. Gently spread the chocolate if needed for even coverage.
Step 8: Setting and Cooling
Let the turtles set at room temperature or refrigerate for 20–30 minutes until firm. Once set, they’re ready to enjoy or store in an airtight container.
Pro Tips for Perfect Turtle Candy
Want your turtle candy to look and taste like it came from a high-end confectionery shop? These professional tips make all the difference.
First, toast your pecans. Skipping this step is like making coffee with cold water—it works, but you miss the depth. Toasting enhances flavor dramatically.
Second, use high-quality chocolate. Since chocolate is a major component, premium brands yield smoother texture and richer flavor.
Third, avoid overheating caramel or chocolate. Gentle heat is your friend. Think slow and steady, not rushed and reckless.
Fourth, sprinkle a tiny pinch of flaky sea salt on top. It amplifies sweetness and creates a sophisticated flavor contrast.
Finally, store them properly. Keep them in an airtight container to maintain freshness and texture.
These small adjustments elevate your turtle candy from good to unforgettable.
Common Mistakes to Avoid
Even simple recipes have pitfalls. Here’s what to watch out for:
- Overheating chocolate: This causes burning or thick texture.
- Skipping parchment paper: Leads to sticking and messy removal.
- Using stale pecans: Results in flat, bitter flavor.
- Adding caramel that’s too hot: It spreads too much and loses shape.
- Refrigerating too long: Can cause condensation and sugar bloom.
Avoiding these mistakes ensures consistent results every time.
Storage and Shelf Life
Turtle candy stores beautifully when handled correctly.
- Room Temperature: Store in an airtight container for up to 2 weeks.
- Refrigerator: Keeps for up to 3 weeks, but allow to return to room temperature before serving.
- Freezer: Freeze for up to 3 months in sealed containers.
Layer candies with parchment paper to prevent sticking.
FAQs about Turtle Candy Recipe
1. Can I use homemade caramel instead of store-bought?
Yes, homemade caramel works wonderfully for turtle candy. It often adds a richer, deeper flavor and allows you to control the sweetness and texture. Just make sure the caramel is thick but still pourable.
2. Why is my chocolate dull instead of shiny?
This usually happens when the chocolate isn’t properly tempered or when the candies are chilled too quickly. Tempering helps chocolate set with a glossy finish and firm snap, while slow cooling improves appearance.
3. Can I use other nuts besides pecans?
Absolutely. Cashews, almonds, or even walnuts make great substitutes. Choose nuts that are toasted and roughly the same size so they form a stable base for the caramel and chocolate.
4. How do I prevent caramel from hardening too much?
Adding a small amount of heavy cream or milk while melting the caramel helps keep it soft and chewy. Gentle heat and frequent stirring also prevent it from becoming overly stiff.
5. Are turtle candies gluten-free?
Most turtle candies are naturally gluten-free since they’re made with nuts, caramel, and chocolate. However, always check ingredient labels to ensure there are no hidden gluten-containing additives.
Conclusion
Making turtle candy at home isn’t just about satisfying a sweet craving—it’s about creating something memorable. With just pecans, caramel, and chocolate, you transform simple ingredients into elegant, irresistible treats. The textures contrast beautifully. The flavors complement perfectly. And the process? Surprisingly simple.
Whether you’re gifting them, serving at a party, or sneaking one with your evening coffee, homemade turtle candy delivers every time.
Once you master this step-by-step turtle candy recipe, you’ll wonder why you ever bought them from a store.


