Thin-Crust Pizza Dough Recipe: There’s something undeniably satisfying about biting into a slice of thin-crust pizza. That delicate crunch. That light, airy interior. That perfect balance between crispness and chewiness. Unlike thick, doughy bases that can feel heavy after just one slice, thin-crust pizza lets the toppings shine while giving you that irresistible crackle with every bite. It’s the kind of pizza you keep reaching for, even when you tell yourself you’re done.
In this professional step-by-step guide, you’ll learn exactly how to make thin-crust pizza dough from scratch. No guesswork. No vague instructions. Just clear, practical steps that help you achieve restaurant-quality results at home. Whether you’re baking in a standard oven or using a pizza stone, this guide will walk you through everything you need to know.
Let’s start with the foundation—the ingredients.
Ingredients You’ll Need
Great pizza begins with great ingredients. Thin-crust dough is minimalistic by design, which means every ingredient plays a crucial role. There’s no hiding behind excess toppings or thick layers of cheese. The dough itself must deliver flavor and texture.
Here’s what you’ll need:
Core Ingredients
- 2 ¼ cups (280g) all-purpose flour or bread flour
- 1 teaspoon active dry yeast
- ¾ cup (180ml) warm water (about 110°F / 43°C)
- 1 teaspoon sugar
- 1 teaspoon salt
- 1 tablespoon olive oil
That’s it. Simple, right? But let’s break down why each one matters.
Flour forms the structure. Bread flour contains more protein, which means more gluten development and a chewier texture. If you want extra crispiness with a slight chew, go with bread flour. All-purpose flour works beautifully too, giving you a lighter bite.
Yeast is the engine. It creates air pockets, adds flavor, and ensures your crust isn’t dense. Sugar feeds the yeast and helps with browning during baking. Salt strengthens gluten and enhances flavor—never skip it. Olive oil adds tenderness and subtle richness while helping achieve that golden finish.
Optional Ingredients for Extra Flavor
- ½ teaspoon garlic powder
- ½ teaspoon dried oregano
- A pinch of red pepper flakes
These additions aren’t mandatory, but they can elevate your dough from basic to bakery-level delicious.
Ingredient Measurement Table
| Ingredient | Measurement | Purpose |
|---|---|---|
| Flour | 2 ¼ cups | Structure & gluten development |
| Yeast | 1 tsp | Fermentation & rise |
| Warm Water | ¾ cup | Activates yeast |
| Sugar | 1 tsp | Feeds yeast & browning |
| Salt | 1 tsp | Flavor & gluten strength |
| Olive Oil | 1 tbsp | Texture & crispiness |
Now that you understand what goes into thin-crust pizza dough, let’s talk about the tools that make the process smoother.
Essential Tools for Perfect Thin-Crust Pizza
You don’t need a commercial kitchen to make professional-quality pizza. But having the right tools? That changes everything.
Basic Kitchen Tools
At minimum, you’ll need:
- A large mixing bowl
- Measuring cups and spoons
- A wooden spoon or dough whisk
- A clean work surface
- A rolling pin (optional)
- Baking sheet
That’s enough to get started. But if you want to take your thin crust to the next level, consider upgrading your setup.
Professional Tools for Better Results
A pizza stone or pizza steel is a game-changer. These tools absorb and retain heat, mimicking the intense base heat of a brick oven. When your dough hits that hot surface, it puffs slightly, crisps instantly, and develops beautiful golden spots.
A bench scraper helps divide dough cleanly. A kitchen scale ensures precise measurements. An oven thermometer verifies that your oven actually reaches the temperature you set—because many don’t.
Think of tools as supporting actors. They’re not the star of the show, but without them, the performance suffers.
Now that your ingredients and tools are ready, it’s time to get your hands in the dough.
Step-by-Step Guide to Making Thin-Crust Pizza Dough
Step 1: Activating the Yeast
In a small bowl, combine warm water (not hot), yeast, and a pinch of sugar. Stir gently and let it sit for 5–10 minutes until foamy. This shows the yeast is active and ready to work.
Step 2: Mixing the Dough
In a large bowl, add flour and salt. Pour in the activated yeast mixture and olive oil. Mix with a spoon or your hands until a rough dough forms. The dough should be slightly firm, not sticky.
Step 3: Kneading the Dough Properly
Transfer the dough to a lightly floured surface. Knead for about 6–8 minutes until smooth and elastic. Proper kneading develops gluten, which gives thin-crust pizza its structure and chew.
Step 4: First Rise (Proofing)
Place the dough in a lightly oiled bowl and cover it. Let it rise in a warm place for 45–60 minutes, or until doubled in size. This step builds flavor and improves texture.
Step 5: Dividing and Resting the Dough
Punch down the dough and divide it into portions. Shape into balls, cover, and let them rest for 10–15 minutes. Resting relaxes the gluten, making stretching easier.
Step 6: Rolling or Stretching the Dough Thin
On a floured surface, roll or stretch each dough ball into a thin circle. Work from the center outward for even thickness.
Step 7: Pre-Baking Tips for Extra Crispiness
Preheat your oven and baking surface well. Lightly dock the dough with a fork and pre-bake for 3–5 minutes before adding toppings for a crisp, golden crust.
Secrets to Achieving Ultra-Crispy Thin Crust
Let’s be honest—anyone can make pizza dough. But achieving that ultra-crispy, restaurant-quality thin crust? That’s where the real craft begins. The difference between “good” and “unforgettable” usually comes down to a few technical details that many home cooks overlook.
First, hydration matters more than most people realize. Hydration refers to the ratio of water to flour in your dough. Thin-crust pizza typically works best at moderate hydration—around 60–65%. Too much water and the dough becomes sticky and difficult to handle. Too little, and you end up with a dense, cracker-like crust instead of a light crisp bite. Balance is everything.
Second, high heat is non-negotiable. Thin crust thrives in intense heat because it cooks quickly, locking in structure before moisture can soften it. Professional pizza ovens reach 700°F or more, but at home, crank your oven to its maximum—usually 500°F. Preheat for at least 30–45 minutes. This isn’t optional; it’s essential.
Third, don’t overload toppings. Thin crust is delicate. Too much sauce or cheese traps moisture and creates sogginess. Think minimal, not mountain-sized. Each ingredient should complement—not overwhelm—the crust.
Finally, consider docking the dough. Gently poke small holes with a fork before baking to prevent large air bubbles. This keeps your crust flat and evenly crisp.
When all these small elements align, the result is magic: a crust that shatters lightly at the edges yet maintains a slight chew in the center. It’s that contrast that keeps you coming back for another slice.
Common Mistakes to Avoid
Even with the best recipe, small missteps can sabotage your thin-crust pizza. The good news? Most mistakes are easy to fix once you know what to watch for.
One of the most common issues is overworking the dough. While kneading is crucial for gluten development, too much handling—especially after proofing—can make the dough tough. Once it’s risen and rested, treat it gently. You’re shaping, not wrestling.
Another mistake is adding too much flour during rolling. It’s tempting, especially if the dough feels sticky. But excess flour dries out the crust and prevents proper browning. Use just enough to prevent sticking—no more.
Temperature errors also ruin texture. Baking at low heat results in pale, limp crust. Thin dough needs high heat to crisp quickly. Always preheat fully before baking.
Then there’s the topping overload problem. Thin crust isn’t built to support heavy layers of sauce, cheese, and meats. Too much weight creates steam and sogginess. Instead, spread sauce thinly and use cheese sparingly.
Lastly, skipping rest times can backfire. If the dough resists stretching, it’s not being stubborn—it just needs time. Let it rest 10–15 minutes, and it will relax naturally.
Avoid these pitfalls, and your thin-crust pizza will consistently turn out crisp, balanced, and flavorful.
Thin-Crust Pizza Variations
Thin crust isn’t one-size-fits-all. Different regions and preferences create subtle variations in texture and flavor. Understanding these styles allows you to tailor your dough to your taste.
Classic Italian Style
Italian thin crust, especially Neapolitan-inspired versions, focuses on simplicity. The dough uses minimal ingredients—often just flour, water, yeast, and salt. It’s stretched thin in the center with a slightly puffed edge. The texture is tender yet crisp at the bottom, with light char from high heat baking.
This style relies on balance. A thin layer of tomato sauce, fresh mozzarella, basil, and olive oil. Nothing excessive. The crust remains the star.
New York-Style Thin Crust
New York-style thin crust is slightly sturdier. It’s thin but flexible enough to fold in half. This version often includes a touch of olive oil and sugar in the dough for flavor and browning.
The crust is crisp on the outside but retains a mild chew. It’s ideal for those who love a slice they can grab and go.
Whole Wheat Thin Crust Option
For a nuttier flavor and added fiber, substitute up to 50% of the flour with whole wheat flour. Because whole wheat absorbs more water, you may need to slightly increase hydration.
The result? A deeper flavor profile and slightly firmer texture, while still maintaining crispness.
Gluten-Free Alternative
Gluten-free thin crust requires specialized flour blends containing xanthan gum or similar binders. The technique differs slightly, often involving more hydration and careful handling.
While the texture won’t perfectly replicate traditional dough, you can still achieve a crisp and satisfying base with proper baking techniques.
These variations show how adaptable thin crust can be. Small tweaks create entirely new experiences.
Best Toppings for Thin-Crust Pizza
When it comes to thin crust, less truly is more. The goal is harmony—not heaviness. Since the base is delicate, toppings should enhance, not overpower.
Start with sauce. Spread it thinly, leaving a small border around the edge. Too much sauce introduces excess moisture. A thin, even layer ensures balanced flavor.
Cheese should be applied lightly. Shredded mozzarella works best because it melts evenly. Fresh mozzarella is delicious but contains more moisture, so use it sparingly and pat it dry beforehand.
Here are topping combinations that shine on thin crust:
- Margherita: tomato sauce, fresh mozzarella, basil
- Prosciutto & arugula: light cheese base, baked prosciutto, fresh arugula after baking
- Mushroom & thyme: sautéed mushrooms, garlic, mozzarella
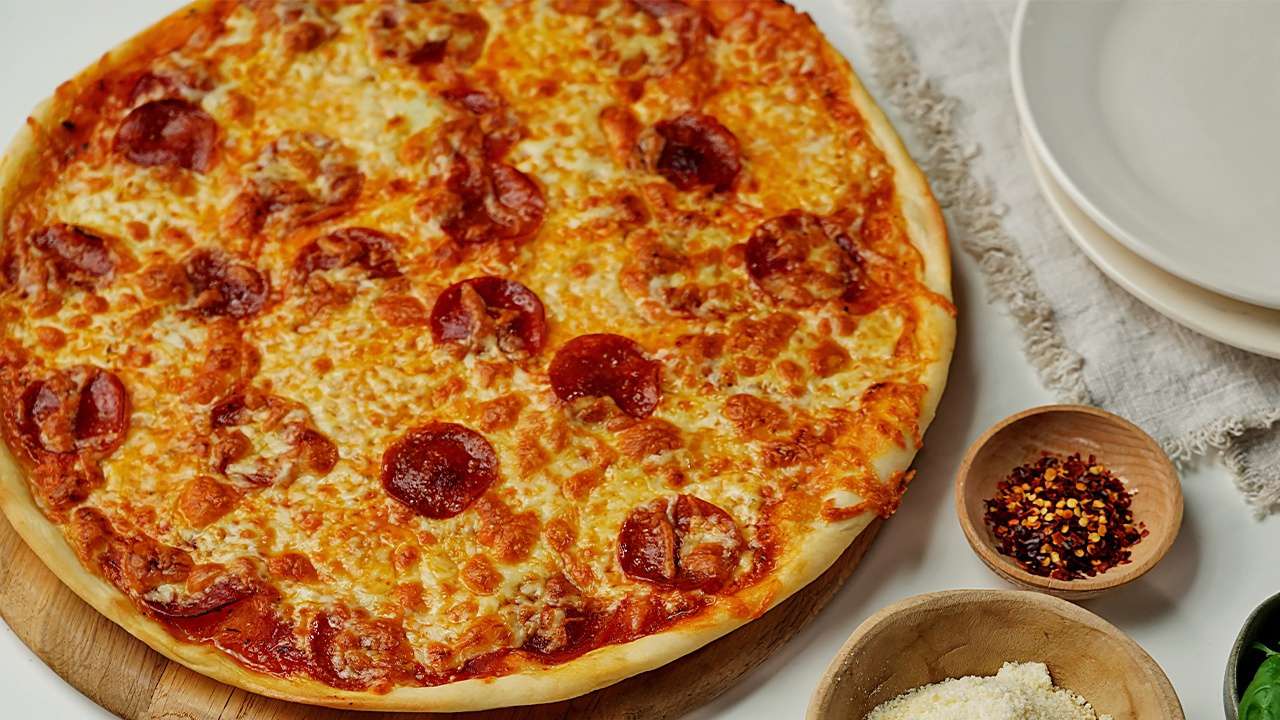
- Pepperoni classic: thin slices, spaced evenly
Vegetables should be pre-cooked if they release water—like mushrooms, spinach, or zucchini. This prevents sogginess.
Think of your thin-crust pizza like a canvas. Each topping is a brushstroke. Too many strokes blur the picture. Keep it intentional, and every bite will feel balanced and refined.
Storage and Make-Ahead Tips
Life gets busy. Thankfully, thin-crust pizza dough stores beautifully if handled correctly.
Refrigerating the Dough
After kneading, place the dough in a lightly oiled container and refrigerate for up to 72 hours. Cold fermentation enhances flavor and improves texture. When ready to use, remove the dough and let it sit at room temperature for 30–45 minutes before shaping.
This slow rise deepens complexity, giving your crust subtle tang and better browning.
Freezing for Later Use
To freeze, lightly coat the dough ball in oil and place it in a sealed freezer bag. It can be stored for up to 3 months.
When ready to use, thaw overnight in the refrigerator, then bring to room temperature before stretching.
These storage methods allow you to prepare dough in advance, making homemade pizza quick and convenient anytime.
FAQs about Thin-Crust Pizza Dough Recipe
1. Can I make thin-crust pizza dough without yeast?
Yes, but the texture will differ. Yeast creates lightness and flavor. Without it, the crust may turn out denser and more cracker-like.
2. What’s the best flour for thin-crust pizza?
Bread flour provides more chew due to higher protein content, while all-purpose flour creates a lighter texture. Both work well.
3. How do I prevent my thin crust from becoming soggy?
Use minimal sauce, preheat your oven thoroughly, and avoid excessive toppings. Pre-baking the crust can also help.
4. Can I prepare the dough ahead of time?
Absolutely. Refrigerating the dough for up to 72 hours improves flavor and texture.
5. Why does my dough shrink back when rolling?
The gluten is too tight. Let the dough rest for 10–15 minutes to relax before stretching again.
Conclusion
Thin-crust pizza dough may seem simple on the surface, but true mastery lies in the details. From proper yeast activation to careful kneading, balanced hydration, high-heat baking, and mindful topping choices—each step plays a critical role.
When done correctly, the result is a crust that’s crisp yet tender, light yet sturdy. It supports toppings without collapsing. It browns beautifully. It delivers that satisfying crunch with every bite.
The beauty of thin crust is its elegance. It doesn’t rely on thickness or excess. It relies on technique, balance, and patience.
Follow this step-by-step professional guide, and you won’t just make pizza—you’ll craft an experience. One slice at a time.


