Rolled Sugar Cookies Recipe: There’s something timeless about rolled sugar cookies. They’re crisp around the edges, soft in the center, and incredibly fun to decorate. Whether you’re baking a batch for a holiday gathering, whipping them up with the kids on a weekend, or just treating yourself with something sweet, these cookies never go out of style.
Rolled sugar cookies are beloved for their perfect texture and shape-holding ability. That means you can use all your favorite cookie cutters—stars, hearts, snowflakes, pumpkins—you name it. Plus, they’re the ideal canvas for icing, sprinkles, and edible glitter. The best part? They’re easier to make than you might think.
Follow this detailed step-by-step guide to create bakery-quality cookies in your own kitchen.
Ingredients You’ll Need
Here’s everything you’ll need for a basic batch of rolled sugar cookies:
- 1 cup (2 sticks) unsalted butter, softened
- 1 cup granulated sugar
- 1 large egg
- 1 ½ teaspoons vanilla extract
- 2 ¾ cups all-purpose flour
- ½ teaspoon baking powder
- ¼ teaspoon salt
Optional flavor variations:
- Swap vanilla for almond extract for a nutty twist.
- Add a dash of lemon zest or orange zest for citrus brightness.
- For a fall flavor, try ½ teaspoon ground cinnamon or nutmeg.
Tools and equipment:
- Mixing bowls
- Hand mixer or stand mixer
- Rolling pin
- Parchment paper
- Cookie cutters
- Baking sheets
- Cooling rack
- Silicone baking mat (optional but helpful)
Having these tools ready ahead of time will make the process smoother and more enjoyable.
Before You Begin
Before diving into the dough, make sure your kitchen is prepped for success. Baking is a science, and small missteps can make a big difference.
1. Measure precisely: Use the spoon-and-level method for dry ingredients like flour. Don’t pack it down.
2. Room temperature butter: This helps the dough come together smoothly and ensures even mixing.
3. Clean surface: You’ll be rolling dough, so make sure your countertop or rolling board is clean and dry.
4. Chill your tools: If your kitchen is warm, stick your rolling pin or cookie cutters in the fridge for 10 minutes before rolling to avoid stickiness.
Step-by-Step Guide to Making Rolled Sugar Cookies
Step 1: Cream the Butter and Sugar
Start by beating the softened butter and sugar together in a large bowl using a hand or stand mixer. Mix on medium speed for 2–3 minutes, until the mixture is light, pale, and fluffy. This step is key—it adds air to the dough and ensures your cookies have that melt-in-your-mouth texture.
Step 2: Add the Eggs and Vanilla
Crack in your egg and pour in the vanilla extract. Continue mixing until everything is fully incorporated. Scrape down the sides of the bowl as needed to make sure all the ingredients are blended evenly.
Step 3: Combine Dry Ingredients Separately
In a separate bowl, whisk together the flour, baking powder, and salt. This prevents clumping and ensures that the leavening agents are evenly distributed.
Step 4: Mix Dry and Wet Ingredients Together
Slowly add the dry ingredients into the wet mixture, one-third at a time. Mix on low speed to avoid overworking the dough. It should come together into a soft, not-too-sticky ball.
Step 5: Divide and Chill the Dough
Once your dough has come together, divide it into two equal parts. Flatten each half into a disk (this makes rolling easier later on), then wrap them tightly in plastic wrap. Chill the dough in the refrigerator for at least 1 hour. This step is essential—it firms up the butter, which helps the cookies hold their shape when baked.
If you’re in a hurry, you can place the wrapped dough in the freezer for about 20–30 minutes. However, avoid skipping chilling altogether. Warm dough is sticky, difficult to roll, and results in cookies that spread too much in the oven.
Step 6: Roll Out the Dough
After chilling, remove one disk of dough and let it rest at room temperature for about 5 minutes so it’s easier to work with. Lightly flour your surface and rolling pin, and start rolling the dough evenly to about ¼ inch thick. You don’t want it too thin—thinner dough bakes too crisp and loses that soft center.
Use a silicone baking mat or parchment paper under the dough to prevent sticking. If it begins to stick to your rolling pin, dust lightly with more flour or use a second sheet of parchment paper on top of the dough.
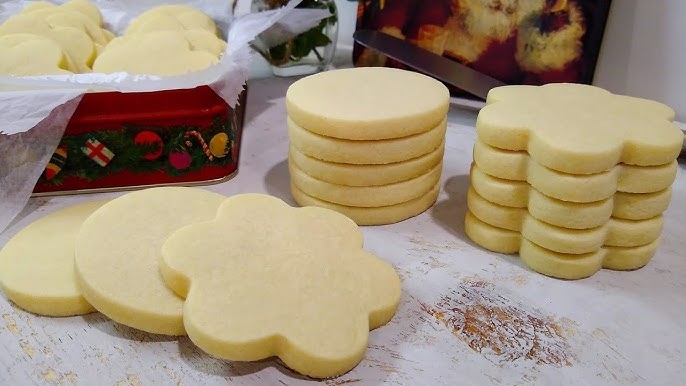
Step 7: Cut Out Your Shapes
Now for the fun part! Use cookie cutters to cut your dough into desired shapes. Try to place the cutters as close together as possible to minimize dough scraps. Dip your cutters in flour if they start to stick.
Once cut, use a small spatula to gently lift and transfer cookies to a parchment-lined baking sheet. Try to keep shapes uniform in size so they bake evenly.
Save and reroll any leftover dough scraps—just be gentle and don’t overwork them, or your cookies may turn out tough.
Step 8: Transfer to Baking Sheet
Place the cut-out cookies on a baking sheet lined with parchment paper or a silicone mat. Leave at least 1 inch of space between each cookie—they won’t spread too much, but a little room ensures they bake evenly.
For ultra-clean shapes, pop the whole tray into the fridge for another 10–15 minutes before baking. This extra chill helps the cookies keep their shape perfectly in the oven.
Step 9: Bake to Perfection
Preheat your oven to 350°F (175°C). Bake cookies for 8–10 minutes, depending on size and thickness. Look for slightly golden edges and a pale center—don’t overbake! The cookies will continue to firm up as they cool on the tray.
Smaller or thinner cookies may need only 6–7 minutes, while larger ones might take closer to 11. Keep an eye on your first batch to learn what timing works best with your oven.
Step 10: Cool Completely
After baking, let the cookies rest on the baking sheet for 5 minutes, then transfer them to a wire rack to cool completely. This step ensures they firm up without becoming overly crisp.
Only decorate cookies once they are 100% cooled—warm cookies will melt icing and ruin your hard decorating work.
Tips for the Perfect Rolled Sugar Cookies
Baking sugar cookies might seem straightforward, but a few smart tips can take your cookies from good to amazing.
Use quality butter: Since butter is a star ingredient, its flavor and quality matter. Go for real, unsalted butter.
Avoid overmixing: After adding the flour, mix just until combined. Overworking the dough leads to tough cookies.
Watch the thickness: Stick to about ¼ inch thickness for a nice balance between crispy edges and a soft center.
Keep the dough cold: Warm dough is your enemy. Always chill before rolling and after cutting shapes if needed.
Flour smartly: Use flour sparingly when rolling—too much will dry out your dough. You can also use powdered sugar to avoid a floury taste.
Reroll scraps gently: Dough gets tougher with every reroll. Be gentle and avoid working scraps more than twice.
Decorating Rolled Sugar Cookies
Here’s where your creativity can shine! Whether you’re making cookies for a birthday party or the holidays, decorating is where it all comes together.
Icing Options:
- Royal Icing – Great for precise lines and detailed designs. It hardens completely, making it ideal for stacking and gifting.
- Glaze Icing – Easier to work with and dries with a shiny finish. Best for quick decorating.
- Buttercream – Softer and richer, perfect for adding a creamy swirl or festive colors.
Fun Decorating Ideas:
- Use food coloring to tint icing for seasonal themes.
- Add sprinkles, colored sugar, or edible glitter before the icing dries.
- Draw faces, patterns, or names using food-safe pens on hardened royal icing.
Storage Tips for Decorated Cookies
Once decorated and fully dried, your cookies can last up to a week at room temperature if stored properly. Place them in an airtight container with layers of parchment paper in between to prevent sticking. For maximum freshness, keep the container in a cool, dry place—avoid direct sunlight and humidity.
Want to store them even longer? You can freeze decorated cookies, too! Freeze in a single layer on a baking sheet first, then transfer to a freezer-safe container using parchment paper to separate layers. Thaw at room temperature before serving.
Common Mistakes to Avoid
Even experienced bakers run into issues when making sugar cookies. Here’s how to sidestep the most common pitfalls:
Overbaking the Cookies
It’s easy to wait for the cookies to look done—but don’t. Sugar cookies should still be pale in the center when you take them out. If they’re brown all over, they’ll be dry and crumbly.
Skipping the Chill Time
If you roll out warm dough, it sticks, warps, and spreads too much in the oven. Always chill your dough before rolling and baking for sharp, clean edges.
Overflouring the Dough
Using too much flour while rolling out the dough makes cookies dry and bland. Light dusting is enough—try rolling between parchment sheets for better control.
Using Uneven Thickness
Uneven dough leads to uneven baking. Some cookies may burn while others stay undercooked. Use rolling pin guides or a silicone rolling mat to help keep things even.
Improper Storage
Leaving cookies out in the open air will dry them out fast. Keep them covered and cool, and always allow icing to fully dry before stacking or packaging.
Make-Ahead and Freezing Instructions
Want to prep these cookies ahead of a holiday or event? No problem—rolled sugar cookie dough freezes beautifully.
Freezing the Dough
- After mixing, divide the dough into disks, wrap tightly in plastic wrap, and place in a freezer-safe bag.
- Freeze for up to 3 months.
- When ready to use, thaw in the fridge overnight, then roll out and bake as usual.
Freezing Baked Cookies
- Bake cookies fully and let them cool completely.
- Place them in a single layer on a tray and freeze for 1 hour.
- Transfer to a freezer-safe container with parchment between layers.
- Cookies can be frozen for up to 2 months.
Decorate them after thawing, or freeze decorated ones using royal icing that hardens completely.
FAQs about Rolled Sugar Cookies Recipe
1. Can I make this dough ahead of time?
Absolutely! The dough can be made and refrigerated up to 3 days in advance or frozen for up to 3 months. Just thaw in the fridge before rolling.
2. What’s the best way to store rolled sugar cookies?
Keep them in an airtight container at room temperature. Use parchment paper between layers to prevent sticking. They’ll stay fresh for up to 7 days.
3. Can I double this recipe?
Yes! This recipe doubles beautifully. Just make sure your mixer can handle the volume, or mix in batches to avoid overloading.
4. Why is my dough cracking while rolling?
Cracks usually happen if the dough is too cold or dry. Let it rest at room temp for 5–10 minutes, then knead gently before rolling.
5. How long do these cookies stay fresh?
Undecorated sugar cookies can last 1–2 weeks if stored properly. Decorated cookies (with dried icing) last about 1 week at room temperature or longer if frozen.
Conclusion
Rolled sugar cookies are more than just a dessert—they’re a tradition, a creative outlet, and a go-to treat for every occasion. With the right ingredients, a chilled dough, and a bit of practice, you can bake cookies that not only look stunning but also taste absolutely delicious.
This step-by-step guide was designed to walk you through every stage with ease, whether you’re baking for the first time or just perfecting your go-to recipe. Take your time, enjoy the process, and don’t be afraid to experiment with flavors, shapes, and decorations.
There’s nothing quite like a perfectly baked sugar cookie that’s been rolled, cut, and decorated with love. And once you master this classic recipe, you’ll always have a sweet weapon in your baking arsenal.


