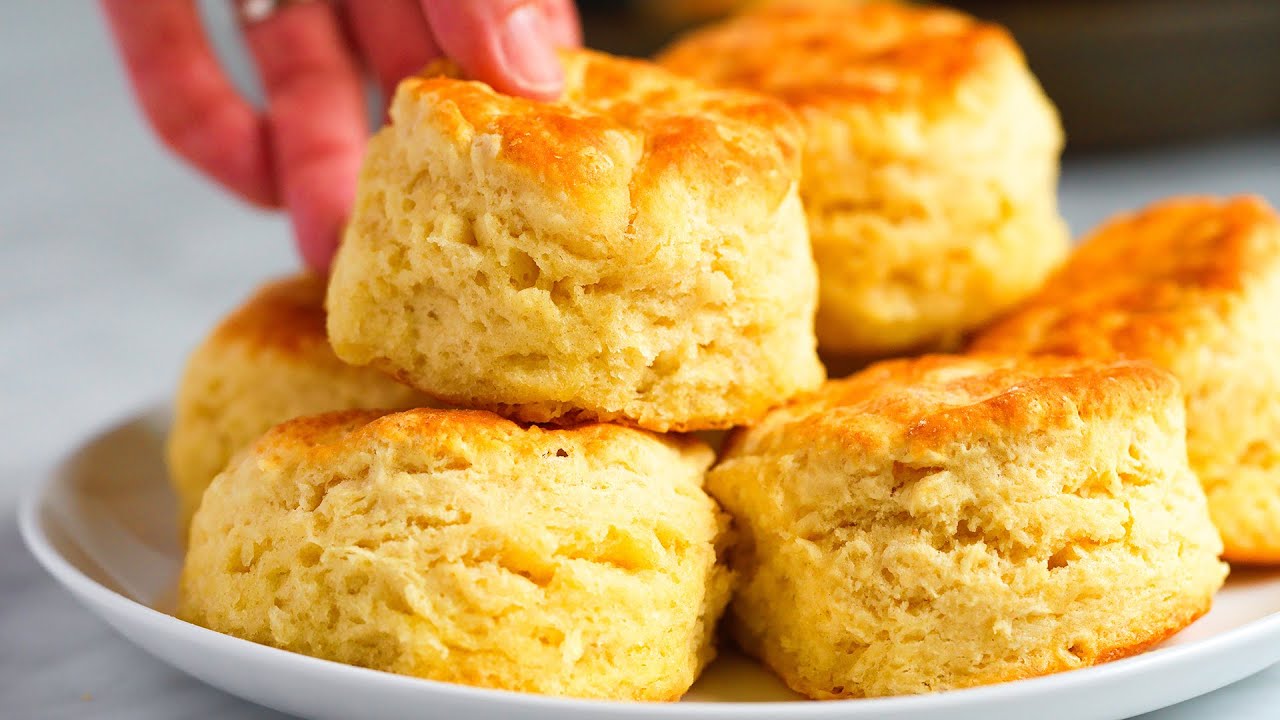
Southern Biscuits Recipe: There’s nothing quite like the comfort of freshly baked Southern biscuits. They’re buttery, fluffy, and golden with a soft, flaky texture that crumbles just right when you break one open. Whether you’re pairing them with gravy, slathering on some jam, or enjoying them plain with a pat of butter, Southern biscuits are a timeless staple in American kitchens. If you’ve ever wondered how to make the perfect batch of homemade biscuits just like grandma used to bake, you’re in the right place.
Let’s break it all down, from the must-have ingredients to the tools and techniques that make a difference. We’ll also go deep into a step-by-step guide so even first-time bakers can confidently whip up a tray of golden biscuits in under an hour.
What Makes Southern Biscuits Special?
Southern biscuits aren’t just any baked good — they’re a cultural classic. Originating from humble roots, these biscuits became a cornerstone of Southern cuisine because they were inexpensive, fast to make, and versatile enough for any meal. What really sets them apart is their pillowy-soft texture inside and crispy, buttery crust outside.
There are a few key traits that define authentic Southern biscuits:
- Buttermilk: This adds tanginess and tenderness.
- Cold Butter or Lard: Ensures flaky layers.
- Soft Wheat Flour: Lower protein content creates a delicate crumb.
- Minimal Handling: Keeps the dough from becoming tough.
Southern biscuits are not to be confused with cookies (called biscuits in the UK). They’re more like a savory quick bread, and when done right, they literally melt in your mouth.
List of Ingredients You’ll Need
Before diving into the baking process, let’s make sure you’ve got everything lined up. These are the classic ingredients for Southern-style biscuits, along with a few optional add-ins to elevate flavor.
Dry Ingredients
- 2 cups all-purpose flour (or Southern-style soft wheat flour)
- 1 tablespoon baking powder
- ½ teaspoon baking soda
- 1 teaspoon salt
- 1 tablespoon sugar (optional, depending on whether you prefer slightly sweet biscuits)
Wet Ingredients
- ½ cup (1 stick) unsalted butter (frozen or very cold)
- ¾ cup to 1 cup buttermilk (chilled)
Optional Add-ins
- 1 cup shredded cheddar cheese (for cheesy biscuits)
- 2 tablespoons chopped chives or herbs
- 1–2 tablespoons honey (for a sweet twist)
These ingredients form the base. Make sure everything is as cold as possible—especially the butter and buttermilk. It’s the cold fat that creates steam pockets, which in turn gives your biscuits those irresistible flaky layers.
Tools You’ll Need
Having the right tools can make your biscuit-making process a lot smoother. Here’s what you’ll want to gather:
- Large mixing bowl
- Box grater or pastry cutter
- Measuring cups and spoons
- Rolling pin (or just your hands)
- Biscuit cutter or a round glass
- Baking sheet
- Parchment paper or silicone baking mat
- Pastry brush (for brushing the tops with butter)
Optional but helpful:
- Food processor (if you prefer to cut in butter quickly)
- Bench scraper (great for folding and lifting dough)
Choosing the Right Flour for Biscuits
Flour isn’t just flour when it comes to biscuits. The type you use can make or break your batch. The best flour for tender Southern biscuits is one made from soft wheat. Why? Because soft wheat has less protein, meaning less gluten development—and that means a more tender, delicate biscuit.
If you’re not in the South and can’t find soft wheat flour like White Lily, don’t worry. You can still make incredible biscuits with all-purpose flour, especially if you avoid overmixing.
Pro tip: Try mixing cake flour (which is very soft) with all-purpose in a 1:1 ratio for a DIY soft wheat blend.
The Secret Behind Cold Butter
Cold butter isn’t optional—it’s the secret sauce. When you mix cold chunks of butter into the flour, they stay solid in the dough. Once the biscuits hit the hot oven, those bits of butter melt, creating steam. That steam makes your biscuits rise and gives them flaky, tender layers.
Grating frozen butter with a box grater is one of the easiest ways to distribute it evenly through the flour. Alternatively, you can cut it into cubes and use a pastry cutter. Just don’t overwork it—if the butter starts melting, pop the bowl in the fridge for 5–10 minutes before continuing.
Step-by-Step Guide to Making Southern Biscuits
Let’s get to the heart of it: how to actually make Southern biscuits from scratch. Here’s your detailed step-by-step guide.
Step 1: Preheat Your Oven
Start by preheating your oven to 450°F (232°C). A hot oven is critical to getting that perfect rise and golden top.
Step 2: Prepare Your Dry Ingredients
In a large bowl, whisk together:
- 2 cups flour
- 1 tablespoon baking powder
- ½ teaspoon baking soda
- 1 teaspoon salt
- 1 tablespoon sugar (optional)
Mix until well combined.
Step 3: Cut in the Butter
Grate ½ cup frozen butter directly into the flour mixture. Gently toss with a fork to coat the butter in flour. Alternatively, use a pastry cutter to cut in small cubes of butter until the mixture looks like coarse crumbs.
Don’t let the butter melt! Work fast, and use cold hands or utensils.
Step 4: Add the Buttermilk
Pour in ¾ cup of cold buttermilk. Gently stir with a spoon until the dough begins to come together. If it’s too dry, add a splash more buttermilk—just don’t overdo it.
The dough should be slightly sticky but not wet.
Step 5: Mix the Dough Gently
Turn the dough onto a floured surface. Pat it out with your hands into a 1-inch thick rectangle. Fold it over itself 3–4 times—this is how you build those layers.
Avoid kneading. You’re just gently pressing and folding.
Step 6: Roll Out the Dough
Use your hands or a rolling pin to roll the dough into a ¾–1 inch thick slab. Again, work quickly to keep everything cold.
Step 7: Cut the Biscuits
Dip your biscuit cutter or glass into flour, then press straight down—don’t twist! Twisting seals the edges and keeps the biscuits from rising fully.
Place each cut biscuit onto a lined baking sheet.
Step 8: Arrange on the Baking Sheet
For softer sides, place the biscuits close together. For crispier edges, space them apart.
Optional: Brush the tops with a bit of melted butter or buttermilk for a golden finish.
Step 9: Bake to Golden Perfection
Bake in your preheated oven for 12–15 minutes, or until the tops are golden brown. Keep a close eye—every oven is a little different.
Step 10: Serve and Enjoy
Remove from the oven and brush with more melted butter. Serve immediately with your favorite toppings—honey, jam, gravy, or even just plain butter.
Common Mistakes to Avoid
Even though biscuits are simple, a few common errors can keep them from reaching that perfect fluffy and flaky status. Let’s clear those up so you don’t end up with hockey pucks instead of heavenly biscuits.
- Overmixing the dough: This toughens the gluten and leads to dense biscuits. Stir gently and stop once the dough just comes together.
- Using warm butter or buttermilk: Always keep your fats cold to create steam and achieve flakiness. If needed, chill the dough before baking.
- Twisting the biscuit cutter: Twisting seals the biscuit edges and prevents a good rise. Always press straight down and lift.
- Not preheating the oven fully: A hot oven creates an immediate burst of steam that lifts the biscuits. Under-heating will lead to flat biscuits.
- Skipping the folding process: Those simple folds in the dough create layers. Don’t skip them if you want those signature flaky pulls.
Mistakes happen, but being mindful of these tips makes a big difference in your biscuit game.
How to Store and Reheat Biscuits
Freshly baked biscuits are best eaten the same day, but if you have leftovers (lucky you!), here’s how to store them right:
Storage:
- Allow them to cool completely.
- Place in an airtight container or zip-top bag.
- Store at room temperature for up to 2 days, or refrigerate for up to 1 week.
Reheating:
- Preheat oven to 350°F (175°C).
- Wrap biscuits in foil and heat for 8–10 minutes.
- For microwave: Wrap in a damp paper towel and heat in 10-second bursts. (But oven is better to bring back crispness.)
To keep biscuits from drying out, avoid storing them in the fridge uncovered. You want to trap that moisture, not lose it.
How to Freeze Biscuits for Later
Want to have biscuits ready to bake at a moment’s notice? Freezing is your friend—either before or after baking.
Freezing Unbaked Biscuits:
- Prepare the dough and cut out your biscuits.
- Place them on a baking sheet and freeze until solid (about 1 hour).
- Transfer to a freezer bag or container.
- To bake: No need to thaw! Just add 2–3 minutes to the baking time.
Freezing Baked Biscuits:
- Let them cool completely.
- Wrap individually in plastic wrap or foil.
- Store in an airtight bag in the freezer for up to 2 months.
- Reheat from frozen in the oven at 350°F (175°C) for about 15 minutes.
This is a game changer for busy mornings or unexpected guests.
Serving Suggestions
Biscuits are like a blank canvas—there are endless ways to enjoy them. Here are some classic and creative ideas:
Breakfast Favorites:
- With sausage gravy (classic Southern combo)
- Egg, cheese, and bacon biscuit sandwiches
- Slathered with honey or fruit preserves
Lunch or Dinner Sides:
- Served alongside fried chicken or BBQ ribs
- Topped with shredded turkey and gravy
- With soups like creamy chicken, gumbo, or chili
Sweet Treats:
- Strawberries and whipped cream for a shortcake spin
- Drizzled with melted butter and a sprinkle of cinnamon sugar
- Split and filled with Nutella or peanut butter and bananas
Sweet vs Savory Southern Biscuits
While classic Southern biscuits lean savory, you can easily switch things up depending on your mood or the meal.
Sweet Biscuits:
- Add a little extra sugar (1–2 tablespoons)
- Mix in vanilla extract, cinnamon, or citrus zest
- Perfect for desserts and brunches
Savory Biscuits:
- Add grated cheese, herbs, or garlic powder
- Great for dinners or hearty breakfasts
- Use as a base for pot pies or biscuit-topped casseroles
Both versions are incredibly versatile—and there’s really no wrong way to enjoy a biscuit!
Healthier Substitutes (if needed)
Watching your diet but still craving biscuits? Here are a few simple swaps:
- Whole wheat flour: Replace up to half of the all-purpose flour for added fiber.
- Greek yogurt: Sub for some of the butter or buttermilk to cut fat and boost protein.
- Plant-based butter or milk: Use dairy-free versions for a vegan-friendly biscuit.
- Low-fat buttermilk: Still gives great flavor with fewer calories.
Note: These substitutes may slightly alter the flavor and texture, but you can still get a delicious result. Just don’t sacrifice cold fats or overwork the dough.
FAQs about Southern Biscuits Recipe
1. Why are my biscuits flat?
Usually, flat biscuits mean the butter was too warm, or the dough was overmixed. Always use cold ingredients and mix gently.
2. Can I make biscuit dough ahead of time?
Yes! Make the dough, cut your biscuits, and freeze them on a tray. Store in a freezer bag and bake from frozen as needed.
3. What’s the difference between baking soda and baking powder in biscuits?
Baking powder provides lift, while baking soda reacts with buttermilk to create additional rise and tenderness. Both work together to make fluffy biscuits.
4. Can I make biscuits without buttermilk?
You can! Substitute with milk + 1 tablespoon of lemon juice or vinegar. Let it sit for 5 minutes before using.
5. Should I grease the baking sheet?
Use parchment paper or a silicone mat. No greasing needed. Grease can sometimes make the bottoms too crispy or oily.
Conclusion
Making Southern biscuits from scratch is one of those life skills that’s both practical and soul-satisfying. Whether you’re serving them with gravy, turning them into breakfast sandwiches, or simply enjoying them warm with butter, the joy they bring is undeniable. With this step-by-step guide, you now have everything you need to create a batch of flaky, golden, buttery perfection.
So roll up your sleeves, preheat that oven, and get ready to wow your taste buds—and maybe even your family—with the real taste of Southern comfort.
Please don’t forget to leave a review.


