Royal Icing Recipe: If you’ve ever admired those perfectly decorated sugar cookies or intricate cake designs, chances are, you’ve already seen royal icing in action. It’s the gold standard for creating clean, sharp, and elegant decorations.
Whether you’re a beginner or a seasoned baker looking to level up, this guide will take you through everything you need to know about royal icing – from ingredients to execution.
What is Royal Icing?
Royal icing is a hard-drying icing made from just a few simple ingredients, typically egg whites (or meringue powder), powdered sugar, and sometimes a touch of lemon juice or vanilla extract. It dries to a firm finish, making it ideal for intricate piping, decorating cookies, and creating edible art.
It’s not like buttercream, which stays soft. Once it dries, royal icing becomes beautifully crisp, providing both aesthetics and structure. You can use it for outlining, flooding cookies, or even building 3D edible decorations like gingerbread houses.
Why Use Royal Icing?
Royal icing is a favorite among professional bakers for several good reasons:
- Sharp, Clean Lines: Perfect for detailed piping and writing.
- Dries Hard: Ideal for stacking and packaging cookies.
- Customizable Consistency: From stiff for flowers to flood for cookie bases.
- Holds Color Well: Great for vibrant designs and patterns.
Whether you’re decorating wedding cookies or crafting sugar flowers, royal icing is the go-to for precision and style.
Types of Royal Icing
Depending on what you’re decorating, you’ll need to adjust the consistency of your royal icing. Let’s break it down:
Stiff Consistency
This is the thickest form and holds its shape well. It’s best for piping flowers, borders, and detailed designs that need to stand up.
Medium Consistency
Perfect for outlining cookies. It’s still thick but a little more pliable than stiff icing.
Flood Consistency
This thin icing fills in outlined cookie shapes smoothly. It levels itself out, giving cookies that sleek, professional finish.
List of Ingredients You’ll Need
Let’s start with the basics. Here’s what you’ll need to make the perfect batch of royal icing:
Classic Ingredients:
- 3 large egg whites (or 6 tablespoons meringue powder + 12 tablespoons water)
- 4 cups (500g) powdered sugar, sifted
- 1 teaspoon lemon juice or vanilla extract (optional, for flavor)
Optional Flavor Additions:
- Almond extract
- Peppermint extract
- Clear vanilla (for white icing)
Make sure all your tools are grease-free. Grease can break down royal icing and ruin the texture.
Equipment You’ll Need
Having the right tools makes all the difference when working with royal icing.
- Electric mixer (stand or hand-held)
- Mixing bowl
- Fine mesh sieve (for sifting sugar)
- Rubber spatula
- Piping bags and tips
- Gel food coloring (avoid liquid)
- Toothpicks (for spreading icing in small areas)
- Airtight containers (for storage)
Preparation Tips Before You Start
Before you dive in, here are a few pro tips to set yourself up for success:
- Use grease-free bowls and utensils: Any trace of fat can mess with the icing’s ability to whip up.
- Sift the sugar: This ensures a smooth texture without lumps.
- Room temperature egg whites: These whip better and faster.
- Avoid overbeating: It can make the icing too thick and airy.
Step-by-Step Guide to Making Royal Icing
This is where the magic happens! Follow each step carefully, and you’ll end up with perfect royal icing every time.
Step 1: Separate the Egg Whites
If using fresh eggs, separate the whites from the yolks carefully. Make sure no yolk gets into the whites – fat will prevent the icing from whipping properly.
If using meringue powder, combine the powder and water first and mix until frothy.
Step 2: Sift the Powdered Sugar
Sift 4 cups of powdered sugar into a large mixing bowl. This step removes any lumps and ensures a silky-smooth icing texture.
Step 3: Mix the Ingredients
Add the egg whites (or meringue mix) to the powdered sugar gradually. Start mixing on low speed to combine without creating a sugar cloud.
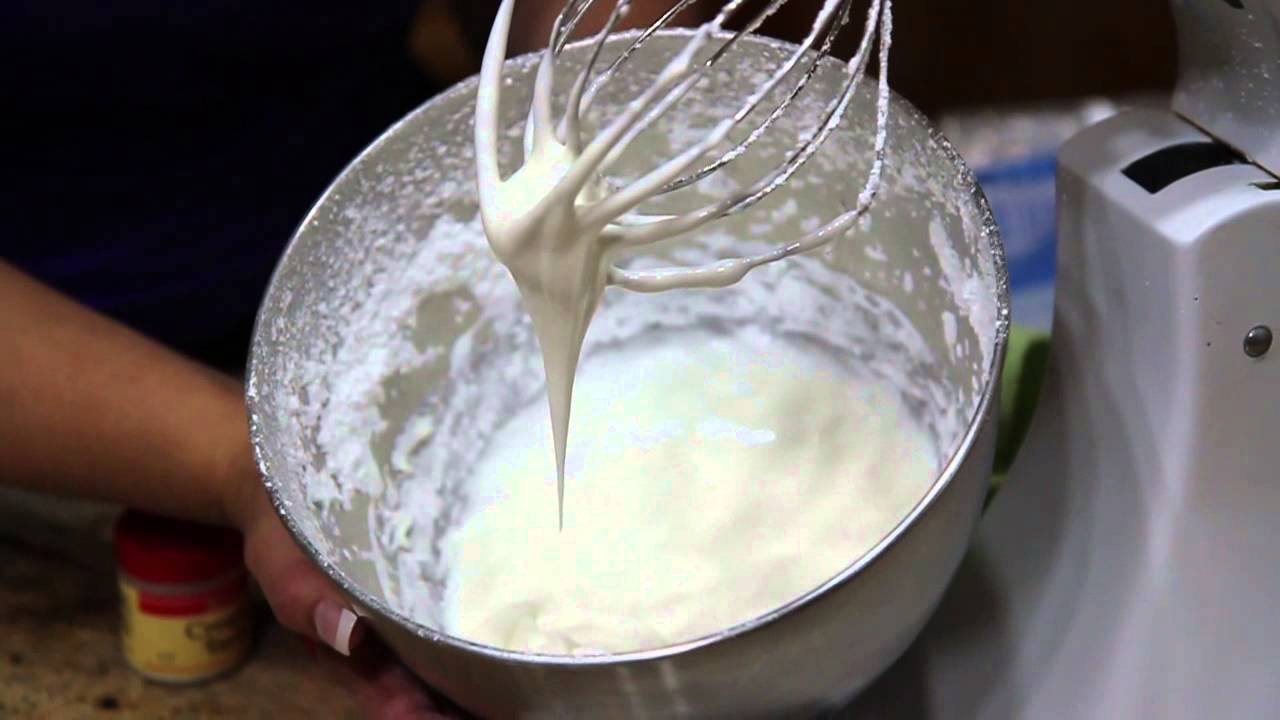
Step 4: Whip to Desired Consistency
Increase to medium speed and beat the icing until glossy and thick, about 5–7 minutes. For stiff peaks, the icing should hold its shape without collapsing.
Step 5: Adjust Consistency
To get the consistency you need:
- Stiff: Use as-is or with a tiny bit more sugar.
- Medium: Add a few drops of water.
- Flood: Add water gradually (1/2 tsp at a time) until it flows smoothly.
Test by dragging a knife through the icing – if it smooths out in 10–12 seconds, it’s flood consistency.
Step 6: Add Color (Optional)
Use gel food coloring for vibrant, consistent shades. Mix well and keep in mind that colors deepen as they sit.
Step 7: Store Properly
Royal icing dries out fast! Store in airtight containers and place plastic wrap directly on the surface to prevent crusting. Refrigerate up to 3 days or freeze for a month.
How to Use Royal Icing
Now that you’ve made the perfect royal icing, let’s dive into how to use it. This versatile icing is the artist’s paint of the baking world, and once you get the hang of it, the possibilities are endless.
Decorating Cookies
This is the most popular use for royal icing. Use stiff or medium icing to outline the shape of the cookie, then fill in with flood icing for a smooth, glossy look. You can create layers by letting the base dry and then adding more designs on top. Want to create marbled or wet-on-wet effects? Simply pipe additional designs while the base layer is still wet.
Making Sugar Flowers
Royal icing is a dream for creating intricate flowers. Use a piping bag with specialty tips (like petal or leaf tips) and stiff icing. With practice, you can make roses, daisies, leaves, and more. These flowers harden and can be stored for future use on cakes or cupcakes.
Writing on Cakes or Cookies
Royal icing is perfect for writing personalized messages. Use a fine round tip (like #1 or #2) and medium consistency icing. Steady hands and practice will help you master clean, elegant lettering.
Tips for Perfect Royal Icing Every Time
Getting consistent results with royal icing takes practice, but these tips can help speed up your learning curve:
- Humidity affects drying time – In humid environments, your icing may take longer to set.
- Use gel colors – Liquid food coloring can thin your icing too much.
- Cover bowls with damp towels – While decorating, always cover unused icing with a damp paper towel to prevent it from crusting over.
- Use parchment cones or tipless bags – They’re easier to control and great for detailed work.
- Let layers dry – To create dimension, allow each layer to dry before adding the next.
Common Mistakes and How to Avoid Them
Royal icing is simple, but a few common mistakes can ruin your final look. Let’s make sure you avoid them:
- Overbeating: If you whip the icing too long, it becomes dry and cracked. Stop once it forms stiff, glossy peaks.
- Wrong consistency: Using stiff icing to flood or thin icing to pipe will result in messy decorations. Always test your icing before using.
- Not sifting sugar: Lumpy icing clogs piping tips and creates uneven flow.
- Not storing properly: Exposure to air will crust your icing. Always keep it covered, especially during long decorating sessions.
Royal Icing Storage Tips
Proper storage is essential for royal icing to stay usable for future decorating.
- Short-term: Keep in an airtight container at room temperature (if made with meringue powder) or in the fridge (if made with egg whites). Use within 3 days.
- Long-term: Freeze royal icing in a ziplock bag with all air removed. Thaw in the fridge and mix well before use.
- On the counter: Keep a damp paper towel on top of the icing if you’re working with it over a few hours to prevent crusting.
Royal Icing vs. Buttercream – What’s the Difference?
If you’re wondering which icing to use, here’s a quick comparison:
| Feature | Royal Icing | Buttercream |
|---|---|---|
| Texture | Dries hard | Stays soft |
| Best for | Cookies, fine details, flowers | Cakes, cupcakes, filling |
| Storage | Can be frozen; lasts longer | Short shelf life |
| Color Holding | Holds vibrant colors well | Colors can fade over time |
| Taste | Sweet, mild flavor | Rich and buttery |
Royal icing wins when you need detailed designs that last. Buttercream is better for spreading, filling, and flavor.
FAQs about Royal Icing Recipe
Let’s clear up some of the most common questions beginners ask:
1. How long does royal icing take to dry?
Generally, it takes 8–12 hours to dry completely, depending on humidity. Thin layers dry faster, but always let your decorated cookies sit overnight for best results.
2. Can I make royal icing without eggs?
Yes! Meringue powder is a great egg-free substitute and is widely used by professionals.
3. How do I color royal icing?
Use gel-based food coloring. Avoid water-based or liquid dyes as they can change the consistency.
4. Why is my royal icing separating?
This happens when the icing sits too long. Just stir it well before use. For long-term storage, always mix before piping.
5. Can I flavor royal icing?
Absolutely. Vanilla, almond, lemon, or peppermint extracts work well. Just make sure they’re oil-free or alcohol-based.
Conclusion
Royal icing may look intimidating at first, but once you master the basics, it opens the door to professional-level decorating right in your kitchen. From intricate cookie designs to stunning sugar flowers, royal icing is as versatile as it is beautiful.
By using the right tools, following a solid recipe, and understanding the different consistencies, you’ll quickly get comfortable with it. Don’t be afraid to make mistakes—every baker starts somewhere, and the more you practice, the better your skills will become.
So go on, grab your mixer and piping bags, and bring your baking creations to life with the magic of royal icing!


