Pumpkin Whoopie Pies Recipe: Ever had a dessert that feels like a warm hug? That’s what Pumpkin Whoopie Pies are. These delicious treats are soft, spiced pumpkin cookies sandwiched with creamy, tangy cream cheese frosting. They’re the perfect fall dessert—but honestly, they’re good any time of the year.
In this step-by-step guide, we’ll break down exactly how to make them so they turn out moist, fluffy, and packed with flavor. Whether you’re baking for a party or just want to impress your taste buds, this recipe is a guaranteed crowd-pleaser.
What Are Pumpkin Whoopie Pies?
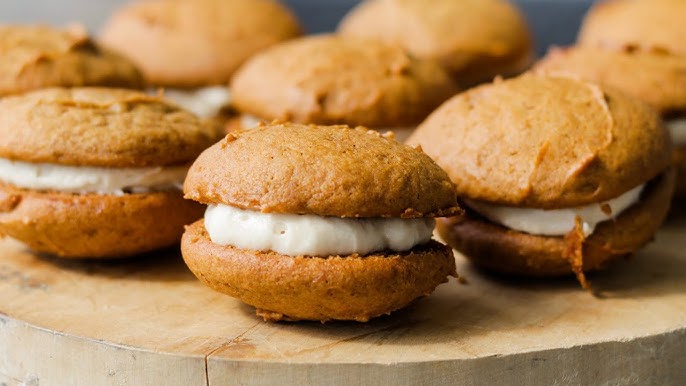
Pumpkin Whoopie Pies are a classic American dessert that originated in the Northeast, especially in Pennsylvania and Maine. They’re essentially a soft sandwich cookie, but way more decadent. Think of it like a cake and cookie had a delicious baby. You get two cakey pumpkin cookies filled with warming spices like cinnamon and nutmeg, then sandwich them around a creamy filling—usually cream cheese or marshmallow-based.
They’re soft, fluffy, and sweet but with a subtle tang, thanks to the cream cheese filling. You can eat them straight from the fridge or let them sit out for a bit to soften into pillowy perfection. Either way, they’re irresistible.
Why You’ll Love This Recipe
Let’s be real—who doesn’t love pumpkin spice everything when fall rolls around? But this recipe isn’t just about flavor; it’s about texture, balance, and that homemade feel.
- Moist & Soft: These pumpkin cookies are ultra soft and melt in your mouth.
- Perfectly Spiced: With cinnamon, nutmeg, and cloves, it screams cozy fall vibes.
- Creamy Filling: Tangy and sweet cream cheese frosting adds the perfect contrast.
- Beginner-Friendly: You don’t need to be a pro baker to nail this.
- Great for Parties: These little treats are portable, adorable, and a hit with crowds.
Still not convinced? Keep reading and you’ll be drooling before you even hit the kitchen.
Ingredients You’ll Need
Let’s break this down into two simple parts: the cookies and the filling.
For the Pumpkin Cookies:
- 3 cups all-purpose flour
- 1 teaspoon baking powder
- 1 teaspoon baking soda
- 1 tablespoon ground cinnamon
- ½ teaspoon ground nutmeg
- ½ teaspoon ground cloves
- ½ teaspoon salt
- 1 cup granulated sugar
- 1 cup packed brown sugar
- 1 cup vegetable oil
- 1 (15 oz) can pumpkin puree
- 2 large eggs
- 1 teaspoon vanilla extract
For the Cream Cheese Filling:
- 1 (8 oz) package cream cheese, softened
- ½ cup unsalted butter, softened
- 3 cups powdered sugar
- 1 teaspoon vanilla extract
- Pinch of salt (optional but balances sweetness)
Kitchen Tools You’ll Need
Before you dive in, gather your tools:
- Mixing bowls (large, medium, small)
- Hand mixer or stand mixer
- Rubber spatula
- Whisk
- Baking sheets
- Parchment paper or silicone baking mats
- Cookie scoop or tablespoon
- Cooling rack
Tips Before You Begin
- Use canned pumpkin puree, not pumpkin pie filling—they’re not the same.
- Room temperature ingredients help everything blend smoothly.
- Don’t overmix your batter; it can make your cookies dense.
- Chill the filling a bit if it’s too soft to pipe or spread.
- Cookies should be completely cool before you add the filling—or you’ll have a melty mess!
Step-by-Step Guide to Make Pumpkin Whoopie Pies
Step 1: Preheat the Oven and Prep Your Baking Sheets
Start strong. Preheat your oven to 350°F (175°C). Line two baking sheets with parchment paper or silicone baking mats to prevent sticking. This step also ensures even baking and keeps cleanup easy—because nobody loves scrubbing stuck-on cookies.
If your oven takes a while to warm up, do this step first thing. Also, get your ingredients out now so everything reaches room temperature while you prep.
Step 2: Mix the Dry Ingredients
In a medium-sized bowl, whisk together:
- Flour
- Baking powder
- Baking soda
- Salt
- Cinnamon
- Nutmeg
- Cloves
Mix well to distribute the spices evenly. This dry mix is what gives those cookies their signature warm, spiced flavor. If you like a stronger spice flavor, feel free to add an extra pinch of cinnamon or even a dash of ginger for some extra kick.
Step 3: Blend the Wet Ingredients
In a large mixing bowl, combine:
- Granulated sugar
- Brown sugar
- Oil
- Pumpkin puree
- Eggs
- Vanilla extract
Use a hand mixer or whisk to blend everything together until it’s smooth and well combined. The mixture should look silky and slightly thick. You’re not going for light and fluffy here—it’s more about incorporating everything evenly.
Step 4: Combine Wet and Dry Mixtures
Slowly add the dry mixture to the wet mixture, about 1 cup at a time. Mix on low speed or stir by hand until just combined. Don’t overmix—just fold everything together until there are no streaks of flour. The batter will be thick and sticky, almost like cake batter. That’s exactly what you want.
Step 5: Scoop and Bake the Cookies
Use a cookie scoop or tablespoon to drop even mounds of batter onto your prepared baking sheets, leaving about 2 inches of space between each cookie. The cookies will spread slightly, so give them room.
Bake for 12–14 minutes, or until the cookies spring back when lightly touched. You can also test with a toothpick—if it comes out clean, they’re done.
Remove from oven and let them sit on the baking sheet for a couple of minutes before transferring them to a cooling rack.
Step 6: Make the Cream Cheese Filling
While the cookies cool, make the filling. In a medium bowl, beat together:
- Cream cheese
- Butter
- Powdered sugar
- Vanilla
- Pinch of salt (if using)
Start on low speed to avoid a powdered sugar cloud, then increase to medium-high and beat until fluffy and smooth—about 2–3 minutes. If it feels too soft, you can pop it in the fridge for 10–15 minutes to firm up.
Step 7: Cool the Cookies
Don’t rush this part. The cookies need to be completely cool before filling, or your frosting will melt and slide off. Let them rest for at least 30 minutes on a cooling rack. You can also speed this up slightly by placing them in the fridge, but don’t freeze them or the texture may suffer.
Step 8: Fill and Assemble the Whoopie Pies
Once cooled, pair the cookies by size. Pipe or spoon a generous dollop of filling onto the flat side of one cookie, then top with its match. Press gently so the filling spreads to the edges.
And boom—you’ve made a Pumpkin Whoopie Pie! Repeat until all your cookies are sandwiched.
Decorating and Storing Tips
Now that your Pumpkin Whoopie Pies are assembled, you can take them up a notch with some optional decorations. For a little extra flair:
- Dust with powdered sugar for a simple, elegant touch.
- Roll the edges in chopped nuts (like pecans or walnuts) for crunch.
- Add sprinkles—perfect if you’re serving at a fall party or holiday gathering.
- Drizzle with white chocolate for a bakery-style finish.
When it comes to storing these beauties, the key is to keep them cool and airtight. Because of the cream cheese filling, they need to be refrigerated. Store in a single layer in an airtight container in the fridge for up to 5 days. If stacking, place parchment paper between layers to avoid sticking.
Want to enjoy them over time? These whoopie pies freeze beautifully. Wrap each one individually in plastic wrap, then place them in a freezer-safe bag or container. When you’re ready to eat, just thaw them in the fridge or at room temperature for about an hour.
Serving Suggestions
Pumpkin Whoopie Pies are the ultimate grab-and-go dessert, but there are fun ways to serve them, especially if you’re entertaining:
- Mini Whoopie Pies – Use a smaller scoop for bite-sized treats, great for parties.
- Add a scoop of ice cream between the cookies for a fall-inspired ice cream sandwich.
- Serve with coffee or spiced chai – The warming flavors pair perfectly.
- Plate with a caramel drizzle for a more elegant presentation at Thanksgiving or a harvest dinner.
You can also serve them chilled straight from the fridge or let them come to room temperature for a softer texture. Either way, they’re going to disappear fast.
Pumpkin Whoopie Pie Variations
Want to mix things up a bit? This recipe is super flexible. Try out some of these variations:
- Maple Cream Cheese Filling – Replace vanilla with maple extract and add a tablespoon of real maple syrup.
- Chocolate Chip Pumpkin Pies – Fold mini chocolate chips into the cookie batter for a little extra indulgence.
- Coconut Pumpkin Pies – Add shredded coconut to the filling for tropical flair.
- Nutty Pies – Mix in some chopped walnuts or pecans into the batter for crunch.
- Spiced Marshmallow Filling – Replace cream cheese filling with marshmallow fluff blended with cinnamon and nutmeg.
These variations make it easy to tailor the recipe to your tastes or the season—pumpkin is the star, but the flavor possibilities are endless.
How to Make Gluten-Free Pumpkin Whoopie Pies
If you or someone you’re baking for needs a gluten-free version, you’re in luck. These whoopie pies adapt well with just a few swaps:
Ingredients to substitute:
- Use a 1:1 gluten-free all-purpose flour mix in place of regular flour.
- Make sure your baking powder and other ingredients are certified gluten-free.
Tips:
- Let the batter sit for 5–10 minutes before scooping to allow the flour to hydrate.
- The cookies may be slightly more delicate, so handle gently.
- If your gluten-free cookies are extra sticky, a quick chill before baking can help them hold shape.
Taste-wise, they’re just as good—rich, spiced, and totally satisfying.
Can You Make Them Ahead of Time?
Yes! Pumpkin Whoopie Pies are a dream for prepping ahead. You can break up the process if you’re tight on time:
- Make the cookie dough and refrigerate it up to 24 hours in advance.
- Bake the cookies, let them cool, and store in an airtight container for up to 2 days before assembling.
- Make the filling and store it in the fridge for 3–4 days.
You can even assemble the whoopie pies a day ahead. They actually taste even better after chilling overnight—the flavors meld beautifully, and the cookies become even more tender.
How to Store and Freeze Whoopie Pies
Here’s a quick reference for storage:
| Storage Method | Duration | Instructions |
|---|---|---|
| Room Temperature | 1 day (max) | Only if filling is stable (like marshmallow) |
| Refrigerated | 4–5 days | Store in airtight container |
| Frozen (assembled) | 2 months | Wrap individually, thaw before serving |
| Frozen (unassembled) | 3 months | Freeze cookies and filling separately |
Make sure to thaw frozen pies in the fridge to preserve texture. If you’re in a hurry, 30 minutes on the counter works too.
Common Mistakes to Avoid
Even simple recipes can go sideways if you’re not careful. Here are a few things to avoid:
- Using pumpkin pie filling instead of pumpkin puree—way too sweet and spiced already.
- Overmixing the batter—leads to tough, dense cookies.
- Not letting cookies cool completely—this causes the filling to melt and slide.
- Filling too early—warm cookies + soft filling = disaster.
- Skipping parchment paper—your cookies might stick or bake unevenly.
Pay attention to the little things and you’ll be rewarded with perfect whoopie pies every time.
FAQs about Pumpkin Whoopie Pies Recipe
1. Can I use store-bought frosting for the filling?
Yes, but homemade cream cheese frosting really makes a difference in flavor. If you’re short on time, go for it—but look for a high-quality frosting.
2. Can I make Pumpkin Whoopie Pies without eggs?
Absolutely. Substitute each egg with ¼ cup of unsweetened applesauce or 1 tablespoon of ground flaxseed mixed with 3 tablespoons of water. The texture will be slightly different but still delicious.
3. Can I use butter instead of oil?
Yes, melted butter works in place of oil, but it may change the texture slightly. The cookies may be a little denser and richer.
4. Why are my cookies too flat?
This can happen if the batter is too wet or your baking soda is expired. Make sure to measure ingredients accurately and check the freshness of your leaveners.
5. How can I make the whoopie pies less sweet?
You can reduce the sugar in both the cookie batter and the filling slightly. Just know that it may affect the texture. You can also add a pinch of salt or use less filling.
Conclusion
Pumpkin Whoopie Pies are the kind of dessert that makes fall feel like a celebration. With their moist, spiced cookies and creamy, dreamy filling, they’re impossible to resist. Whether you’re whipping up a batch for your family, a holiday gathering, or just a cozy night in, these treats are guaranteed to impress.
The best part? You don’t need to be a pro baker to make them. This step-by-step guide gives you everything you need to nail it on your first try—and make it again and again. So go ahead, preheat that oven and get ready to wow your taste buds!


