Pretzel Bread Buns Recipe: There’s something magical about pretzel bread buns — that glossy, golden-brown crust, the chewy texture, and the rich, slightly salty flavor that just hits the spot. If you’ve only had these delights from a bakery or restaurant, you’re seriously missing out. Making them at home isn’t just doable—it’s incredibly satisfying. Whether you’re serving burgers, using them for sandwiches, or snacking straight from the oven, pretzel buns are a game-changer.
Let’s dive into the ultimate homemade pretzel bread buns recipe, complete with a step-by-step guide that ensures delicious, bakery-style results every single time.
Ingredients You’ll Need
To make the perfect batch of pretzel buns, you’ll need just a few pantry staples. These ingredients come together to create that signature crust and soft interior we all crave.
For the Dough:
- 1 ½ cups warm water (about 110°F)
- 2 ¼ teaspoons active dry yeast (1 packet)
- 1 tablespoon granulated sugar
- 4 cups all-purpose flour (plus more for dusting)
- 2 teaspoons salt
- 2 tablespoons unsalted butter, melted
For the Baking Soda Bath:
- 10 cups water
- ⅔ cup baking soda
Optional Toppings:
- Coarse sea salt (classic topping)
- Sesame seeds
- Poppy seeds
- Shredded cheese
- Everything bagel seasoning
These simple ingredients will transform into fluffy, golden buns that will rival anything you’ve bought before.
Essential Equipment
Before you get started, make sure you’ve got the right tools. Here’s what you’ll need:
- Large mixing bowl (or stand mixer with dough hook)
- Measuring cups and spoons
- Whisk and wooden spoon
- Baking sheets
- Parchment paper or silicone baking mats
- Slotted spoon
- Sharp knife or lame (for scoring)
Having the proper tools can make the difference between frustration and fun. Now, let’s get into the good stuff — the step-by-step guide.
Step-by-Step Guide to Making Pretzel Bread Buns
Step 1: Preparing the Yeast Mixture
In a bowl, combine warm water (not hot), sugar, and active dry yeast. Stir gently and let it sit for 5–10 minutes until foamy. This activates the yeast and ensures a good rise.
Step 2: Mixing and Kneading the Dough
Add flour, salt, and melted butter to the yeast mixture. Mix until a soft dough forms, then knead by hand or mixer for 8–10 minutes until smooth and elastic. The dough should be slightly tacky, not sticky.
Step 3: Letting the Dough Rise
Place the dough in a lightly oiled bowl, cover, and let it rise in a warm spot for 1 hour or until doubled in size. This step gives the buns their light, fluffy interior.
Step 4: Shaping the Pretzel Buns
Punch down the dough and divide it into equal portions. Shape each piece into a smooth ball by tucking the edges underneath. Place on a lined baking sheet.
Step 5: Preparing the Baking Soda Bath
Bring a pot of water to a gentle boil and carefully add baking soda. Reduce heat slightly to avoid splashing. This bath gives pretzel buns their classic chewy crust.
Step 6: Dipping the Buns in the Bath
Lower each bun into the baking soda bath for 20–30 seconds, then remove with a slotted spoon and return to the baking sheet.
Step 7: Scoring and Topping the Buns
Use a sharp knife to score an “X” on top of each bun. Brush lightly with egg wash and sprinkle with coarse salt or sesame seeds.
Step 8: Baking to Golden Perfection
Bake at 425°F (220°C) for 12–15 minutes until deep golden brown. Cool slightly before serving.
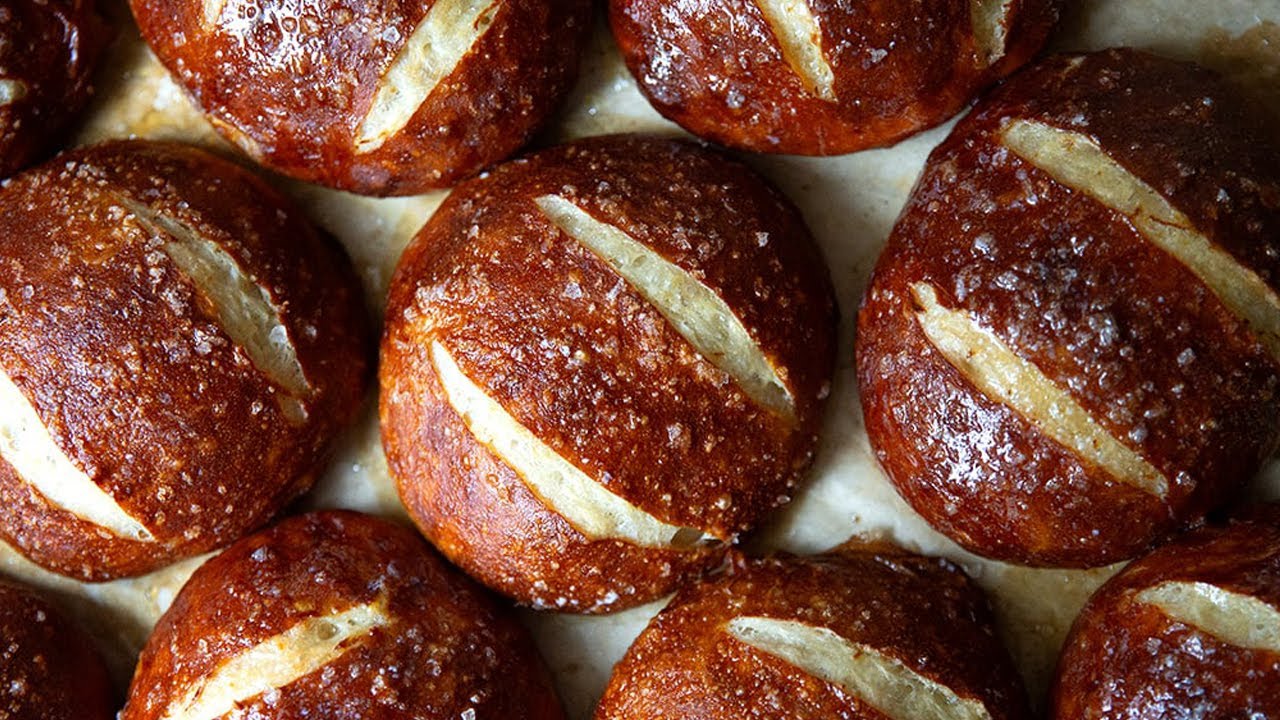
Soft inside, chewy outside—pretzel bread buns are bakery magic at home 🥨🍞
Pro Tips for Perfect Pretzel Buns
Want next-level results? Here’s what the pros do:
- Use Bread Flour for a Chewier Texture: If you have bread flour, try using it instead of all-purpose for more chew.
- Chill the Dough Overnight: Letting the dough cold-proof in the fridge overnight deepens the flavor and makes it easier to shape.
- Don’t Skip the Score: It helps control the expansion and gives that iconic pretzel look.
- Steam in the Oven: Place a small pan of water on the bottom rack to add steam and make the crust even glossier.
Making pretzel buns is more of a science than just tossing flour and water together. These extra steps can be the difference between “pretty good” and “bakehouse quality.”
Serving Ideas for Pretzel Buns
Alright, you’ve made your pretzel buns — now what? Trust me, these aren’t just any dinner rolls. Their rich, chewy texture and savory flavor make them incredibly versatile. Whether you’re prepping for a family meal or just want to upgrade your weekday lunch, these buns can do it all.
Here are a few delicious ways to serve them:
- Pretzel Bun Burgers: Swap out your usual sesame bun for a pretzel bun and watch your burger game go from zero to hero. The slightly salty, firm texture holds up perfectly to juicy patties, melted cheese, and all your favorite toppings.
- Mini Sandwich Sliders: Hosting a party? Slice them in half and stuff them with deli meats, cheese, and spreads for mouthwatering sliders everyone will rave about.
- Breakfast Sandwiches: Think bacon, egg, and cheese layered between a warm pretzel bun. It’s a breakfast upgrade you didn’t know you needed.
- Dipping Buns: Serve them warm with beer cheese, mustard, or creamy garlic dip. Great for game day or lazy afternoons.
- Soup Sidekick: Use your pretzel bun to soak up hearty stews or creamy soups. It’s like an edible sponge for flavor.
The possibilities are endless, and the rich flavor of these buns pairs with just about everything. Bonus tip? Slightly toast them before serving to enhance the flavor and texture even more.
How to Store Pretzel Bread Buns
You’ve baked a big batch—now let’s keep them fresh. The great thing about pretzel buns is that they hold up surprisingly well if stored properly.
Short-Term Storage (1–3 Days):
- Let the buns cool completely after baking.
- Store them in an airtight container or zip-top bag at room temperature.
- Avoid refrigeration—it can dry them out and make them tough.
Want that freshly baked feel? Pop them in the oven at 300°F for 5–7 minutes or microwave for 15 seconds before eating.
Long-Term Storage (Up to 3 Months):
- Wrap each bun tightly in plastic wrap or foil.
- Place in a freezer-safe bag or container.
- When ready to use, let them thaw at room temp or reheat from frozen in the oven.
They’ll taste just as good weeks later, especially when you warm them up a bit. Perfect for making ahead for parties, school lunches, or quick dinners.
Troubleshooting Common Issues
Even with a straightforward recipe, sometimes things can go a little sideways. Don’t worry—it happens to the best of us. Here’s how to fix or avoid common pretzel bun problems:
Problem: Dough Too Sticky
- Solution: Add a little extra flour (one tablespoon at a time) during kneading. It should be tacky but not gluey. Oiling your hands can also help.
Problem: Buns Didn’t Rise
- Solution: Your yeast may have been old or your water too hot. Make sure yeast is bubbly after 10 minutes. Always check your expiration dates!
Problem: Crust is Pale or Too Soft
- Solution: Make sure your baking soda bath is hot enough, and the buns are boiled long enough (30 seconds each side). Also, make sure your oven is fully preheated.
Problem: Buns are Too Dense
- Solution: You may have over-floured or under-proofed. Let the dough rise until it truly doubles in size, and be gentle when shaping.
Learning the quirks of your kitchen and ingredients takes time, but these little tips can seriously up your baking game.
Why Homemade Beats Store-Bought
Let’s be honest—store-bought buns are convenient, but they just don’t compare. Here’s why your homemade pretzel buns are a cut above the rest:
- No Preservatives: You control every ingredient. That means no weird additives or mystery chemicals.
- Custom Flavor: Want them more salty? Less? Add cheese or garlic? You get to experiment and personalize every batch.
- Cost-Effective: A few basic ingredients yield 8–10 buns. That’s a fraction of what you’d pay at a gourmet bakery.
- Freshness Factor: Nothing beats a warm pretzel bun fresh out of your oven. Soft on the inside, crisp on the outside—every bite is heaven.
Once you taste your homemade version, you’ll find it hard to go back to store-bought. There’s just something about knowing you made it.
Nutritional Information (Approximate per Bun)
Here’s a general idea of the nutritional breakdown for one standard-sized pretzel bread bun. Keep in mind this can vary based on toppings or added ingredients like cheese or butter.
| Nutrient | Amount (Approx.) |
|---|---|
| Calories | 220–250 kcal |
| Total Fat | 4–5g |
| Saturated Fat | 2g |
| Carbohydrates | 40–45g |
| Sugar | 1–2g |
| Dietary Fiber | 1–2g |
| Protein | 6–7g |
| Sodium | 500–700mg |
A Few Notes:
- Lower the sodium: Skip or reduce the coarse salt topping if you’re watching your salt intake.
- Boost the fiber: Use half whole wheat flour, though it may change the texture slightly.
- Add more protein: Consider adding a bit of Greek yogurt or powdered milk to the dough.
This nutritional info makes it easier to fit these buns into your lifestyle, whether you’re meal-prepping or just indulging on a weekend.
FAQs about Pretzel Bread Buns Recipe
1. Can I Make These Without a Stand Mixer?
Absolutely. While a stand mixer makes kneading easier, you can totally knead the dough by hand. It might take 8–10 minutes, but think of it as a mini workout with delicious rewards.
2. Can I Freeze Pretzel Dough Instead of Baking It All at Once?
Yes! After shaping the buns but before the baking soda bath, freeze them on a tray. Once frozen solid, transfer to a freezer-safe bag. When ready to bake, thaw, give them the baking soda bath, and bake as usual.
3. Why Do You Boil Pretzels in Baking Soda?
The baking soda bath raises the pH on the surface of the dough, which helps create that deep brown color and chewy crust. It’s the step that turns regular bread into pretzels.
4. Can I Use Whole Wheat Flour?
You can replace up to 50% of the all-purpose flour with whole wheat. Any more, and the buns may become too dense. You might also need a bit more water due to whole wheat’s higher absorption.
5. What Toppings Work Best for Pretzel Buns?
Classic coarse sea salt is a favorite, but don’t stop there. Try:
- Shredded cheddar or parmesan
- Garlic butter and herbs
- Everything bagel seasoning
- Jalapeños and cheese for a spicy twist
Conclusion
There you have it—a complete, no-fail, step-by-step guide to making delicious, bakery-style pretzel bread buns right at home. Whether you’re using them to elevate your burger game, prepping them for sandwiches, or just enjoying them warm from the oven with a dab of butter, one thing is for sure: once you go homemade, you won’t want to go back.
Pretzel buns aren’t just food—they’re an experience. And now that you’ve mastered the technique, you can bring that experience into your kitchen whenever you want.
Ready to roll up your sleeves and give it a shot?


