No-Bake Energy Bites Recipe: Looking for a quick, healthy snack that doesn’t require an oven or fancy equipment? These no-bake energy bites are your go-to solution.
Packed with protein, fiber, and healthy fats, they’re the perfect bite-sized snacks for busy mornings, after-school munchies, or post-workout fuel.
This article walks you through every single step to making these delicious treats at home—with zero baking required.
Why You’ll Love This Recipe
There’s something satisfying about making a snack that’s not only easy but also super nutritious. These energy bites come together in minutes, don’t require any cooking, and are endlessly customizable. Whether you’re a fitness junkie or just looking for a healthy alternative to store-bought snacks, this recipe is for you.
Some reasons to fall in love with this recipe:
- No baking necessary – perfect for hot days or lazy days.
- Customizable – add whatever flavors or mix-ins you love.
- Portable – great for lunchboxes, gym bags, or car rides.
- Kid-friendly – even picky eaters love them.
- Budget-friendly – made with pantry staples you probably already have.
Health Benefits of Energy Bites
What makes these little snacks so powerful? It’s all about the ingredients. Oats, nut butters, seeds, and natural sweeteners create a nutritional powerhouse in every bite.
- Oats: Provide fiber, help keep you full longer, and regulate blood sugar.
- Nut butters: Packed with protein and healthy fats to keep your energy up.
- Chia seeds or flaxseeds: Add omega-3 fatty acids and fiber.
- Honey or maple syrup: Natural sugars for a quick energy boost.
- Add-ins like cacao, nuts, or coconut: Boost flavor and nutrients.
With balanced macros (protein, fats, carbs), these bites make a great snack before a workout or when you hit that mid-afternoon slump.
When to Eat Energy Bites
You might be wondering: “When should I actually eat these?” The beauty is—they fit into any part of your day. Here are some great times to grab a couple:
- Pre-workout fuel: Light and energizing, with no crash.
- Post-workout recovery: Replenish your body with carbs and protein.
- Mid-morning snack: Beat that early slump without junk food.
- Afternoon pick-me-up: Better than a candy bar.
- Late-night cravings: Satisfy your sweet tooth the healthy way.
Whether you’re in school, at work, or running errands—these bites are ideal to keep you going.
Types of Energy Bites
You’ll see lots of variations on energy bites, depending on ingredients and purpose. Here are some popular types:
- Protein-packed: Extra protein powder or collagen added.
- Vegan-friendly: Made with maple syrup and plant-based options.
- Low-sugar: With dates or sugar-free alternatives.
- Dessert-style: Tastes like cookie dough or brownies but healthier.
- Kids’ versions: Sweeter and bite-sized for tiny hands.
List of Ingredients You’ll Need
Let’s dive into what you’ll actually need to make a basic batch.
Base Ingredients
These are the core items that hold your energy bites together:
- 1 cup rolled oats (old-fashioned)
- ½ cup natural peanut butter (or almond butter)
- ⅓ cup honey (or maple syrup)
- ¼ cup ground flaxseed
- 1 tsp vanilla extract
- Pinch of salt
Optional Add-ins
Get creative with flavors, textures, and nutrients:
- Chia seeds (1–2 tbsp)
- Mini chocolate chips (¼ cup)
- Shredded coconut (¼ cup)
- Dried fruit (cranberries, raisins, chopped apricots)
- Crushed nuts (walnuts, almonds, pecans)
Flavor Variations
Want to switch things up? Try these ideas:
- Cocoa powder + chocolate chips = Brownie bites
- Pumpkin puree + pumpkin spice = Fall vibes
- Matcha + coconut = Green energy balls
Kitchen Tools Required
Nothing fancy needed here—just the basics:
- Large mixing bowl
- Measuring cups and spoons
- Spatula or spoon
- Baking sheet (for chilling)
- Parchment paper
- Airtight container (for storage)
No food processor or blender required—though you can use one if you want a smoother texture.
Tips Before You Begin
Before we get to the steps, here are some quick pro tips:
- Use sticky nut butter: Natural and unsweetened works best.
- Warm the honey a bit so it mixes easily with other ingredients.
- Use your hands to mix if the spoon isn’t cutting it.
- Chill before rolling: Makes shaping easier.
- Taste the mix before chilling to adjust sweetness or flavor.
Ready to get rolling? Let’s break it down step by step.
Step-by-Step Guide to Make No-Bake Energy Bites
Step 1: Gather Your Ingredients
Get all your ingredients on the counter. Measure everything out so you’re not scrambling halfway through. Trust me, it makes everything smoother.
Step 2: Mix the Dry Ingredients
In a large mixing bowl, toss in your rolled oats, ground flaxseed, chia seeds, salt, and any dry add-ins like coconut or mini chocolate chips. Stir well.
Why dry first? Because it ensures everything gets evenly coated later when you add wet ingredients.
Step 3: Add the Wet Ingredients
Now pour in the peanut butter, honey, and vanilla extract. If your peanut butter or honey is thick, microwave them for about 10-15 seconds so they blend easier.
Stir it all together until a sticky, slightly crumbly dough forms.
Step 4: Combine Everything
At this point, you might need to get in there with your hands. Mix until there are no dry patches, and everything sticks together when you press it between your fingers.
Step 5: Chill the Mixture
Cover the bowl and pop it in the fridge for at least 20–30 minutes. This makes rolling them into bites way easier and less sticky.
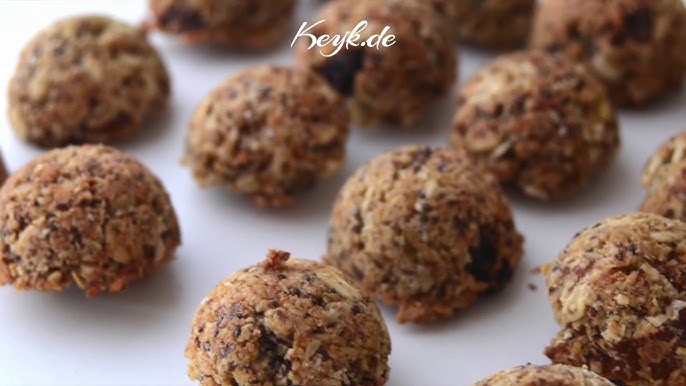
Step 6: Shape into Bites
Scoop out a tablespoon of the mixture and roll it into a ball. Place on a lined baking sheet or tray. Repeat until all your mix is used up.
You should get about 20–25 bites per batch depending on size.
Step 7: Store Properly
Place the energy bites in an airtight container. Store in the fridge for up to a week or freeze them for up to 3 months. Just thaw before eating or enjoy frozen for a crunchy treat.
Troubleshooting: What If Your Bites Are Too Dry or Too Sticky?
Not all energy bite mixtures come out perfect on the first try—and that’s totally okay. The good news is, this recipe is super forgiving. If your dough isn’t cooperating, you probably just need to tweak the texture a bit.
If your mixture is too dry:
- Add 1 tablespoon of peanut butter or honey at a time until the dough sticks better.
- If you want to avoid adding too much sweetness, a little milk or almond milk can help add moisture.
- Make sure your oats aren’t overly dry or processed—they should be the classic rolled oats, not steel-cut or instant.
If your mixture is too sticky:
- Pop it in the fridge or freezer for 15–30 minutes before shaping.
- Add a little extra ground flaxseed or rolled oats to absorb moisture.
- Stir in some shredded coconut or crushed nuts to help dry it out naturally.
Don’t be afraid to adjust—it’s more like crafting than baking. Trust your hands, not just the measurements.
Flavor Variations to Try
One of the coolest things about no-bake energy bites? You can remix the basic recipe into almost any flavor combo you crave. Here are a few tried-and-true variations you’ll love:
Chocolate Peanut Butter
- Add 2 tablespoons cocoa powder
- Use dark chocolate chips
- Drizzle with melted chocolate for an extra treat
Coconut Almond Joy
- Swap peanut butter for almond butter
- Stir in unsweetened shredded coconut and mini chocolate chips
- Top with a toasted almond before chilling
Matcha Green Tea
- Add 1 teaspoon matcha powder
- Mix with white chocolate chips and coconut flakes
- A little maple syrup works well in this version
Pumpkin Spice
- Mix in ¼ cup pumpkin puree
- Add ½ teaspoon pumpkin spice and cinnamon
- Use almond butter and a touch of nutmeg
Feel free to experiment. You can even add protein powder for an extra muscle-fueling boost, or collagen peptides for hair and skin benefits.
How to Store and Freeze Energy Bites
These energy bites aren’t just quick to make—they’re also perfect for meal prep. Make a big batch on Sunday and you’ll have healthy snacks all week long.
To refrigerate:
- Place them in an airtight container or zip-top bag.
- Keep in the fridge for up to 7 days.
- Layer with parchment paper to avoid sticking.
To freeze:
- Place the bites in a single layer on a baking sheet.
- Freeze for 1–2 hours, then transfer to a container or freezer bag.
- Store in the freezer for up to 3 months.
They thaw quickly—just let them sit at room temp for 5–10 minutes. Or, if you like a crunchier bite, eat them straight from the freezer!
Are These Suitable for Kids and Meal Prep?
Absolutely! In fact, kids love them—and you’ll love how mess-free and portable they are.
For kids:
- Use sunflower seed butter or other nut-free alternatives for allergy-friendly versions.
- Add some mini M&Ms or natural sprinkles to make them more fun.
- Shape them into smaller bites for little hands.
For meal prep:
- Make a double or triple batch and freeze the extras.
- Pre-portion them into snack bags or containers for grab-and-go convenience.
- Add a couple to lunchboxes, gym bags, or keep some in your desk drawer at work.
Energy bites are one of the few snacks that are as easy as they are wholesome. They fit into just about every lifestyle, from picky toddlers to fitness-focused teens to busy adults.
Nutritional Information (Per Serving)
Here’s an estimate based on a standard recipe with peanut butter, honey, oats, flaxseed, and chocolate chips. One serving = 1 bite.
| Nutrient | Amount (per bite) |
|---|---|
| Calories | ~120 |
| Protein | 3–4g |
| Carbohydrates | 12–14g |
| Sugar | 5–6g |
| Fiber | 2–3g |
| Fat | 6–7g |
Note: These values can change depending on your add-ins and substitutions. For example, using protein powder will increase the protein content, while adding dried fruit may bump up the sugar.
If you’re tracking macros, it’s best to plug your exact ingredients into a nutrition calculator for precision.
FAQs about No-Bake Energy Bites Recipe
Can I skip the peanut butter?
Yes! You can substitute it with almond butter, sunflower seed butter, cashew butter, or even tahini. Just make sure it’s thick and sticky enough to hold the mixture together.
Are these gluten-free?
They can be! Just make sure you use certified gluten-free oats and double-check that your add-ins (like chocolate chips or flavorings) are also gluten-free.
How long do they last?
In the fridge, they’ll stay fresh for up to 7 days. In the freezer, they last for up to 3 months. Always store in an airtight container for the best shelf life.
Can I use maple syrup instead of honey?
Absolutely. Maple syrup is a great vegan alternative to honey and works just as well in texture and taste. Just keep in mind, it might be a little less sticky, so you may need to chill the mixture longer.
Do I have to refrigerate them?
It’s strongly recommended. While they’ll hold up at room temperature for a few hours, they’re best stored in the fridge or freezer to maintain freshness and shape—especially if your home is warm.
Final Thoughts
No-bake energy bites are the perfect storm of simple, healthy, and delicious. They require minimal effort, no baking, and can be customized to fit almost any dietary preference or flavor craving. Whether you’re making a quick snack for yourself, prepping meals for the week, or keeping healthy options in reach for your family, these bites are a total game-changer.
Try a few different variations, get the kids involved, and make a batch (or two) today. Once you’ve tried them, you’ll always want a stash in the fridge or freezer.


