Pickle Brine Recipe: Let’s kick things off with the star of the show—pickle brine. Think of it as the magic potion behind every crunchy, tangy, flavorful pickle you’ve ever loved.
Brine is a flavorful solution typically made from water, vinegar, salt, and spices. It’s the medium that transforms plain old cucumbers (or carrots, onions, or whatever you’re pickling) into zesty, mouth-puckering bites.
Whether you’re a fan of sweet, dill, or spicy pickles, the brine is what makes the magic happen. And guess what? You don’t need to be a professional chef to whip up a killer brine at home.
Why Learn to Make It at Home?
Because store-bought pickles just don’t hit the same. When you make your own brine, you control the flavor, the strength, the spice level—everything. Want it garlicky? Add more garlic. Want it fiery? Toss in more chili flakes. Plus, homemade brine means fewer preservatives, more creativity, and a fun kitchen project that delivers delicious results.
Benefits of Making Your Own Pickle Brine
Sure, buying a jar off the shelf is easy. But making your own? That’s a whole different level of satisfaction. Here’s why it’s worth it:
- Customization: Like it salty? Prefer sweet pickles? Want something that burns your tongue (in a good way)? You can tweak the brine to match your taste perfectly.
- Cost-Effective: A few pantry staples are all you need. No more overpriced jars from the specialty aisle.
- Healthier Option: Control over salt, sugar, and no mystery ingredients. Goodbye, artificial preservatives.
Not to mention, it’s just plain fun. It’s like kitchen chemistry—with way tastier results.
Types of Pickles and How Brine Differs
Not all pickles are created equal—and neither are their brines.
- Quick Pickles: Made with vinegar brine and stored in the fridge. Ready in hours or days.
- Fermented Pickles: Brined with salt water only and rely on natural bacteria. They take a few weeks but offer probiotic benefits.
- Sweet Pickles: Sugar is the star here. Great with onions and bread & butter pickles.
- Dill Pickles: Dill and garlic-heavy brine with a savory punch.
- Spicy Pickles: Add chili flakes, peppercorns, or jalapeños to heat things up.
Each type has a slightly different brine makeup. Let’s build the base next.
Ingredients You’ll Need
Here’s your pickle brine shopping list. It’s basic, affordable, and flexible.
- Vinegar (white distilled or apple cider for a tangier twist)
- Water (filtered if possible)
- Salt (non-iodized like pickling or kosher salt is best)
- Sugar (optional, for sweet pickles)
- Garlic cloves (adds a punch of flavor)
- Fresh dill (for dill pickles)
- Spices: Mustard seeds, black peppercorns, red chili flakes, coriander, bay leaves
- Optional Add-ins: Jalapeños, horseradish, turmeric, or even a cinnamon stick for sweetness
You likely have most of this already!
Equipment You’ll Need
Nothing fancy here—just some kitchen basics:
- Glass jars with tight-fitting lids (Mason jars work great)
- Measuring cups & spoons
- Saucepan for heating your brine
- Funnel (helps avoid spills when filling jars)
- Labels and markers to keep track of flavors and dates
Now that you’re prepped, let’s dive into the science behind this tasty process.
Understanding the Science of Pickling
Pickling is preservation meets flavor infusion. Here’s how it works:
- Acidic Environment: The vinegar creates a low-pH environment that keeps harmful bacteria out.
- Osmosis Magic: Salt draws water out of veggies and lets the flavorful brine soak in.
- Fermentation (if used): Salt-only brines encourage lactobacillus bacteria to do their thing—creating that tangy, gut-healthy ferment.
So yeah, your brine isn’t just tasty. It’s scientifically awesome.
The Perfect Pickle Brine Ratio
Want a foolproof formula? Try this:
- 1 cup vinegar
- 1 cup water
- 1 tablespoon salt
- 1 tablespoon sugar (optional)
This ratio is ideal for a small batch. You can scale it up easily. Adjust the salt and sugar depending on the veggies and flavor you’re aiming for.
- For sour pickles, use more vinegar.
- For milder pickles, increase the water.
- For sweeter pickles, add more sugar.
- Want spicy? Add crushed red pepper or jalapeños.
Step-by-Step Guide: How to Make Pickle Brine
Step 1: Prepare Your Ingredients
Wash and slice your vegetables. You want them uniform so they pickle evenly. Wash herbs too.
Step 2: Boil the Brine
In a saucepan, combine vinegar, water, salt, and sugar. Bring to a gentle boil. Stir until everything dissolves. This helps meld flavors and activates certain spices.
Step 3: Add Spices and Herbs
Once the base is boiling, toss in your garlic, dill, and chosen spices. Simmer for a minute or two to infuse.
Step 4: Cool the Brine (if needed)
For softer veggies like cucumbers, cool the brine to room temp to avoid mushy results. For firmer veggies like carrots or green beans, hot brine is fine.
Step 5: Pour Over Your Pickles
Pack your veggies into jars tightly but without squishing. Use a funnel to pour the brine over them, covering completely.
Step 6: Seal and Store
Seal the jars. Let cool if hot. Store in the fridge or pantry (depending on type). Wait 24–72 hours before digging in—longer for deeper flavor.
Best Vegetables to Pickle Using This Brine
The beauty of pickle brine is that it works on way more than just cucumbers. Here are some superstar veggies you can transform using the same brine recipe:
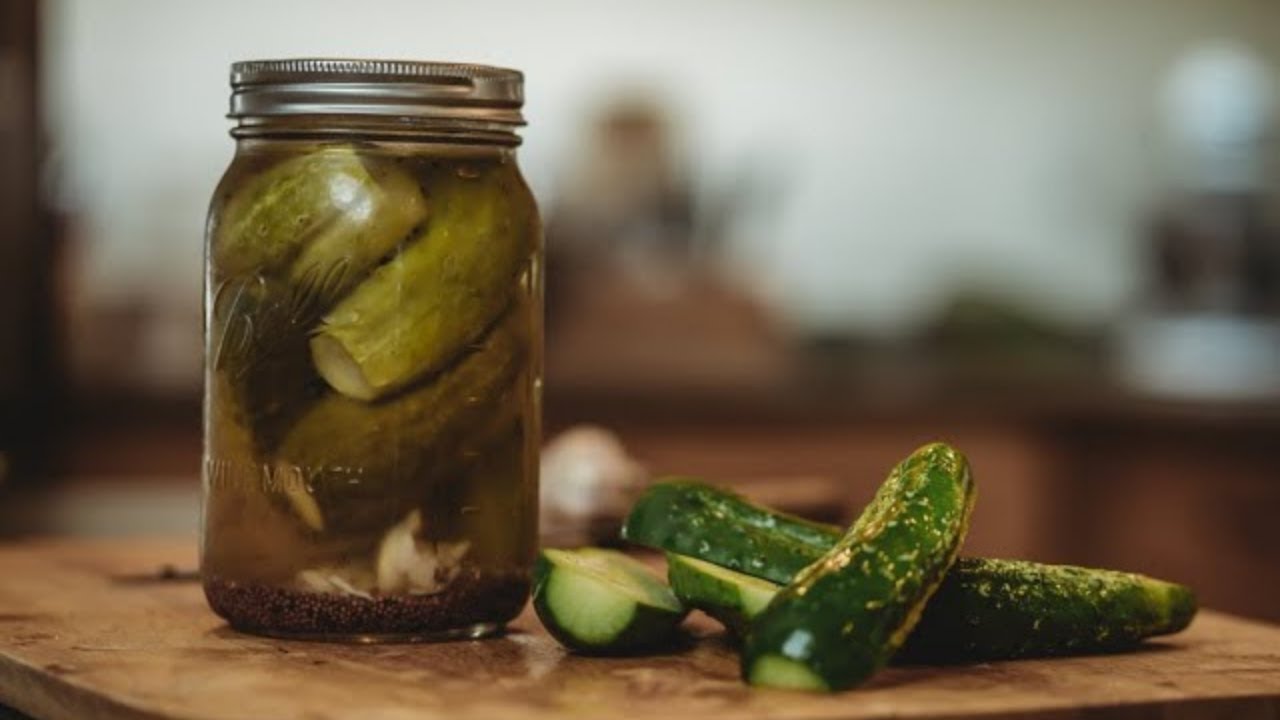
Cucumbers
The classic. Go for small varieties like Kirby or Persian cucumbers for that perfect crunch. Slice them, spear them, or pickle them whole.
Carrots
Sweet and crunchy, carrots absorb brine beautifully. Try slicing them into sticks or coins. They’re great with a little heat—add chili flakes or ginger for an extra kick.
Red Onions
These turn into bright pink flavor bombs after just a few hours in brine. Perfect as a topping for tacos, burgers, and sandwiches.
Jalapeños and Peppers
Want spicy? Brine sliced jalapeños or banana peppers. They’re ready in just a day or two and add heat to everything from nachos to scrambled eggs.
Radishes
Radishes take on brine fast and offer a sharp, peppery crunch. They’re excellent with a sweeter or spiced vinegar mix.
Green Beans, Cauliflower, Beets
If you’ve got leftovers or garden extras, chances are, you can pickle it. Just make sure firm veggies are blanched before brining to soften them slightly.
With a good brine, even the pickiest veggie becomes a pickle lover’s dream.
How Long to Let Pickles Sit in Brine
Patience is key—but how long do you really need to wait?
Quick Pickles (Refrigerator Pickles)
- These are usually ready in 24 to 48 hours.
- The longer they sit, the more flavorful they get.
- Best eaten within 2–3 weeks for peak texture and taste.
Fermented Pickles
- Saltwater brine, no vinegar.
- Takes 1 to 4 weeks depending on temperature and type of vegetable.
- Develops tang naturally through good bacteria.
For the brine recipe in this guide (which includes vinegar), you’re making quick pickles. So within a couple of days, you’re in flavor town.
Pro Tip: Label your jars with the date you made them so you can track aging easily!
Flavor Variations to Try
Once you’ve nailed the basic brine, it’s time to get creative. Here are some fun ways to level up your pickle game:
Garlic & Dill Pickles
Add 2–3 crushed garlic cloves and a few fresh dill sprigs per jar. Classic and crowd-pleasing.
Spicy Chili Pickles
Crushed red pepper, whole dried chilies, or sliced jalapeños bring the heat. Great with carrots and cucumbers.
Sweet Bread & Butter Pickles
Add more sugar (up to 3 tablespoons per cup of vinegar), mustard seeds, turmeric, and celery seed. These are tangy, sweet, and irresistible.
Curry Pickles
Yep—curried pickles are a thing. Add curry powder or whole spices like cumin and coriander. Try this with cauliflower or onions.
Smoky Pickles
Add smoked paprika or a touch of liquid smoke to the brine. Perfect for BBQ sides.
You’re not just making pickles—you’re crafting flavor bombs. Experiment, taste, and tweak to your liking.
Storage Tips for Pickle Brine
A good brine is more than a one-time deal. Here’s how to store it and reuse it safely:
Refrigerator Storage
- Most homemade brine pickles should be stored in the fridge, especially if the jars aren’t sealed for shelf-stability.
- Pickles last up to 2 months refrigerated, though the texture may soften over time.
Room Temperature Storage
- Only safe for properly canned pickles using sterilized jars and lids.
- Requires following food safety guidelines (boiling water bath, sealed jars, etc.)
Reusing Brine
- You can reuse pickle brine once for a new batch—but only for refrigerator pickles.
- Don’t reuse brine that has been sitting with old veggies for too long.
- Never reuse fermented pickle brine for quick pickles or vice versa.
Also, brine loses strength and acidity over time, so always taste and adjust if reusing.
Common Mistakes to Avoid
Even the simplest brine can go sideways if you’re not careful. Watch out for these classic errors:
Using Iodized Salt
- Iodine can make the brine cloudy and affect taste.
- Stick to pickling salt or kosher salt for the best results.
Wrong Vinegar
- Don’t use cleaning vinegar or anything stronger than 5% acidity unless diluted.
- White distilled or apple cider vinegar is best.
Mushy Pickles
- Caused by hot brine on soft veggies or letting them sit too long before sealing.
- Chill your brine or use firmer vegetables.
Not Enough Liquid
- Your veggies should be fully submerged to avoid spoilage.
- Always make a little extra brine just in case.
Bad Seals
- If you’re canning, make sure lids seal properly.
- Unsealed jars = fridge storage only.
By avoiding these missteps, your homemade pickles will be crisp, safe, and full of flavor.
FAQs about Pickle Brine Recipe
1. Can You Reuse Pickle Brine?
Yes—but only once, and only for refrigerator pickles. The acidity drops after the first use, so don’t reuse it multiple times or for long-term storage.
2. Is Pickle Brine Good for You?
It can be! It’s full of electrolytes, and many athletes drink it to prevent cramps. Just watch the sodium levels.
3. Why Did My Pickles Get Mushy?
You probably poured hot brine over delicate veggies or used the wrong salt. Use firmer produce and let brine cool if needed.
4. Can You Drink Pickle Brine?
Believe it or not—yes! Some people love a swig post-workout for hydration. It’s also a killer cocktail ingredient.
5. What’s the Best Vinegar for Pickle Brine?
White distilled for a neutral base, apple cider for something fruitier. Avoid flavored vinegars unless you want them to take over the taste.
Conclusion
There you have it—the ultimate guide to making your own pickle brine. Whether you’re going old-school with dill spears or getting wild with curry-spiced carrots, it all starts with a great brine. The beauty of it? Once you understand the ratio and the process, the possibilities are endless. It’s simple, satisfying, and a delicious way to preserve and enjoy your favorite veggies. So grab your jars, spice it up, and start pickling like a pro. Your sandwiches (and your taste buds) will thank you.


