Phyllo Dough Recipe: If you’ve ever had flaky baklava or a perfectly crisp spanakopita, then you’ve tasted the magic of phyllo dough. This ultra-thin pastry is used in a variety of sweet and savory dishes and adds a beautiful crunch and delicate texture to every bite. While it’s easy to find pre-made phyllo in stores, nothing beats the freshness and satisfaction of making it yourself.
Making phyllo dough from scratch might sound intimidating—but don’t worry, it’s not as complicated as it seems. It just requires a bit of patience, a good rolling pin, and a lot of love. Plus, homemade phyllo gives you full control over the ingredients, and you can tweak it for your dietary preferences (think whole wheat, vegan, or gluten-free).
In this complete step-by-step guide, we’ll cover everything from ingredients and tools to rolling techniques and storage. Whether you’re a seasoned home cook or trying phyllo for the first time, this guide is your new go-to resource.
Ingredients You’ll Need
Here’s a simple list of what you’ll need to make homemade phyllo dough. The beauty of this recipe is its simplicity. Most of these ingredients are already in your pantry.
Basic Ingredients:
- 2 ½ cups (300g) all-purpose flour (plus more for dusting)
- 1 tsp salt
- 1 tsp white vinegar or lemon juice
- 1 tbsp olive oil (or any neutral oil)
- ¾ cup (180ml) warm water
Optional Add-Ins (Depending on Preference):
- 1 tsp sugar (for a slightly sweet version)
- Cornstarch (for dusting between sheets)
- Additional olive oil or melted butter (for layering)
Every ingredient plays a role. Flour is the base, water hydrates, vinegar strengthens the gluten structure, and oil makes the dough pliable and easier to roll out. If you’re after a slightly richer flavor or using it for a dessert, a little sugar can be added to balance the taste.
Kitchen Tools Required
Before diving into dough-making, make sure your kitchen is ready with the right tools. You don’t need anything fancy, but the right equipment will make your life way easier.
Must-Have Equipment:
- Large mixing bowl
- Rolling pin (preferably long and smooth)
- Clean, flat surface (like a large countertop or table)
- Measuring cups and spoons
- Clean kitchen towel or plastic wrap
Optional Tools for Easier Rolling:
- Pasta roller (for uniform thinness)
- Bench scraper
- Pastry brush
- Food scale (for precision)
If you’re using a pasta roller, you can speed up the process while ensuring the dough stays consistently thin—something that can be tricky with a rolling pin alone. However, if you enjoy traditional techniques, hand-rolling gives a rustic, authentic finish.
Understanding the Texture and Consistency
So, what does perfect phyllo dough feel like? It’s all about that soft yet elastic texture. It should be smooth, slightly tacky (but not sticky), and stretch easily without tearing. The dough should feel supple in your hands, similar to a well-rested pizza dough but slightly firmer.
Here are a few signs you’ve nailed it:
- It stretches thin without snapping.
- It doesn’t spring back aggressively when rolled.
- It holds its shape without being crumbly.
Common Mistakes to Avoid:
- Using cold water: Always use warm water to activate the gluten.
- Skipping the rest time: This makes rolling out way harder.
- Over-flouring: Too much flour can make the dough tough.
Step-by-Step Guide to Making Phyllo Dough
Ready to dive in? Let’s break it down into manageable, bite-sized steps. Making phyllo dough is more about patience and precision than speed.
Step 1: Preparing Your Workspace
Before anything else, clean off a large area on your kitchen counter or table. Phyllo needs space—it’s a stretch-out kind of dough! Make sure the surface is dry and lightly floured. Keep a clean towel nearby to cover the dough as you work, preventing it from drying out.
Also, keep your ingredients pre-measured and your tools within reach. You don’t want to be hunting down a rolling pin halfway through!
Step 2: Mixing the Dough
In a large mixing bowl, combine the flour and salt. In a separate container, mix the warm water with the vinegar and oil. Slowly pour the wet mixture into the dry ingredients, stirring as you go. Use a spoon or your hands to mix until a shaggy dough forms.
Once the dough starts coming together, turn it out onto your floured surface and begin to knead.
Step 3: Kneading the Dough
Kneading is where the magic begins. Work the dough for about 10–15 minutes. It should become smooth, elastic, and slightly tacky. If it’s too dry, add a tablespoon of water at a time. If it’s too sticky, dust lightly with flour. Don’t rush this part—developing gluten is key to a stretchy dough that won’t tear later.
Once it’s smooth and supple, shape the dough into a ball and coat it lightly with oil.
Step 4: Resting the Dough
Place the oiled dough ball back in the bowl and cover it with a clean towel or plastic wrap. Let it rest for at least 1 hour at room temperature. This relaxes the gluten and makes it much easier to roll thin sheets without resistance.
If you’re prepping ahead, you can let it rest in the fridge overnight—just bring it back to room temperature before rolling.
Step 5: Rolling Out the Dough
Now the fun (and slightly challenging) part: rolling.
Divide the dough into 10–12 equal portions. Roll each into a small ball, then start with one piece at a time. Keep the rest covered to prevent drying.
Lightly flour your surface and rolling pin. Begin rolling from the center outwards, rotating the dough frequently to keep it circular. You’re aiming for paper-thin sheets—almost see-through. This can take some time and effort, especially by hand.
For ultra-thin sheets, stretch them gently with your hands after rolling—similar to making strudel or stretching pizza dough.
Step 6: Stacking and Storing
Once each sheet is rolled out, dust it with a little cornstarch and place it on a floured surface or parchment paper. Repeat, stacking each sheet on top of the last with cornstarch or flour between to prevent sticking.
If you’re not using the phyllo immediately, wrap the stacked sheets in plastic wrap and a damp towel. Use within a few hours or freeze for later.
Pro Tips for Perfect Phyllo
Want bakery-level results at home? Here are a few expert tricks:
- Let the dough rest longer: Even up to 2 hours can help it stretch more easily.
- Use a long, thin rolling pin (called an “oklava” in Turkish): It gives better control over stretching.
- Rotate often: Turn your dough frequently while rolling to keep it even.
- Don’t over-flour: Too much flour dries out the dough. Use just enough to prevent sticking.
- Use cornstarch for layering: It keeps the sheets from fusing together while stacked.
And most importantly? Be patient. Your first sheet may not be perfect. That’s totally okay.
How to Store Phyllo Dough
Made a big batch? No worries—homemade phyllo stores surprisingly well.
Storing Fresh Dough
If you haven’t rolled it out yet, wrap the dough ball tightly in plastic wrap and store it in the refrigerator for up to 3 days. Bring it to room temperature before rolling.
Storing Rolled Sheets
Layer rolled sheets between parchment or wax paper, dusted lightly with cornstarch. Wrap tightly with plastic wrap and place in an airtight bag. Use within 2 days if refrigerated.
Freezing Tips
Homemade phyllo freezes beautifully. Just ensure it’s well-wrapped to prevent freezer burn. Lay sheets flat in a ziplock or vacuum-sealed bag. When ready to use, thaw in the fridge overnight and bring to room temperature before handling.
How to Use Phyllo Dough in Recipes
So, what can you actually make with your beautiful, flaky sheets?
Sweet Recipes:
- Baklava: The classic Middle Eastern dessert layered with nuts and honey.
- Galaktoboureko: Greek custard pie wrapped in crispy phyllo.
- Apple strudel: A thin, crisp variation of a classic European dessert.
Savory Recipes:
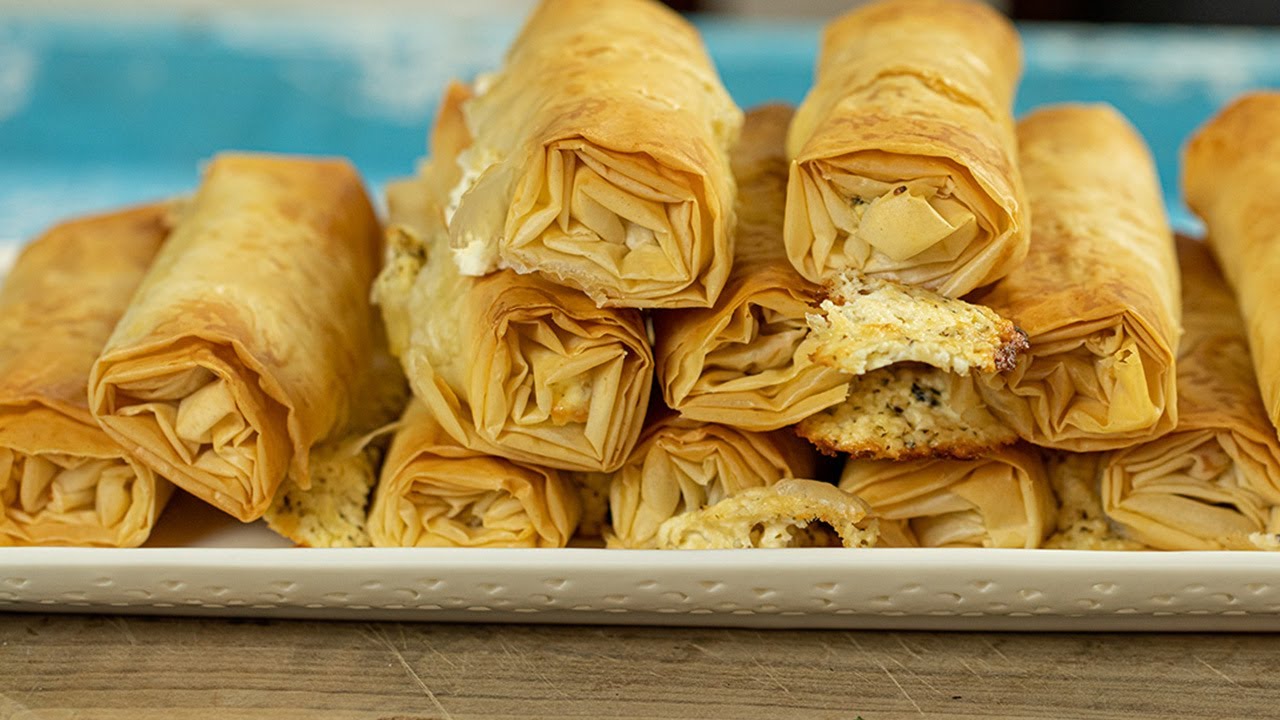
- Spanakopita: Greek spinach and feta pie.
- Börek: Turkish savory pastries filled with cheese, meat, or veggies.
- Phyllo Pizza: A quick and creative twist on pizza night.
Phyllo can be layered for thicker, more substantial bites or folded into parcels, triangles, or rolls.
Phyllo Dough vs Puff Pastry
People often confuse phyllo with puff pastry, but they’re totally different creatures.
| Feature | Phyllo Dough | Puff Pastry |
|---|---|---|
| Fat Content | Very little in dough itself | High fat laminated into layers |
| Texture | Crispy and flaky | Buttery and airy |
| Preparation | Rolled ultra-thin | Folded repeatedly with butter |
| Use Cases | Light, crisp dishes | Rich, buttery pastries |
Phyllo is better for lighter, crispier textures. Puff pastry, with all its buttery layers, is heavier and more indulgent.
Common Troubleshooting FAQs
Even experienced bakers mess up phyllo sometimes. Here’s how to fix common issues:
- Too sticky? Add a little more flour and knead again.
- Dough tearing while rolling? It may need more rest. Let it sit for another 30 minutes.
- Sheets sticking together? Use more cornstarch or flour between layers.
- Dough snaps back when rolling? Gluten’s too tight—rest it longer.
Healthier Alternatives & Variations
Trying to lighten things up? Phyllo is super versatile.
- Whole Wheat Phyllo: Substitute up to 50% of the all-purpose flour with whole wheat flour. It adds a nutty flavor and extra fiber.
- Vegan Phyllo: This recipe is already naturally vegan if you skip butter in layering and use oil.
- Gluten-Free Phyllo: Use a gluten-free flour blend with xanthan gum for elasticity, but note—it’s trickier to work with and more fragile.
Time-Saving Hacks
Short on time but still want that flaky finish?
- Use a Pasta Roller: Roll dough to the thinnest setting for even, smooth sheets.
- Pre-roll and freeze: Make a big batch, roll out, and freeze the sheets in stacks for up to 3 months.
- Cut and shape ahead: Fold into triangles or rolls, freeze, then bake fresh as needed.
Serving Suggestions
Want to impress dinner guests (or just yourself)? Try these phyllo-based dishes:
- Mini Phyllo Cups: Fill with goat cheese and roasted peppers for appetizers.
- Phyllo-Wrapped Brie: Add honey and walnuts for the ultimate holiday starter.
- Fruit Tarts: Stack layers of phyllo in a muffin tin, fill with fruit and bake.
These are just a few ideas, but really, phyllo is a blank canvas.
FAQs about Phyllo Dough Recipe
1. Can I make phyllo dough without a stand mixer?
Absolutely! This recipe is traditionally made by hand. Just be prepared to knead thoroughly—about 10 to 15 minutes.
2. How long can homemade phyllo last in the freezer?
Up to 3 months if properly wrapped and stored flat. Just thaw overnight before using.
3. Can I use olive oil instead of vegetable oil?
Yes! Olive oil adds a richer, slightly fruity flavor. It’s great for savory phyllo dishes.
4. How do I rehydrate dried-out phyllo?
Mist lightly with water and cover with a damp towel for a few minutes. Don’t soak—it’ll get soggy.
5. Is it worth making phyllo from scratch?
If you love cooking, absolutely. It’s fresher, cleaner, and more customizable than store-bought options.
Conclusion
Homemade phyllo dough is more than a recipe—it’s a culinary adventure. Yes, it takes a little time and a gentle hand, but the rewards are crisp, golden, and incredibly satisfying. Whether you’re layering it for baklava, wrapping it around spinach and cheese, or trying something new entirely, the effort pays off in flavor and texture that store-bought just can’t match.
Once you try making your own phyllo, you’ll wonder why you didn’t do it sooner. So roll up your sleeves, dust your counter, and get ready to impress yourself.


