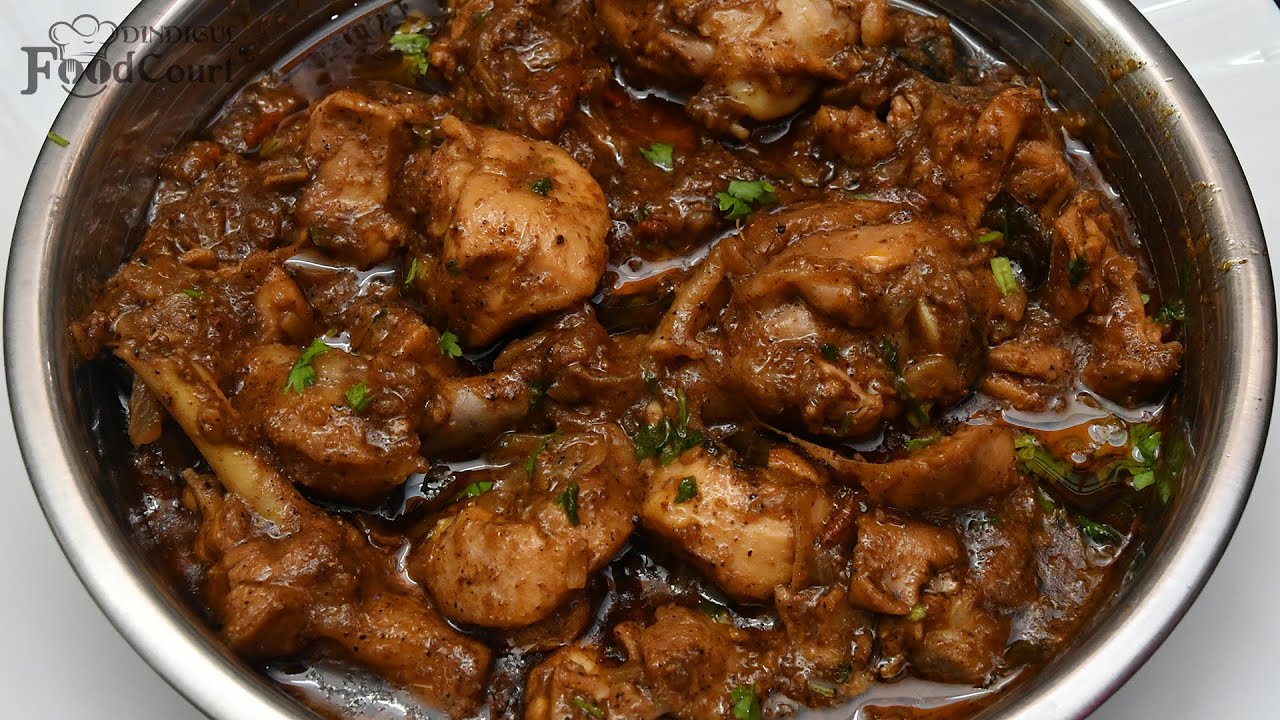
Pepper Gravy Recipe: Who doesn’t love a rich, creamy, pepper-packed gravy poured generously over fluffy mashed potatoes, buttery biscuits, or sizzling steak? Pepper gravy is a Southern kitchen staple, and once you taste it made from scratch, you’ll never go back to the packaged stuff again. It’s warm, bold, and loaded with that distinctive peppery bite that makes every bite feel like a cozy hug on a cold day.
In this guide, I’ll walk you through everything you need to know to make a flawless batch of homemade pepper gravy—from gathering your ingredients to whisking the perfect roux and mastering the creamy texture. Whether you’re prepping for a family dinner, a holiday feast, or just looking to impress with a hearty brunch addition, this recipe is a keeper.
Ready to dive in and learn the secrets of making the best pepper gravy ever? Grab your whisk, and let’s get started!
List of Ingredients You’ll Need
Before we hit the stovetop, let’s round up everything you’ll need. The good news? Pepper gravy is made with simple ingredients you probably already have in your pantry or fridge.
Basic Pantry Staples:
- Butter or Bacon Grease (2-3 tbsp): The flavor base. Bacon grease adds a smoky twist.
- All-Purpose Flour (2 tbsp): Used to create a roux that thickens your gravy.
- Milk or Broth (2 cups): Whole milk makes it creamy, but chicken or beef broth can be used for a savory variation.
Fresh Ingredients:
- Freshly Ground Black Pepper (1 to 1 ½ tsp): The star of the show. Use freshly cracked for max flavor.
- Salt (to taste): Enhances and balances the pepper’s kick.
- Garlic (optional, 1 clove minced): Adds depth and complexity.
Optional Add-ins for Custom Flavor:
- Heavy Cream (for extra richness)
- Onion Powder or Garlic Powder (¼ tsp each)
- Cayenne Pepper (for heat)
- Chopped Fresh Herbs (thyme, rosemary, parsley)
This ingredient list is super flexible. If you’re cooking for guests or dietary needs, you can tweak it (and I’ll show you how later in the article).
Tools You’ll Need
Let’s make sure you have the right tools ready. Pepper gravy doesn’t require anything fancy, but a few basics will make the job smoother.
Cooking Equipment:
- Medium Saucepan or Skillet: Preferably nonstick or cast iron for even heat distribution.
- Whisk: Essential for smooth, lump-free gravy.
- Wooden Spoon or Silicone Spatula: For stirring without damaging nonstick surfaces.
Measuring Tools:
- Measuring Cups and Spoons: Accuracy matters for a balanced flavor.
- Pepper Grinder: If you’re going the fresh route—and I highly recommend you do!
Having everything within reach before you begin cooking is key to a smooth and stress-free process. Nothing ruins gravy faster than having to stop mid-stir to look for an ingredient or tool!
Choosing the Right Pepper
Let’s talk about the real MVP of this recipe: black pepper. It’s not just about spicing things up—it’s about creating layers of flavor that hit you with warmth and depth in every spoonful.
Black Pepper Varieties:
There are several types of black pepper, and each brings something unique to your gravy:
- Tellicherry Pepper: Bold, fruity, and slightly citrusy. Perfect for a more refined, complex gravy.
- Malabar Pepper: More traditional with a pungent and sharp flavor. Great for a classic southern pepper gravy.
- Smoked Pepper: Adds a deep, smoky kick—ideal if you’re pairing the gravy with grilled meats or roasted veggies.
Freshly Cracked vs. Pre-ground:
This might sound like a small detail, but trust me—it makes a huge difference. Freshly cracked black pepper delivers a stronger aroma and flavor than the pre-ground stuff, which can lose its punch over time. If you’ve got a pepper grinder, use it generously!
You want visible flecks of black pepper throughout the gravy—it’s not just about taste, but that rustic, homemade look too. That speckled finish screams “made from scratch,” and it tastes as good as it looks.
Tips Before You Start Cooking
Before you start heating the pan, there are a few pro-tips that will help you nail it on your first try.
Prepping Your Ingredients:
- Measure everything out first. Gravy comes together fast, so having your flour, fat, liquid, and seasonings ready to go will keep you from scrambling.
- Warm the milk or broth slightly before adding it to the roux—it prevents clumping and helps everything blend more smoothly.
Temperature Control:
- Start on medium heat—you want the butter or fat to melt, not burn.
- Don’t walk away. Gravy is one of those things that needs your full attention for a few minutes. If you step away, the flour can overcook or burn in seconds.
Bonus Tip:
If you’re using broth, go for low-sodium so you have better control over the saltiness. You can always add more salt—but you can’t take it out!
Step-by-Step Guide to Making Pepper Gravy
Now for the fun part: let’s make some gravy! This process takes about 10–15 minutes from start to finish.
Step 1: Melt the Fat or Butter
Start by placing your saucepan or skillet over medium heat. Add 2 to 3 tablespoons of butter or bacon grease. Let it melt completely. If you’re using bacon grease, let the little brown bits stay—they’ll add insane flavor!
Keep your whisk or spoon handy—this will move quickly.
Step 2: Whisk in the Flour to Make a Roux
Once your fat is hot and melted, add in 2 tablespoons of all-purpose flour. Begin whisking immediately and keep the mixture moving. You’re looking for a smooth, bubbly texture.
Cook the roux for about 2–3 minutes until it turns a light golden color. This helps remove that raw flour taste. Don’t rush this step—it’s the foundation of a good gravy!
Step 3: Add Liquid (Milk or Broth)
Slowly pour in 2 cups of warm milk or broth, a little at a time. Whisk continuously as you pour to prevent lumps from forming.
Once all the liquid is in, keep whisking until the mixture is smooth and starting to thicken. This should take about 5–7 minutes depending on your heat level.
Step 4: Stir Continuously Until Smooth
As your gravy heats, it will begin to bubble and thicken. Keep stirring—it’s the key to getting that ultra-silky texture. Use a spoon to check the back for consistency. If it coats the spoon without sliding off, you’re on the right track.
Step 5: Add Pepper and Seasonings
Now it’s time to season. Add:
- 1 to 1½ teaspoons of freshly ground black pepper
- Salt to taste (start with ¼ tsp and adjust)
- Optional: Garlic powder, onion powder, or a pinch of cayenne for a kick
Stir everything together and let it simmer for 2 more minutes so the flavors can marry. You’ll smell that peppery magic wafting up—mouthwatering!
Step 6: Simmer and Thicken
Let your gravy simmer gently for another 2–3 minutes, stirring occasionally. It will thicken further as it sits, so don’t panic if it seems slightly runny now.
Taste and adjust seasoning if needed. Add more pepper if you want it bolder. Craving richness? Stir in a splash of cream or a bit of butter to finish it off.
That’s it—you’ve just made perfect homemade pepper gravy!
How to Adjust Thickness
Not all gravies are created equal—some folks love it silky and pourable, others want it thick enough to stand a spoon in. Here’s how to tweak your pepper gravy’s consistency like a pro.
Want Thicker Gravy?
If your gravy is too thin, don’t worry—it’s an easy fix.
- Simmer it longer: The heat will naturally reduce the liquid, thickening the gravy over time. Just keep stirring so it doesn’t scorch.
- Make a slurry: Mix 1 tablespoon of flour or cornstarch with 2 tablespoons of water or broth. Whisk it in slowly while simmering.
- Add cream: Heavy cream will not only thicken your gravy but also make it extra rich.
Want Thinner Gravy?
If your gravy turned out thicker than you’d like:
- Add more liquid—milk, broth, or even a splash of water.
- Whisk constantly while adding liquid until it reaches the consistency you want.
- If it becomes too thin, just simmer it a bit longer and it’ll bounce back.
Avoiding Lumps
Lumpy gravy is a common issue, but totally preventable:
- Always whisk the flour into melted fat completely before adding liquid.
- Warm your liquid before adding it.
- Pour slowly and whisk constantly.
Smooth, creamy, and speckled with peppery goodness—that’s your gravy goal.
Flavor Variations
Ready to spice things up? Here are some fun twists you can try once you’ve mastered the classic pepper gravy recipe.
Creamy Pepper Gravy
Want to make your gravy extra indulgent?
- Substitute ½ cup of the milk with heavy cream.
- Add a knob of butter right before serving for a glossy finish.
- You can even stir in a little grated Parmesan cheese for umami and richness.
This version is perfect over biscuits or scrambled eggs for a decadent brunch.
Spicy Southern-Style Gravy
Crank up the heat with this bold twist:
- Add ½ teaspoon of cayenne pepper or a splash of hot sauce.
- Use cracked black pepper instead of finely ground.
- Throw in a pinch of paprika for color and a smoky edge.
This fiery version pairs amazingly with fried chicken or country-fried steak.
Mushroom Pepper Gravy
Looking for a vegetarian version that’s packed with umami?
- Sauté ½ cup of chopped mushrooms in butter before adding the flour.
- Use vegetable broth instead of milk.
- Add a splash of soy sauce for extra depth.
It’s earthy, savory, and pairs beautifully with mashed potatoes or roasted veggies.
Serving Suggestions
You’ve just made a batch of luscious pepper gravy—now what do you pour it on? Here are some classic and creative serving ideas that’ll make your dish shine.
Over Biscuits
This one’s a Southern tradition for a reason. Split warm, buttery biscuits and ladle that pepper gravy right over the top. It’s simple, satisfying, and oh-so-soulful.
With Mashed Potatoes
A plate of fluffy mashed potatoes without gravy? Sad. Pour your pepper gravy right into the center, let it ooze down the sides, and you’ve got comfort food gold.
On Fried Chicken or Chicken-Fried Steak
A crunchy, golden fried cutlet with pepper gravy smothered on top? Yes, please. The bold spice of the gravy cuts through the richness of fried food and creates a match made in heaven.
Other Ideas:
- On meatloaf
- Over roasted veggies
- Drizzled on breakfast casseroles
- Inside a breakfast burrito
It’s more versatile than you think—and trust me, you’ll want to pour it on everything once you taste it.
Make-Ahead and Storage Tips
Good news: pepper gravy stores like a champ. Whether you’re meal-prepping or saving leftovers, here’s how to keep it delicious for days.
Refrigeration:
- Let the gravy cool to room temperature.
- Transfer to an airtight container.
- Store in the fridge for up to 4 days.
It might thicken a bit in the fridge, but don’t worry—we’ll fix that next.
Reheating Tips:
- Reheat on low heat on the stovetop.
- Add a splash of milk or broth while stirring to loosen the texture.
- Microwave? Sure—just use short intervals and stir between each one.
Freezing:
Yes, you can freeze pepper gravy!
- Pour into a freezer-safe container or zip bag.
- Freeze for up to 2 months.
- Thaw in the fridge overnight and reheat slowly.
For best texture, use milk or broth-based gravy rather than cream-based when freezing.
Common Mistakes to Avoid
Even simple recipes have room for error—here’s how to sidestep the biggest pepper gravy pitfalls.
Burning the Roux
This happens fast. The key is low-to-medium heat and constant whisking. If your roux turns dark brown or smells burnt, start over. A bitter roux will ruin your whole batch.
Adding Liquid Too Fast
Dumping in all the milk or broth at once will cause lumps. Always pour slowly and whisk as you go.
Too Much Pepper
Yes, this is a pepper gravy—but balance is key. Start small (1 tsp) and build up. You can add more, but you can’t take it out.
Not Stirring Enough
Gravy loves to stick to the bottom of the pan and scorch if you leave it alone. Keep that whisk or spoon moving, especially while it’s thickening.
Gluten-Free and Dairy-Free Options
Just because you’re avoiding gluten or dairy doesn’t mean you have to miss out on a steaming plate of pepper gravy. With a few smart swaps, you can still enjoy all the rich, peppery goodness—without the allergens.
Gluten-Free Version
Skip the all-purpose flour and use one of these instead:
- Gluten-free all-purpose flour blends: These mimic regular flour 1:1.
- Cornstarch slurry: Mix 1 tablespoon cornstarch with 2 tablespoons cold water and whisk it in at the end to thicken.
- Arrowroot powder or potato starch: Great natural thickeners that work similarly to cornstarch.
Tips:
- If using cornstarch, don’t boil the gravy too long—it can become stringy.
- Always whisk vigorously to prevent clumps from forming.
Dairy-Free Version
For a creamy gravy without milk or butter:
- Use plant-based milks like unsweetened almond, oat, or soy milk. Oat milk gives the creamiest texture.
- Use olive oil, vegan butter, or margarine instead of regular butter.
- Add a splash of nutritional yeast for added savory flavor.
Bonus: Coconut milk adds a unique, rich twist, especially in spicy versions.
With these easy substitutions, your gravy will still be smooth, flavorful, and just as satisfying—proof that dietary restrictions don’t have to mean flavor sacrifices.
Nutritional Breakdown
Here’s a rough look at the nutritional content of one serving (about ¼ cup) of classic pepper gravy made with milk and butter:
| Nutrient | Amount per Serving |
|---|---|
| Calories | 130–160 kcal |
| Fat | 10–12g |
| Saturated Fat | 6g |
| Carbohydrates | 8–10g |
| Protein | 2–3g |
| Sodium | 200–300mg |
| Fiber | 0g |
Note: The exact numbers will vary depending on the type of milk, fat, and flour used, as well as how much salt and pepper you add.
Looking to make it lighter? Use:
- Low-fat milk instead of whole milk
- Olive oil instead of butter
- Less added salt and fat
Why Homemade Is Better Than Store-Bought
Let’s be real—there are pepper gravy packets lining grocery shelves. But once you make your own, you won’t go back. Here’s why homemade always wins:
1. Fresher Flavor
You’re using real ingredients: fresh pepper, rich dairy (or dairy-free options), quality broth. No weird aftertaste or preservatives—just bold, clean flavor.
2. Total Control
You can adjust everything:
- Spice level
- Thickness
- Salt content
- Ingredients for dietary needs
No need to settle for bland or overly salty gravy ever again.
3. It’s Cheaper (and Quicker!)
You probably already have most of the ingredients. And from start to finish, it takes less than 15 minutes to whip up from scratch. Way faster than a trip to the store!
4. It Feels Homemade—Because It Is
That satisfaction of making something comforting and delicious with your own hands? You can’t buy that in a packet.
FAQs about Pepper Gravy Recipe
1. Can I use cornstarch instead of flour to thicken my gravy?
Yes! Just make a slurry by mixing 1 tablespoon of cornstarch with 2 tablespoons of cold water, then whisk it into the hot gravy. It’ll thicken quickly—no roux needed.
2. Is pepper gravy vegetarian or vegan?
The classic version isn’t (it uses butter and milk), but you can easily make it vegetarian or vegan by swapping in plant-based milk and butter, and using veggie broth instead of meat broth.
3. What’s the best broth to use?
Chicken broth adds great flavor, but beef broth gives it a darker, richer finish. For a vegetarian option, go with a high-quality veggie broth. Just avoid anything too salty.
4. Can I freeze leftover gravy?
Absolutely. Let it cool, then store it in a freezer-safe container or zip bag. It keeps for up to 2 months. Thaw in the fridge and reheat slowly, adding a splash of milk or broth to bring it back to life.
5. How long does homemade pepper gravy last in the fridge?
Stored in an airtight container, it’ll stay fresh in the refrigerator for 3 to 4 days. Reheat gently and stir well to restore the creamy texture.
Conclusion
Pepper gravy might be humble in its ingredients, but it’s big in flavor and comfort. Whether you’re making it for biscuits, mashed potatoes, steak, or just to drizzle over breakfast, this rich, peppery sauce is bound to become a favorite at your table.
From its buttery roux base to the bold punch of freshly cracked black pepper, everything about this dish feels warm and homey. And once you’ve got the basics down, you can tweak and twist it to fit your tastes, your diet, or whatever you’ve got in the fridge.
So the next time you want to impress with something deceptively simple yet totally delicious, make this pepper gravy. It’s not just a recipe—it’s a kitchen skill that’ll serve you for life.


