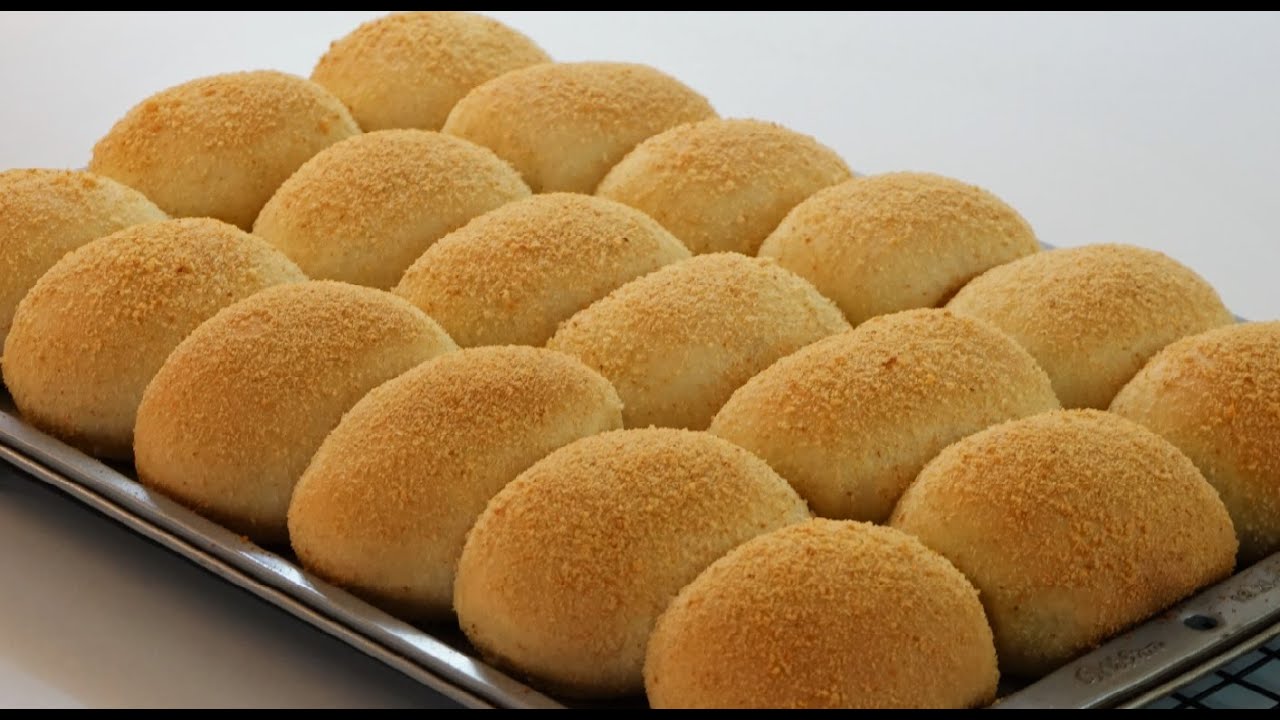
Pandesal Recipe: Pandesal, or pan de sal, is the beloved Filipino bread roll that has become a staple in every Filipino household.
Literally meaning “salt bread” in Spanish, this bread isn’t overly salty—it’s slightly sweet, super soft, and irresistibly fluffy on the inside, with a golden breadcrumb-coated crust on the outside. It’s often eaten for breakfast, merienda (snack), or paired with coffee or hot chocolate.
Whether you eat it plain, slathered with butter, filled with cheese, or dipped in coffee, pandesal has a special way of bringing comfort and nostalgia.
Why You’ll Love This Pandesal Recipe
There are dozens of pandesal recipes out there, but this one stands out for several reasons. First off, it’s beginner-friendly. You don’t have to be a professional baker to pull this off. Second, the texture is everything you want in pandesal—pillowy soft, slightly chewy, with a toasty crust from the breadcrumbs. It’s not too sweet, making it a perfect blank canvas for savory or sweet fillings.
Also, this recipe uses ingredients you probably already have in your pantry. And if you follow the step-by-step guide, you’ll avoid the most common mistakes. Want a tip? Don’t rush the proofing process. That’s the secret to getting that classic rise and airy texture.
Baking your own pandesal also lets you control the size, sweetness, and flavor. Add cheese, ube, or even corned beef if you’re feeling adventurous. This recipe is versatile and forgiving—ideal for experimentation or just sticking to tradition. And the smell that fills your kitchen while baking? Pure heaven.
Is Pandesal Sweet or Savory?
Great question—and the answer is: both! Traditional pandesal leans slightly sweet, but it’s incredibly neutral at its core. That’s why Filipinos pair it with a wide range of fillings—everything from cheese and peanut butter to sardines and scrambled eggs. It’s like a bread roll that adapts to your cravings.
So, if you prefer sweet rolls, you’ll love pandesal with condensed milk or chocolate spread. More into savory snacks? Slap on some ham and egg or stuff it with adobo flakes. Because of its subtle flavor, pandesal is one of the most versatile breads you can bake at home.
Tools You’ll Need to Make Pandesal
You don’t need fancy tools, but having the right basics helps a lot. Here’s what you’ll need:
Mixing Tools:
- Mixing bowls (at least two sizes)
- Measuring cups and spoons
- Wooden spoon or spatula
- Stand mixer with dough hook (optional but helpful)
Baking Tools:
- Baking tray or sheet pan
- Parchment paper or baking mat
- Clean kitchen towel (for proofing)
- Oven thermometer (to ensure accurate temp)
- Sifter (optional but helps for flour)
- Rolling pin (optional for shaping)
List of Ingredients You’ll Need
Getting your ingredients ready before starting saves time and helps prevent errors.
Dry Ingredients:
- 4 cups all-purpose flour (plus extra for kneading)
- 1 cup breadcrumbs (for coating)
- 1 tsp salt
Wet Ingredients:
- 2¼ tsp active dry yeast (or 1 packet)
- 1 cup warm milk (110°F / 43°C)
- 1 large egg
- ⅓ cup sugar
- ¼ cup unsalted butter (melted)
Optional Add-ins:
- ½ cup grated cheese (cheddar or Eden cheese for Filipino flavor)
- Ube jam or dulce de leche
- Pandan or ube extract (for flavor variations)
Want a twist? Add 1 tsp of vanilla extract for a richer aroma.
Tips Before You Start Baking
- Use warm—not hot—milk to activate the yeast. Hot milk can kill it.
- Let the dough rise in a warm, draft-free spot.
- Don’t over-flour the dough—it should be slightly sticky but manageable.
- Be patient with the rising time—this is when the magic happens.
- Use fresh yeast. If your yeast doesn’t foam in 10 minutes, it’s dead. Get a new one.
- Coating with fine breadcrumbs gives pandesal its signature texture.
Step-by-Step Guide to Make Pandesal
Let’s break this down so you can follow it easily.
Step 1: Activate the Yeast
In a small bowl, mix warm water, sugar, and active dry yeast. Stir gently and let it sit for 5–10 minutes until foamy. This shows the yeast is active and ready.
Step 2: Mix the Dry Ingredients
In a large bowl, combine all-purpose flour, salt, and a little sugar. Mix well to evenly distribute the ingredients.
Step 3: Combine Wet and Dry Mixtures
Add the yeast mixture, milk, melted butter or oil, and eggs (if using) to the dry ingredients. Mix until a soft, slightly sticky dough forms.
Step 4: Knead the Dough
Transfer the dough to a lightly floured surface. Knead for 8–10 minutes until smooth, elastic, and no longer sticky. Add small amounts of flour if needed.
Step 5: First Rise (Proofing)
Place the dough in a greased bowl, turning once to coat. Cover and let it rise in a warm area for 1–1½ hours, or until doubled in size.
Step 6: Divide and Shape the Dough
Punch down the dough to release air. Divide it into equal portions and shape each piece into smooth balls.
Step 7: Second Rise (Proofing Again)
Arrange the dough balls on a baking tray, leaving space between them. Cover lightly and let rise again for 30–45 minutes until puffy.
Step 8: Coat with Breadcrumbs
Gently roll each dough ball in fine breadcrumbs to give pandesal its signature coating.
Step 9: Bake to Golden Perfection
Preheat the oven to 350°F (175°C). Bake for 15–20 minutes or until the tops are lightly golden.
Step 10: Let it Cool Before Serving
Remove from the oven and allow to cool slightly. Serve warm and enjoy with butter, cheese, or coffee ☕🍞
How to Store Pandesal
Freshly baked pandesal is best enjoyed within a day, but you can definitely store it for later.
Storing at Room Temperature:
- Let the pandesal cool completely.
- Place in an airtight container or bread box.
- Store at room temp for up to 2–3 days.
Freezing Instructions:
- Let pandesal cool completely.
- Wrap individually in plastic wrap, then place in a zip-top freezer bag.
- Store for up to 1 month.
- To reheat, thaw at room temp and warm in the oven or microwave.
How to Reheat Pandesal
To bring your pandesal back to life:
- Microwave: Wrap in a damp paper towel and heat for 10–15 seconds.
- Oven: Reheat at 300°F (150°C) for 5–7 minutes.
- Toaster oven: Perfect for lightly crisping the outside.
Avoid over-reheating—it can dry out the bread.
Common Mistakes to Avoid
- Killing the yeast: Always test your yeast before baking. Use warm (not hot) liquid.
- Not kneading enough: Gluten needs time to develop. Don’t skip kneading.
- Skipping proofing time: Letting the dough rise fully ensures soft, fluffy pandesal.
- Using too much flour: Dough should be slightly sticky. Resist over-flouring.
- Overbaking: A few extra minutes can dry out the bread. Watch closely near the end.
Variations and Flavor Ideas
Pandesal is flexible! Try these creative twists:
- Cheese Pandesal: Add cubes of cheddar or cream cheese inside.
- Ube Pandesal: Mix in ube extract and fill with ube halaya.
- Coffee Pandesal: Add 1 tbsp instant coffee to your wet ingredients.
- Garlic Butter Pandesal: Brush with garlic butter before baking.
- Chocolate Pandesal: Stuff with Nutella or chocolate chips.
Each variation brings a new layer of flavor while keeping the soul of pandesal intact.
Serving Suggestions
Pandesal is more than just bread—it’s a blank canvas for endless pairings. Traditionally, Filipinos eat it during breakfast or merienda (afternoon snack), but honestly, it’s delicious any time of day.
Here are some popular ways to enjoy pandesal:
- Classic Butter Spread: Warm pandesal with a thick slab of butter that melts into the crumb? Yes, please.
- With Coffee or Hot Chocolate: Dunking pandesal in your morning drink is practically a national ritual in the Philippines.
- Savory Style: Add scrambled eggs, longganisa, tapa, or corned beef. It becomes an instant sandwich.
- Sweet Style: Spread with peanut butter, Nutella, or condensed milk for a comforting dessert-like treat.
- Cheesy Pandesal: Pair it with slices of Eden or cheddar cheese—it’s the ultimate merienda combo.
Pandesal also works great as a base for sliders or mini sandwiches. Hosting brunch? Serve mini pandesals with assorted spreads and fillings for a DIY sandwich bar.
Is Pandesal Healthy?
Pandesal, like most bread, can be part of a healthy, balanced diet—especially if eaten in moderation. It’s not a health food, but it doesn’t have to be a guilty pleasure either.
Let’s break it down:
- Carbohydrates: Yes, it’s carb-heavy, but carbs fuel your energy, especially when eaten earlier in the day.
- Protein: You get a bit from the flour, milk, and egg. Pair with protein-rich fillings like egg or cheese to balance it out.
- Fat: Mostly from butter and eggs. You can reduce the butter slightly or use a healthier alternative like olive oil, but it will change the flavor and texture.
- Sugar: This recipe uses modest sugar, but you can adjust based on your preference.
If you’re watching your sugar or carb intake, just have one or two and enjoy them mindfully. Or, try whole wheat flour for a healthier twist.
Fun Facts About Pandesal
- It’s not that salty: Despite its name, pandesal isn’t salty at all. The “salt bread” title comes from the Spanish origin of the name, not its actual taste.
- A staple since the Spanish era: Pandesal has been a Filipino favorite since the 1600s, during Spanish colonization.
- Sold in panaderías: Local bakeries, or panaderías, often open before sunrise just to meet the morning demand for fresh pandesal.
- Eaten in every province: No matter where you are in the Philippines—from cities to rural towns—you’ll find pandesal being enjoyed with coffee at daybreak.
- Pandesal’s humble rise: It was originally made with cheaper flour alternatives when imported wheat was expensive, showing its roots as “bread for the people.”
FAQs about Pandesal Recipe
1. Can I make pandesal without breadcrumbs?
Yes, but it won’t have the signature texture. If you don’t have breadcrumbs, you can skip it or make your own by toasting and grinding stale bread.
2. How do I know if my dough has risen enough?
Poke it gently—if it springs back slowly and leaves a slight indent, it’s ready.
3. Can I use whole wheat flour instead of all-purpose?
You can! Just note that it’ll be denser and less fluffy. Try a 50/50 mix to start.
4. What can I substitute for milk?
You can use water or dairy-free milk like almond or soy, but it might slightly alter the taste and softness.
5. Why is my pandesal dense instead of soft?
It’s likely due to under-kneading, using expired yeast, or rushing the proofing process. Make sure you let the dough rise fully.
Conclusion
Making pandesal from scratch is more than just baking bread—it’s recreating a comforting piece of Filipino culture right in your kitchen. This soft, fluffy roll has stood the test of time, filling homes with its irresistible aroma and hearts with warm memories. Whether you’re eating it plain, filled, toasted, or dunked in coffee, pandesal always delivers that homey satisfaction that can’t be beaten.
Now that you have this ultimate step-by-step guide, you’re more than ready to bake your own batch. It may take a bit of patience, especially with the rising times, but trust me—the results are worth every minute.
So, preheat that oven, roll up your sleeves, and bring the delicious smell of freshly baked pandesal into your home. Once you try homemade pandesal, you might never go back to store-bought again.


