Nestlé Toll House Cookie Recipe: There’s something incredibly nostalgic about the smell of fresh-baked chocolate chip cookies wafting through the house. And when it comes to legendary cookie recipes, nothing beats the Nestlé Toll House original. Whether you’re a seasoned baker or just stepping into the world of homemade treats, this guide will walk you through every step to make cookies that are soft, chewy, and bursting with melty chocolate.
Let’s get started with the essentials!
A Sweet Legacy: The History Behind Nestlé Toll House Cookies
Before we dive into the dough, let’s take a quick look at how this iconic recipe came to be. The Nestlé Toll House cookie has roots going all the way back to the 1930s, when Ruth Wakefield, owner of the Toll House Inn in Massachusetts, created the first-ever chocolate chip cookie. She chopped up a Nestlé semi-sweet chocolate bar and added it to her cookie dough, expecting the chocolate to melt. Instead, the pieces held their shape, and the rest is delicious history.
Nestlé saw the potential and struck a deal with Ruth—her recipe would appear on their chocolate packaging, and she’d receive a lifetime supply of chocolate. Not a bad deal for creating what is arguably America’s most beloved cookie.
Why Everyone Loves This Classic Chocolate Chip Cookie
There are dozens of chocolate chip cookie recipes out there, but none hit the sweet spot quite like this one. So what makes the Nestlé Toll House cookie so special?
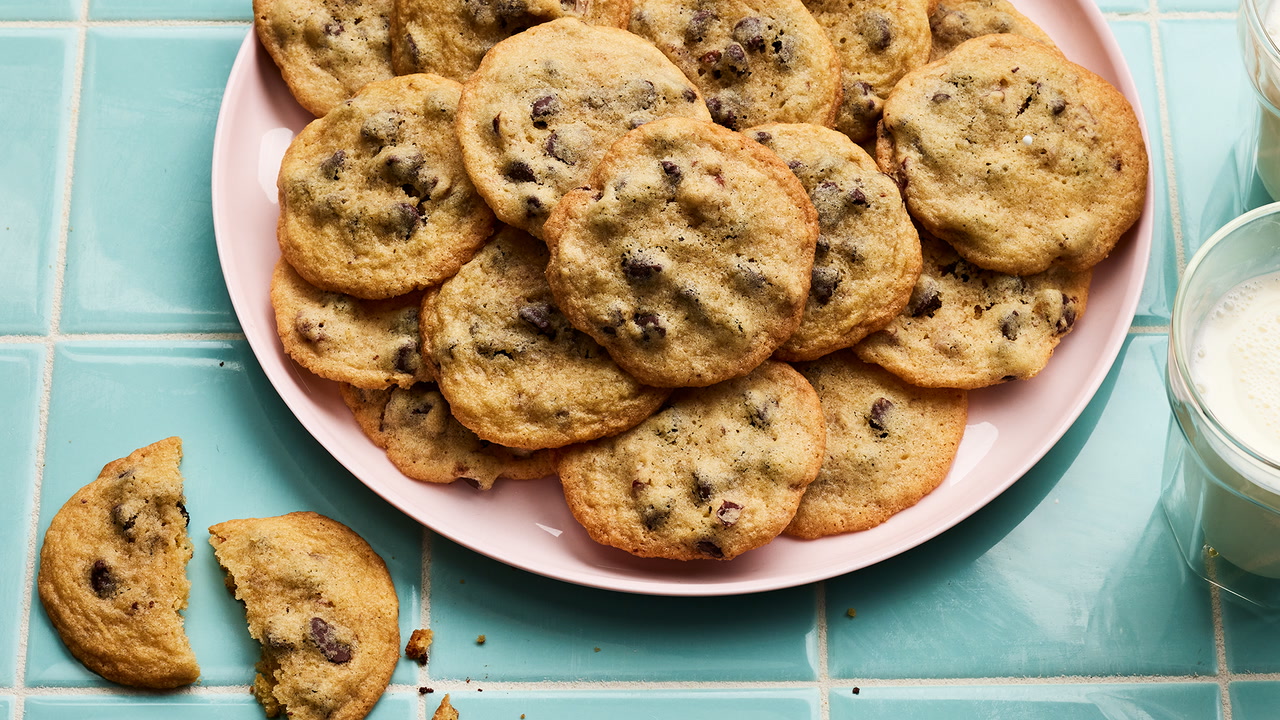
- Perfect Texture: Slightly crispy edges with a soft, gooey center.
- Flavor Balance: The ideal mix of rich chocolate, sweet vanilla, and buttery goodness.
- Consistency: Reliable results, every single time.
- Customizable: Add nuts, swap the chips, or turn them into bars—it’s a flexible base recipe.
- Pure Nostalgia: It’s the taste of childhood for many, and a comfort food for all.
List of Ingredients You’ll Need
Getting the ingredients right is key to achieving that classic Toll House taste. Below is the complete list of what you’ll need, divided into categories for clarity.
Essential Dry Ingredients
- 2 1/4 cups all-purpose flour
- 1 teaspoon baking soda
- 1 teaspoon salt
These form the dry base of your dough, giving the cookies structure and helping them rise slightly during baking.
Wet Ingredients That Make the Magic
- 1 cup (2 sticks) unsalted butter, softened
- 3/4 cup granulated sugar
- 3/4 cup packed brown sugar
- 1 teaspoon vanilla extract
- 2 large eggs
The combination of brown and white sugars gives the cookies a rich sweetness and helps with that perfect chewy texture.
Optional Add-ins for Extra Flavor
- 2 cups Nestlé Toll House Semi-Sweet Chocolate Morsels
- 1 cup chopped nuts (walnuts or pecans recommended)
You can get creative here. Not a fan of nuts? Skip them. Want double chocolate? Swap out some flour for cocoa powder.
Equipment You’ll Need for This Recipe
You don’t need a commercial kitchen—just a few basic tools to pull off professional-quality cookies:
- Mixing bowls (large and medium)
- Electric mixer (hand or stand)
- Measuring cups and spoons
- Rubber spatula or wooden spoon
- Baking sheets
- Parchment paper or silicone baking mats
- Wire cooling racks
- Cookie scoop (optional but great for uniform size)
Having everything prepped and within reach will make the process smoother and more enjoyable.
Preparation Tips Before You Start Baking
Baking is part science, part art. To get consistent results, consider these prep tips:
- Measure Accurately: Spoon flour into measuring cups, then level with a knife.
- Room Temp Butter: This helps it cream properly with sugar for a fluffy dough.
- Don’t Overmix: Overworking the dough develops gluten, leading to tougher cookies.
- Preheat Your Oven: Make sure it’s fully at 375°F (190°C) before cookies go in.
Also, line your baking sheets in advance. This prevents sticking and helps with even browning.
Step-by-Step Guide to Making Nestlé Toll House Cookies
Now we’re ready to bake. Follow these steps for cookie perfection.
Step 1: Preheat the Oven
Preheat your oven to 190°C (375°F). Line baking sheets with parchment paper or lightly grease them to prevent sticking.
Step 2: Combine Dry Ingredients
In a medium bowl, whisk together all-purpose flour, baking soda, and salt. Set aside. Mixing these first ensures even distribution later.
Step 3: Cream Butter and Sugars
In a large bowl, beat softened butter with granulated sugar and brown sugar until light and fluffy. This step creates a tender, chewy cookie texture.
Step 4: Add Eggs and Vanilla Extract
Add eggs one at a time, beating well after each addition. Mix in vanilla extract until fully incorporated and smooth.
Step 5: Gradually Mix in the Flour Mixture
Slowly add the dry ingredients to the wet mixture. Mix on low speed or stir gently until just combined. Avoid overmixing to keep cookies soft.
Step 6: Fold in the Chocolate Chips (and Nuts)
Gently fold in chocolate chips and optional chopped nuts using a spatula. Make sure they’re evenly distributed throughout the dough.
Step 7: Scoop the Dough onto Baking Sheets
Drop rounded tablespoons of dough onto the prepared baking sheets, spacing them about 2 inches apart to allow spreading.
Step 8: Bake to Golden Perfection
Bake for 9–11 minutes, or until edges are golden brown and centers still look slightly soft. Do not overbake—they’ll firm up as they cool.
Step 9: Cool and Enjoy
Let cookies cool on the baking sheet for 2 minutes, then transfer to a wire rack to cool completely. Enjoy warm or store for later—if they last that long! 🍪
Troubleshooting Common Cookie Issues
Even with a great recipe, things can sometimes go wrong. Here are a few common cookie problems—and how to fix them.
- Flat cookies? Your butter might have been too soft or melted. Chilling the dough helps prevent this.
- Too cakey? You may have added too much flour or overmixed the dough. Try weighing your flour next time.
- Too dry or hard? You likely overbaked. Cookies should come out when the centers are still slightly soft.
- Spread too much? Too much sugar or not enough flour can cause spreading. Make sure your measurements are accurate.
- Not spreading enough? The oven might be too cold, or the dough was too cold. Let it warm slightly before baking.
Consistency in baking comes with practice, so don’t be discouraged by the occasional batch gone wrong.
Pro Tips for Baking the Perfect Nestlé Toll House Cookie
Want to take your cookies to the next level? These expert tips can make all the difference:
- Use high-quality chocolate. Nestlé’s chips are classic, but you can upgrade to chunks or bars for a gourmet feel.
- Chill the dough. Chilling for at least 30 minutes enhances flavor and prevents spreading.
- Use parchment or silicone baking mats. They help ensure even baking and prevent burning.
- Try a mix of sugars. A bit more brown sugar than white will add chewiness.
- Add a pinch of cinnamon or espresso powder. These subtle boosts enhance the chocolate flavor without overpowering it.
- Underbake slightly. The residual heat will finish the baking, leaving you with soft centers and crisp edges.
Remember: baking is chemistry, but it’s also intuition. Don’t be afraid to tweak and test!
Storing Your Cookies for Freshness
Once you’ve baked the perfect batch, storing them correctly is crucial to keeping them fresh.
- Room Temperature: Store cookies in an airtight container at room temperature for up to one week.
- Add a slice of bread: It helps retain moisture. The cookies stay soft while the bread dries out.
- Don’t refrigerate baked cookies: It dries them out faster than room temperature storage.
If you want them warm again, pop them in the microwave for 10 seconds—just like fresh from the oven.
Can You Freeze the Dough? Yes—Here’s How
Freezing cookie dough is a game-changer. It lets you have freshly baked cookies anytime, with zero prep.
To freeze cookie dough:
- Scoop dough into individual balls.
- Place them on a baking sheet and freeze for 1 hour.
- Transfer to a zip-top freezer bag and label with the date.
- Store for up to 3 months.
To bake from frozen:
- Preheat oven to 375°F.
- Place frozen dough balls on a baking sheet.
- Bake 2–3 minutes longer than usual—no thawing needed!
It’s perfect for portion control or surprise guests.
Nestlé Toll House Recipe Variations to Try
This recipe is a classic, but don’t be afraid to get creative. Here are a few fun variations to try:
- Double Chocolate: Replace 1/4 cup of flour with cocoa powder.
- Peanut Butter Chips: Swap half the chocolate chips for peanut butter chips.
- Oatmeal Chocolate Chip: Replace 1 cup flour with rolled oats for a heartier texture.
- Salted Caramel: Add caramel bits and sprinkle sea salt on top before baking.
- White Chocolate Macadamia: Sub the chocolate chips and nuts for white chocolate and macadamia nuts.
The base dough is versatile, so the flavor possibilities are endless.
Making It Allergy-Friendly (Gluten-Free, Dairy-Free, Nut-Free Options)
Don’t worry—this recipe can be adapted for most dietary needs.
For Gluten-Free:
- Use a 1:1 gluten-free baking flour (with xanthan gum for structure).
- Chill the dough longer, as GF flour tends to spread more.
For Dairy-Free:
- Use plant-based butter (like Earth Balance).
- Use dairy-free chocolate chips (check labels for vegan or dairy-free options).
For Nut-Free:
- Simply omit the nuts.
- Always double-check that your chocolate chips and other ingredients are produced in a nut-free facility.
Safe baking is still delicious baking—you won’t be sacrificing flavor!
Perfect Occasions to Serve Nestlé Toll House Cookies
These cookies aren’t just for weeknight cravings. Here are some great times to whip up a batch:
- Holiday gatherings: Add festive sprinkles or drizzle with white chocolate.
- Birthday parties: Serve with ice cream or make cookie sandwiches.
- Bake sales: A crowd-pleaser that always sells out.
- Gifting: Package in cute tins or bags for a homemade touch.
- School lunches: One cookie goes a long way in brightening someone’s day.
Whether it’s a celebration or a comfort food moment, Toll House cookies always hit the spot.
FAQs about Nestlé Toll House Cookie Recipe
1. Can I use margarine instead of butter in this recipe?
Yes, but the flavor and texture may be slightly different. Butter gives a richer taste and better consistency.
2. Why are my cookies hard the next day?
They may have been overbaked or stored incorrectly. Use an airtight container and add a slice of bread to keep them soft.
3. Can I make this recipe into bars instead of cookies?
Absolutely! Spread the dough into a greased 9×13-inch pan and bake at 350°F for about 20–25 minutes.
4. How can I make these cookies chewier?
Use more brown sugar than white sugar and slightly underbake them.
5. Do I need to chill the dough before baking?
It’s optional, but chilling helps control spreading and enhances flavor. Even 30 minutes can make a difference.
Conclusion
Nestlé Toll House cookies have stood the test of time—and for good reason. They’re more than just dessert; they’re tradition, warmth, and home, all baked into one bite. Whether you follow the recipe to the letter or add your own twist, the results are always magical. Baking these cookies is a ritual passed from one generation to the next, and each batch tells a story.
So grab your apron, preheat the oven, and get ready to bake up some joy. Because honestly, the best memories are made in the kitchen—with a cookie in hand.


