Mung Bean Sprouts Recipe: Ever wondered how those crisp, juicy little sprouts in your salad or stir-fry come to life? Mung bean sprouts are one of the easiest and most rewarding ingredients you can grow right at home.
They’re tiny powerhouses—packed with nutrients, low in calories, and versatile enough to fit into almost any dish. Whether you’re on a health kick or just want something fresh and crunchy in your bowl, mung bean sprouts are where it’s at.
You don’t need fancy equipment or a green thumb to grow them. All it takes is a few days, a handful of mung beans, and a little patience. Trust me, once you try making your own, you’ll never want to go back to store-bought sprouts again.
Let’s dive into everything you need to know—from ingredients and tools to each step of the sprouting process, plus how to use and store your homemade mung bean sprouts.
Benefits of Eating Mung Bean Sprouts
Before we get to the recipe, let’s talk about why mung bean sprouts deserve a place in your kitchen. First off, they’re incredibly nutritious. We’re talking protein, fiber, vitamins (like A, B, C, and E), and essential minerals like calcium, iron, and magnesium—all in a low-calorie package. That’s a big win for anyone watching their weight or boosting their immune system.
They also help with digestion. Sprouted beans are easier for your body to break down, and they promote good gut health thanks to their fiber content. Want glowing skin, better metabolism, or a detoxified system? These little guys help with that too.
Plus, they’re vegan, gluten-free, and keto-friendly. They fit into almost every diet and lifestyle. And did I mention they’re super cheap?
Why Make Mung Bean Sprouts at Home?
Sure, you can find mung bean sprouts at most grocery stores. But if you’ve ever picked up a slimy, wilted bag from the produce section, you already know—fresh is best.
When you sprout mung beans at home, you control the quality. You know they’re chemical-free, you get to rinse and treat them properly, and you avoid any unwanted additives or preservatives. Also, making sprouts yourself is ridiculously cost-effective. A small bag of mung beans can make multiple servings of fresh sprouts.
And let’s not ignore the satisfaction that comes with watching them grow day by day. It’s like a mini science experiment in your kitchen—only tastier.
List of Ingredients You’ll Need
Here’s what you’ll need to get started:
- 1 cup mung beans (green whole mung beans)
- Water (filtered or clean tap water)
That’s it for the basics!
Optional add-ins:
- Apple cider vinegar (for an extra-clean rinse)
- Cheesecloth or sprouting lid (for draining)
- Sprouting jar or wide-mouth glass jar
These are not must-haves, but they do make the process easier and more hygienic.
Equipment Needed
To make things smooth and mess-free, gather the following:
- Glass jar (quart-size mason jars work best)
- Sprouting lid or cheesecloth with a rubber band
- Strainer
- Bowl (to catch drained water)
- Dark towel or a small cardboard box (to block light)
Don’t worry if you don’t have a sprouting lid. A clean kitchen towel or a piece of breathable fabric will do the trick.
Step-by-Step Guide to Making Mung Bean Sprouts at Home
Let’s break it down day-by-day so you know exactly what to expect.
Step 1: Rinse the Mung Beans
Place your mung beans in a colander and rinse them thoroughly under cold water. This removes any dust or debris and gives your sprouts a clean start.
Make sure to discard any broken or discolored beans. A quick visual inspection can save you trouble later on.
Step 2: Soak the Beans Overnight
Transfer the rinsed mung beans into a large glass jar or bowl. Add about 3 cups of water for every 1 cup of beans. They’ll absorb a lot of water and swell up, so make sure they have room.
Let them soak for 8–12 hours at room temperature. Overnight is perfect. In the morning, you’ll see they’ve doubled or tripled in size—this means they’re ready for sprouting.
Step 3: Drain and Rinse Again
After soaking, drain the water using a strainer or the sprouting lid. Rinse the beans well with fresh water and drain again. This rinse removes any slimy residue and keeps the sprouts from getting moldy.
From this point on, you’ll be rinsing and draining twice a day—once in the morning and once in the evening.
Step 4: Sprouting Process (Day 1 to Day 4)
Each day, rinse your mung beans with water, drain them thoroughly, and place the jar at a 45-degree angle upside down to let excess water drip out. Keep the jar in a cool, dark place—sunlight can cause them to turn bitter.
By Day 2, you’ll start to see little white tails forming. That’s your sign that the magic is working.
By Day 4, the sprouts should be 1 to 2 inches long, crunchy, and ready to eat. If you want longer sprouts, you can go up to Day 5—but don’t let them grow too long or they’ll lose their crunch and become fibrous.
Step 5: Final Rinse and Storage
On the final day, give the sprouts one last rinse and let them dry completely. Then transfer them to a clean container lined with a paper towel to absorb extra moisture. Store in the fridge for up to 5 days.
And that’s it—you just made fresh mung bean sprouts from scratch!
How to Store Mung Bean Sprouts
Once your mung bean sprouts are ready, storing them properly is key to keeping them fresh and crisp for as long as possible. These little sprouts are full of water, so if you don’t store them right, they can get soggy or spoil quickly.
First, make sure the sprouts are completely dry before storing. Lay them on a clean kitchen towel or paper towel and gently pat them dry. Excess moisture can speed up spoilage.
Next, grab an airtight container—preferably a glass one. Line the bottom with a dry paper towel. This helps absorb any remaining moisture. Add the sprouts, then place another paper towel on top before sealing the container with the lid.
Pop them into the refrigerator, ideally in the crisper drawer. They should stay fresh for 4 to 5 days if kept cool and dry.
Pro tip: Don’t wash them again before storing. Only rinse them right before using them in a dish to help them stay fresh longer.
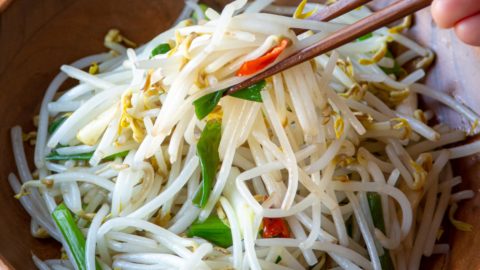
How to Use Mung Bean Sprouts in Recipes
Now that you’ve got a jar full of fresh sprouts, how do you actually use them? Great question! These crunchy gems are surprisingly versatile and can elevate almost any dish with freshness and texture.
Here are some delicious ways to use mung bean sprouts:
- Stir-Fries: Add them at the end of cooking so they stay crunchy. Great with garlic, soy sauce, and sesame oil.
- Salads: Toss them into green salads, noodle salads, or rice bowls for extra crunch.
- Soups: Drop them into hot soups like pho or miso just before serving.
- Wraps & Rolls: Use them in spring rolls or lettuce wraps for that satisfying bite.
- Sandwiches & Tacos: Think beyond lettuce—sprouts add a refreshing twist to sandwiches and even tacos.
They can even be blended into smoothies or juices for a nutrient boost—though not everyone loves their flavor raw in drinks. If you’re adventurous, give it a shot.
Cooking vs. Eating Raw Sprouts
You might be wondering: is it safe to eat mung bean sprouts raw? The answer is yes—but with a few caveats.
Raw sprouts retain all their natural enzymes and nutrients, which is great for your health. But because they grow in warm, moist conditions, they can sometimes be a breeding ground for bacteria like E. coli or Salmonella.
To play it safe, especially if you’re serving them to children, pregnant women, or elderly folks:
- Rinse them thoroughly under cold water before eating
- Consider lightly steaming or stir-frying them
If you’re healthy and your sprouts are clean and fresh, eating them raw is generally safe—and delicious.
Flavor Tips for Your Sprouts
Want to take your sprouts to the next level? There are some clever tricks to enhance their flavor during the sprouting process.
- Infuse with herbs: Add a sprig of fresh mint or basil to the jar during the last day of sprouting.
- Use flavored water: Rinse with lightly salted water or a splash of lemon juice during the final rinse to brighten their taste.
- Spicy kick: Sprinkle in a few mustard or fenugreek seeds during soaking for a peppery flavor blend.
Just don’t overdo it—mung bean sprouts have a mild, earthy flavor that’s best when fresh and simple.
Mistakes to Avoid While Sprouting Mung Beans
Even though sprouting is simple, there are a few common mistakes that can spoil the batch or reduce sprout quality. Here’s what to avoid:
- Over-soaking: Leaving beans in water too long (over 12 hours) can lead to mushy, spoiled beans.
- Infrequent rinsing: Skipping daily rinses leads to mold and bad smells.
- Poor drainage: Always let the jar drain well between rinses. Standing water = bacteria.
- Too much light: Direct sunlight can turn sprouts bitter. Keep them in a dark space.
- Wrong temperature: Sprouting works best between 65°F to 75°F. Too cold slows growth; too warm promotes spoilage.
Avoid these, and you’ll get beautiful, fresh sprouts every time.
Mung Bean Sprout Variations
Want to mix things up? Try sprouting different legumes alongside mung beans for a unique mix of flavors and textures.
- Lentils: Add red or green lentils to the jar—they sprout quickly and offer a peppery bite.
- Chickpeas: Slower to sprout, but worth it for their nuttiness.
- Adzuki Beans: Sweet and crunchy, a nice complement to mung beans.
You can also experiment with layered sprouting—starting with mung beans and adding a second seed type a day later for staggered growth.
Mung Bean Sprouts and Weight Loss
Looking to drop a few pounds? Mung bean sprouts are a perfect companion for your weight loss journey.
They’re:
- Low in calories – About 30 calories per cup
- High in fiber – Keeps you full longer
- Rich in protein – Helps retain muscle while losing fat
- Low glycemic index – No blood sugar spikes
Add them to meals as a healthy filler or snack on them with a dash of lemon and chili powder for a guilt-free treat. They help control cravings and support a clean, detox-friendly diet.
FAQs about Mung Bean Sprouts Recipe
1. Can I use split mung beans for sprouting?
No, you need whole, unpolished mung beans with the skin on. Split mung beans won’t sprout properly.
2. How long does it take for mung beans to sprout?
Typically, 3 to 4 days. You’ll start seeing tails by Day 2, and they’re usually ready by Day 4.
3. Can I store sprouts in the freezer?
Not recommended. Freezing alters the texture and ruins the crunch. Keep them in the fridge and eat within 4–5 days.
4. Are sprouted mung beans easier to digest?
Yes! Sprouting reduces anti-nutrients and breaks down complex carbs, making them gentler on your stomach.
5. Can I eat sprouted mung beans raw every day?
Yes, but make sure they’re rinsed and fresh. If you have a weak immune system, consider cooking them lightly to be safe.
Conclusion
Mung bean sprouts are truly one of the easiest, healthiest foods you can grow and enjoy at home. In just a few days, you can turn a simple handful of beans into a crunchy, nutritious ingredient that fits into almost any dish. Whether you toss them into a salad, stir-fry them with noodles, or eat them raw by the spoonful, mung bean sprouts are a flavor and health booster you’ll want to keep on hand all the time.
So go ahead—grab some mung beans, follow this guide, and start sprouting. Your future self (and your taste buds) will thank you.


