Mulberry Jam Recipe: There’s something magical about the process of turning fresh, sun-ripened mulberries into a glossy, sweet, and tangy jam. If you’ve got a mulberry tree in your backyard (or a generous neighbor), making homemade mulberry jam is the best way to preserve that flavor for months. Not only does it taste better than store-bought, but it’s also free from preservatives and artificial ingredients. Plus, it fills your kitchen with the nostalgic smell of bubbling berries and warm sugar. Think of it as edible summer in a jar.
And let’s be real—how often do you see mulberry jam in stores? Rarely, right? That’s exactly why making it at home feels special. Whether you’re new to jam-making or a seasoned home cook, this guide will walk you through everything you need—ingredients, tools, tricks, and tips.
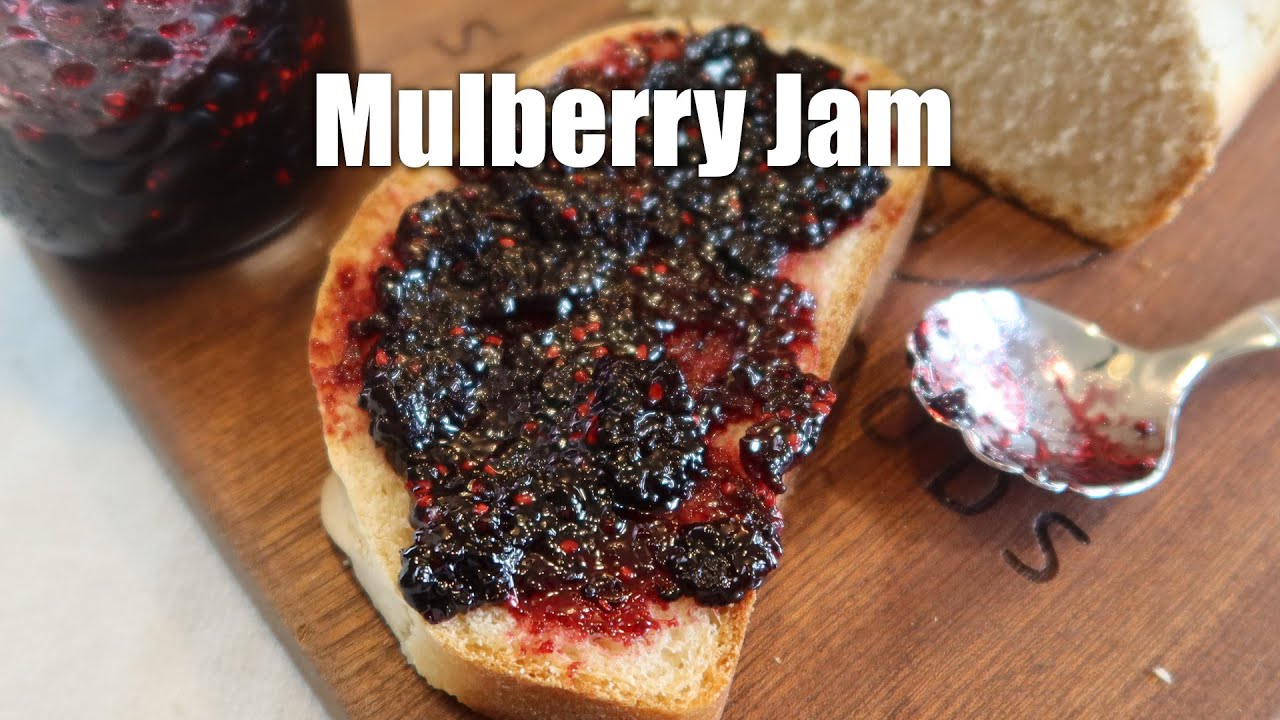
What is Mulberry Jam?
Mulberry jam is a sweet spread made from mulberries, sugar, and often lemon juice. It’s similar to blackberry or raspberry jam in texture and taste but carries its own unique flavor profile—rich, deep, and slightly earthy. The jam can be smooth or chunky depending on how much you mash the berries. It’s perfect for toast, pancakes, or even a spoonful straight from the jar.
There are several types of mulberries: black, red, and white. The black and red varieties are most commonly used for jam because they’re more flavorful and juicy. White mulberries are less tart and a bit more mellow but still work well, especially when combined with other berries.
Health Benefits of Mulberries
You’re not just making something delicious—you’re also making something nutritious. Mulberries are packed with:
- Vitamin C – supports immune health
- Vitamin K – helps with blood clotting
- Iron – boosts energy and reduces fatigue
- Resveratrol – a potent antioxidant known for its heart-health benefits
- Dietary Fiber – aids digestion
They’re also low in calories and contain natural sugars, making them a healthier alternative to artificial spreads. If you’re looking to enjoy sweets without all the guilt, mulberry jam is a fantastic choice.
Ingredients You’ll Need
To make a classic mulberry jam, you’ll need just a handful of ingredients—most of which you might already have.
Main Ingredients:
- 4 cups fresh mulberries (washed and stemmed)
- 2 cups granulated sugar
- 2 tablespoons lemon juice (fresh is best)
Optional Add-ins:
- 1/2 teaspoon ground cinnamon – for a warm, spiced flavor
- 1 teaspoon vanilla extract – adds depth
- Zest of one lemon – boosts citrus notes
Substitutions:
- Honey or maple syrup can replace sugar (adjust amounts to taste)
- Frozen mulberries can be used in place of fresh (thaw first)
- Lime juice instead of lemon, for a sharper tang
Tools & Equipment Required
Before diving in, gather your tools. Here’s what you’ll need:
- Medium to large saucepan – preferably heavy-bottomed
- Wooden spoon or silicone spatula
- Measuring cups and spoons
- Ladle
- Canning jars (8 oz size works well)
- Jar funnel – for mess-free filling
- Tongs or jar lifter
- Clean towel
- Water bath canner or large pot for sterilizing
Having the right tools not only makes the process smoother but also ensures your jam is safe and shelf-stable.
Before You Start: Prepping the Mulberries
Good prep makes great jam. Start by washing the mulberries thoroughly. These berries are delicate, so rinse gently under cold running water. Remove any stems or leaves—this part can be a bit tedious, but it’s worth it.
If your berries have a lot of juice, let them drain in a colander for a few minutes. Gently pat them dry with a clean towel or paper towels. You don’t want excess water diluting your jam.
Some folks like to mash the berries a little before cooking to speed up the process. If you’re into chunkier jam, leave some whole; if you prefer it smooth, mash them thoroughly.
Step-by-Step Guide to Making Mulberry Jam
Step 1: Measure & Prepare Ingredients
Measure out your berries, sugar, and lemon juice. Place them next to your stove so everything’s within reach. If you’re using optional ingredients like cinnamon or vanilla, have those ready too.
Step 2: Cook the Berries
Pour the mulberries into your saucepan and turn the heat to medium. Stir occasionally as they begin to break down. The juices will release, and the mixture will start to look syrupy—this usually takes 5-10 minutes.
Step 3: Add Sugar & Lemon Juice
Once the berries are soft, add the sugar and lemon juice. Stir well to dissolve the sugar completely. The lemon juice isn’t just for flavor—it helps the jam set properly thanks to its natural pectin.
Step 4: Simmer Until Thickened
Bring the mixture to a gentle boil. Keep stirring so it doesn’t stick or burn. You’ll notice it starts to thicken after about 15-25 minutes, depending on your stove and the water content in the berries.
Step 5: Test Jam Consistency
To check if it’s ready, do the “wrinkle test.” Place a spoonful of jam on a chilled plate. Let it sit for 30 seconds, then push it with your finger. If it wrinkles slightly, it’s done!
Step 6: Sterilize and Fill Jars
While the jam is cooking, sterilize your jars by boiling them in water for 10 minutes. When your jam is ready, use a funnel to ladle it into hot jars, leaving 1/4 inch of headspace.
Step 7: Seal and Cool
Wipe the rims clean, place the lids, and screw on the bands until just tight. Process in a boiling water bath for 10 minutes to seal properly. Let the jars cool completely before storing.
Jam Storage Tips
Now that you’ve sealed your mulberry jam into jars, let’s talk about keeping it fresh. Proper storage is key to preserving the flavor and safety of your homemade creation.
Room Temperature Storage (Pantry):
If you processed your jars in a boiling water bath and heard that satisfying pop as they sealed, congrats! Your jam is shelf-stable. Store the sealed jars in a cool, dark place—like a pantry or cupboard—for up to 12 months. Avoid areas with direct sunlight or major temperature changes.
Refrigerator Storage:
If you didn’t use a water bath or want to skip canning altogether, just pop the filled jars into the fridge. They’ll stay fresh for about 3 to 4 weeks. Once a jar is opened, refrigerate it immediately and consume within a month for best quality.
Freezing Option:
Yes, you can freeze jam! Just use freezer-safe jars or containers. Leave enough headspace at the top (about ½ inch) to allow for expansion. Mulberry jam can be frozen for up to 6 months without losing much in flavor or texture.
Storage Tips:
- Always label jars with the date you made the jam.
- Check the seal before using. If the lid pops or is loose, refrigerate and consume quickly.
- Discard any jam that shows signs of mold, off smells, or weird texture.
Troubleshooting Common Problems
Not every batch goes perfectly, and that’s totally normal—especially if you’re new to jam-making. Here are some common problems and how to fix them:
1. My jam didn’t set!
Don’t panic. Mulberries are naturally low in pectin, so it may just need more cooking time. Reheat the jam and simmer for another 5–10 minutes. Still too runny? Consider adding a pectin product or mix in a small amount of grated green apple (a natural pectin source).
2. It’s too sweet!
Next time, reduce the sugar a bit or balance it with extra lemon juice. For the current batch, try serving it with plain yogurt or unsweetened toast to balance the flavor.
3. There are air bubbles in the jar. Is it ruined?
Not necessarily. As long as the jars are sealed properly, small bubbles are fine. However, large bubbles or foam can be avoided by skimming the surface of your jam before filling jars.
4. The jam is too tart!
Add a spoonful of honey or sugar after opening a jar to adjust the sweetness for your taste buds. Don’t try to tweak it after sealing—it’s best done jar by jar as needed.
5. Mold appeared after a week. What happened?
It’s likely the jars weren’t sterilized properly, or they didn’t seal fully. Always inspect your jars before storing them long term. If in doubt, toss it out.
Variations You Can Try
Want to level up your mulberry jam? Here are some fun and flavorful twists:
1. Mulberry-Raspberry Combo: Mix equal parts mulberries and raspberries for a tangier, brighter flavor. The raspberry seeds add texture, and the color becomes a gorgeous deep red.
2. Spiced Mulberry Jam: Add ground cinnamon, a dash of nutmeg, and a clove or two. This variation is perfect for the holiday season and pairs beautifully with toast and butter.
3. Sugar-Free Mulberry Jam: Use stevia, monk fruit, or erythritol in place of sugar. These sugar substitutes don’t thicken the same way, so expect a looser consistency unless you use low-sugar pectin.
4. Mulberry-Chia Jam: Mash the berries and simmer with a bit of water. Add chia seeds (about 1 tbsp per cup of fruit) and let them do the thickening. This no-cook option is super quick and refrigerator-friendly.
5. Mulberry-Lime Jam: Swap lemon juice for lime and add some zest for a sharper citrus punch. It’s refreshing and unique—perfect for summertime!
Mulberry Jam Uses
So you’ve got jars of this sweet, rich goodness—now what? There’s no wrong way to enjoy mulberry jam, but here are some ideas to get you started:
Breakfast Favorites:
- Spread on warm toast or bagels
- Swirled into oatmeal or yogurt
- Spooned over pancakes, waffles, or French toast
Dessert Additions:
- Drizzle over cheesecake or ice cream
- Layer in parfaits or trifles
- Use as a filling for cakes, cupcakes, or cookies
Savory Surprises:
- Serve with brie, goat cheese, or aged cheddar
- Use as a glaze for roast meats (pork tenderloin is a favorite)
- Add a dollop to your next charcuterie board
Homemade jam is the ultimate multitasker—and it’s so much more than just a toast-topper.
Making Mulberry Jam Without Pectin
Many homemade jam recipes call for commercial pectin, but guess what? You don’t need it for mulberry jam. With the right technique and patience, your jam can thicken naturally.
Here’s how it works:
- Cook longer and slower. Simmer the mulberries with sugar and lemon juice until the mixture reduces and thickens on its own.
- Use lemon juice. It adds acidity and naturally occurring pectin that helps the jam gel.
- Use the “wrinkle test.” Chilling a plate and placing a spoonful of jam on it is an old-school way to check if your jam is set.
If you still want extra help, you can toss in a bit of grated green apple (with peel), which is rich in natural pectin.
Canning Mulberry Jam Safely
Canning ensures your jam stays preserved for months. Here’s a quick safety checklist for the water bath method:
- Sterilize your jars and lids by boiling them for 10 minutes.
- Fill jars with hot jam, leaving ¼ inch of headspace.
- Wipe rims, place lids, and screw on bands.
- Process jars in boiling water for 10 minutes.
- Remove and cool for 24 hours. You should hear a “pop” as they seal.
Check seals before storing. A sealed lid won’t move when pressed in the center. If it pops back, keep that jar in the fridge and eat it first.
How to Gift Homemade Mulberry Jam
Nothing says love like a jar of homemade jam. Whether it’s for birthdays, holidays, or just because—mulberry jam makes a thoughtful, personal gift.
Gifting Tips:
- Use small 4 oz or 8 oz jars for gift-size portions
- Decorate lids with fabric, ribbons, or kraft paper
- Create custom labels with the flavor, ingredients, and date
- Add a handwritten recipe card or serving suggestion
Wrap the jar in a cute box or basket with crackers, cheese, or tea for an instant gourmet gift.
FAQs about Mulberry Jam Recipe
1. Can I freeze mulberry jam?
Absolutely! Just use freezer-safe containers, leave a bit of space at the top, and freeze for up to 6 months.
2. Is mulberry jam good for kids?
Yes! It’s a great way to add natural fruit to their diet. Just be mindful of the sugar content if you’re making it for toddlers.
3. Can I use frozen mulberries?
You sure can. Just thaw them first and drain excess water before cooking.
4. What’s the best sugar substitute for mulberry jam?
Try honey, maple syrup, or monk fruit sweetener. Keep in mind, the jam may be looser without regular sugar.
5. How do I know if my jam has spoiled?
Check for mold, odd smells, or bubbling. If anything seems off, it’s safer to discard it.
Conclusion
Making mulberry jam at home is more than a recipe—it’s an experience. From picking or buying the berries to stirring the bubbling pot and hearing the satisfying pop of a sealing jar lid, it’s a project filled with joy. Plus, the reward? Sweet, vibrant jam you can enjoy for months or gift to someone special.
This step-by-step guide walks you through everything: ingredients, tools, cooking, and preserving. So even if you’ve never made jam before, now you have everything you need to make it like a pro.
So go ahead, roll up your sleeves, and turn those beautiful mulberries into jars of goodness.


