Moon Cake Recipe: Moon cakes are more than just pastries—they’re cultural icons, rich in history and flavor. Traditionally eaten during the Mid-Autumn Festival, these round delights symbolize reunion and togetherness. With a golden-brown crust and a rich, sweet filling, moon cakes are a staple in Chinese households during the lunar celebration. Whether you’re gifting them to family or crafting them for the first time, moon cakes are the ultimate expression of care and tradition.
Baking moon cakes at home might sound intimidating at first. But with a little patience and the right steps, anyone can recreate this ancient dessert. It’s a rewarding journey into Asian baking that allows you to personalize each cake with fillings and styles you love.
Ready to try your hand at making your own moon cakes? Let’s get into the ingredients and the full recipe step-by-step.
History and Cultural Significance of Moon Cakes
Moon cakes date back over 3,000 years, connected with the Chinese Moon Festival, or Mid-Autumn Festival, which is celebrated on the 15th day of the 8th lunar month. This festival is a time to gather, appreciate the moon, and give thanks. The round shape of moon cakes symbolizes unity and harmony, making them perfect for family reunions.
Legends tie moon cakes to ancient Chinese resistance. During the Yuan dynasty, messages were hidden inside moon cakes to coordinate uprisings. These days, while you won’t find secret notes inside, they still carry deep meaning—offered to loved ones as a symbol of love and peace.
With each bite of a moon cake, you’re tasting a piece of history. That’s what makes them so special—not just the flavor, but the heritage they represent.
Different Types of Moon Cakes Around the World
Moon cakes vary significantly based on region and preference. Let’s take a look at the most popular types:
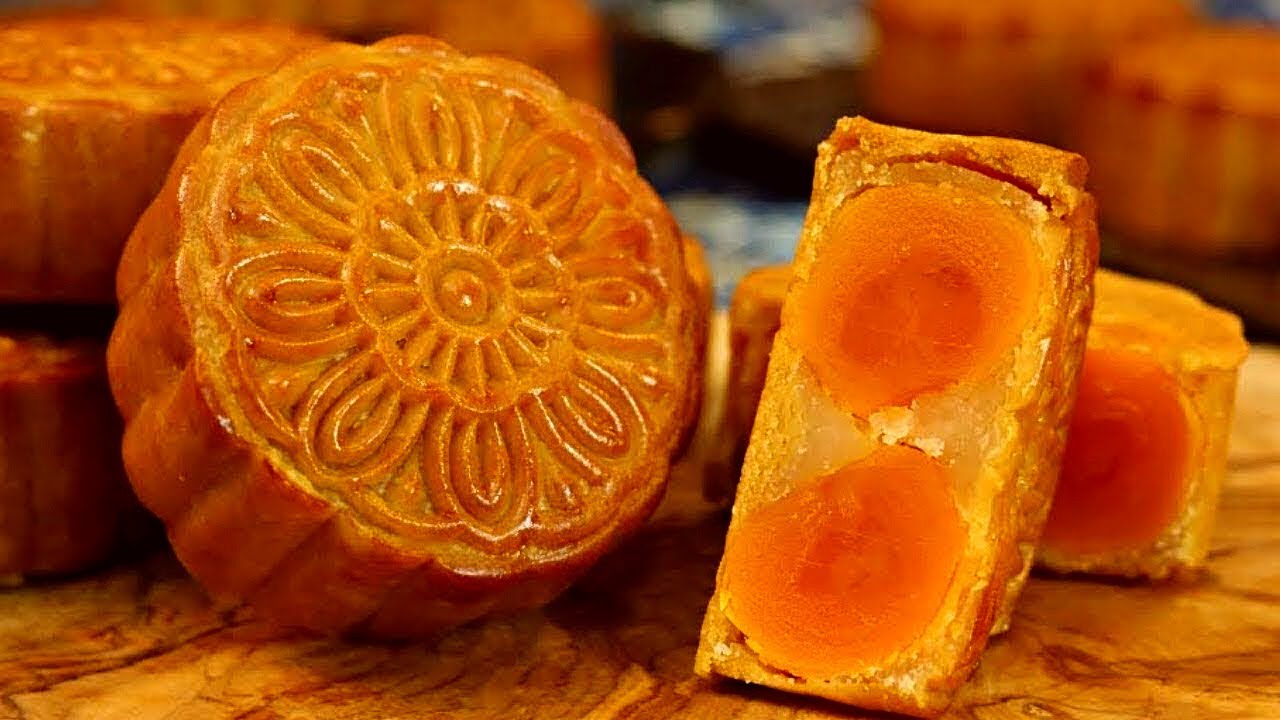
Cantonese-style Moon Cakes
The most widely known version globally. These are baked with a glossy golden skin and are filled with lotus seed paste, red bean paste, or mixed nuts, often with a salted egg yolk in the center.
Suzhou-style Moon Cakes
These are flakier and often savory. Their puff pastry-like skin gives a crispy texture, and fillings may include pork or ham. A favorite in Eastern China.
Snow Skin Moon Cakes
Not baked but chilled, these moon cakes use glutinous rice flour for the skin. They’re light, refreshing, and can be filled with anything from mango mousse to matcha custard. Perfect for those who prefer a less oily version.
Yunnan-style Moon Cakes
These cakes are bulkier with a thick, crumbly crust. Fillings often include ham or honey-based pastes. They’re less sweet and more rustic.
Each style brings a unique taste, texture, and cultural background to the table.
What Makes a Good Moon Cake?
A good moon cake has a thin, even crust and a generous, flavorful filling. It should be lightly sweet, with the crust complementing the richness of the filling. When bitten into, the texture should be soft yet firm, not dry or overly sticky.
Balance is key. The salted egg yolk, if used, should contrast the sweetness perfectly. The oil content should give it that signature glossy finish without feeling greasy.
Homemade moon cakes also allow for personalization—playing with the sweetness level, the texture, and even adding your own twist to the traditional fillings. Freshness and attention to detail are what make a homemade moon cake truly exceptional.
List of Ingredients You’ll Need
Before diving in, gather all your ingredients. Here’s a complete list:
Dough Ingredients:
- 200g all-purpose flour
- 120g golden syrup
- 50g vegetable oil (or peanut oil)
- 1/2 tsp alkaline water (lye water)
Filling Ingredients:
- 600g lotus seed paste or red bean paste
- 4 salted egg yolks (optional)
- Melon seeds or nuts (optional)
Egg Wash:
- 1 egg yolk
- 1 tbsp milk or water
Make sure to prep everything in advance for a smooth workflow. Using quality ingredients will significantly affect the outcome—especially for the filling.
Tools and Equipment Needed
- Kitchen scale (for accuracy)
- Mixing bowls
- Spatula or wooden spoon
- Baking tray
- Parchment paper
- Moon cake mold (plastic or wooden)
- Oven (preheated to 180°C / 350°F)
- Pastry brush (for egg wash)
These tools will help you achieve the traditional shape and glossy finish of a professional-style moon cake. The mold, in particular, is what gives moon cakes their iconic decorative look.
How to Choose the Right Filling
Your filling choice can make or break your moon cake. Here are some popular options:
- Lotus seed paste: Classic, creamy, subtly sweet.
- Red bean paste: Earthy, dense, slightly nutty.
- Mixed nuts: Crunchy, chewy, great for texture lovers.
- Matcha custard or chocolate ganache: Great for modern fusion flavors.
Store-bought pastes save time, but homemade versions give you total control over taste and sweetness. Salted egg yolks, often added to lotus seed paste, add a deliciously savory contrast.
Make sure your filling is smooth and pliable—not too sticky or too dry. The right consistency ensures it will be easy to shape and won’t burst through the dough during baking.
Making the Dough
Let’s get hands-on. Moon cake dough is delicate yet forgiving.
Mixing the Dough:
- Combine golden syrup, oil, and alkaline water in a bowl.
- Gradually add flour and stir to form a sticky dough.
- Knead gently until just combined—don’t overwork it.
Resting the Dough:
Cover and let the dough rest for at least 1 hour. This allows it to soften and become easier to handle. Patience pays off here; rested dough is smoother, stretchier, and much easier to shape.
Preparing the Filling
Now that your dough is resting, it’s time to prep the filling. This step is just as important—your filling needs to be firm enough to shape but soft enough to bite into.
Traditional Lotus Seed Paste:
If you’re going all out and making your own lotus seed paste from scratch (major props to you), here’s the quick process:
- Soak dried lotus seeds overnight.
- Boil until soft.
- Blend into a smooth paste.
- Cook on low heat with sugar and oil until it becomes thick and glossy.
This is a labor of love, but homemade paste tastes incredible. If you’re short on time, opt for a quality store-bought version—look for ones without added preservatives.
Salted Egg Yolks:
Salted egg yolks are optional but traditional. If using:
- Steam or bake them briefly (5–10 minutes) until cooked through.
- Let them cool before wrapping.
Pro tip: Brush them with a bit of alcohol like Chinese rice wine before baking to reduce any gamey flavor.
Flavor Variations:
- Matcha + white bean paste: Earthy and slightly bitter-sweet.
- Chocolate ganache: For a fusion twist.
- Mung bean paste: Lighter, more delicate.
- Coconut paste: Popular in Southeast Asia.
Once your filling is ready, divide it into equal portions—usually around 30–35g each for standard moon cake molds. If using salted egg yolks, press them into the center of the paste ball and seal well.
Shaping the Moon Cakes
Here’s where it all comes together. Time to get your hands a little messy—but in the most satisfying way.
Weighing Dough and Filling:
- Standard size moon cakes usually weigh 50g total.
- Use about 15g dough and 35g filling.
- Adjust according to your mold size.
Keeping your portions consistent helps the moon cakes bake evenly and fit the mold properly.
Assembling the Cake:
- Flatten the dough into a thin circle using your fingers or a small roller.
- Place the filling ball in the center.
- Carefully wrap the dough around it, sealing the edges at the top.
- Gently roll it into a smooth ball.
If the dough cracks, don’t panic! Pinch it together and smooth it out. You can even chill the dough for a few minutes if it gets too soft to work with.
Using Moon Cake Molds
Now comes the fun (and Instagram-worthy) part—pressing your moon cake into a mold.
- Lightly flour the inside of your moon cake mold to prevent sticking.
- Place the assembled moon cake ball inside.
- Press firmly down on a flat surface.
- Release gently.
You’ll see a beautiful pattern on the top and perfect edges. It might take a few tries to get the pressure just right—but once you get the hang of it, it’s very satisfying.
For snow skin moon cakes, the process is the same—but you’ll be using chilled, uncooked dough made from glutinous rice flour.
Baking the Moon Cakes
This is where magic happens. Baked moon cakes transform from dull dough balls into shiny, golden treasures.
First Bake:
- Preheat your oven to 180°C (350°F).
- Place the moon cakes on a parchment-lined tray.
- Bake for 5–6 minutes until the pattern sets but before browning begins.
Remove from the oven and let cool for about 10 minutes. This resting time is crucial for getting a clean, smooth egg wash layer.
Applying the Egg Wash:
- Mix 1 egg yolk with 1 tbsp water or milk.
- Lightly brush the top of each moon cake—avoid letting it pool in the crevices (it’ll blur the design).
- Use a soft brush for even coating.
Final Bake:
- Return moon cakes to the oven.
- Bake for another 10–15 minutes, or until golden brown.
If needed, rotate the tray halfway through to ensure even coloring.
Cooling and Storing Moon Cakes
Once baked, moon cakes need time to “return oil”—a process where the oil in the dough seeps to the surface, giving that signature shine and soft bite.
- Let the moon cakes cool completely on a wire rack.
- Store in an airtight container for 1–3 days before eating.
- Moon cakes last up to a week at room temperature.
They taste best on day 2 or 3—after the flavors have fully developed and the skin softens. If you’ve added salted yolks, store them in a cool spot or refrigerate.
Tips for Perfect Moon Cakes
- Use a kitchen scale. Precision matters!
- Don’t over-knead the dough. It can make the crust tough.
- Test bake one moon cake first. This helps fine-tune your baking time and egg wash.
- Brush egg wash lightly. Overdoing it ruins the design.
- Let them rest. Freshly baked moon cakes are too dry—wait for the magic.
These small tips make a huge difference. Moon cake baking is a delicate dance of tradition and patience.
Common Mistakes to Avoid
- Too much egg wash: Leads to blurred designs.
- Under-rested dough: Makes shaping harder.
- Wrong filling consistency: If too soft, it will ooze; if too dry, it will crack.
- Skipping the “return oil” period: They’ll feel dry and stiff.
- Incorrect baking time: Overbaked moon cakes lose moisture and become crumbly.
Learn from these common hiccups and your next batch will be bakery-quality.
FAQs about Moon Cake Recipe
1. Can I make moon cakes without a mold?
Yes! While molds give them their signature look, you can shape them by hand into neat rounds or even use cookie cutters for fun shapes.
2. How long do homemade moon cakes last?
Stored properly in an airtight container, they can last up to a week at room temperature, or up to two weeks in the fridge.
3. Can I freeze moon cakes?
Absolutely—especially if you’re making snow skin versions. For baked moon cakes, freeze them before applying egg wash, and bake fresh when needed.
4. My moon cake crust is hard after baking. What should I do?
Don’t worry—this is normal. Let them rest 1–2 days in an airtight container. The crust will soften naturally.
5. What fillings are best for beginners?
Start with store-bought lotus seed or red bean paste—they’re easy to work with and give traditional flavor without the extra prep time.
Conclusion
Making moon cakes at home may seem like a long process, but it’s an incredibly rewarding one. You’re not just baking a pastry—you’re recreating a cultural masterpiece, connecting with tradition, and sharing something meaningful. From the fragrant filling to the delicately imprinted skin, every moon cake you make is a small work of edible art.
So gather your ingredients, clear your workspace, and give it a shot. Once you bite into your own homemade moon cake, you’ll understand why this tradition has lasted for centuries.


