Mochi Cake Recipe: If you’re a fan of chewy, dense desserts with a satisfying texture and rich flavor, you’re in for a treat! Mochi cake is the perfect fusion of Japanese and Western baking traditions. It’s like biting into a cloud — soft, slightly sweet, and deliciously chewy. This recipe brings you the full experience of homemade mochi cake with simple ingredients and straightforward steps.
Whether you’re already a mochi lover or totally new to it, this guide will walk you through everything you need to know — from ingredients to baking, and even creative twists you can try. Let’s dive into the delicious world of mochi cake.
What is Mochi Cake?
Mochi cake is a baked dessert made using glutinous rice flour (also known as sweet rice flour), which gives it its signature chewy texture. Unlike traditional cakes, mochi cake doesn’t rely on a fluffy crumb; instead, it’s all about the dense, bouncy chew.
Think of it like a cross between a brownie and mochi ice cream — minus the cold! It’s perfect for snacking, parties, or just satisfying a sweet craving. And the best part? You don’t need any fancy tools or hard-to-find ingredients. Everything you need is probably already in your pantry.
Why You’ll Love This Recipe
There are tons of reasons to fall head over heels for mochi cake:
- Easy to make: No complicated techniques, just mix and bake.
- Customizable: You can add flavors like matcha, chocolate, or coconut.
- Gluten-free: Perfect for those with gluten sensitivities.
- Stays fresh longer: Thanks to its moisture and density.
- Texture heaven: The chewy bite is simply addictive.
Whether you’re baking for family, friends, or just yourself (no judgment here), this recipe is bound to be a crowd-pleaser.
The Origin of Mochi Cake
While traditional mochi comes from Japan and is often made by pounding steamed rice into a sticky dough, mochi cake has its roots in Japanese-American and Hawaiian kitchens. It’s a modern twist that uses the same sweet rice flour but bakes it instead of steaming or pounding.
Hawaiians have been enjoying butter mochi for decades. The addition of eggs, milk, and sugar turns the traditional sticky rice treat into a comforting, oven-baked dessert that feels familiar yet totally unique.
Key Ingredients You’ll Need
Let’s break down the stars of the show. These ingredients are simple but essential for that perfect mochi cake texture and taste.
Sweet Rice Flour (Glutinous Rice Flour)
- The backbone of any mochi cake.
- Not to be confused with regular rice flour — this one creates that sticky, chewy texture.
- Brands like Mochiko or Koda Farms are top picks.
Sugar
- Adds sweetness, of course, but also contributes to moisture and browning.
- White granulated sugar works best, but you can also try brown sugar for a caramelized twist.
Eggs
- They give structure and richness.
- Use large eggs at room temperature for best results.
Milk or Coconut Milk
- Milk makes the batter smooth and silky.
- Coconut milk (especially full-fat) gives it a Hawaiian-style, buttery flavor.
- You can even mix the two!
Butter
- Adds richness and helps bind the ingredients.
- Melted butter is easiest to mix into the batter.
Baking Powder
- Just a touch helps give the cake a little lift.
- Don’t expect fluffiness — this is just enough to prevent it from being too dense.
Vanilla Extract
- Rounds out the flavor with warm, sweet notes.
- Pure vanilla extract is preferred over imitation.
Salt
- Balances the sweetness and enhances all the flavors.
- Just a pinch goes a long way.
Optional Add-ins for Mochi Cake
Want to make your mochi cake even more special? Here are some fun ingredients you can mix in:
Matcha (Green Tea Powder)
- Adds a vibrant green color and earthy flavor.
- Pair with white chocolate for a matcha latte vibe.
Chocolate Chips
- Who doesn’t love melty chocolate chunks in every bite?
- Try semi-sweet, dark, or even white chocolate.
Shredded Coconut
- Makes the cake extra moist and gives it a tropical flair.
- Toasted coconut on top adds texture.
Red Bean Paste
- A traditional Japanese addition.
- Swirl into the batter or layer in the center for a sweet surprise.
Tools You’ll Need
You really don’t need a fancy setup to make mochi cake. Here’s your checklist:
- Mixing bowls (one large, one medium)
- Whisk or hand mixer
- Measuring cups and spoons
- 9×13-inch baking pan
- Spatula
- Oven
Easy, right?
How to Prepare Your Ingredients
Before diving into baking, get everything ready:
- Bring eggs and milk to room temperature. This helps them mix better.
- Melt the butter. Let it cool slightly before adding to your batter.
- Grease your pan. Use butter or cooking spray for easy removal.
- Preheat your oven to 350°F (175°C).
A little prep goes a long way in baking success.
Step-by-Step Guide to Making Mochi Cake
Here comes the fun part! Follow these steps for foolproof mochi cake every time.
Step 1: Preheat the Oven
Set your oven to 350°F (175°C). Don’t skip this step — baking at the right temperature is crucial to getting that golden crust and chewy interior.
Step 2: Melt the Butter
In a microwave-safe bowl or small saucepan, melt your butter. Let it cool slightly so it doesn’t scramble the eggs when mixed in.
Step 3: Mix Wet Ingredients
In a large mixing bowl, whisk together:
- Eggs
- Sugar
- Milk or coconut milk
- Melted butter
- Vanilla extract
Whisk until the mixture is smooth and well-combined. You want a creamy, custard-like base here.
Step 4: Combine Dry Ingredients
In a separate bowl, sift together:
- Sweet rice flour
- Baking powder
- Salt
Sifting helps avoid lumps and ensures even mixing.
Step 5: Mix Wet and Dry Together
Slowly add the dry ingredients to your wet mixture. Use a whisk or spatula to stir until smooth. The batter will be slightly thick but pourable.
Be patient — you don’t want to overmix, but you do want everything evenly incorporated.
Step 6: Pour into Pan
Pour the batter into your greased 9×13-inch pan. Tap the pan gently on the counter to release any air bubbles.
If you’re adding mix-ins like chocolate chips or coconut, sprinkle them in now and give a light swirl.
Step 7: Bake to Perfection
Place the pan in the center of your preheated oven. Bake for 50 to 60 minutes, or until:
- The top is golden brown
- The center is set (a toothpick should come out clean)
- The edges start to pull slightly away from the pan
Don’t overbake — mochi cake should be moist!
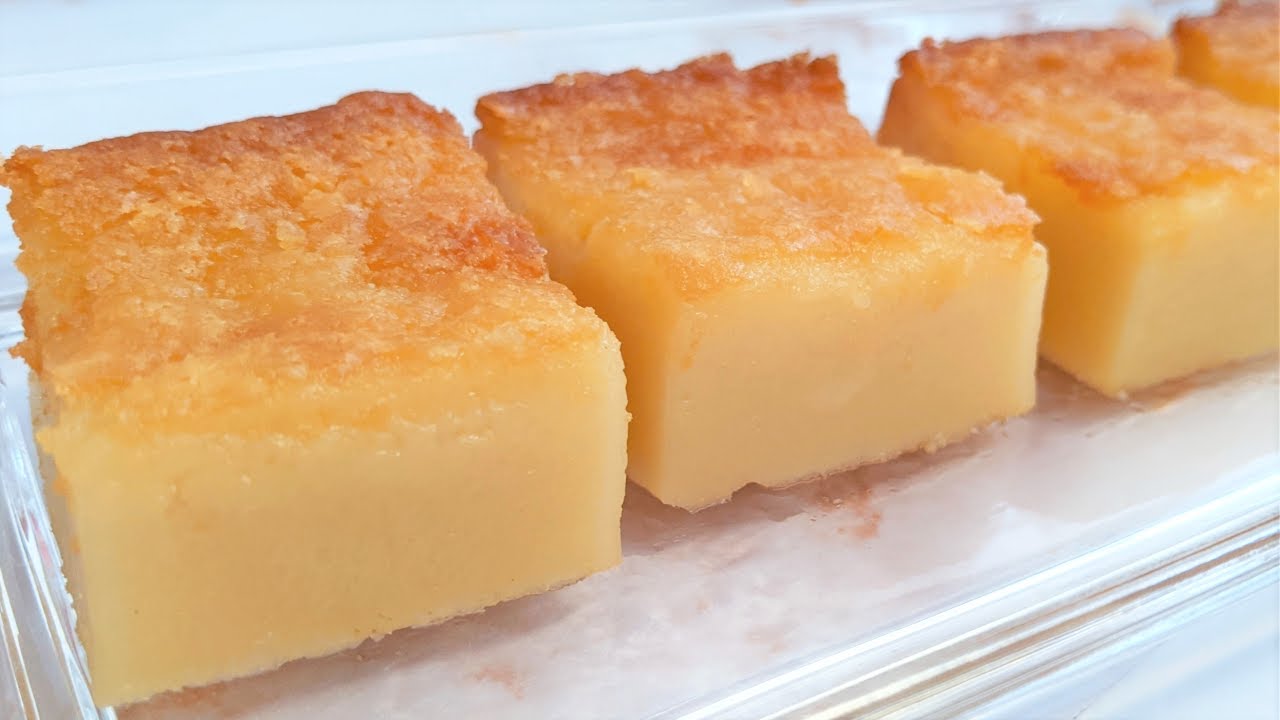
How to Know When It’s Done
Wondering if your mochi cake is fully baked? The key is to look for a golden brown crust and a firm, springy texture in the middle. Insert a toothpick into the center — if it comes out clean (or with just a few sticky crumbs), you’re good to go.
Another sign? The edges will pull slightly away from the sides of the pan, and the top may develop small cracks — totally normal and adds character.
Avoid overbaking, as it can dry out the mochi and make it overly firm. Mochi cake should be moist, dense, and delightfully chewy — not crumbly.
Cooling and Slicing Tips
Patience, friend — let your mochi cake cool completely before slicing. It might be tempting to dig in right away, but cooling helps the texture set up properly.
Here’s how to get those clean, Instagram-worthy slices:
- Let it cool in the pan for at least 1 hour.
- Run a knife around the edges to loosen the cake.
- Use a sharp knife or plastic knife (less sticking) to slice into squares.
- Wipe the blade clean between cuts for the neatest results.
If it’s still too sticky, lightly oil your knife. Pro tip: slightly chilled mochi cake slices even better!
Serving Suggestions
Mochi cake is fantastic all on its own, but if you want to level up, try these fun serving ideas:
- Dust with powdered sugar or a drizzle of sweetened condensed milk.
- Serve with fresh fruit like mango, strawberries, or kiwi.
- Top with whipped cream or a scoop of vanilla ice cream.
- Pair with a cup of matcha tea or a latte for a cozy snack.
Hosting a party? Cut it into small squares and serve as finger food. It holds up well and is always a hit!
Storage Tips
Got leftovers? Lucky you! Here’s how to store your mochi cake so it stays fresh and chewy:
- Room temperature: Store in an airtight container for up to 2 days.
- Refrigerator: Lasts up to a week. Just note that it may firm up — microwave slices for 10–15 seconds to bring back that chewy softness.
- Freezer: Mochi cake freezes beautifully! Wrap individual slices and store in a zip-top bag. Thaw overnight in the fridge or microwave for a quick treat.
Avoid leaving it uncovered, as mochi tends to dry out quickly.
Common Mistakes to Avoid
Even simple recipes have their traps. Let’s dodge some common baking blunders:
- Using the wrong flour: Only use sweet rice flour (like Mochiko), NOT regular rice flour. The texture depends on it.
- Overmixing: Gentle folding is key. Overworking the batter can make it dense and rubbery (in a bad way).
- Skipping the grease: Always grease your pan or you’ll end up with a sticky mess.
- Cutting too early: Let it cool! Slicing hot mochi cake = gooey disaster.
- Overbaking: It dries out the chewy texture — don’t walk away from the oven!
Keep these tips in mind and your mochi cake will be perfect every time.
Mochi Cake Variations You Can Try
Ready to get creative? Mochi cake is like a blank canvas — try these unique variations to spice things up:
Matcha Mochi Cake
Add 2 tablespoons of matcha powder to the dry mix for a vibrant green color and subtle bitterness that balances the sweet flavor.
Chocolate Mochi Cake
Mix ½ cup of cocoa powder into the batter and toss in chocolate chips. It’s like a chewy brownie with a twist!
Butter Mochi (Hawaiian Style)
Use full-fat coconut milk, increase butter to 1 stick (½ cup), and skip vanilla. You’ll get a rich, buttery flavor straight from the islands.
Taro or Ube Mochi Cake
Add mashed cooked taro or ube jam for a purple hue and nutty flavor. Great for a colorful dessert spread!
Pumpkin Spice Mochi Cake
Perfect for fall! Add ¾ cup pumpkin puree and 1 tsp pumpkin pie spice to your batter. Great with a cream cheese drizzle.
The options are endless — don’t be afraid to experiment and find your favorite combo!
FAQs about Mochi Cake Recipe
1. Can I use regular rice flour instead of sweet rice flour?
Nope! Regular rice flour won’t give you the chewy texture mochi cake is known for. Always use sweet rice flour (also labeled glutinous rice flour).
2. Is mochi cake gluten-free?
Yes! Sweet rice flour contains no gluten, so this dessert is naturally gluten-free — just make sure your other ingredients are, too.
3. How long does mochi cake last?
At room temperature, 1–2 days. Refrigerated, up to a week. For longer storage, freeze it for up to 3 months.
4. Can I make it vegan?
Absolutely. Use plant-based milk (like oat or almond), vegan butter, and egg substitutes like flax eggs or commercial egg replacers.
5. Why is my mochi cake too hard or dry?
Most likely it’s overbaked. Always check a few minutes early and look for that golden top and springy center.
Conclusion
Mochi cake is more than just a dessert — it’s a joyful experience. That satisfying chew, the subtly sweet flavor, and the endless variations make it a go-to treat for any occasion. Whether you’re new to mochi or a lifelong fan, this step-by-step guide gives you all the tools you need to bake a perfect mochi cake every time.
It’s easy, fun, and impressively delicious. Once you’ve made it, don’t be surprised if it becomes your signature dish.
So preheat that oven, grab your mixing bowl, and let the magic begin. Happy baking!


