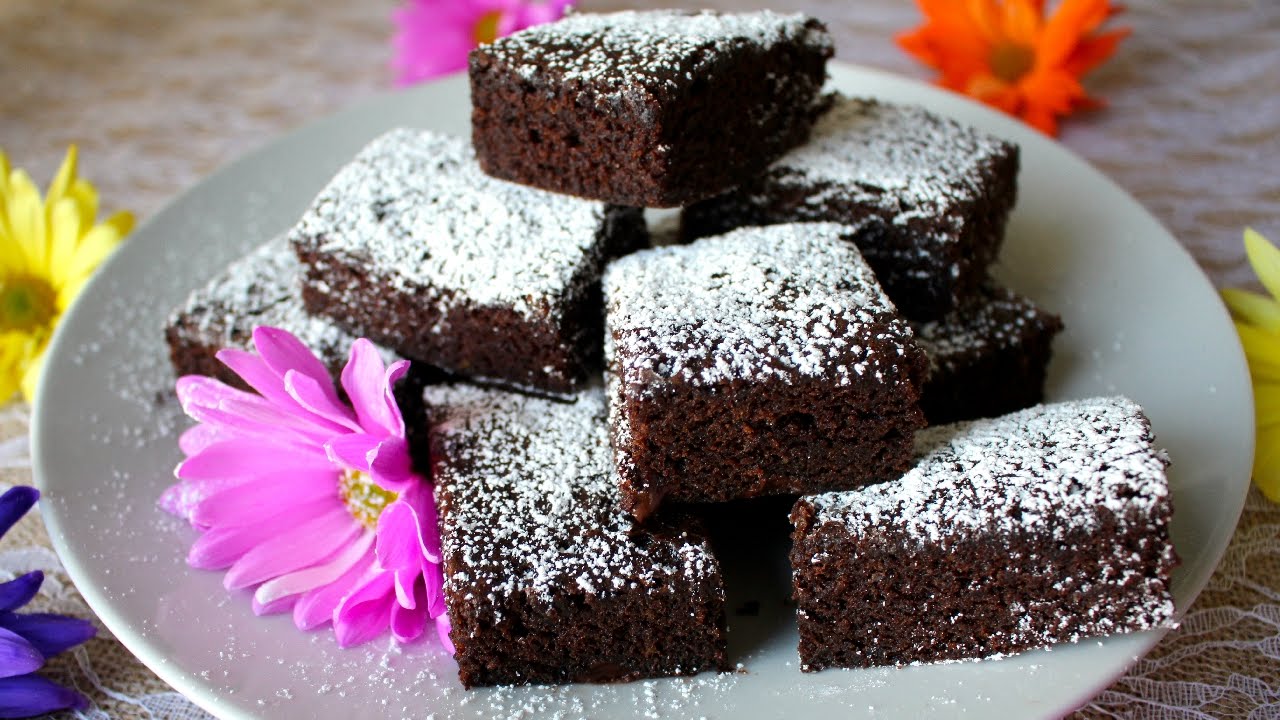
Microwave Brownie Recipe: There’s something magical about making a brownie in just a few minutes using nothing but a mug and a microwave.
Whether you’re in the mood for a late-night snack or you don’t want to bake a whole tray of brownies, this microwave brownie recipe is a total lifesaver. It’s fast, it’s easy, and yes—it’s dangerously delicious.
So if you’ve got a sweet tooth and just a few pantry staples, this step-by-step guide will have you spoon-deep in rich, fudgy goodness in no time.
Why Microwave Brownies Are a Game-Changer
Think about it: a warm, gooey brownie in under five minutes—without preheating an oven or dirtying up a bunch of dishes. Microwave brownies are perfect for college students, busy parents, or literally anyone who’s short on time but still craves dessert. They’re portion-controlled (if you stick to just one!), and customizable to whatever cravings you have. No baking experience? No problem. If you can stir and press a microwave button, you’re already halfway there.
Microwave brownies also cut down on waste. Instead of baking an entire batch, you’re making a single serving (or two, if you’re feeling generous). That means no leftovers tempting you the next day and no heating up the whole kitchen just for a bite of chocolate. Plus, the cleanup is basically nonexistent. One mug. One spoon. One microwave. That’s it.
The Beauty of a Mug Brownie: Quick, Easy & Delicious
A mug brownie is basically a dessert miracle. It combines the joy of a freshly baked brownie with the simplicity of your favorite mug and microwave. It’s made with pantry staples, comes together in minutes, and satisfies even the most intense chocolate cravings. You don’t need fancy equipment, expensive ingredients, or an hour of prep. Just a mug, a spoon, and a little bit of chocolatey love.
Unlike oven-baked brownies, a microwave brownie is soft, warm, and fudgy right out of the mug. Want it gooey? Microwave it for less time. Want it cakier? Microwave it for a few more seconds. You get full control without any guesswork.
List of Ingredients You’ll Need
Basic Ingredients for a Classic Microwave Brownie
Here’s everything you need for a simple, delicious microwave brownie:
- All-purpose flour – 4 tablespoons
- Granulated sugar – 4 tablespoons
- Unsweetened cocoa powder – 2 tablespoons
- Salt – a pinch
- Milk – 3 tablespoons (whole or plant-based)
- Vegetable oil – 2 tablespoons (can use melted butter too)
- Vanilla extract – 1/4 teaspoon
Optional Add-Ins to Elevate the Flavor
Want to spice things up? Try adding:
- Chocolate chips – 1–2 tablespoons for extra gooeyness
- Peanut butter – A swirl for a nutty twist
- Instant coffee powder – A pinch to deepen the chocolate flavor
- Chopped nuts – Walnuts or pecans work great
- Cinnamon or chili powder – For a fun flavor kick
Kitchen Tools You’ll Need
Before you start, gather these tools:
- Microwave-safe mug or bowl
- Spoon or small whisk
- Measuring spoons and tablespoons
- Microwave (obviously!)
Keep it simple—no mixers, no trays, no oven mitts required. Your microwave does all the work.
Step-by-Step Guide to Making a Microwave Brownie
Step 1: Gather All Ingredients
Collect everything before you start. You’ll need flour, sugar, cocoa powder, a pinch of salt, oil or melted butter, milk, and vanilla extract. Optional add-ins like chocolate chips or nuts can be included for extra indulgence.
Step 2: Choose the Right Mug or Bowl
Select a microwave-safe mug or small bowl with enough space for the brownie to rise. It should hold at least 12 ounces to prevent overflowing.
Step 3: Mix Dry Ingredients First
Add flour, sugar, cocoa powder, and salt to the mug or bowl. Stir well to remove lumps and evenly distribute the cocoa.
Step 4: Add in the Wet Ingredients
Pour in the oil or melted butter, milk, and vanilla extract. These ingredients bring moisture and richness to the brownie.
Step 5: Mix Until Smooth (But Don’t Overmix)
Stir gently until the batter is smooth and glossy. Stop once combined—overmixing can make the brownie dense or rubbery.
Step 6: Microwave It!
Microwave on high for 60–90 seconds, depending on your microwave’s power. The brownie should look set around the edges but slightly soft in the center.
Step 7: Let It Cool Slightly Before Digging In
Allow the brownie to cool for 1–2 minutes. This helps it set and prevents burns. Grab a spoon and enjoy warm.
Pro Tips to Get the Best Texture
Even though this recipe is simple, these little tricks can turn your microwave brownie from “good” to “insanely good”:
- Use room-temperature milk – Cold milk can make the batter seize or thicken too quickly.
- Sift the cocoa powder – It makes a smoother batter and richer flavor.
- Microwave power matters – Higher wattage means less cooking time. Start low, then add time if needed.
- Avoid overmixing – Stir until just combined. Think gentle love, not a workout.
- Add moisture – A spoonful of yogurt or applesauce can make it extra moist.
Microwaves cook from the outside in, so the center may stay gooier. That’s totally fine—and honestly, preferred by most brownie lovers!
Common Mistakes to Avoid
Even simple recipes can go wrong if you’re not careful. Here are the most common microwave brownie mishaps—and how to avoid them:
- Overcooking – This is the #1 mistake. Microwaves cook FAST. Keep an eye on the clock.
- Wrong mug size – If your mug is too small, the batter will overflow. Too big, and it might dry out.
- Too much flour – A heaping tablespoon isn’t the same as a level tablespoon. Use precise measurements.
- Using baking powder – Skip it. You want a fudgy brownie, not a cake.
- Undermixing dry ingredients – If you don’t fully blend the flour and cocoa, you’ll end up with weird dry pockets.
Paying attention to the little details makes a big difference in taste and texture.
How to Customize Your Brownie
The base recipe is awesome, but why not get creative?
Make It Vegan
Swap the milk for:
- Almond milk
- Oat milk
- Soy milk
And instead of regular chocolate chips, use dairy-free or vegan chips. The result? Still fudgy. Still amazing.
Add Extra Gooeyness
Love gooey centers? Add:
- A dollop of Nutella in the middle
- Marshmallows on top
- A small chunk of chocolate in the center before microwaving
You’ll get that melt-in-your-mouth, lava-like experience.
Go Sugar-Free
Trying to cut down on sugar? Use:
- Stevia or monk fruit sweetener (check conversion ratios)
- Unsweetened applesauce to reduce added sugar
- Sugar-free chocolate chips
It’s all about balance—you can make it healthier without losing the magic.
Serving Suggestions
Ready to take your microwave brownie to the next level? Try these toppings and pairings:
Top with Ice Cream or Whipped Cream
Nothing beats the warm-cold contrast of a hot brownie and a scoop of ice cream. Try:
- Vanilla
- Salted caramel
- Mint chocolate chip
Whipped cream and a cherry on top? Total retro dessert vibes.
Pair with Coffee or Milk
Coffee enhances the chocolatey richness. Milk balances out the sweetness. Either way, it’s a match made in dessert heaven.
Add a dusting of cocoa powder or a drizzle of caramel syrup, and your simple mug brownie just got gourmet.
How to Store Leftover Brownie
Okay, let’s be honest—you probably won’t have leftovers. But in the rare case you do (maybe you doubled the batch or made a second one “for later”), here’s how to store it properly:
- Let it cool completely. Trapping steam will make it soggy.
- Cover the mug tightly with plastic wrap or transfer the brownie to an airtight container.
- Store at room temperature for up to 1 day, or refrigerate for up to 3 days.
To reheat: Pop it in the microwave for 10-15 seconds until warm. Don’t overdo it, or it’ll turn dry. You can also enjoy it cold—it still tastes great, especially with a splash of milk.
If you’re planning to freeze it (less common for a single mug dessert), wrap it well in plastic and foil, and store it for up to a month. Just note: texture may change slightly upon thawing.
Is It Safe to Cook Brownies in the Microwave?
Yes—completely safe, as long as you follow a few key guidelines:
- Use microwave-safe mugs or bowls. No metal. No gold trim.
- Microwave in short bursts. Avoid overcooking by starting with 1 minute and increasing in 10-second intervals.
- Don’t leave it unattended. Microwaves work fast. It’s not like baking where you walk away for 30 minutes.
Also, don’t worry about eggs (there aren’t any in this recipe), which makes this recipe even safer and less fussy.
Microwave cooking has come a long way. When done right, you can achieve almost oven-like results in just a fraction of the time—and with zero safety risks.
How Does Microwave Time Vary by Wattage?
Here’s where it gets a little technical—but super important for getting the perfect brownie:
| Microwave Wattage | Suggested Cooking Time |
|---|---|
| 600–700W | 1 minute 30–50 seconds |
| 800–900W | 1 minute 10–30 seconds |
| 1000W+ | 60–70 seconds |
If your microwave is on the lower end, you’ll need to cook longer. If it’s high-powered, check early to avoid a dry, rubbery brownie.
Still unsure? Microwave it for 60 seconds, then add time in 10-second bursts, checking for doneness. You want the edges firm and the center slightly soft.
Comparison: Microwave Brownie vs Oven Brownie
Let’s settle this once and for all: how does a microwave brownie stack up against a traditional oven brownie?
| Feature | Microwave Brownie | Oven Brownie |
|---|---|---|
| Time | 5 minutes total | 30–45 minutes |
| Serving Size | Single-serve | Multiple servings |
| Texture | Soft, fudgy | Chewy or cakey (depending on recipe) |
| Prep Effort | Minimal (1 mug, 1 spoon) | Moderate (bowl, pan, mixer) |
| Clean-Up | One mug | Multiple dishes |
If you want a fast, low-mess dessert fix, microwave wins every time. But if you’re hosting guests or love that crisp edge and chewy bite, oven brownies still hold the crown.
Honestly? Why not enjoy both, depending on your mood!
FAQs about Microwave Brownie Recipe
1. Can I double the recipe?
Yes, but use a large microwave-safe bowl instead of a mug to avoid overflow. You may also need to increase the microwave time by 20–30 seconds, checking every 10 seconds after the first minute.
2. What kind of mug is microwave safe?
Use a ceramic or glass mug labeled “microwave safe.” Avoid metal or any mug with metallic paint or trim.
3. How do I know when it’s done?
The edges should look set, and the center should be just a little soft. If it’s still wet or shiny on top, microwave in short bursts until it firms up.
4. Can I add chocolate chips?
Absolutely! Add 1–2 tablespoons of chocolate chips to the batter or sprinkle some on top before microwaving. They melt slightly and create gooey pockets of chocolate.
5. Why did my brownie turn out rubbery?
Most likely, you overcooked it or overmixed the batter. Stick to the timing guide, use level measurements, and don’t stir more than necessary.
Conclusion
There you have it—the ultimate microwave brownie guide. Fast, rich, and ridiculously easy, this recipe is the definition of dessert freedom. No ovens, no mess, no stress. Just a few pantry staples, a mug, and a microwave standing between you and sweet, chocolatey satisfaction.
Whether you’re craving a solo treat or whipping one up for a friend, this brownie delivers every time. Customize it, top it, or keep it classic—it’s your brownie, your rules.
The next time that chocolate craving hits, skip the box mix or bakery line. Just grab your favorite mug and get microwaving.


