Matzo Recipe: Matzo, or matzah, is one of the oldest and most symbolic foods in Jewish cuisine. It’s a type of unleavened bread traditionally eaten during Passover to commemorate the Israelites’ hasty departure from Egypt, when there was no time to let bread rise. While you can find it in most grocery stores, making your own matzo from scratch adds a whole new level of connection and meaning. Not to mention, it’s super satisfying and way easier than you’d think.
In this guide, I’ll walk you through everything you need to know—from a full ingredient list to expert tips for getting the perfect crunch. Whether you’re making it for a religious occasion or just want to try something new, homemade matzo is a fun and fulfilling kitchen project.
Ingredients You’ll Need
Making matzo doesn’t require any fancy ingredients. In fact, one of the things that makes it so special is how simple it is. Here’s what you’ll need to get started:
Basic Ingredients:
- 2 cups of all-purpose flour (or whole wheat flour for a heartier version)
- ½ cup of water (room temperature)
- ½ teaspoon of kosher salt (optional but recommended for flavor)
Optional Add-Ins (For Flavor):
- 1 tablespoon olive oil (adds richness and helps crisp the dough)
- Dried herbs like rosemary, thyme, or za’atar
- Cracked black pepper
- Sesame or poppy seeds
- Cinnamon and sugar (for sweet matzo)
Tools & Equipment:
- Rolling pin
- Baking sheet or pizza stone
- Fork or dough docker
- Mixing bowl
- Pastry cutter or sharp knife
- Oven (preheated to 475°F / 245°C)
One important thing to keep in mind: time is of the essence when making matzo. Traditionally, the dough must go from mixing to baking in under 18 minutes to qualify as unleavened and kosher for Passover.
So get everything prepped and ready to go before you start mixing—this is not the kind of recipe where you pause halfway to search for your rolling pin!
Step-by-Step Guide to Making Matzo
Let’s get hands-on! Follow this process carefully and you’ll end up with crispy, golden matzo that looks and tastes amazing. The entire prep-to-oven process should happen quickly, so read all steps first.
1. Prepare Your Workspace and Oven:
Preheat your oven to 475°F (245°C). Place a baking sheet or pizza stone inside to heat up. Clear a large workspace and dust it with flour for rolling the dough. Have your timer ready, because once the water touches the flour, your 18-minute countdown begins.
2. Mix the Dough:
In a large mixing bowl, combine your flour and salt (if using). Quickly pour in the water and stir with a spoon or your hands. It should come together into a rough dough within 30 seconds. If it’s too dry, add a few drops of water. If too sticky, sprinkle in a bit more flour.
3. Knead Quickly:
Transfer the dough to your floured workspace and knead it for just 1–2 minutes. You’re not trying to build a stretchy gluten structure like with bread—just enough to make it smooth and pliable.
4. Divide and Roll Out:
Cut the dough into 4–6 equal pieces. Roll each one out as thin as possible (less than 1/8 inch). The thinner, the crispier your matzo will be. Try to keep the shape relatively even, but it doesn’t have to be perfect—rustic is part of the charm!
5. Prick the Dough:
Using a fork or dough docker, pierce the surface of each sheet all over. This prevents puffing and helps ensure even baking. Don’t skip this step!
6. Bake It Fast:
Carefully place the dough sheets onto the preheated baking surface. Bake for 2–3 minutes per side, flipping once. Watch closely—matzo can go from perfect to burnt in seconds.
7. Cool and Store:
Let the baked matzo cool completely on a rack. They’ll crisp up even more as they cool. Store in an airtight container for up to a week.
Tips for Making Perfect Matzo
Making matzo might seem simple at first glance—just flour and water, right? But getting that perfect texture and snap takes a little finesse. Here are some key tips to keep in mind to make sure your matzo turns out just right every single time.
Respect the 18-Minute Rule:
One of the most important aspects of making matzo—especially for Passover—is the rule that the entire process, from when water touches flour to when the dough goes into the oven, must take no more than 18 minutes. This is rooted in tradition to ensure that the dough doesn’t begin to ferment or rise. That means you’ll want to work fast and efficiently, so prep everything ahead of time. Set a timer and go!
Roll It Super Thin:
Matzo should be thin and crisp, not thick and chewy. If your dough is too thick, it may not cook through, and you’ll miss that classic crunch. Aim for a thickness of 1/8 inch or less. If you can see light through it when you hold it up, you’re on the right track.
Use a Hot Oven:
Your oven needs to be preheated to a high temperature—at least 475°F (245°C). A hot oven is essential for fast baking and achieving that perfect, toasty texture. You can even place a pizza stone in the oven while preheating for even heat distribution.
Don’t Skip the Docking:
Docking—pricking holes in the dough—isn’t just for looks. It helps prevent the dough from puffing up like a pita, which would technically make it leavened. Use a fork or a dough docker and cover the surface thoroughly with small holes.
Rotate and Watch Closely:
Because matzo bakes so quickly, it’s important to keep a close eye on it. Ovens can have hot spots, so rotating the baking sheet halfway through helps achieve even browning. The moment the edges turn golden, you’re done!
Cool on a Rack:
Once out of the oven, place your matzo on a cooling rack. This prevents steam from building up underneath, which could make them soggy. You want to maintain that crisp texture.
With these tips, you’re set up to make bakery-quality matzo in your own kitchen.
Flavor Variations of Matzo
Traditional matzo is plain, which works perfectly for religious observances. But when you’re not making it specifically for Passover, why not have some fun and add flavor?
1. Olive Oil and Sea Salt:
Brush your rolled-out dough with a little extra virgin olive oil and sprinkle with flaky sea salt before baking. This creates a richer, slightly more indulgent matzo with a beautiful golden finish.
2. Herb-Infused Matzo:
Mix dried herbs such as rosemary, thyme, or za’atar into your flour before adding water. This subtle infusion brings an aromatic twist that pairs beautifully with cheese, hummus, or soups.
3. Everything Bagel Matzo:
Sprinkle a mixture of sesame seeds, poppy seeds, garlic flakes, onion flakes, and salt over the dough just before baking. You’ll get that irresistible everything bagel flavor in a crispy matzo form!
4. Cinnamon Sugar Matzo:
For a sweet treat, brush the rolled dough lightly with butter or oil, then sprinkle cinnamon and sugar over the surface before baking. Perfect for snacking or breakfast!
5. Spicy Matzo:
Add a pinch of chili flakes or smoked paprika to the dough. It brings a little heat and pairs wonderfully with dips like guacamole or tzatziki.
These variations aren’t kosher for Passover, but they’re great for year-round enjoyment and give you the freedom to play around with your personal tastes.
Using Matzo in Other Recipes
Homemade matzo is great on its own, but it also shines as an ingredient in other dishes. Once you’ve got a batch ready, here’s how you can turn it into something entirely new.
1. Matzo Brei:
Think of this as the matzo version of French toast. Break up the matzo, soak it briefly in water, then mix with beaten eggs and fry in a skillet. Sweet or savory—it’s your choice.
2. Matzo Pizza:
Use matzo as a crunchy base for a quick pizza. Top with tomato sauce, cheese, and your favorite toppings, then broil for 2–3 minutes. Super easy and incredibly tasty.
3. Matzo Lasagna:
Replace pasta sheets with matzo to create a Passover-friendly lasagna. Layer matzo with ricotta, sauce, spinach, and mozzarella. Bake until bubbly and golden.
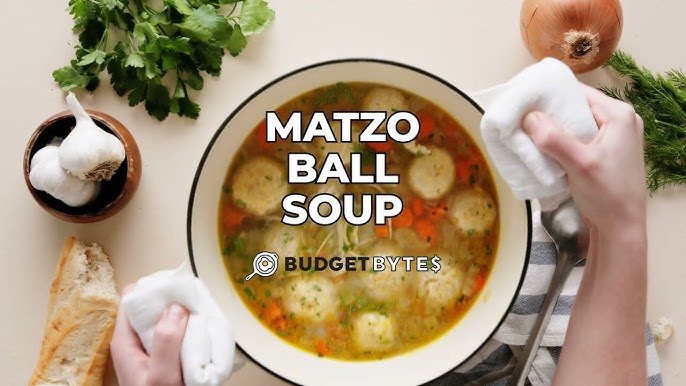
4. Matzo Ball Soup (with Crushed Matzo):
While matzo balls are typically made with matzo meal, you can crush your homemade matzo into fine crumbs to make a fresh batch of fluffy or dense matzo balls for a comforting bowl of soup.
5. Matzo Nachos:
Break the matzo into chips and pile on cheese, beans, jalapeños, and salsa. Melt the cheese under a broiler and serve with sour cream or guac. It’s an unexpected twist on a party favorite.
Matzo is more than just flatbread—it’s a versatile canvas for a range of creative recipes.
Common Mistakes to Avoid
Even with the best intentions, it’s easy to run into hiccups when making matzo. Here are some of the most common pitfalls and how to avoid them.
1. Waiting Too Long to Bake:
The biggest mistake? Taking more than 18 minutes to go from mixing to baking. If you’re trying to keep your matzo unleavened and kosher for Passover, speed is key. Have everything ready to go beforehand.
2. Rolling Dough Too Thick:
Thick dough won’t bake evenly and may turn out chewy instead of crisp. Roll it thinner than you think you need—it should be nearly translucent.
3. Forgetting to Dock the Dough:
If you skip piercing the dough with a fork, it will puff up in the oven and lose its flat, cracker-like texture. Always dock generously.
4. Not Preheating the Oven Fully:
A hot oven is essential. If you don’t let it preheat all the way, your matzo may dry out before it crisps properly, or bake unevenly.
5. Overbaking:
Matzo bakes fast. If you leave it in too long, it will burn—especially the edges. Stay close and monitor the process.
6. Using Self-Rising Flour:
Matzo should be made with plain flour only. Self-rising flour contains leavening agents, which defeats the purpose.
7. Not Cooling Properly:
If you stack hot matzo or seal it in a container before it cools, steam will make it soggy. Let it cool on a rack for the perfect crunch.
Avoid these common mistakes, and you’ll have crisp, golden matzo every time.
Storing and Preserving Matzo
Once your homemade matzo has cooled down, proper storage becomes essential to maintain its crisp texture and fresh flavor. Because matzo has no preservatives and minimal moisture, it can last a long time if stored correctly—but it can also go stale or soft quickly if exposed to humidity or air. Let’s talk about how to keep it fresh and crunchy for as long as possible.
Short-Term Storage Tips:
If you plan to eat your matzo within a few days, the best option is to store it in an airtight container or a zip-top bag. Place parchment paper between the sheets so they don’t stick together or get scratched. Keep the container in a cool, dry place—your pantry or a bread box works perfectly.
Avoid the Fridge:
Refrigeration introduces moisture, and matzo thrives in dryness. Putting it in the fridge can actually make it soggy or chewy over time, which defeats the purpose of that crispy snap you worked so hard to achieve.
Long-Term Storage:
If you’ve made a large batch and want to keep some for later, you can freeze matzo. Here’s how:
- Wrap each sheet individually in parchment or wax paper.
- Place the wrapped sheets in a large freezer-safe zip-top bag or container.
- Label the bag with the date, and freeze for up to 3 months.
When you’re ready to use frozen matzo, allow it to come to room temperature naturally—do not microwave or heat directly, as that can make it rubbery. If needed, you can pop it in the oven for 2–3 minutes to revive the crispiness.
Shelf Life of Homemade Matzo:
Unlike commercial matzo, homemade versions don’t contain stabilizers. At room temperature and stored properly, they’ll stay fresh for 5–7 days. In the freezer, up to 3 months. If they begin to lose their crunch, try re-toasting them in the oven for a few minutes to bring them back to life.
Health and Nutrition Info
Let’s talk health. While matzo might seem like a simple, “clean” food, it’s still important to understand its nutritional value—especially if you plan to make it a regular part of your diet or are preparing for Passover.
Is Matzo Healthy?
Matzo is very basic: just flour and water. That means it’s low in fat, has no added sugar, and is naturally dairy-free and egg-free. Sounds pretty healthy, right? Well, yes and no.
Traditional white flour matzo is high in carbs and low in fiber, which can cause blood sugar spikes if eaten in large quantities. Whole wheat matzo is a better option if you’re watching your diet or trying to include more whole grains.
Typical Nutritional Breakdown (Per Sheet):
- Calories: ~110–130
- Carbohydrates: ~22g
- Protein: ~3g
- Fat: 0–1g
- Fiber: <1g (white flour) / ~2g (whole wheat)
Is Gluten-Free Matzo an Option?
Yes, but it’s a bit more complicated. Gluten-free matzo is typically made with flours like potato starch, tapioca, or almond flour. If you’re making matzo for Passover and need it to be both gluten-free and kosher, you’ll need to follow strict guidelines, as traditional matzo must be made from one of five grains (wheat, barley, oats, rye, or spelt).
For everyday use, though, feel free to experiment with gluten-free recipes. Just know that the texture will be a bit different—more like a cracker and less like traditional matzo.
Add-Ins and Their Effects:
If you’re using olive oil or herbs, keep in mind they’ll slightly increase the calorie count and fat content. Sweet toppings like cinnamon and sugar will obviously bump up the carb and sugar content. But everything in moderation, right?
So, while matzo isn’t exactly a superfood, it’s a simple and flexible bread alternative that can fit into most diets—especially when made at home.
Matzo for Passover
Passover, or Pesach, is the holiday most closely tied to matzo. But not all matzo is created equal, especially when it comes to making it kosher for Passover. There are specific religious guidelines and traditions that must be followed if your matzo is intended for ceremonial use.
What Makes Matzo Kosher for Passover?
Kosher-for-Passover matzo must be made under strict supervision to ensure that the dough does not rise. This is why the 18-minute rule is so important. In some traditions, once the flour and water touch, a timer is started, and the matzo must be rolled, pricked, and in the oven before that time is up.
Other Kosher Requirements Include:
- Using only specific types of flour (wheat, barley, oats, rye, or spelt)
- No contact with water before mixing
- No leavening agents or additives
- Supervision by a rabbi or certified kosher authority during production
Handmade vs. Machine-Made Matzo:
- Handmade (Shmura Matzo) is often used during the Seder. It’s carefully guarded and made entirely by hand to fulfill the mitzvah of eating matzo.
- Machine-Made Matzo is commonly eaten throughout the week of Passover. It’s consistent in shape and often more affordable.
Homemade Matzo for Passover—Is It Allowed?
Technically, yes—but only if you strictly adhere to the kosher preparation process. Unless you’re very familiar with the religious laws and have rabbinical supervision, most people buy certified kosher matzo for the Seder and use homemade versions for practice or everyday enjoyment.
Matzo for Everyday Use
Think matzo is just for Passover? Think again. Homemade matzo is a delicious, rustic cracker that can be used year-round. Its neutral flavor makes it the perfect base for everything from breakfast to snacks to dinner sides.
Ways to Use Matzo Year-Round:
- Crumble it into soups like croutons
- Top it with peanut butter, banana, and honey for a quick breakfast
- Use it as a base for mini open-faced sandwiches
- Layer it with cheese and fruit for a simple appetizer
Make it a Pantry Staple:
Homemade matzo is shelf-stable, easy to make, and endlessly customizable. Keep a few sheets on hand for those days when you run out of bread or need a quick snack.
It’s also a fantastic conversation starter—there’s something pretty cool about saying, “Yeah, I made that cracker from scratch.”
Kids and Matzo: Fun Family Ideas
Matzo isn’t just a cultural or religious food—it’s also a fantastic way to involve kids in the kitchen, spark creativity, and have some good old-fashioned family fun. Its simplicity makes it a perfect hands-on project for younger cooks, and its versatility means it can double as a craft project or even a learning tool.
1. Making Matzo with Kids:
Kids love getting messy in the kitchen, and making matzo is the perfect introduction to simple baking. The ingredients are basic, and the process is quick enough to hold their attention. Before you begin, explain the significance of matzo, especially around Passover—it’s a chance to teach history and culture in an interactive way.
Let them:
- Help mix the dough
- Use the rolling pin
- Dock the dough with a fork
- Sprinkle on toppings like cinnamon sugar or sesame seeds
They’ll feel a sense of pride seeing their own creations come out of the oven—and eating something they made themselves is always more exciting!
2. Matzo Crafts:
Got some broken or leftover pieces of matzo? Turn them into art! Kids can glue matzo to paper to make mosaics, create little matzo houses with peanut butter “mortar,” or even decorate matzo pieces with edible paints (just mix food coloring with a little water or cornstarch paste).
3. Fun Toppings and Dip Stations:
Set up a DIY matzo bar! It’s like a mini snack buffet where kids can top their matzo with:
- Nut butter and banana slices
- Cream cheese and sprinkles
- Hummus and veggie sticks
- Chocolate spread with strawberries
Let them build their own matzo “masterpieces”—perfect for a weekend snack or even a birthday party activity.
4. Storytime with Snacks:
Pair matzo-making with storytelling. Read the story of Exodus or children’s books about Passover while the matzo is in the oven. It’s a beautiful way to connect food, culture, and family tradition.
Involving kids in the kitchen fosters life skills, builds family bonds, and creates cherished memories. And matzo, with its quick turnaround and meaningful backstory, is a great place to start.
Matzo Around the World
While matzo may have its roots in Jewish tradition, it has traveled far and wide, with different cultures interpreting and using it in their own unique ways. Whether it’s prepared differently, flavored with local ingredients, or incorporated into new dishes, matzo has global appeal that goes beyond borders.
Sephardic vs. Ashkenazi Matzo:
The two primary Jewish traditions—Sephardic (Middle Eastern, North African) and Ashkenazi (Eastern European)—have slight differences in how matzo is made and used.
- Ashkenazi Matzo tends to be very thin and cracker-like, baked quickly to stay unleavened.
- Sephardic Matzo can sometimes be softer, closer to flatbread, and may include olive oil. In some communities, soft matzo is still considered kosher for Passover if made under the proper conditions.
Regional Variations and Uses:
- Moroccan Jews often serve matzo with haroset and spicy dips during the Seder meal.
- In Iraq, matzo is sometimes cooked with meat and vegetables in layered stews.
- Latin American Jewish communities may incorporate matzo into sweet puddings or bake it with chocolate and fruit.
- American Jewish cooks have popularized matzo pizza, matzo kugel (a baked pudding), and even matzo brittle for dessert.
Matzo as a Cultural Bridge:
Because of its plain flavor and versatility, matzo has found its way into the kitchens of people outside the Jewish faith as well. It’s used like any other flatbread—topped, dipped, and crumbled into dishes around the world.
Whether you’re following tradition or putting your own spin on it, matzo’s cross-cultural appeal makes it one of the most flexible and beloved unleavened breads on the planet.
Troubleshooting Your Matzo
Even the most seasoned bakers run into hiccups. If your homemade matzo didn’t turn out quite right, don’t worry—it’s all part of the learning process. Here’s a guide to troubleshooting the most common matzo issues and how to fix them next time.
Problem #1: Dough is Too Sticky
This often happens if you’ve added too much water. Try:
- Adding small amounts of flour during kneading until the dough becomes smooth
- Making sure you’re using room-temperature water (not warm)
Problem #2: Dough is Too Dry and Crumbly
This usually means you didn’t add quite enough water, or you let the dough sit too long. Try:
- Adding an extra teaspoon of water at a time and kneading it in
- Working faster to avoid moisture loss
Problem #3: Matzo Puffing in the Oven
If your matzo puffs like pita bread, it likely wasn’t docked well. Be sure to:
- Prick it thoroughly with a fork or dough docker before baking
- Use even pressure across the entire sheet
Problem #4: Matzo Is Too Chewy or Soft
This happens when the dough is too thick or the baking time is too short. Try:
- Rolling the dough thinner next time (aim for paper-thin)
- Baking it a bit longer—but watch closely to avoid burning
Problem #5: Matzo Burned Too Fast
Ovens can have hot spots. If your matzo burned too quickly:
- Reduce the baking temperature slightly
- Flip the matzo halfway through baking
- Consider baking on a lower rack
Problem #6: Matzo Turned Out Bland
Matzo is meant to be plain, but you can still boost flavor with:
- A sprinkle of sea salt or herbs before baking
- A drizzle of olive oil for richness
Learning to make perfect matzo takes a bit of practice. But every failed batch teaches you something new—and gives you a reason to try again!
FAQs about Matzo Recipe
1. Can I make matzo without an oven?
Yes! You can cook matzo on a hot cast iron skillet or griddle. Just roll it thin, place it on the hot surface, and cook 1–2 minutes per side. It may not be as crisp as oven-baked, but it still works.
2. What kind of flour is best for matzo?
All-purpose flour is the most common and accessible. For more fiber and a richer taste, try whole wheat. If you’re making matzo for Passover, it must be from one of the five grains—wheat, barley, rye, oats, or spelt.
3. Is homemade matzo allowed for Passover?
Yes, but only if it follows strict rules: no leavening, under 18 minutes from mixing to baking, and preferably under rabbinical supervision. If unsure, use your homemade matzo for practice or everyday meals, and purchase certified kosher matzo for Passover.
4. How thin should matzo dough be?
As thin as possible—less than 1/8 inch. Aim for translucent sheets that bake quickly and evenly. Thinner dough = crispier matzo.
5. Can I flavor matzo with garlic or cheese?
Yes, but not for Passover use. For everyday enjoyment, feel free to add garlic powder, cheese, herbs, or spices. These additions make matzo more versatile and delicious.
Conclusion
Matzo is more than just flour and water—it’s a symbol of heritage, a reflection of history, and a blank canvas for creativity in the kitchen. Making it at home lets you connect with tradition while enjoying the satisfaction of baking from scratch. Whether you’re following strict guidelines for Passover or just experimenting with fun flavors, homemade matzo brings something special to the table.
By understanding the key techniques, avoiding common mistakes, and exploring global variations, you can create matzo that’s not just authentic—but truly yours.
So roll up your sleeves, preheat that oven, and give it a go. You’re not just baking bread—you’re baking a story.


