Maple Syrup Recipe: Ever tasted real maple syrup straight from the source? If you’ve only had the store-bought stuff, you’re in for a surprise. Homemade maple syrup is rich, flavorful, and uniquely satisfying—especially when you make it yourself. The process might sound a little rustic (okay, maybe a bit old-school), but that’s part of the charm. Whether you’re tapping trees in your backyard or experimenting with sap concentrate, making maple syrup at home is one sweet adventure.
Why bother making maple syrup from scratch? First, it’s 100% natural. No additives, no preservatives, and certainly no high fructose corn syrup. Just pure sap, boiled down into golden magic. Second, it’s surprisingly doable—even for beginners. Plus, there’s something deeply rewarding about pouring your own syrup over a stack of pancakes and knowing you made it yourself.
In this complete guide, you’ll learn everything you need to make real maple syrup at home—from tapping the tree to pouring it into a bottle. We’ll walk through the ingredients, tools, and every step of the process, along with bonus tips and troubleshooting help. Let’s get sticky!
List of Ingredients You’ll Need
You’d be surprised how simple maple syrup is in terms of ingredients. In fact, there’s technically only one ingredient in traditional maple syrup: sap from a sugar maple tree. But to make the process work smoothly, here’s a breakdown of what you’ll need:
Ingredients
- Fresh maple sap (ideally from a sugar maple tree)
- Optional: a bit of baking soda (to help reduce foam)
- Optional flavor infusions: vanilla bean, cinnamon stick, or bourbon
Equipment
- Drill with a 7/16″ or 5/16″ drill bit
- Spile (tap) to insert into the tree
- Buckets or food-grade containers to collect sap
- Large evaporator pan or stainless steel pot
- Thermometer (preferably a candy or syrup thermometer)
- Filter material (cheesecloth or syrup filter)
- Glass jars or bottles for storage
- Funnel (for pouring into containers)
Alternative Ingredients (If Not Tapping a Tree)
- Maple sap concentrate (buyable online)
- Or store-bought maple sap from specialty stores
- In a pinch: mix 100% pure maple extract with sugar and water (not real syrup, but a substitute)
Making maple syrup doesn’t need a massive forest or professional gear. Even just one tapped tree and a pot on a backyard stove can yield enough for you and your family.
Step-by-Step Guide to Making Maple Syrup
Step 1: Choose the Right Maple Tree
Sugar maple trees are the best choice because they have the highest sugar content. Look for trees with gray-brown bark and a diameter of at least 10–12 inches. The ideal tapping season is late winter to early spring, when days are above freezing and nights are below freezing.
Step 2: Tap the Tree
Drill a hole about 2–2.5 inches deep at a slight upward angle, roughly 3–4 feet from the ground. Insert a spile snugly into the hole and hang a bucket or attach tubing to collect the sap. Avoid overtightening to protect the tree.
Step 3: Collect the Sap
Sap usually flows best during freeze–thaw cycles. Check and empty the buckets daily, especially during warm spells. Keep containers clean to prevent contamination. Sap should be boiled within 24–48 hours to avoid spoilage.
Step 4: Boil the Sap
Boil sap outdoors if possible, as it creates a lot of steam. Use a wide, shallow pan to speed evaporation. Boil until the sap reduces significantly—about 40 gallons of sap make 1 gallon of syrup. Finish boiling carefully, keeping the temperature around 104°C (219°F), which is syrup stage.
Step 5: Filter the Syrup
While hot, filter the syrup to remove sugar sand (niter). Use a maple syrup filter or clean cloth filters. Filtering ensures a clear, smooth final product.
Step 6: Bottle the Syrup
Pour hot syrup into sterilized glass bottles or jars. Seal immediately for hot packing. Tight sealing helps prevent mold and preserves freshness.
Step 7: Store and Use
Store unopened syrup in a cool, dark place. Once opened, refrigerate. Properly bottled syrup can last up to one year unopened and several months after opening when refrigerated.
Maple Syrup from Store-Bought Sap or Concentrate
Don’t have a sugar maple in your backyard? No worries! You can still make syrup using store-bought sap or maple sap concentrate.
Where to Buy:
- Online specialty retailers
- Local farms during sugaring season
- Natural food stores
The boiling process is the same—just boil the sap or diluted concentrate down to the right temperature, filter, and bottle. It’s a great way to try syrup-making without tapping your own trees.
Tips for Better Flavor
Want to elevate your syrup to something next-level? Try infusing it with subtle flavors during or after boiling.
Flavor Ideas:
- Cinnamon sticks
- Vanilla beans
- A splash of bourbon (after boiling, for a grown-up twist)
- A pinch of sea salt for balance
Start small—maple syrup is delicate, and you don’t want to overpower its natural sweetness.
Common Mistakes to Avoid
- Overcooking the syrup – This can cause a burnt taste. Use a thermometer!
- Not filtering properly – Sugar sand isn’t dangerous, but it ruins texture.
- Storing in dirty containers – Always sterilize your bottles.
- Skipping the boil test – Undercooked syrup is watery and spoils fast.
When in doubt, boil longer, but carefully. It’s better to finish syrup thick than too thin.
Maple Syrup Nutrition and Benefits
Real maple syrup is a natural sweetener that contains antioxidants, calcium, potassium, and zinc. It’s also lower on the glycemic index than refined sugar, meaning it causes a slower rise in blood sugar.
Keep in mind—it’s still sugar. But if you’re choosing between artificial syrup and the real deal, homemade wins every time.
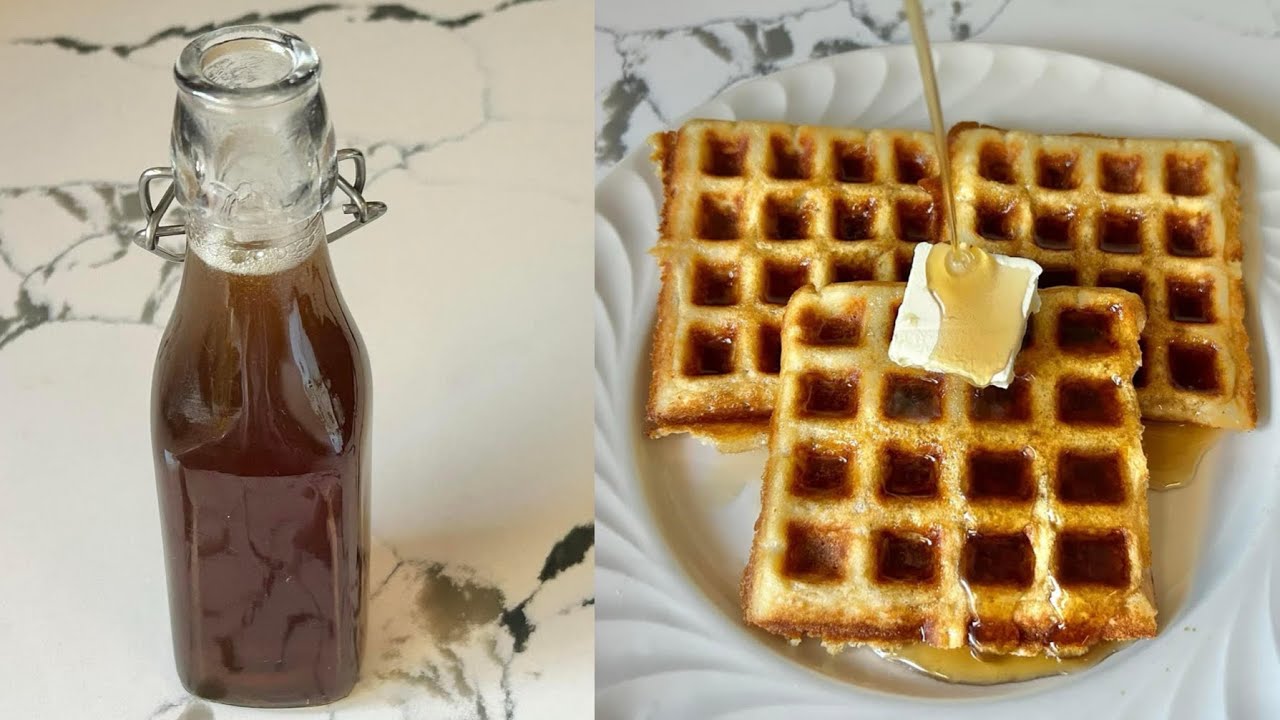
Creative Uses for Homemade Maple Syrup
- Drizzle over pancakes, waffles, or French toast
- Stir into oatmeal, yogurt, or smoothies
- Use as a glaze for salmon or roasted vegetables
- Swap in for sugar in baking (cookies, muffins, granola bars)
- Mix into salad dressings or marinades
The possibilities are endless. Maple syrup’s unique flavor can transform everyday dishes into something magical.
Troubleshooting Guide
- Syrup is too runny? Boil a bit more to reach the right temp (219°F).
- Too thick? You’ve overboiled it. Add a bit of water and reheat gently.
- Cloudy appearance? Not harmful—just filter more thoroughly next time.
- Crystallized syrup? Warm it up slowly to dissolve the crystals.
Environmental and Ethical Considerations
Making your own syrup supports sustainable, small-batch production. If you tap your own trees, make sure to:
- Never over-tap one tree
- Rotate tapping spots each year
- Give the tree time to heal
This ensures your trees stay healthy and productive for years to come.
FAQs about Maple Syrup Recipe
1. Can I make maple syrup without a sugar maple tree?
Yes! You can use red, black, or silver maples. You can also buy sap or concentrate online.
2. How long does homemade maple syrup last?
Unopened syrup lasts up to a year. Once opened, store in the fridge and use within 6 months.
3. How do I know when it’s done boiling?
Use a thermometer—syrup is ready at 219°F (104°C).
4. Can I flavor my syrup naturally?
Yes! Add cinnamon sticks, vanilla beans, or other natural infusions during boiling or bottling.
5. Is homemade syrup healthier than store-bought?
Homemade syrup is free of additives and preservatives, making it a more natural choice compared to artificial syrups.
Conclusion
Making maple syrup at home might sound intimidating, but it’s actually a fun, rewarding, and surprisingly peaceful process. From wandering into the woods to tap a tree to watching the sap boil into thick, amber syrup—it’s like alchemy in your own backyard.
Whether you bottle one jar or twenty, that first drizzle of homemade syrup will make all your effort worthwhile. It’s nature’s candy, made by your own hands.


