Lechon Kawali Recipe: Lechon Kawali is one of those Filipino dishes that instantly triggers cravings with just its name. Golden-brown, gloriously crispy pork belly deep-fried to perfection—what’s not to love? This dish has earned its place in Filipino cuisine not just as a comfort food but as a centerpiece at celebrations. Whether served with garlic rice, sawsawan (dipping sauce), or paired with local sides, Lechon Kawali is all about indulgence and crunch.
But here’s the thing—while it might look intimidating, it’s actually very doable at home. You don’t need to be a professional chef or have a restaurant-grade deep fryer. All you need is the right ingredients, a bit of patience, and the willingness to get that skin ultra crispy. Ready to turn your kitchen into a fiesta? Let’s get frying.
What Makes Lechon Kawali Special?
At first glance, Lechon Kawali might just look like deep-fried pork belly. But what sets it apart is the cooking process—a blend of boiling, drying, and double frying that creates an unmatched texture. The inside stays juicy and flavorful, while the outer skin transforms into a crispy, golden layer that crackles with each bite. It’s the contrast between tender and crunchy that makes this dish so irresistible.
Unlike the whole roasted lechon (a full pig on a spit), Lechon Kawali is a more manageable, everyday version. It doesn’t need a huge grill or several hours of slow roasting. You can make it with just a stovetop and a deep pan. That’s the beauty of it—it gives you that festive flavor and texture, without the hassle.
Ingredients You’ll Need
Before diving into the steps, let’s make sure your ingredients are prepped and ready. Here’s what you’ll need to create the ultimate Lechon Kawali:
Meat Selection Tips
- Pork Belly (1 to 2 lbs): The star of the show. Choose pork belly with an even ratio of meat, fat, and skin. The fat renders during cooking and gives the pork its juiciness.
Seasonings and Spices
- Salt (1 tbsp)
- Peppercorns (1 tbsp)
- Bay Leaves (3 to 4 leaves)
- Garlic (5 cloves, smashed)
- Onion (1 whole, quartered)
These ingredients help infuse flavor into the pork while boiling. Don’t skip them!
Other Essential Items
- Water (enough to cover pork)
- Cooking Oil (for deep frying – around 4 to 5 cups depending on pot size)
- Optional: Vinegar or soy sauce (for marinade or boiling water)
Want to level up the taste? Adding a splash of vinegar while boiling enhances the depth of flavor and tenderizes the meat.
Tools and Equipment You’ll Need
Don’t worry, you won’t need any fancy gadgets. Here’s a list of kitchen tools you’ll need for this recipe:
- Large pot (for boiling)
- Strainer or tongs
- Paper towels or clean kitchen towels
- Cooling rack (optional but helpful)
- Deep pan or wok (for frying)
- Splatter screen (trust us—you’ll want this)
- Tongs or spider strainer (for handling hot pork safely)
Having these tools nearby will make the entire process smoother and safer.
Preparing the Pork Belly
The prep work is where the magic starts. You want to make sure your pork belly is clean and well-prepared before it hits the hot oil.
Cleaning and Boiling
Start by rinsing your pork belly thoroughly under cold water. Place it in a large pot, and add enough water to submerge it completely. Add your aromatics—salt, peppercorns, bay leaves, garlic, and onion. Turn on the heat and bring to a boil, then lower to a simmer. Let it cook for 45 minutes to 1 hour, depending on thickness.
Boiling serves two purposes: it tenderizes the meat and infuses it with flavor. It also begins the rendering of fat, which helps with crisping later on.
Cooling and Drying Process
Once boiled, take out the pork belly and let it cool slightly. Then comes the most crucial part—drying. Pat the pork belly dry with paper towels. The drier it is, the crispier the result.
Some people refrigerate the pork overnight, uncovered, to remove excess moisture. This step is optional, but highly recommended if you have time.
Secret to Crispy Skin
Here’s the insider trick—drying is everything. Moisture is the enemy of crispiness. Make sure your pork skin is dry, dry, dry. You can even poke small holes in the skin using a fork to help it blister during frying.
Also, a second fry at high heat (after the first fry at medium heat) gives the pork that extra crackle factor. Don’t skip it.
Step-by-Step Guide to Cooking Lechon Kawali
Let’s break down the entire process step-by-step so you can follow along like a pro.
Step 1: Boil the Pork Belly
Place pork belly in a large pot and add enough water to fully cover it. Add salt, garlic, bay leaves, and peppercorns for flavor. Bring to a boil, then lower the heat and simmer for 45–60 minutes until the meat is tender but not falling apart. Drain well.
Step 2: Cool and Dry Thoroughly
Remove the pork belly and let it cool completely. Pat it dry with paper towels, then let it air-dry uncovered in the refrigerator for several hours or overnight. Dry skin is essential for achieving crispy crackling.
Step 3: Deep Fry the Pork Belly
Heat oil in a deep pot over medium heat. Carefully lower the pork belly into the hot oil, skin-side down. Fry for 8–10 minutes until the fat renders and the skin begins to blister. Use a splatter guard for safety.
Step 4: Second Fry for Extra Crisp
Remove the pork from the oil and let it rest for 10 minutes. Increase the oil temperature slightly, then return the pork to the oil and fry for another 3–5 minutes until deeply golden and ultra-crispy. Drain on paper towels, rest briefly, then slice and serve hot.
Tips to Avoid Oil Splatter
Let’s be real—frying Lechon Kawali can be messy and even a little intimidating because of oil splatter. But don’t worry, there are a few easy hacks you can use to keep your kitchen and your skin safe.
- Dry the Pork Thoroughly: Moisture is the #1 cause of splattering. After boiling, pat the pork belly completely dry with paper towels. Refrigerating it uncovered for a few hours (or overnight) helps reduce moisture even more.
- Use a Deep Pot or Wok: This contains the oil better and limits splatter range. The deeper the pot, the safer your fry zone.
- Don’t Overcrowd the Pan: Fry one slab at a time. Overcrowding drops the oil temperature and causes unnecessary splashing.
- Use a Splatter Screen: These inexpensive mesh lids reduce mess and protect you from hot oil without trapping steam.
- Lower the Pork Slowly: Don’t just toss it in the oil. Lower it gently using tongs or a spider strainer.
Safety first, always. Hot oil burns are no joke, so take these precautions seriously.
Best Oil for Deep Frying Lechon Kawali
Choosing the right oil makes a huge difference, especially when you’re cooking at high temperatures. You’ll want something with a high smoke point so the oil doesn’t break down or impart a burnt flavor.
Here are the best options:
- Canola Oil – Neutral flavor, high smoke point, and budget-friendly.
- Peanut Oil – Great for crisping and can handle high heat well.
- Corn Oil – Another solid choice with a clean taste and high tolerance to heat.
- Vegetable Oil – Readily available and versatile.
Avoid olive oil or butter-based oils—they burn too quickly and aren’t ideal for deep frying. You want that golden crunch, not a bitter aftertaste.
Alternative Cooking Methods
If deep frying isn’t your thing, or you’re trying to cut down on oil, don’t worry—Lechon Kawali still has options. While nothing completely mimics the deep-fried crunch, these alternatives come pretty close.
Air Fryer Lechon Kawali
Yep, your air fryer can work some serious magic here. After boiling and drying the pork:
- Preheat the air fryer to 400°F (200°C).
- Place pork belly skin side up in the basket.
- Air fry for 30–40 minutes, flipping once halfway through.
- Cook until golden and crispy.
Pro tip: Lightly brush the skin with oil to help the blistering process.
Oven-Baked Lechon Kawali
Don’t have an air fryer? Use your oven!
- Preheat to 425°F (220°C).
- Place pork belly on a wire rack over a baking sheet.
- Bake for 40–50 minutes, or until crispy, turning once for even browning.
For even better results, broil the last few minutes to help the skin pop and crackle.
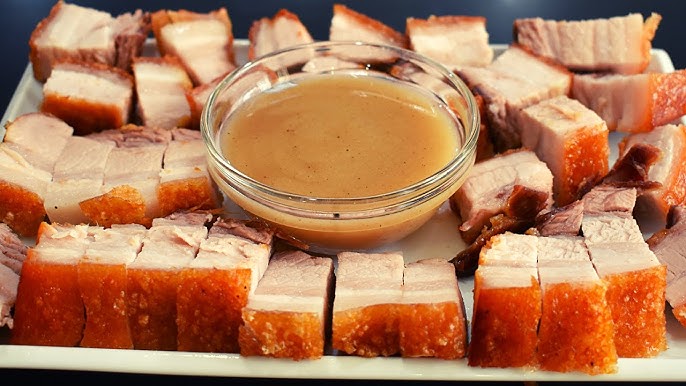
How to Make Lechon Sauce (Sarsa ng Lechon)
You’ve nailed the pork, now let’s talk about the sauce. The classic Filipino Lechon Sauce is tangy, savory, and slightly sweet—perfect for balancing the richness of Lechon Kawali.
Ingredients:
- 1 cup liver spread or mashed pork liver (canned liver spread works great)
- 1/2 cup vinegar
- 1/2 cup brown sugar
- 1/2 cup breadcrumbs
- 1 small onion, finely chopped
- 3 cloves garlic, minced
- 1 tbsp soy sauce
- 1 cup water
- Salt and pepper to taste
Instructions:
- Sauté garlic and onion until fragrant.
- Add liver spread and cook for 2–3 minutes.
- Pour in vinegar (don’t stir yet), then soy sauce, sugar, and water.
- Let it simmer until slightly thick.
- Add breadcrumbs to adjust thickness.
- Season with salt and pepper.
And that’s it! A rich, flavorful dipping sauce that elevates your Lechon Kawali game.
Serving Suggestions
So you’ve fried up that golden slab of pork belly—now what? Lechon Kawali shines brightest when paired with the right sides and sauces.
With Rice
- Garlic Fried Rice (Sinangag) – The ultimate combo. Crunchy pork, garlicky rice—yes, please.
- Steamed Jasmine Rice – Let the pork do the talking with simple white rice.
With Dips and Sides
- Lechon Sauce – Classic, rich, and savory.
- Spiced Vinegar (Sukang Maanghang) – Adds tang and heat that cuts through the fat.
- Atchara (Pickled Papaya) – A sweet-tangy side that refreshes your palate.
- Ensaladang Kamatis (Tomato & Onion Salad) – Fresh and light to contrast the richness.
Pro tip: Chop Lechon Kawali into bite-sized pieces and serve on a sizzling plate with garlic rice and egg for a full-on silog meal.
Storing and Reheating Leftovers
Can’t finish it all in one sitting? No problem. Lechon Kawali stores surprisingly well, and you can bring back its crunch with the right methods.
Storing:
- Place cooled Lechon Kawali in an airtight container.
- Store in the fridge for up to 3 days.
- For longer storage, freeze it for up to a month.
Reheating:
- Air Fryer: Reheat at 375°F for 5–8 minutes.
- Oven: Bake at 400°F for 10–12 minutes.
- Stovetop: Pan-fry over medium heat until crisp again (no extra oil needed).
Avoid microwaving unless you want soggy skin (and no one wants that!).
Common Mistakes to Avoid
Let’s make sure your Lechon Kawali turns out perfect. Here are a few common pitfalls and how to dodge them:
- Skipping the Drying Step: Moisture = splatter + soggy skin.
- Frying Cold Pork: Let it come to room temperature before frying for even cooking.
- Not Monitoring Oil Temperature: Too hot and it burns, too cool and it soaks up oil.
- Only Frying Once: That second fry makes a big difference.
- Crowding the Pan: It lowers the oil temp and gives you uneven results.
Take your time, follow each step, and you’ll be serving up restaurant-quality Lechon Kawali in no time.
Healthier Tips Without Sacrificing Flavor
Let’s face it—Lechon Kawali isn’t the healthiest dish on the planet. But if you’re watching your diet or just want to lighten things up a bit, you don’t have to give it up entirely. There are smart ways to make this indulgent treat a little better for you without totally compromising on flavor and crunch.
Trim the Fat
Start with a leaner cut of pork belly. Some pork belly cuts come with a super thick fat layer, and while fat adds flavor, too much can be overkill. Trim off excessive fat, especially from the bottom layer, but leave enough to help render and keep the meat juicy.
Use an Air Fryer
This is a game changer. Air frying significantly reduces oil use while still giving you crispy skin. Just remember: drying the pork thoroughly is still the key to getting that perfect crackle.
Boil with Flavor, Skip the Salt
If you’re watching your sodium intake, flavor your pork with herbs and aromatics instead of loading it with salt. Garlic, bay leaves, onions, peppercorns, and a dash of vinegar can make a big impact without pushing your salt limits.
Pair with Healthy Sides
Serve your Lechon Kawali with a side of vegetables, a fresh tomato salad, or atchara (pickled papaya) to balance the richness. These light sides help cut through the heaviness of the pork and make the whole meal feel less greasy.
Portion Control
Instead of serving large slabs, slice your Lechon Kawali into smaller, bite-sized pieces and share. Enjoy the flavor without going overboard.
Bottom line? You don’t have to give it up—just be smarter with how you prep, cook, and serve it.
FAQs about Lechon Kawali Recipe
1. Can I use other cuts of pork?
Yes! While pork belly is the traditional choice for its fat-meat-skin combo, you can also use pork shoulder or pork ribs. Just make sure the cut has skin if you want that crispy crunch.
2. Why is my Lechon Kawali not crispy?
Chances are your pork wasn’t dry enough before frying, or your oil wasn’t hot enough. Remember: dry pork + hot oil = crispy skin. Don’t skip the drying phase, and use a thermometer if needed to keep your oil at around 350–375°F.
3. How do I store it to keep it crunchy?
Store cooked Lechon Kawali in an airtight container in the fridge, then reheat in an air fryer or oven to revive the crispiness. Avoid microwaving—it softens the skin.
4. Can I make this ahead of time?
Absolutely. Boil and dry the pork a day in advance, store it in the fridge, and then fry it right before serving. You can even do the first fry earlier, then do the second fry when you’re ready to serve.
5. Is Lechon Kawali gluten-free?
Yes, the basic recipe is naturally gluten-free if you don’t use soy sauce or any marinades with gluten. Just check all ingredients and avoid breaded coatings or sauces with flour if you’re serving it to someone with gluten sensitivity.
Conclusion
Lechon Kawali is more than just deep-fried pork—it’s a celebration on a plate. From the savory, juicy meat to that loud crunch of golden skin, every bite brings joy. While it might seem like a complicated dish at first, it’s all about patience and preparation. With the right ingredients, some helpful tips, and a willingness to get a little greasy, you can master this iconic Filipino comfort food right in your own kitchen.
Whether you’re making it for a weekday treat or a special occasion, Lechon Kawali will always have a way of stealing the spotlight. Now that you’ve got the step-by-step guide, it’s time to put it into action.
So go ahead—get that pork belly sizzling, whip up your dipping sauces, and enjoy the crispy, juicy magic of homemade Lechon Kawali.


