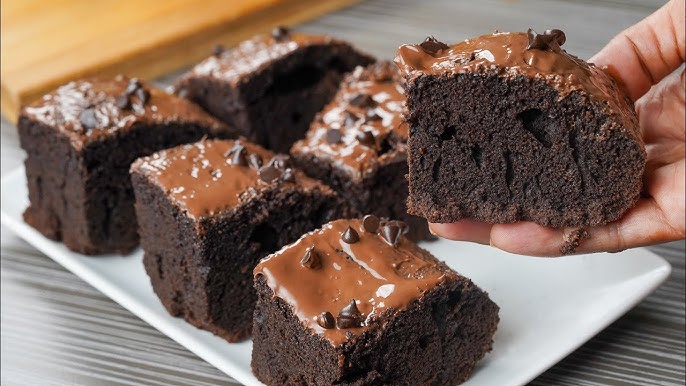
Fudge Brownies Recipe: There’s nothing quite like the rich, gooey, chocolatey bite of a perfectly baked fudge brownie.
Whether you’re a baking pro or just getting started, this complete step-by-step guide will help you create the most irresistible batch of fudge brownies that’ll make everyone ask for seconds (or thirds!).
With the perfect balance of chewy edges and melt-in-your-mouth centers, these brownies are sure to be a hit.
Why Fudge Brownies Are a Classic Favorite
Fudge brownies hold a special place in the heart of dessert lovers everywhere. They’re the go-to treat for birthdays, holidays, sleepovers, or just a cozy night in. Unlike lighter, fluffier desserts, fudge brownies are rich and satisfying, giving you that indulgent chocolate punch in every single bite. People love them because they’re versatile, easy to make, and endlessly customizable. Whether you enjoy them plain, filled with nuts, or topped with caramel, fudge brownies are the ultimate comfort dessert.
The Difference Between Fudgy and Cakey Brownies
Ever wonder why some brownies are dense and gooey while others are fluffy and light? It all comes down to the ingredient ratios and mixing technique. Fudgy brownies contain more fat—like butter or chocolate—and less flour, giving them that gooey, decadent texture. On the other hand, cakey brownies use more flour and baking powder for a lighter bite. If you’re here for the fudge, we’ve got you covered.
Essential Tools for Making Brownies
Must-Have Kitchen Tools
Before diving into the recipe, it helps to get your tools in order. Here’s what you’ll need:
- Mixing bowls (medium and large)
- Whisk or electric hand mixer
- Rubber spatula
- 8×8 or 9×9-inch baking pan
- Measuring cups and spoons
- Sifter (optional but recommended)
- Parchment paper
Optional Tools That Make Life Easier
If you want to go the extra mile, these tools make the process even smoother:
- Kitchen scale (for accuracy)
- Offset spatula (for leveling the batter)
- Cooling rack
- Cookie scoop (for even cutting and serving)
List of Ingredients You’ll Need
Basic Ingredients Breakdown
Here’s everything you need to whip up a batch of delicious fudge brownies:
- 1/2 cup (1 stick) unsalted butter
- 1 cup granulated sugar
- 2 large eggs
- 1 teaspoon vanilla extract
- 1/3 cup unsweetened cocoa powder
- 1/2 cup all-purpose flour
- 1/4 teaspoon salt
- 1/4 teaspoon baking powder
- 1/2 cup semi-sweet chocolate chips (optional but recommended)
Optional Add-ins for Extra Flavor
Want to take things up a notch? Try these:
- Chopped walnuts or pecans
- Caramel chunks or swirls
- Crushed Oreos
- Peanut butter chips
- A pinch of espresso powder for richness
Understanding the Role of Each Ingredient
The Science Behind Fudgy Brownies
Each ingredient has a job. Butter adds moisture and fat. Sugar sweetens and helps create a chewy texture. Eggs bind everything together and contribute to richness. Cocoa powder gives that deep chocolate flavor, while flour provides structure. A small amount of baking powder gives just a touch of lift without compromising the fudginess. Salt enhances flavor, and those optional chocolate chips? They melt into gooey pockets of joy.
Tips on Substitutions
Out of something? Here are a few smart swaps:
- Butter: Use margarine or coconut oil, but expect a slight change in texture.
- Sugar: Brown sugar gives a more caramelized flavor.
- Eggs: For a vegan option, use flax eggs (1 tbsp flaxseed meal + 3 tbsp water per egg).
- Flour: Gluten-free flour blends work well with slight tweaks.
Step-by-Step Fudge Brownie Recipe Guide
Step 1: Prepping the Oven and Pan
Preheat your oven to 180°C (350°F). Line a square baking pan with parchment paper, leaving some overhang for easy removal. Lightly grease the paper to prevent sticking.
Step 2: Melting the Butter and Chocolate
In a heatproof bowl, combine butter and chopped dark chocolate. Melt gently using a microwave in short bursts or over a double boiler, stirring until smooth and glossy. Let it cool slightly.
Step 3: Mixing the Wet Ingredients
Add sugar to the melted chocolate mixture and whisk well. Beat in the eggs one at a time, followed by vanilla extract. Mix until the batter looks thick and shiny—this helps create that fudgy texture.
Step 4: Sifting and Adding Dry Ingredients
In a separate bowl, sift together flour, cocoa powder, and a pinch of salt. Sifting removes lumps and keeps the brownies tender.
Step 5: Combining Everything Carefully
Gently fold the dry ingredients into the wet mixture using a spatula. Mix just until no dry streaks remain. Avoid overmixing, which can make brownies cakey instead of fudgy.
Step 6: Pouring the Batter into the Pan
Pour the batter into the prepared pan and spread it evenly with a spatula. Tap the pan lightly on the counter to release air bubbles.
Step 7: Baking Time and Temperature
Bake for 20–25 minutes. The edges should look set while the center remains slightly soft. A toothpick inserted should come out with moist crumbs, not wet batter.
Step 8: Cooling and Cutting for Perfect Squares
Allow the brownies to cool completely in the pan. Once cooled, lift them out using the parchment paper and cut into neat squares. This ensures clean edges and perfect texture.
Enjoy rich, fudgy brownies every time. 🍫
Pro Tips for Extra-Fudgy Brownies
Don’t Overmix the Batter
This can’t be stressed enough: mix just until the flour disappears. The more you stir, the more gluten you activate, and the more cakey your brownies will turn out. Fudge brownies need just enough mixing to bring the ingredients together—no more.
Let the Brownies Rest Overnight
Brownies actually taste better the next day. The chocolate flavor deepens and the texture becomes even fudgier. If you can, cover the brownies and let them sit overnight at room temperature or refrigerate them for extra chewiness.
Common Mistakes to Avoid
Overbaking
As mentioned earlier, this is the most common culprit behind dry brownies. Always err on the side of slightly underdone. They’ll continue to firm up as they cool.
Using Cold Eggs or Butter
Room temperature ingredients mix more evenly. Cold eggs can make the batter seize or bake unevenly. Let your eggs and butter sit out for at least 30 minutes before starting the recipe.
Other pitfalls include:
- Not lining the pan properly (makes them hard to remove)
- Using low-quality chocolate or cocoa
- Doubling the recipe without adjusting bake time
Best Toppings and Mix-ins
Nuts, Caramel Swirls, and More
If you want to make your brownies extra fancy or give them a signature twist, try one of these delicious ideas:
- Walnuts or pecans: Add crunch and earthiness
- Peanut butter: Swirl a few tablespoons on top before baking
- Caramel drizzle: Layer in between batter or on top post-baking
- Marshmallows: Add during the last 5 minutes of baking for a s’mores vibe
- Espresso powder: Enhances chocolate flavor without tasting like coffee
Frosting vs. No Frosting
Frosting on fudge brownies? It’s totally up to you. Some purists say it’s unnecessary, but a thin layer of chocolate ganache or cream cheese frosting can take your brownies to bakery-level status.
How to Store Brownies Properly
Room Temperature, Fridge, and Freezer Storage Tips
The key to long-lasting, moist, and fudgy brownies is storing them the right way. If you’re not planning to eat the entire batch the same day (though we wouldn’t blame you if you did), here’s how to keep them fresh:
Room Temperature
Keep your brownies in an airtight container at room temperature for up to 4 days. Line the container with parchment or wax paper to prevent sticking and place a layer of paper towel on top to absorb moisture and keep the top from getting sticky.
Refrigeration
Want to keep them a bit longer? You can refrigerate them for up to 7 days. Just make sure they’re wrapped tightly in plastic wrap or stored in a sealed container so they don’t absorb any odors from the fridge. Refrigerated brownies tend to get denser and fudgier—some people actually prefer them that way!
Freezing
Brownies freeze incredibly well. To freeze, wrap individual squares in plastic wrap and then place them in a zip-top freezer bag or airtight container. They’ll keep for up to 3 months. To enjoy, just thaw at room temperature or warm briefly in the microwave for that just-baked taste.
How to Reheat Brownies Without Drying Them Out
Reheating brownies can be tricky—do it wrong, and they’ll turn tough or rubbery. But do it right, and they’ll be just as gooey as when they came out of the oven.
Here’s how:
- Microwave: Place a brownie on a microwave-safe plate, cover with a damp paper towel, and heat for 10–15 seconds. The moisture keeps them soft and prevents drying out.
- Oven: Preheat your oven to 300°F (150°C) and wrap brownies in foil. Warm for about 5–10 minutes, just until heated through.
- Bonus tip: Add a scoop of vanilla ice cream on top for the ultimate dessert experience!
Brownies for Special Diets
Gluten-Free Fudge Brownies
Yes, you can totally make brownies gluten-free and still keep them rich and fudgy. Simply substitute the all-purpose flour with a 1:1 gluten-free flour blend. Almond flour is another great option—it adds a slightly nutty flavor and extra moisture. Just reduce the amount slightly (use about ¾ of the regular flour amount) since almond flour is denser.
Vegan and Dairy-Free Alternatives
Making vegan fudge brownies isn’t as hard as it sounds. Here’s how to tweak the recipe:
- Butter → Use coconut oil or vegan butter.
- Eggs → Use flax eggs (1 tablespoon ground flaxseed + 3 tablespoons water = 1 egg).
- Chocolate chips → Make sure they’re dairy-free.
- Milk (if needed) → Use almond milk or oat milk.
The result? Fudgy, chocolate-packed brownies that vegans and non-vegans alike will devour.
Creative Serving Ideas
Brownie Sundae Bar
Hosting a party or just want to have fun with dessert? Set up a brownie sundae bar! Cut your brownies into small squares and offer toppings like:
- Ice cream (vanilla, chocolate, caramel)
- Whipped cream
- Chocolate syrup or hot fudge
- Crushed candy bars
- Cherries and sprinkles
It’s interactive, delicious, and a guaranteed crowd-pleaser.
Brownie Trifles and Milk Pairings
Layer brownie chunks with whipped cream, pudding, or fruit in a jar or bowl to make easy brownie trifles. They’re perfect for birthdays or romantic desserts without the effort of baking a cake.
Want to keep it classic? Pair a warm brownie with a tall glass of cold milk. There’s something nostalgic and comforting about this timeless combo.
FAQs about Fudge Brownies Recipe
1. Can I double the brownie recipe for a larger batch?
Yes! Just use a 9×13-inch pan and bake for 35–40 minutes. Keep an eye on the center to avoid underbaking.
2. What’s the secret to getting that crackly top?
It’s all about beating the sugar and eggs thoroughly. That glossy top forms when the sugar dissolves into the eggs and forms a thin crust during baking.
3. Can I use dark chocolate instead of cocoa powder?
Absolutely! Melt 4 ounces of dark chocolate with the butter for a richer brownie. You can still add cocoa powder for extra depth.
4. How do I know when brownies are done baking?
Insert a toothpick into the center. If it comes out with a few moist crumbs (not wet batter), they’re done. Don’t wait for it to come out completely clean—that leads to dry brownies.
5. Why are my brownies too cakey?
You probably used too much flour or overmixed the batter. Stick to the measurements and mix just until combined for that fudgy texture.
Conclusion
Fudge brownies are one of those timeless desserts that never go out of style. With their gooey centers, rich chocolate flavor, and crisp edges, they hit every note a dessert lover could ask for. Whether you stick with the classic version or go wild with mix-ins and toppings, this guide ensures your brownies come out perfect every single time.
Baking is part science, part magic—and with this step-by-step recipe, you’ve got both covered. So, gather your ingredients, preheat that oven, and get ready to bake the best fudge brownies of your life. Don’t forget to let them cool before slicing… if you can wait that long!