Jell-o Jigglers Recipe: Who doesn’t love a good wiggly, jiggly treat? Jell-O Jigglers are the ultimate playful snack that both kids and adults adore. They’re fun to eat, simple to make, and bursting with flavor. Whether you’re planning a kids’ party, holiday gathering, or just looking for a nostalgic snack, these colorful bites always hit the mark.
So, what exactly are Jell-O Jigglers? Think of them as firmer, cuttable versions of regular Jell-O. They hold their shape well, don’t require spoons to eat, and can be made in endless shapes and colors. Basically, they’re edible art.
Ready to dive into the world of DIY Jigglers? Grab your gelatin, and let’s get wiggling!
List of Ingredients You’ll Need
Making Jell-O Jigglers is surprisingly straightforward, and the ingredients are probably already in your pantry. Here’s everything you’ll need for the basic recipe, plus some creative options to level up your Jigglers.
Basic Ingredients:
- 2 boxes (3 oz each) of flavored Jell-O gelatin (any flavor you like)
- 1 cup boiling water (not cold water like regular Jell-O)
That’s it! Just two ingredients. But if you want to go beyond the basics, keep reading.
Optional Add-ins & Variations:
- Fruit pieces (for texture and added sweetness)
- Flavored juice (replace water for a flavor twist)
- Sprinkles (for festive looks)
- Yogurt or whipped topping (for creamy Jigglers)
- Edible glitter or food-safe shimmer dust (for sparkle)
Recommended Tools and Equipment:
- A large mixing bowl
- A whisk or spoon
- Measuring cups
- Silicone molds or a shallow baking dish
- Non-stick spray (for easier release)
- Sharp knife or cookie cutters (for shapes)
Having everything ready before you begin makes the whole process smoother. Now, let’s get to the fun part — making them!
Understanding the Gelatin Ratio
The secret to Jigglers’ firm, bouncy texture lies in the gelatin-to-water ratio. Regular Jell-O is soft and spoonable, but Jigglers are meant to be picked up and handled — almost like gummy candy.
For Jigglers, you skip the cold water step from traditional Jell-O recipes. Instead, you use half the water, which doubles the gelatin concentration, creating a firmer end result.
Basic Ratio:
- 2 (3 oz) packages Jell-O + 1 cup boiling water
This creates a dense, solid structure perfect for cutting and shaping. If you use more water, they’ll be too wobbly and won’t hold their shape.
If you want even firmer Jigglers, especially if you’re using cookie cutters or complex molds, consider adding 1 envelope of unflavored gelatin along with the flavored Jell-O.
Choosing the Right Mold
The mold can make or break your Jell-O Jiggler experience. Literally. Choose the right one based on your desired shape, event theme, or occasion.
Fun Shape Ideas:
- Stars, hearts, and animals for birthday parties
- Pumpkins, ghosts, and trees for holidays
- Letters and numbers for educational fun
- Geometric shapes for a modern look
How to Make Jigglers Without Fancy Molds:
Don’t have themed molds? No problem.
- Use a shallow pan or baking dish.
- Pour the Jell-O mix in and let it set.
- Use cookie cutters or a knife to cut into shapes.
- Done!
Just make sure to use non-stick spray or line with parchment if your container is sticky.
Step-by-Step Guide to Making Jell-O Jigglers
This is where the magic happens. Let’s break down every step so you can make your Jigglers with confidence.
Preparing Your Workspace:
Before starting, clear a spot in your fridge for the molds or pan. Gather all your ingredients and tools so you’re not scrambling mid-recipe.
Step 1: Boil Water
Boil 1 cup of water for every two 3-ounce boxes of Jell-O. This step is crucial. The water must be boiling, not just hot.
Step 2: Mix in Jell-O
Empty the Jell-O powder into a heat-safe bowl. Carefully pour the boiling water over it.
Step 3: Stir Until Fully Dissolved
Whisk the mixture for at least 2 minutes, making sure every grain of powder dissolves. No one likes grainy Jigglers!
Step 4: Pour into Molds or Pan
Grease your molds or dish lightly with non-stick spray. Pour the Jell-O in slowly to avoid bubbles. Tap the mold gently to settle it.
Step 5: Refrigerate Until Firm
Place your molds in the fridge (not freezer) and chill for at least 3 hours. Overnight is even better.
Step 6: Cut and Serve
If using a dish, run a knife around the edges and carefully cut into cubes or use cookie cutters. Pop them out and enjoy!
Tips for Perfect Jigglers Every Time
Making Jell-O Jigglers might seem foolproof, but a few pro tips can take your game to the next level. Whether you’re crafting Jigglers for a party platter or just for fun at home, these tips ensure a flawless finish every single time.
Avoiding Common Mistakes:
- Don’t use cold water: Unlike traditional Jell-O, Jigglers need only boiling water. Adding cold water dilutes the mix, making it too soft to cut.
- Stir thoroughly: Undissolved gelatin creates a gritty texture. Stir for at least 2 full minutes until the powder is completely gone.
- Don’t rush the chilling process: If you try to unmold or cut Jigglers before they’re fully set, they’ll tear. Chill for a full 3-4 hours minimum.
Texture and Flavor Enhancements:
- Want a more intense flavor? Use half fruit juice and half boiling water (make sure it’s compatible with gelatin).
- For a smoother, creamier texture, stir in a few spoonfuls of Greek yogurt or whipped topping after the Jell-O is partially cooled.
- Want it extra firm for intricate shapes? Add 1 packet of unflavored gelatin along with your Jell-O mix.
These tweaks give your Jigglers more variety and a gourmet touch without losing the fun and simplicity.
Creative Jell-O Jiggler Ideas
Once you’ve mastered the classic recipe, it’s time to get creative! Jell-O Jigglers are one of the most versatile treats out there. From festive themes to layered masterpieces, you can customize them to suit any occasion.
Holiday-Themed Jigglers:
- Christmas: Use red and green Jell-O in tree or star molds.
- Halloween: Try orange and black molds shaped like bats, ghosts, or pumpkins.
- Valentine’s Day: Go for heart shapes in cherry, raspberry, or strawberry flavors.
- Easter: Pastel Jigglers in bunny or egg shapes are always a hit.
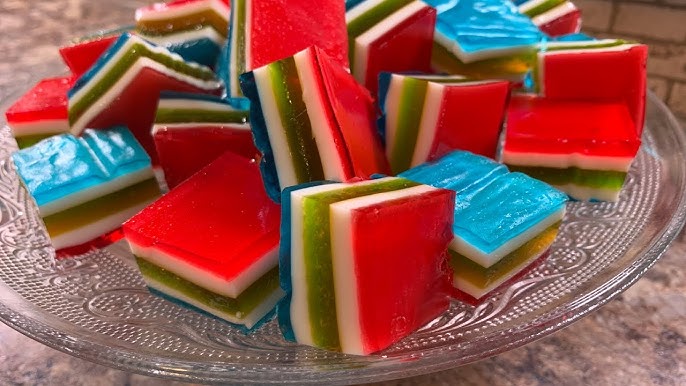
Rainbow & Layered Jigglers:
Layering Jell-O is super easy—just a little time-consuming.
- Make your first color and let it set halfway (about 30–45 minutes).
- Gently pour the next color on top and refrigerate again.
- Repeat as needed.
You can go full rainbow, do a two-tone color scheme, or even add creamy layers with yogurt or whipped cream in between.
Jiggler Art with Cookie Cutters:
Using cookie cutters opens a world of possibilities. Go for letters to spell names, numbers for birthdays, or animal shapes for themed parties. You can even use mini cutters to create mosaic-style designs by combining multiple colors.
The options are endless—and it’s a great activity to do with kids or for themed events.
How to Store Jell-O Jigglers
Storage is easy, but a few quick pointers will help you keep your Jigglers fresh, flavorful, and firm.
Best Practices for Freshness:
- Store Jigglers in an airtight container to prevent them from drying out or absorbing fridge odors.
- Place a sheet of parchment or wax paper between layers to prevent sticking.
- Keep them refrigerated at all times—Jell-O melts if left at room temperature too long.
Properly stored, Jigglers will last up to 7 days in the fridge, though they’re best within the first 3–4 days.
Freezing & Thawing:
While technically possible, freezing is not recommended. Gelatin changes texture when frozen and thawed—it turns rubbery and separates. If you must freeze, do it in single layers and consume quickly after thawing.
Jell-O Jiggler Recipe for Kids
Kids love anything that jiggles—and Jell-O Jigglers are the perfect treat for little hands. They’re not only fun to eat but also safe and simple enough to involve kids in the kitchen.
Kid-Friendly Tips:
- Let them pick the colors and shapes.
- Involve them in pouring and stirring (with adult supervision).
- Use smaller molds to create bite-size pieces perfect for lunchboxes or party trays.
Safe Kitchen Activities:
- Older kids can help measure and pour.
- Younger children can press cookie cutters into cooled Jigglers for fun shapes.
- Set up a “decorate your own Jiggler” station with whipped cream, sprinkles, and fruit pieces.
Making Jigglers together is a great way to bond, teach basic kitchen skills, and sneak in a little edible science lesson.
Healthier Alternatives
Want a healthier version of your favorite wiggly snack? Good news: there are ways to make Jigglers more nutritious without sacrificing flavor or fun.
Sugar-Free Jigglers:
- Use sugar-free Jell-O mixes.
- Watch the ingredients—some sugar-free versions contain artificial sweeteners. If you’re avoiding those, opt for natural gelatin mixes flavored with real fruit juice.
Natural Color and Flavor Options:
- Replace artificial Jell-O with unflavored gelatin and 100% fruit juice.
- Add mashed berries, pureed mango, or even beet juice for natural color and a nutrient boost.
- Use honey or maple syrup as a sweetener if needed.
These swaps can make Jell-O Jigglers a daily snack instead of a guilty treat—and they’re still just as fun!
Vegan Jell-O Jigglers
Traditional Jell-O contains gelatin, which is animal-derived. But don’t worry—there are plenty of plant-based alternatives.
Gelatin Substitutes:
- Agar-agar: A seaweed-based alternative to gelatin. It sets more firmly and faster than gelatin.
- Carrageenan: Another seaweed extract used in desserts.
- Pectin: Often used in jams, it can work for soft Jigglers.
Plant-Based Flavors and Textures:
- Use natural fruit juices or plant-based drink mixes with agar.
- Sweeten with agave syrup, fruit purees, or stevia.
- Vegan Jigglers tend to set quicker—usually within an hour.
Agar Jigglers will have a firmer, slightly crunchier texture than gelatin-based ones, but they’re just as enjoyable.
Troubleshooting Common Issues
Even the simplest recipes can go sideways from time to time. If your Jell-O Jigglers didn’t turn out quite right, don’t toss them just yet! Here’s how to fix the most common issues.
Jigglers Not Setting?
- You used too much water: Remember, the correct ratio is 1 cup of boiling water for every two 3 oz boxes of Jell-O. If you added cold water like you would with regular Jell-O, it will stay too soft.
- Didn’t refrigerate long enough: Jigglers need at least 3–4 hours to fully set. Patience pays off.
- Improper mixing: Undissolved gelatin can prevent a proper set. Stir thoroughly until completely dissolved—no shortcuts.
Fix: If they’re still liquid after 4 hours, you can try reheating the mixture gently on the stove, stir in an extra packet of unflavored gelatin, and reset it in the fridge.
Too Sticky or Crumbly?
- Didn’t grease the mold: If your molds or pans aren’t non-stick, lightly coat them with non-stick spray before pouring in the mixture.
- Cut too soon: Jigglers that are cut before fully firm can be gooey or break apart.
- Overcooked gelatin: Rare, but boiling the water too long or reheating after mixing can damage the structure.
Fix: Let them rest a bit longer. If they’re sticky but set, pop them in the freezer for 5–10 minutes before cutting. That firms them up just enough for clean slicing.
Serving Suggestions
Jell-O Jigglers aren’t just fun—they can be downright fancy if you know how to serve them. Whether it’s a kids’ birthday or a grown-up gathering, how you present your Jigglers makes all the difference.
Party Platters:
- Use a mix of shapes and colors to create a visually stunning platter.
- Pair Jigglers with fruit slices, whipped topping, or mini marshmallows.
- Place on a white or mirrored tray to highlight their colors.
You can also stick toothpicks or mini skewers in each piece for a more elegant, grab-and-go option.
Bento Box or Lunch Ideas:
- Add Jigglers as a fun, healthy treat in kids’ lunches.
- Pair with grapes, cheese cubes, and crackers for a balanced snack box.
- Cut into mini squares, stars, or letters to keep things interesting.
With a little creativity, Jell-O Jigglers can fit in almost any mealtime scenario.
FAQs about Jell-o Jigglers Recipe
1. Can I use just one box of Jell-O instead of two?
Yes, but reduce the water proportionately (½ cup boiling water). Otherwise, they’ll be too soft to cut into shapes.
2. How long do Jell-O Jigglers last in the fridge?
They stay fresh for 5–7 days if stored in an airtight container. After that, they may dry out or lose flavor.
3. Can I make Jell-O Jigglers without molds?
Absolutely! Just use a shallow baking dish, let it set, then cut shapes with cookie cutters or a knife.
4. What’s the best way to unmold Jell-O Jigglers?
Spray your mold with non-stick spray beforehand. To release, gently pull the edges or dip the mold bottom in warm water for 10 seconds.
5. Are Jigglers gluten-free?
Yes! Most flavored Jell-O products are gluten-free. Always double-check labels if you’re using off-brand or flavored add-ins.
Conclusion
Jell-O Jigglers are more than just a snack—they’re a creative, customizable, and nostalgic treat that brings smiles to all ages. With just a couple of ingredients and endless ways to personalize them, Jigglers are perfect for birthdays, holidays, or even just a fun kitchen project on a lazy afternoon.
From understanding the perfect water-to-gelatin ratio to choosing unique molds and experimenting with flavors, you now have everything you need to master the art of Jell-O Jigglers. Whether you’re keeping it classic or getting experimental with healthy or vegan variations, there’s no wrong way to make them—as long as they jiggle, you’re good to go!
So go ahead—get jiggly with it. The fridge is calling, and it’s time to make some wobbly magic.


