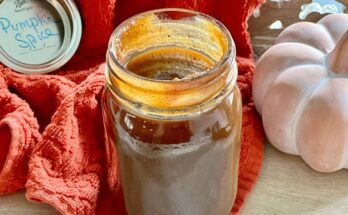
Honeycomb Candy Recipe: Have you ever crunched into a piece of honeycomb candy and felt that melt-in-your-mouth, airy sweetness that somehow crackles and dissolves at the same time? That’s honeycomb magic. Honeycomb candy, also known as sponge toffee, cinder toffee, or hokey pokey depending on where you are in the world, is a golden-brown confection made with just a few pantry staples and a bit of kitchen chemistry. What makes this treat so special is the chemical reaction that happens when baking soda is introduced into hot sugar syrup—it foams up dramatically, creating the signature bubbly texture.
This candy has been a favorite in households and candy shops for generations. It’s simple to make, fun to watch, and even more fun to eat. Whether you’re making it for a treat jar, a holiday dessert, or just because you want to try something new, honeycomb candy is one of those recipes that will impress every single time. And guess what? You don’t need fancy equipment or a pastry degree to pull it off.
Why You’ll Love This Recipe
Let’s be honest: homemade candy sounds intimidating. But honeycomb candy is surprisingly beginner-friendly. Here’s why you’re going to love it:
- It’s only three ingredients. Seriously—sugar, syrup, and baking soda. That’s it.
- It looks super impressive but only takes about 15 minutes of hands-on time.
- The crunch is addictive, and it melts into a sweet, caramelized finish.
- It’s customizable—you can dip it in chocolate, sprinkle with sea salt, or even crush it on top of your favorite dessert.
Another reason to love this recipe? It’s cheap. You probably already have everything in your pantry. Plus, it stores well, making it a great homemade gift option. One batch can go a long way if you don’t eat it all in one sitting.
Essential Tools You’ll Need
Before you start whipping up this candy, make sure your kitchen is equipped with the basics. Here’s a quick checklist:
- A heavy-bottomed saucepan (this helps heat distribute evenly)
- A wooden spoon or heat-safe silicone spatula
- A baking sheet lined with parchment paper or a silicone mat
- A candy thermometer (optional but highly recommended for beginners)
- A measuring cup and spoon
- Heat-resistant gloves or oven mitts for safety
The process gets a bit wild once the baking soda hits, so make sure everything is within reach and that you’re focused—this isn’t the time to multitask.
Ingredients You’ll Need
Let’s talk about what goes into this sweet, golden candy.
Main Ingredients
- 1 cup granulated sugar
- 1/4 cup golden syrup or light corn syrup
- 1½ teaspoons baking soda
That’s it. Three ingredients to make one of the most magical confections ever.
Optional Add-Ins
- Pinch of salt – balances the sweetness
- 1 teaspoon vanilla extract – for extra depth
- Melted chocolate – for dipping or drizzling
- Sea salt flakes – adds a gourmet touch
Golden syrup is preferred for its mild, buttery taste and golden color, but corn syrup works in a pinch. Just don’t use honey—despite the name, it doesn’t behave the same way and could burn quickly.
Before You Begin: Prep Tips
Before diving into the bubbling sugar science experiment, prep your space like a pro.
Safety First
Sugar syrup gets very hot—like 300°F+ hot. Burns from molten sugar are no joke, so:
- Keep pets and kids away.
- Use long sleeves and oven mitts.
- Don’t touch the candy until it’s fully cooled.
Prep the Tray
Line a baking sheet with parchment paper or use a silicone baking mat. Don’t grease it with butter—it’ll mess with the candy’s texture. You want a smooth release without altering the structure.
Have everything measured and ready to go. Once the sugar reaches the right temperature, things move fast.
Step-by-Step Guide to Making Honeycomb Candy
Alright, ready for some candy wizardry? Follow these steps and you’ll be a honeycomb master in no time.
Step 1: Measure Your Ingredients Accurately
This is the foundation of the recipe. Get your sugar, syrup, and baking soda measured and set aside. Trust us—you won’t have time to fumble later.
Step 2: Melt the Sugar and Syrup
Combine the sugar and golden syrup in your saucepan over medium heat. Stir gently to combine, but once it’s mixed, resist the urge to stir again. Stirring can cause the sugar to crystallize.
Let it simmer and bubble for 4-5 minutes, until it becomes a deep golden amber color. If you have a candy thermometer, you’re aiming for 300°F (hard crack stage).
Step 3: Watch for the Golden Color
Once the mixture hits that deep golden hue, turn off the heat. The window between perfect and burned is small, so keep a close eye.
Step 4: Add Baking Soda and Watch It Puff
Now for the show. Quickly whisk in the baking soda. The mixture will foam up like a science experiment—this is what gives the candy its bubbly texture.
Mix just enough to combine (don’t overmix), then immediately pour the foaming mixture onto your prepared tray. Don’t spread it flat—just let it settle naturally.
Step 5: Let It Cool and Set
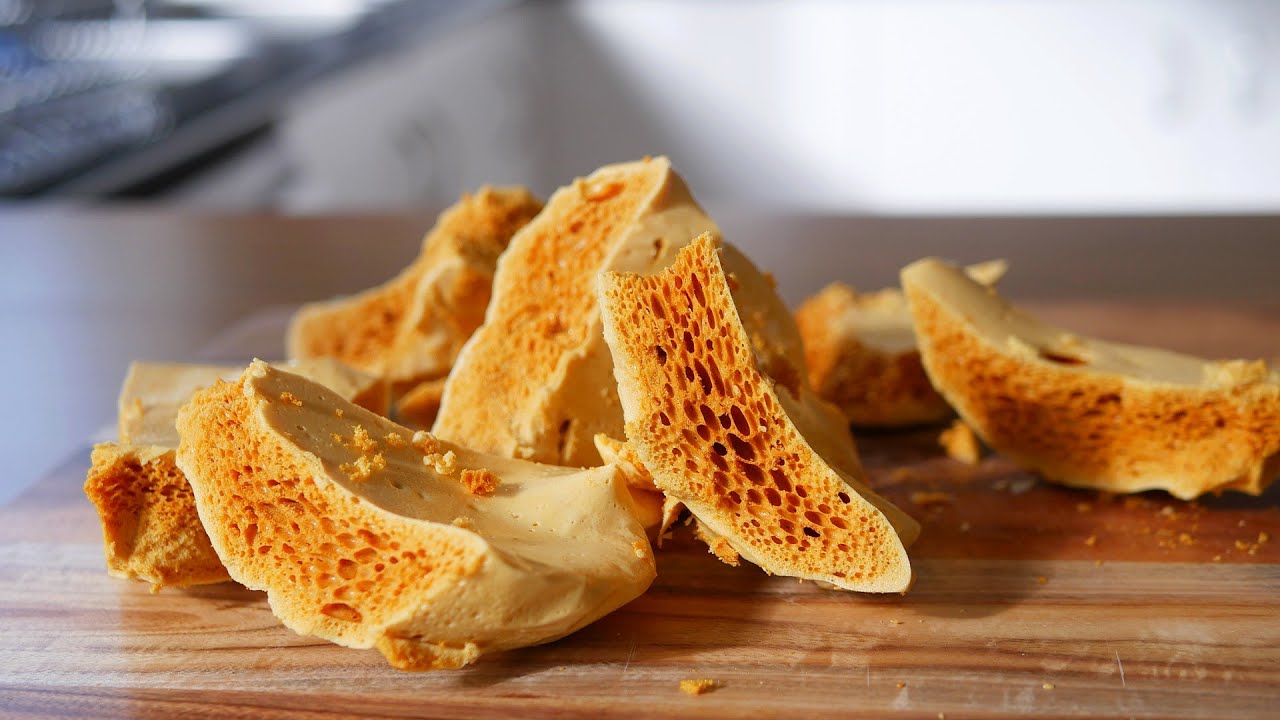
Let the candy sit undisturbed for at least an hour. Once cool, it should feel hard and crisp. You’ll hear a satisfying crack when you break it.
Troubleshooting Common Mistakes
So, your honeycomb candy didn’t turn out quite like you expected? Don’t worry—it happens even to seasoned cooks. Let’s troubleshoot some common issues and how to avoid them next time.
Problem 1: My Honeycomb Is Chewy, Not Crunchy
If your candy didn’t develop that signature crisp crunch, it’s likely because the sugar syrup didn’t reach a high enough temperature. For honeycomb to harden properly, you need to reach the hard crack stage (around 300°F). If you remove it from the heat too soon, the result will be sticky or chewy instead of airy and brittle.
Fix: Use a candy thermometer if possible. If you’re eyeballing it, wait for the syrup to turn a deep amber color and start to smell slightly toasted—but not burnt.
Problem 2: It Tastes Bitter or Burnt
On the flip side, letting the sugar cook for too long or using high heat can make your honeycomb taste like burnt caramel.
Fix: Use medium heat and don’t walk away while it’s cooking. The moment it reaches the right color or temperature, remove it from the stove and proceed quickly.
Problem 3: It Didn’t Puff Up
The puffing magic comes from the baking soda reacting with the hot syrup. If nothing happens, you may have:
- Used old or expired baking soda
- Overmixed the mixture, collapsing the bubbles
- Waited too long after removing it from heat to add the baking soda
Fix: Make sure your baking soda is fresh and act quickly once the syrup is ready. A light stir is enough—don’t deflate it.
How to Cut and Store Honeycomb
Once your honeycomb has cooled and hardened, it’s time to break it up and store it the right way.
Cutting Honeycomb Without Crushing It
Honeycomb is delicate. If you try to cut it with a knife, it might just shatter into dust. Here’s what to do:
- Use your hands to break it into chunks for a rustic look
- If you prefer clean pieces, use a serrated knife and gently saw through it
- Don’t press too hard—it’s meant to snap, not slice
You can even tap it lightly with the handle of a spoon to break it into even-sized chunks.
How to Store Honeycomb Candy
Air is the enemy here. Honeycomb is hygroscopic, which means it absorbs moisture from the air and becomes sticky or soggy.
Storage Tips:
- Store in an airtight container at room temperature
- Add a silica gel packet or a piece of rice paper to absorb moisture
- Don’t refrigerate—it accelerates softening
- Use wax paper between layers to prevent sticking
Properly stored, your honeycomb candy can last up to a week without losing its crunch. That is, if it doesn’t get devoured in a day.
Honeycomb Candy Variations
Want to level up your honeycomb game? Try these fun and easy variations to suit your mood or occasion.
1. Chocolate-Dipped Honeycomb
Once cooled and broken, dip each piece in melted dark or milk chocolate and let them set on parchment paper. The combo of bitter and sweet is unbeatable.
You can also drizzle white chocolate on top for a decorative twist.
2. Spiced Honeycomb
Add a pinch of spice like cinnamon, cardamom, or even ground chili to the sugar mixture before it reaches temperature. It adds a surprise kick that pairs beautifully with the sweetness.
3. Salted Honeycomb
Sprinkle flaky sea salt over the top of the candy while it’s still warm. It enhances the flavor and adds a sophisticated touch.
4. Nutty Crunch
Mix in crushed nuts like pistachios or almonds before the mixture cools. It adds texture and a nutty depth.
These small tweaks go a long way in making the recipe feel brand new every time.
Fun Ways to Use Honeycomb Candy
You’re not limited to snacking on honeycomb straight from the jar (though it’s amazing that way). Here are some creative uses:
- Topping for ice cream – Crumble it over vanilla or coffee ice cream for a sweet crunch
- Layer in cakes – Add crushed honeycomb between cake layers for texture and surprise
- Dip in coffee – Drop a chunk in hot coffee or hot chocolate; it melts into caramel heaven
- Mix into cookies or brownies – Fold pieces into your batter for golden candy surprises in each bite
- Garnish for cocktails – Use shards as a garnish for a dramatic drink presentation
Its versatility makes honeycomb candy more than just a treat—it’s a full-on flavor upgrade.
Honeycomb Candy in Different Cultures
Did you know honeycomb candy has cousins all around the globe? Different names, same awesome result.
- Hokey Pokey (New Zealand) – A beloved national treat and also a flavor of ice cream
- Cinder Toffee (UK) – Often sold at fairs and associated with Bonfire Night
- Sponge Toffee (Canada) – Especially popular in chocolate-covered form from candy brands
- Dalgona (Korea) – A thinner, flatter version often imprinted with shapes (thanks to “Squid Game” fame!)
Each region adds its own twist, but the base recipe is surprisingly consistent.
Nutritional Information
Let’s be real—honeycomb candy isn’t a health food. But it’s a sweet treat, and knowing what’s in it can help you enjoy it mindfully.
Here’s an approximate nutritional breakdown for one serving (about 20g or a few small pieces):
| Nutrient | Amount per serving |
|---|---|
| Calories | 90-110 kcal |
| Total Fat | 0 g |
| Saturated Fat | 0 g |
| Carbohydrates | 24 g |
| Sugars | 23 g |
| Protein | 0 g |
| Sodium | 30 mg (from baking soda) |
This is a high-sugar treat, with no fat or protein to slow digestion. That means it gives you a quick energy spike—but also a crash. So treat it like you would any dessert: small portions, savored slowly.
If you add extras like chocolate or nuts, expect the calorie and fat count to go up. On the bright side, a small piece is usually enough to satisfy your sweet tooth.
FAQs about Honeycomb Candy Recipe
1. Can I use honey instead of golden syrup?
Technically you can, but it’s not recommended. Honey burns faster than golden or corn syrup and can mess up the texture. Stick to golden syrup or light corn syrup for best results.
2. How long does honeycomb candy last?
When stored in an airtight container at room temperature, honeycomb candy stays fresh and crunchy for about 1 week. After that, it can start to absorb moisture and soften.
3. Can I double the recipe?
Yes, but be careful. Larger batches can be tricky to manage because the sugar can burn faster, and the foaming reaction with baking soda is more intense. If you double it, use a larger saucepan and act quickly during the soda step.
4. Can I make honeycomb without a candy thermometer?
Yes! It just requires a little more attention. Watch for the deep amber color of the sugar syrup. When it starts to foam a little and smells caramelized, it’s probably ready. But if you’re new to candy-making, a thermometer is a huge help.
5. Why did my honeycomb collapse?
This usually happens if you overmix after adding baking soda or pour it into the tray too slowly. Mix gently and pour immediately to preserve the airy texture.
Tips for Cleaning Up
Ah yes, the sticky aftermath. Cleaning up hardened sugar can be a pain, but here’s how to make it easier:
- Soak your pan in hot water right after use. The sugar will dissolve on its own within 10–15 minutes.
- Don’t scrape with metal utensils—it can damage your cookware.
- For stubborn bits, add water to the pan and bring it to a boil. The sugar will melt, making it easy to rinse out.
And don’t forget your spoon or spatula—those can get just as sticky!
FAQs about Honeycomb Candy Recipe
1. Can I make honeycomb candy vegan?
Absolutely! Just make sure your sugar and syrup are certified vegan, as some sugars are processed with bone char. Other than that, the base ingredients are plant-based.
2. Can I flavor my honeycomb with extracts like peppermint or almond?
Yes, but be cautious—add flavor extracts after removing from heat and just before the baking soda. Use only a few drops to avoid messing with the texture.
3. What’s the best type of sugar to use?
White granulated sugar is the gold standard. Brown sugar has too much moisture, which affects the texture and rise.
4. Can I add food coloring?
It’s not common, but yes! Add a few drops of gel food coloring just before the baking soda. Avoid water-based colors, as they can interfere with the texture.
5. Is honeycomb candy gluten-free?
Yes, the basic recipe is naturally gluten-free. Just check your syrup and baking soda labels to ensure there’s no cross-contamination if you’re highly sensitive.
Conclusion
Honeycomb candy is the kind of recipe that feels like a magic trick. With just three humble ingredients, you can whip up a crackly, crunchy, caramelized delight that’s as fun to make as it is to eat. Whether you’re going classic or putting your own spin on it with chocolate, spices, or nuts, this candy never fails to impress.
It’s easy to mess up a batch—but it’s even easier to master with just a little patience and attention to detail. The dramatic puff, the golden shards, and the satisfying crack when you break it apart make honeycomb candy a truly unique homemade treat.
So grab your saucepan and a little baking soda—it’s time to get cooking!