Green Chili Recipe: There’s something magical about a steaming bowl of green chili—it’s warm, spicy, hearty, and full of flavor. Whether you’re into traditional New Mexican green chili or just looking for something new to spice up your weekly dinner rotation, this recipe delivers. Made with vibrant green chilis and simmered slowly with garlic, onions, and seasonings, green chili can be a dish on its own or an incredible topping for everything from burritos to scrambled eggs. It’s comfort food with a kick—and once you try it, you’ll be hooked.
This guide will walk you through how to make the perfect green chili from scratch. We’ll break down each step clearly so even beginners can follow along with ease. You’ll also find helpful tips, ingredient substitutes, and storage advice to get the most out of every batch.
Benefits of Green Chili
Green chili isn’t just about bringing the heat—it’s surprisingly loaded with nutritional benefits too. These little green powerhouses are rich in vitamins, minerals, and antioxidants, making them a spicy addition that’s good for your health.
First up, green chilis are packed with Vitamin C—even more than oranges in some cases. This vitamin helps boost your immune system, repair tissues, and keep your skin glowing. They’re also a solid source of Vitamin A, which is essential for eye health, and Vitamin B6, which helps in energy metabolism.
One of the standout compounds in green chilis is capsaicin, the element responsible for their heat. But capsaicin isn’t just about making your tongue tingle—it has real health perks. It’s been linked to improved metabolism, reduced inflammation, and even pain relief. Some research also suggests it may support heart health by reducing bad cholesterol levels.
Additionally, green chilis are naturally low in calories and virtually fat-free, making them ideal for weight-conscious eaters. They contain dietary fiber too, which aids in digestion and helps keep you feeling full.
Got sinus issues? Spicy green chili can act as a natural decongestant. Having it in soups or stews can clear up nasal passages and make breathing easier.
Of course, like with all spicy foods, moderation is key—especially if you’re sensitive to heat or have stomach issues. But overall, when used wisely, green chilis can add not just flavor, but a bunch of health benefits to your meals.
Ingredients You’ll Need
Here’s your go-to grocery list for making mouthwatering green chili from scratch. Most of these are pantry staples, but we’ve also included optional ingredients in case you want to level it up or switch things around.
Essential Ingredients:
- 1 ½ lbs of green chili peppers (preferably Hatch or Anaheim)
- 1 tablespoon vegetable oil (can use olive oil too)
- 1 medium yellow onion, diced
- 4 cloves of garlic, minced
- 1 tablespoon all-purpose flour (for thickening)
- 2 cups chicken broth (or vegetable broth for vegetarian version)
- 1 teaspoon ground cumin
- ½ teaspoon oregano
- Salt and black pepper, to taste
Optional Add-ins:
- 1 lb of diced pork, chicken, or beef (if making a meat-based version)
- ½ teaspoon smoked paprika (adds depth)
- 1 small green bell pepper, chopped (adds mild sweetness)
- Fresh cilantro, chopped (for garnish)
- Juice of ½ lime (adds brightness)
Ingredient Substitutions:
- No fresh green chilis? Use canned green chilis or roasted green chili paste.
- Gluten-free option? Replace all-purpose flour with cornstarch or gluten-free flour.
- Vegetarian version? Use vegetable broth and skip the meat.
Make sure to gather everything before you start cooking—mise en place (everything in its place) is key for a smooth cooking experience.
Choosing the Right Green Chilis
Not all green chilis are created equal, and choosing the right kind can make or break your dish. Let’s break down the best options available and how to pick the perfect ones.
Hatch Green Chilis are the gold standard when it comes to green chili recipes. Grown in New Mexico, they have a complex flavor that’s both smoky and mildly spicy. When in season, they’re fresh and vibrant—but you can also find them roasted and frozen year-round.
Anaheim Chilis are a great alternative if you can’t find Hatch. They’re mild, with a similar flavor profile but less heat. These are perfect for those who want flavor without too much burn.
Poblano Peppers are another fantastic choice. They’re mild and earthy, with a thicker skin. They’re ideal if you’re aiming for a rich, smoky green chili.
Jalapeños and Serranos are smaller and hotter. While they can be added to boost heat, they’re not typically the main chili in a traditional green chili recipe.
How to Select Fresh Chilis:
- Look for firm, shiny chilis with a deep green color.
- Avoid ones with wrinkles, dark spots, or soft areas.
- If buying in bulk, choose a mix of small and large chilis to balance flavor and heat.
Freshness matters here. The fresher the chili, the better the flavor once roasted and simmered.
Preparation Before Cooking
Before you jump into the cooking part, there’s some important prep work to do. Prepping properly not only saves you time but also ensures your green chili turns out restaurant-worthy.
1. Roast the Chilis
Roasting is a non-negotiable step. It brings out the smoky flavor and makes peeling easier. Place the chilis directly on a gas flame, under a broiler, or in a hot cast-iron skillet until the skins blister and char. This usually takes about 5–8 minutes.
2. Steam and Peel
Once charred, transfer the chilis to a bowl and cover with plastic wrap or a lid. Let them steam for 10 minutes—this loosens the skins. Then, use your hands or a paper towel to peel off the skins. Don’t rinse under water; you’ll lose flavor.
3. De-seed and Chop
Slice off the tops, remove the seeds (unless you want extra heat), and chop them finely. Set aside.
4. Chop the Aromatics
Dice your onions and mince your garlic in advance. You want these ready to go once you start sautéing.
5. Prep the Meat (if using)
If you’re adding pork, chicken, or beef, cut it into small bite-sized chunks and season lightly with salt and pepper.
Reduce Heat (Optional)
To mellow out the spiciness, you can soak the chopped chilis in milk for 10–15 minutes before cooking. Another option is to add a diced green bell pepper to dilute the spice level naturally.
Step-by-Step Guide to Making Green Chili
Ready to dive into the cooking part? Here’s a foolproof, step-by-step walkthrough for making green chili that’s rich, flavorful, and totally addictive. Whether you’re making it meaty or going plant-based, these steps work for both.
Step 1: Roast or Char the Green Chilis
If you haven’t done it yet during prep, start by roasting the green chilis. This step is essential to get that deep, smoky flavor. Place the chilis on a baking sheet under a broiler, directly over a gas burner, or in a hot cast iron skillet. Roast until the skin is blistered and blackened, turning occasionally for even charring.
Once they’re evenly charred, remove the chilis and place them in a bowl. Cover with a plate or plastic wrap and let them steam for 10 minutes. This loosens the skins. Then peel off the charred skins, remove seeds if needed, and chop finely.
Step 2: Sauté the Aromatics
In a large pot or Dutch oven, heat the oil over medium heat. Add the diced onion and sauté for 5–7 minutes, until translucent. Add the minced garlic and stir for another 30 seconds, just until fragrant.
This base layer is where the flavor starts building—don’t rush it. If you’re using bell pepper, add it now and let it soften.
Step 3: Add the Flour and Spices
Sprinkle in the flour and stir well to coat the onions and garlic. This will help thicken your green chili. Cook for about 2–3 minutes to get rid of the raw flour taste.
Next, add cumin, oregano, and any optional spices like smoked paprika. Let them toast slightly in the oil and flour—this intensifies the flavor.
Step 4: Add Broth and Green Chilis
Pour in the broth slowly, stirring constantly to avoid lumps. Once the broth is fully incorporated, add your chopped green chilis. Stir everything together and bring it to a simmer.
If you’re adding meat, toss it in now. Make sure the meat is cut into small, even pieces so it cooks evenly and absorbs the chili flavor.
Reduce heat to low, cover partially, and let it simmer for at least 30–45 minutes. The longer it simmers, the deeper the flavor becomes. Stir occasionally to prevent sticking.
Step 5: Taste and Adjust
After the chili has thickened and simmered, give it a taste. Adjust salt, pepper, or spices as needed. Want more heat? Add a bit of finely chopped jalapeño or a pinch of chili flakes. Want more brightness? A squeeze of lime juice or a touch of vinegar can balance things out beautifully.
Simmer uncovered for another 10–15 minutes if it needs to thicken more.
Tips for Perfect Green Chili Every Time
Green chili is one of those dishes where small mistakes can make a big difference—but with a few insider tricks, you’ll knock it out of the park every time.
1. Roast, Don’t Skip
Roasting the chilis is non-negotiable. It intensifies the flavor and gives your chili that iconic smoky depth. If you’re short on time, consider using fire-roasted canned green chilis—but nothing beats fresh.
2. Simmer Low and Slow
Like a good stew or curry, green chili thrives when simmered gently. It gives the ingredients time to meld and the meat (if you’re using it) to become tender and flavorful.
3. Don’t Over-Spice Early
Spices bloom over time, especially in long-simmered dishes. Start with less and build up after tasting. You can always add heat, but it’s hard to take it away.
4. Use the Right Pot
A heavy-bottomed pot or Dutch oven retains and distributes heat evenly, helping prevent burning or uneven cooking.
5. Let It Rest
Green chili often tastes better the next day. If you’re meal prepping, make it ahead and let the flavors deepen overnight in the fridge.
6. Add Acid Last
If you’re using lime juice, vinegar, or tomatoes for balance, add them at the end of cooking. Acidity can mute flavors if added too early during simmering.
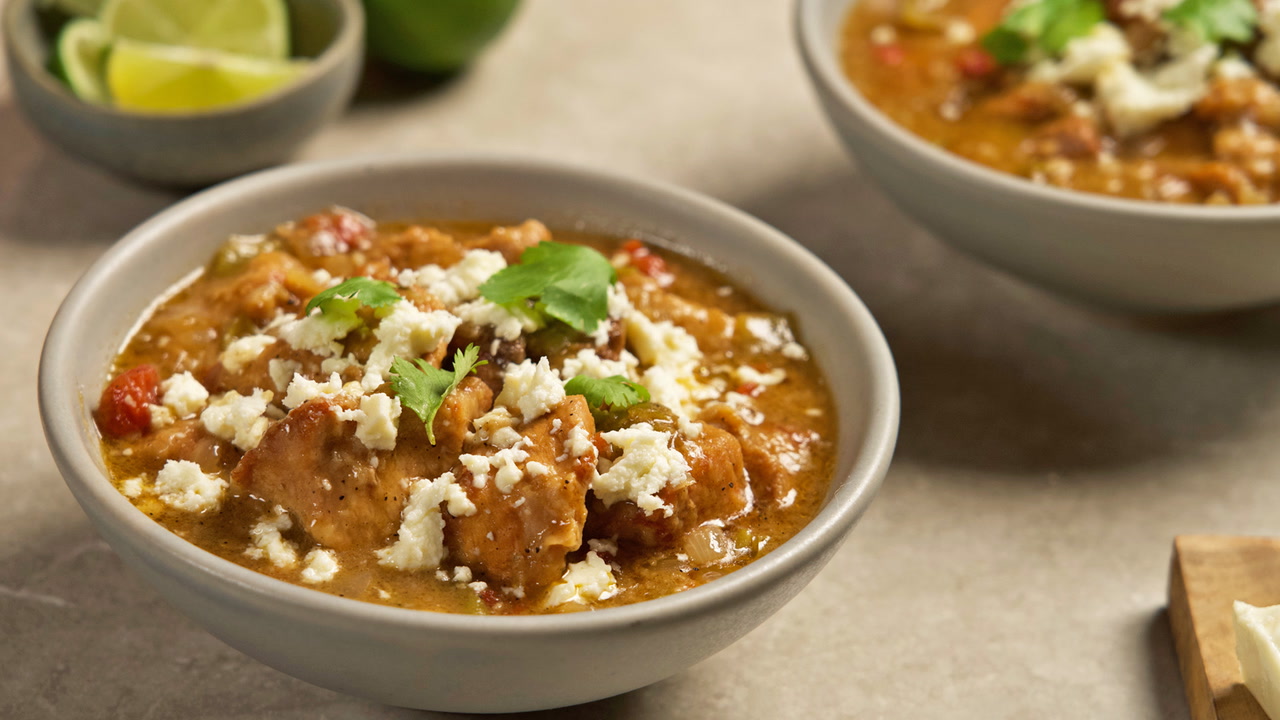
Serving Suggestions
Green chili is incredibly versatile. You can serve it as a main dish or use it as a topping, dip, or even a filling. Here are some mouthwatering ways to enjoy it:
- Over rice – Simple and hearty
- In a burrito – Add beans, cheese, and protein for a loaded experience
- On eggs – Spoon it over scrambled or fried eggs for a spicy breakfast
- With tortillas – Scoop it up with warm flour or corn tortillas
- As a soup – Eat it like a stew with some sour cream and avocado on top
- On baked potatoes – A surprising but insanely good combo
Want a more indulgent route? Serve it with shredded cheese and sour cream for a Tex-Mex twist. Or add a dollop of Greek yogurt for a healthier, tangy topping.
Don’t be afraid to experiment—green chili can complement all sorts of dishes. It even works as a nacho topping, enchilada sauce, or in a cheesy dip.
Making Green Chili Less Spicy
Let’s be real—not everyone loves having their taste buds on fire. The good news? You can totally enjoy green chili without it being overwhelming. There are a bunch of ways to control the heat without sacrificing flavor.
1. Choose Milder Peppers
Start with mild chili varieties like Anaheim or poblano peppers. Hatch green chilis also come in varying levels of heat—look for the “mild” label when buying fresh or frozen.
2. Remove the Seeds and Membranes
Most of the heat in chili peppers lives in the white membranes and seeds. Removing them before cooking can seriously reduce the spiciness. Always wear gloves when doing this—you don’t want to rub your eyes accidentally afterward!
3. Soak the Chopped Peppers
If you’re really sensitive to spice, try soaking your roasted, peeled, and chopped peppers in a little milk or yogurt for 10–15 minutes. The dairy helps pull out some of the heat. Drain and pat dry before adding them to the pot.
4. Balance with Acid and Fat
Acid (like lime juice or vinegar) can help brighten and balance out spice, while fat (like sour cream, cheese, or avocado) can cool things down. You can also add a splash of cream or a knob of butter at the end for a milder, richer finish.
5. Add Bulk
If your green chili turns out too spicy, add more broth, some cooked rice, or even beans to dilute the heat. You could also stir in some mashed potatoes or a mild vegetable like squash to absorb and balance the flavor.
6. Use a Creamy Garnish
Top your bowl with a spoonful of sour cream, Greek yogurt, or crème fraîche. These dairy-based garnishes not only look great but also calm the heat instantly.
Heat tolerance is super personal. Always taste as you go, and remember—it’s easier to add more heat than to take it away.
Vegetarian and Vegan Variations
If you’re living the plant-based life—or just trying to eat more meatless meals—green chili is easy to customize. With the right ingredients, you can make a version that’s just as hearty, flavorful, and satisfying.
1. Use Veggie Broth
The first switch is simple—use a rich, flavorful vegetable broth instead of chicken or beef broth. Opt for low-sodium so you can control the salt level yourself.
2. Skip the Meat
Green chili doesn’t need meat to be amazing. If you’re looking for protein, try adding:
- White beans or pinto beans for heartiness
- Tempeh or tofu for a chewy, meaty texture
- Mushrooms, especially cremini or portobello, for umami richness
3. Use Plant-Based Oil or Butter
Stick with vegetable oil, olive oil, or vegan butter for sautéing your aromatics.
4. Add Flavor Builders
Without meat, it’s important to boost flavor in other ways:
- Smoked paprika or liquid smoke for depth
- Nutritional yeast for a cheesy flavor
- Soy sauce or tamari to add umami (just a splash!)
5. Thicken Without Animal Products
Instead of using flour and meat-based drippings, try thickening your chili with:
- Cornstarch slurry
- Mashed white beans
- A bit of potato puree
This version is just as cozy and rich, but 100% vegan—and you won’t miss the meat one bit.
Storing and Reheating Green Chili
One of the best things about green chili is that it tastes even better the next day. The flavors deepen overnight, making leftovers a dream. Here’s how to store and reheat it like a pro:
Storing:
- Refrigerator: Let the chili cool completely, then transfer it to an airtight container. It will last 4 to 5 days in the fridge.
- Glass containers work best because they won’t absorb the smell or stain.
Reheating:
- Stovetop: Pour it into a saucepan and heat over medium-low heat, stirring occasionally until hot. Add a splash of broth or water if it’s too thick.
- Microwave: Place in a microwave-safe bowl, cover loosely with a lid or damp paper towel, and heat in 1-minute increments, stirring between each round until hot.
Extra Tip:
Always taste and adjust seasoning after reheating. Sometimes flavors settle and need a little salt or acid to perk back up.
Freezing Green Chili for Later
Want to make a big batch and enjoy it weeks from now? Green chili freezes incredibly well. It’s one of those meals that’s perfect for meal prep or emergency dinners.
How to Freeze:
- Let the chili cool completely.
- Divide it into meal-sized portions using freezer-safe containers or resealable freezer bags.
- Label with the date and contents.
- Lay bags flat to freeze—they’ll stack more easily.
Frozen green chili will keep for up to 3 months without losing flavor.
How to Thaw and Reheat:
- Thaw overnight in the fridge.
- Reheat on the stovetop or in the microwave until it’s piping hot.
You can even reheat from frozen—just warm slowly on the stove with a bit of water or broth to help loosen it up.
Green Chili for Meal Prep
Planning ahead? Green chili is the meal prep hero you didn’t know you needed. It’s filling, nutritious, and ridiculously easy to portion out.
Why It Works for Meal Prep:
- It stores well
- Flavors improve over time
- It’s versatile across meals (breakfast, lunch, dinner!)
Ideas for Meal Prep:
- Lunch bowls: Pair with rice, beans, and veggies
- Breakfast burritos: Wrap green chili, eggs, and potatoes in tortillas, then freeze
- Stuffed sweet potatoes: Top baked sweet potatoes with reheated green chili
- Mini casseroles: Layer with tortillas and cheese in a baking dish
Make a big pot on Sunday and coast through your week without breaking a sweat.
Nutrition Breakdown (Per Serving)
Knowing what’s in your bowl is always a smart move, especially if you’re keeping an eye on your diet. Green chili is surprisingly balanced—it’s hearty but not heavy, and depending on your ingredients, it can be quite nutritious.
Here’s a general nutrition breakdown per 1-cup serving of green chili (made with lean pork and without toppings):
| Nutrient | Approximate Value |
|---|---|
| Calories | 280–320 kcal |
| Protein | 22–25g |
| Fat | 12–15g |
| Carbohydrates | 18–22g |
| Fiber | 4–5g |
| Sugars | 4g |
| Sodium | 700–850mg |
| Vitamin C | 30–40% DV |
| Vitamin A | 20–25% DV |
Want to make it even healthier?
- Lower sodium: Use low-sodium broth and cut back on added salt.
- Lower fat: Use lean meat or skip it entirely for a vegetarian version.
- Add more fiber: Stir in beans or vegetables like zucchini or corn.
- Boost nutrients: Garnish with avocado (for healthy fats) or fresh spinach for extra vitamins.
This is one of those rare comfort foods that won’t weigh you down, especially when made with wholesome, fresh ingredients.
FAQs about Green Chili Recipe
1. How long does green chili last in the fridge?
Green chili stays fresh in the refrigerator for 4 to 5 days when stored in an airtight container. Make sure it’s cooled completely before refrigerating to preserve flavor and texture.
2. Can I use canned green chilis instead of fresh ones?
Yes! Canned green chilis are a great time-saving substitute, especially when fresh chilis are out of season. Just be sure to drain them before adding to the pot. For a smokier flavor, look for fire-roasted varieties.
3. Is green chili gluten-free?
It can be! Simply swap out the all-purpose flour used for thickening with cornstarch, arrowroot powder, or a gluten-free flour blend. Also, double-check your broth and spices to ensure they’re certified gluten-free.
4. What kind of meat works best with green chili?
Pork shoulder or diced pork loin are traditional choices because they become super tender when simmered. You can also use ground pork, chicken, or beef. Just avoid lean, dry cuts—they don’t hold up as well to long cooking.
5. Can I make green chili in a slow cooker?
Absolutely! Brown your meat and sauté your aromatics first for best flavor, then transfer everything to a slow cooker. Cook on low for 6–8 hours or high for 3–4 hours until it’s thick, tender, and delicious.
Conclusion
Green chili is the kind of recipe that sticks with you—once you’ve tasted the smoky, savory goodness, it becomes a staple in your kitchen. It’s bold but balanced, spicy but customizable, and hearty enough to stand on its own or enhance any meal you pair it with.
What’s truly great about green chili is its versatility. Whether you keep it traditional with roasted Hatch chilis and pork, lighten it up with a vegan twist, or mellow the spice for the whole family, there’s room to make it your own. And with make-ahead options, easy storage, and endless serving possibilities, it fits into even the busiest lifestyles.
Now that you’ve got the step-by-step guide, the only thing left to do is grab your apron and fire up the stove. Your perfect batch of green chili is just a few steps away.


