Vanilla Glaze Recipe: Let’s be honest—there’s nothing quite like the simple magic of vanilla glaze. Whether it’s drizzled over warm cinnamon rolls, poured onto a freshly baked loaf cake, or used as a finishing touch on donuts, this glossy, sweet topping brings just the right amount of indulgence without overpowering your baked masterpiece.
So why is it such a staple? First, it’s insanely easy to make. With just a handful of ingredients and zero cooking involved, you can whip it up in minutes. And second? It’s wildly versatile. You can flavor it, color it, or make it thicker or thinner depending on your vibe. It’s the little black dress of baking toppings—classic, elegant, and always in style.
Whether you’re a total beginner or a seasoned baker, this step-by-step guide will show you how to make the perfect vanilla glaze every single time.
Ingredients You’ll Need
To make a basic vanilla glaze, you’ll only need three main ingredients, but there’s room for a few optional upgrades.
Common Pantry Ingredients
- Powdered Sugar (1 cup) – Also known as confectioners’ sugar, this is the base of the glaze.
- Milk or Heavy Cream (2–3 tablespoons) – Milk gives a lighter glaze, while cream makes it richer.
- Vanilla Extract (1 teaspoon) – Use pure vanilla extract for the best flavor.
Optional Add-Ins for Flavor Twist
- Butter (1 tablespoon, melted) – For a richer, thicker texture.
- Almond Extract – A few drops can add a nutty kick.
- Citrus Zest – Adds a fresh flavor twist (great with lemon or orange zest).
- Salt (pinch) – Balances sweetness and enhances flavor.
Simple ingredients, yet when combined, they create something magical.
Essential Tools and Equipment
You don’t need fancy equipment to whip up a good vanilla glaze, but using the right tools definitely makes it easier:
- Mixing bowl – Medium-sized, preferably glass or ceramic.
- Whisk or fork – For smoothing out any lumps.
- Sifter – To make your powdered sugar lump-free.
- Measuring spoons and cups – Precision is key, even with a simple glaze.
- Spatula – Helps in transferring and spreading glaze.
Optional:
- Piping bag or squeeze bottle – For more detailed glaze designs.
Before starting, make sure all tools are clean and dry. Even a drop of water can mess with the consistency of your glaze if you don’t want it too runny.
How to Make Vanilla Glaze: Step-by-Step Guide
Step 1: Measure Your Ingredients Accurately
Start by measuring out 1 cup of powdered sugar. Level off the top with a knife if you’re using a measuring cup. Accuracy matters more than you think. Using too much sugar leads to a too-thick glaze; too little and it’s soup.
Next, pour out 2 tablespoons of milk or cream and measure 1 teaspoon of pure vanilla extract.
Pro tip: If you’re using butter or any add-ins, get them ready now.
Step 2: Sift the Powdered Sugar
Don’t skip this. Even fresh powdered sugar can have lumps that will ruin the glaze’s texture. Place a fine-mesh sifter over your bowl and sift all the sugar in.
Sifting takes a few seconds but makes your glaze super smooth. If you’re in a rush and can’t sift, whisk the sugar a few times first to break up clumps.
Step 3: Mix the Wet Ingredients
In a separate small bowl, combine your milk (or cream) and vanilla extract. If you’re adding melted butter, stir it in here as well.
This helps everything blend more evenly with the sugar. Adding the liquids gradually also prevents the glaze from becoming too runny too fast.
Step 4: Combine and Whisk Until Smooth
Now pour your liquid mixture into the sifted powdered sugar slowly, about half at a time. Whisk continuously to create a silky, lump-free glaze.
Once the mix starts looking smooth, add the rest of the liquid and whisk again.
Tip: If your glaze is too thick, add more milk—but just a half teaspoon at a time. If it’s too thin, add a little more powdered sugar.
Step 5: Adjust the Consistency
Depending on how you want to use the glaze, you’ll want different textures:
- Drizzling glaze (for cakes or muffins): Slightly runnier, like honey.
- Dipping glaze (for donuts): Medium-thick, like yogurt.
- Spreading glaze (for cookies): Thick but still pourable.
Add more milk or sugar in tiny amounts until you hit your sweet spot.
Step 6: Use or Store Your Glaze
Use the glaze immediately if possible. It begins to crust over and harden within minutes, especially if exposed to air.
If you’re not using it right away, cover it with plastic wrap, pressing it directly against the surface to avoid skin forming. Refrigerate for up to 5 days.
Tips for Perfect Vanilla Glaze Every Time
Even though vanilla glaze seems simple, getting it just right takes a bit of finesse. Here’s how to make sure yours turns out perfect every time:
- Always sift your powdered sugar. This is non-negotiable. Even a few tiny clumps can ruin the smooth finish of your glaze.
- Use room-temperature ingredients. Cold milk or butter can cause the glaze to seize or separate. Let your ingredients sit out for 10–15 minutes before mixing.
- Start with less liquid. You can always add more if needed. But if you add too much from the start, you’ll be stuck adding sugar to balance it, and you might end up with way too much glaze.
- Whisk like you mean it. Don’t just stir—use a whisk and get some air in there. It helps with the consistency and prevents lumps.
- Flavor and color last. If you’re using any extract or coloring, add them at the end. It gives you better control over taste and appearance.
- Work fast. Vanilla glaze begins to set as it cools and sits. Apply it quickly, especially if you’re working with something like donuts or muffins.
Remember, there’s no one “right” consistency—it all depends on how you plan to use it. So don’t be afraid to test and tweak!
How to Use Vanilla Glaze
The beauty of vanilla glaze is that it works on just about anything. Once you’ve nailed the basic recipe, the possibilities are endless.
Drizzle It
This is the most classic way to use vanilla glaze. Drizzle it over:
- Bundt cakes
- Pound cakes
- Muffins
- Quick breads (like banana bread)
You can use a spoon, a piping bag, or even a fork to create fun drizzle patterns.
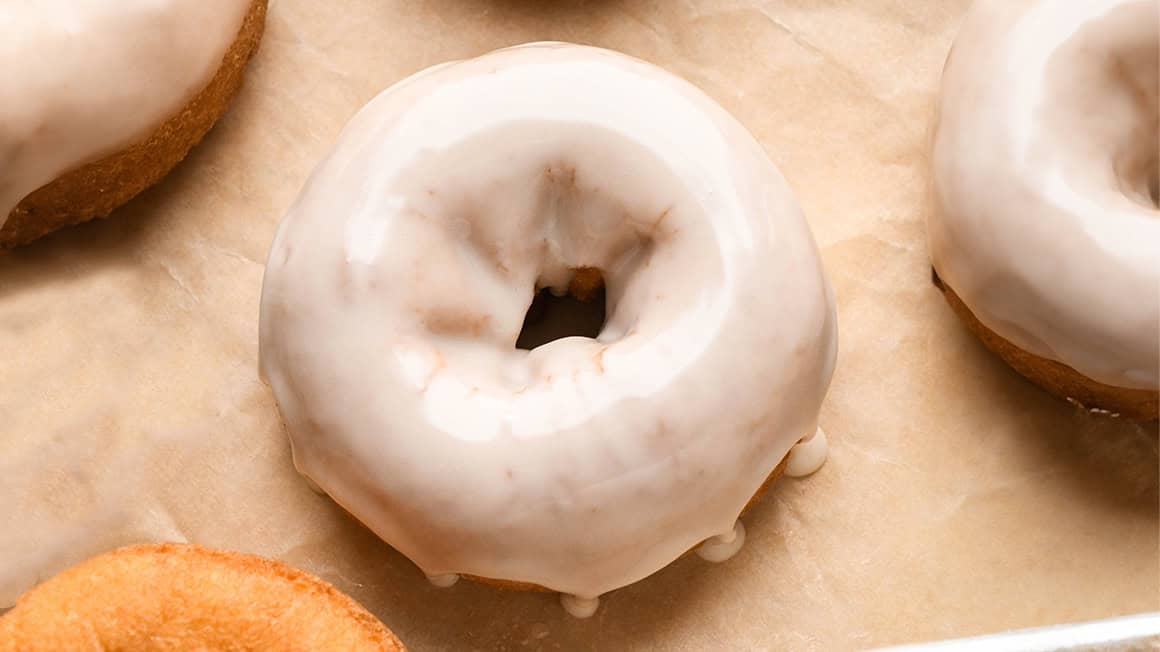
Dip It
Dipping is ideal for smaller items like:
- Donuts
- Mini bundt cakes
- Cake pops
- Cookies
Dip the top side of your baked goods into the glaze, let the excess drip off, and set them on a wire rack.
Spread It
For cookies or scones, use a small spatula or butter knife to spread glaze across the surface. This works best when the glaze is just slightly thicker.
Pour It
Pour your glaze over cakes while they’re still a little warm for a semi-soaked effect. This makes the outer layer super moist and flavorful.
Pro tip: You can even use vanilla glaze as a sweet finishing touch on cinnamon rolls or homemade toaster pastries.
Vanilla Glaze Variations You Can Try
Once you master the classic vanilla glaze, you can easily remix it to suit your flavors and cravings.
Lemon Vanilla Glaze
Add 1 teaspoon of fresh lemon juice and a little lemon zest. Pairs perfectly with blueberry muffins or lemon pound cake.
Chocolate-Vanilla Marble Glaze
Split your glaze into two bowls. Add 1 tablespoon of cocoa powder to one. Drizzle both colors over your dessert for a marbled effect.
Almond Vanilla Glaze
Substitute half of the vanilla extract with almond extract. This version is incredible on sugar cookies and cherry scones.
Maple Vanilla Glaze
Replace part of the milk with maple syrup. Great for spiced cakes and autumn-themed desserts.
Spiced Vanilla Glaze
Add a pinch of cinnamon, nutmeg, or cardamom. Ideal for apple pie bars or pumpkin bread.
The sky’s the limit. Don’t be afraid to experiment and find your personal signature glaze.
Make-Ahead and Storage Tips
Good news: vanilla glaze is make-ahead friendly! But there are a few things to keep in mind to keep it fresh and functional.
Refrigeration
Store leftover glaze in an airtight container in the fridge for up to 5 days. Before using it again, let it sit at room temperature for 10–15 minutes and give it a good whisk. Add a splash of milk if it’s too thick.
Freezing
Technically, you can freeze vanilla glaze, but it may separate or lose its smooth texture after thawing. If you must freeze it, use an airtight container and thaw in the fridge overnight, then whisk again.
Reusing
If your stored glaze has hardened slightly, place the container in a bowl of warm water for a few minutes to soften it. Stir until smooth again.
Avoid Crusting
Vanilla glaze starts to crust over quickly once exposed to air. Always cover the surface directly with plastic wrap if you’re not using it immediately.
Nutritional Information
Here’s a rough estimate for 1 tablespoon of vanilla glaze (basic recipe):
| Nutrient | Amount |
|---|---|
| Calories | 70-80 |
| Carbohydrates | 15-18g |
| Sugar | 14-16g |
| Fat | 0-2g |
| Protein | 0g |
| Sodium | 0-10mg |
Please note: these numbers vary based on what you add (e.g., butter or cream).
Healthier Swaps
Want to make your glaze just a bit healthier?
- Use almond milk instead of whole milk.
- Try a sugar substitute like powdered monk fruit or erythritol.
- Add Greek yogurt for a tangy, protein-rich twist (and a thicker texture).
Just remember, it’s still a treat—balance is key!
Troubleshooting Your Glaze
Sometimes even the simplest recipe can go sideways. Here’s a quick troubleshooting guide to help save your vanilla glaze in a pinch.
Problem: Lumpy Glaze
Fix: Sift the powdered sugar before mixing. If it’s already mixed and lumpy, try running the glaze through a fine-mesh sieve or blend it briefly with an immersion blender.
Problem: Glaze Is Too Runny
Fix: Add 1 tablespoon of powdered sugar at a time and whisk until thickened. Make sure your measurements were accurate to begin with and don’t rush the process.
Problem: Glaze Has Separated
Fix: This sometimes happens when it’s stored for too long or the fats (like butter or cream) weren’t well combined. Re-whisk it thoroughly, or warm slightly and whisk again until smooth.
Problem: Glaze Cracks After Drying
Fix: The glaze may have dried too fast or was too thick. Try using slightly more milk next time or applying the glaze while the baked goods are still warm to prevent cracking.
Problem: Glaze Doesn’t Set
Fix: If it stays wet or sticky for too long, you may have added too much liquid or applied it to very hot baked goods. Let your pastries cool a bit before glazing, and make sure the glaze is the right consistency.
Glaze problems can be frustrating, but with these quick fixes, you’ll be back on track in no time.
Pairing Ideas for Vanilla Glaze
Vanilla glaze is the ultimate team player. It pairs beautifully with so many baked goods and can even add a surprise twist to non-traditional recipes.
Classic Sweet Pairings
- Donuts – A no-brainer. Glazed donuts are a crowd favorite.
- Pound cakes – Let it drip slowly over the sides for a bakery finish.
- Cinnamon rolls – Pour over warm rolls for gooey, vanilla-sweet heaven.
- Sugar cookies – Spread or drizzle; it adds shine and flavor.
Muffins & Quick Breads
- Banana muffins
- Blueberry bread
- Zucchini loaf
- Pumpkin muffins
The slight sweetness and vanilla aroma elevate the flavors of these hearty baked goods.
Unexpected (but Delicious) Pairings
- Baked croissants – A light drizzle on top adds a café-style touch.
- Apple fritters – The warm fruit plus the cold glaze = magic.
- Scones – Adds a sweet finish and softens their firm tops.
- Savory-sweet combos – Try it on cornbread or slightly sweet focaccia with fruit.
Vanilla glaze is more than just a topping—it’s an experience.
Glaze vs. Frosting: What’s the Difference?
Let’s settle this once and for all: glaze and frosting are not the same thing.
| Feature | Glaze | Frosting |
|---|---|---|
| Texture | Thin, pourable, glossy | Thick, creamy, spreadable |
| Base | Powdered sugar + liquid | Butter/cream + sugar |
| Drying Time | Dries quickly, forms a crust | Stays soft or slightly firm |
| Use On | Donuts, cakes, muffins, cookies | Cakes, cupcakes, cookies |
When to Use Glaze
- When you want a light, sweet coating
- When you want to highlight, not hide, the texture of your baked goods
- For visual appeal with minimal effort
When to Use Frosting
- When you want a rich, creamy texture
- When decorating cakes or cupcakes
- When you want to pipe designs or layer
Think of glaze as your quick-and-easy shine, and frosting as your creamy, dreamy star of the show.
Vanilla Glaze for Vegan and Gluten-Free Baking
Good news: you can absolutely make a vegan or gluten-free version of vanilla glaze—and it’s just as tasty!
Vegan Vanilla Glaze
- Use plant-based milk (like almond, oat, or soy)
- Choose a vegan powdered sugar brand (some are processed with bone char)
- Skip butter, or use vegan butter for added richness
Gluten-Free Vanilla Glaze
The basic vanilla glaze recipe is already gluten-free—just make sure your powdered sugar brand doesn’t include any additives or fillers that contain gluten.
Optional gluten-free mix-ins:
- Almond extract
- Gluten-free food coloring
- Gluten-free cocoa powder
Vanilla glaze is one of the easiest recipes to adapt for dietary needs. Whether you’re vegan, dairy-free, or gluten-sensitive, you can still enjoy that smooth, sweet finish on your favorite treats.
FAQs about Vanilla Glaze Recipe
1. Can I freeze baked goods with vanilla glaze?
Yes, but the glaze may lose some of its shine and texture when thawed. Freeze in a single layer, then reheat gently.
2. Can I use vanilla bean paste instead of extract?
Absolutely! Vanilla bean paste adds a richer flavor and those pretty black specks. Use the same amount as you would extract.
3. Does vanilla glaze harden completely?
It forms a soft crust but doesn’t harden like royal icing. It’s perfect for a light crunch and soft interior.
4. Can I double or triple the recipe?
Yes! Just maintain the same ratios. Mix larger batches in stages to avoid lumps.
5. Is powdered sugar the same as confectioners’ sugar?
Yep! Powdered sugar, icing sugar, and confectioners’ sugar are all the same thing—just different names in different regions.
Conclusion
Vanilla glaze might just be one of the most underrated heroes in the baking world. It’s quick to make, requires minimal ingredients, and instantly transforms any dessert into something that looks (and tastes) professionally made. Whether you’re pouring it over cakes, drizzling it on muffins, or dipping donuts straight in, this glaze brings a perfect balance of sweetness and shine.
With the simple techniques, flavor tips, and troubleshooting strategies in this guide, you’ve got everything you need to master vanilla glaze like a pro. So go ahead—get whisking, get glazing, and most of all, get baking. Your desserts will thank you.