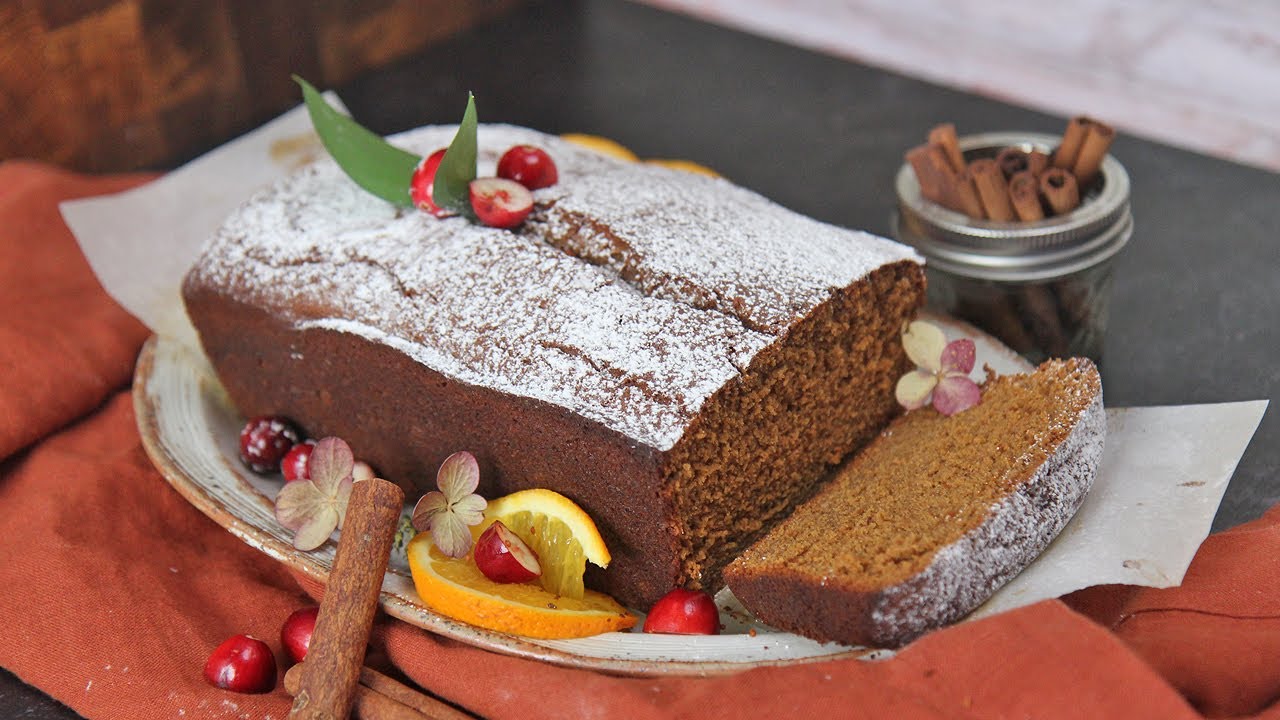
Gingerbread Loaf Recipe: There’s something undeniably cozy about the smell of gingerbread baking in the oven. It brings back memories of holidays, snowy mornings, and warm family gatherings.
The gingerbread loaf, in particular, is a timeless classic—moist, spiced just right, and versatile enough to be a breakfast treat, afternoon snack, or dessert centerpiece.
This recipe is a tried-and-true favorite that yields a bakery-style gingerbread loaf with a rich flavor and perfect crumb. Whether you’re baking for the holidays or just because, this guide will walk you through every step.
What Makes This Gingerbread Loaf Special?
This gingerbread loaf stands out thanks to its deep, warm flavor and incredibly moist texture. The secret lies in the blend of spices and the addition of molasses, which not only gives the loaf its characteristic dark color but also contributes to the soft, dense texture that gingerbread lovers crave. What makes this version even more special is how adaptable it is—you can keep it simple or get creative with nuts, chocolate chips, or a lemon glaze on top. And it stays fresh for days, making it perfect for make-ahead baking or gifting.
List of Ingredients You’ll Need
Getting your ingredients ready before you start baking is a smart move. Here’s everything you’ll need for a classic gingerbread loaf.
Dry Ingredients
- 1 ½ cups all-purpose flour
- 1 teaspoon baking soda
- 2 teaspoons ground ginger
- 1 teaspoon ground cinnamon
- ¼ teaspoon ground cloves
- ¼ teaspoon ground nutmeg
- ¼ teaspoon salt
Wet Ingredients
- ½ cup unsalted butter, softened
- ½ cup brown sugar (light or dark)
- 2 large eggs
- ½ cup unsulphured molasses
- ½ cup buttermilk (or milk + 1 tsp vinegar as a substitute)
- 1 teaspoon vanilla extract
Optional Add-ins and Toppings
- ½ cup chopped nuts (walnuts or pecans)
- ¼ cup raisins or dried cranberries
- Powdered sugar for dusting
- Lemon glaze (1 cup powdered sugar + 2 tbsp lemon juice)
- Cream cheese frosting for a richer twist
Tools and Equipment Required
Before you dive into mixing, make sure you have the right tools on hand. Here’s what you’ll need:
- Mixing bowls (at least two)
- Measuring cups and spoons
- Whisk and spatula
- Electric mixer (optional but helpful)
- Loaf pan (9×5 inch recommended)
- Non-stick spray or parchment paper
- Cooling rack
- Toothpick (for doneness test)
Having these items within arm’s reach will make your baking process smoother and mess-free.
How to Prepare Your Loaf Pan
To prevent sticking and ensure your gingerbread loaf comes out beautifully, it’s important to prep the loaf pan properly. Start by spraying the inside with a non-stick cooking spray. If you want extra insurance, line the bottom with parchment paper and spray again. This step will help you lift the loaf out with ease once it’s baked and cooled.
Step-by-Step Guide to Making the Perfect Gingerbread Loaf
Step 1: Preheat Your Oven
Set your oven to 350°F (175°C). Preheating ensures that the loaf bakes evenly from the moment it goes in. This is one of the most important steps—don’t skip it!
Step 2: Prepare the Dry Mix
In a medium-sized bowl, whisk together:
- Flour
- Baking soda
- Ginger
- Cinnamon
- Cloves
- Nutmeg
- Salt
Whisking helps to distribute the spices evenly so you won’t get clumps of flavor in one bite.
Step 3: Mix the Wet Ingredients
In a separate large mixing bowl:
- Cream the softened butter and brown sugar until light and fluffy. You can use a mixer or do it by hand.
- Beat in the eggs one at a time, mixing well after each addition.
- Stir in the molasses and vanilla extract.
This mixture will smell amazing—it’s where that rich, spiced flavor begins to come alive.
Step 4: Combine Wet and Dry Mixes
Slowly add the dry ingredients into the wet mixture, alternating with the buttermilk. Begin and end with dry ingredients. This step keeps your batter smooth and prevents over-mixing, which can make the loaf tough.
Mix until just combined. The batter will be thick and sticky—that’s exactly what you want.
Step 5: Pour Batter into Loaf Pan
Pour the batter into your prepared loaf pan and smooth out the top with a spatula. Give it a gentle tap on the counter to release any air bubbles.
At this point, you can sprinkle some chopped nuts on top for a crunchy finish or keep it plain for a classic look.
Step 6: Bake the Loaf
Place your pan in the center rack of the oven and bake for 50–60 minutes. Check for doneness by inserting a toothpick in the center. If it comes out clean or with a few moist crumbs, you’re good to go.
Resist the urge to open the oven door too often—it can cause the loaf to sink.
Step 7: Cooling and Removing from Pan
Once baked, remove the loaf from the oven and let it cool in the pan for about 10–15 minutes. Then transfer it to a wire rack to cool completely. Trying to slice too early can cause crumbling, so patience is key here!
Step 8: Optional Icing or Toppings
Now for the fun part—toppings! If you’re feeling fancy, drizzle a lemon glaze over the top or dust with powdered sugar for a snowy look. For an extra indulgent dessert, go with cream cheese frosting.
Tips for a Moist and Flavorful Gingerbread Loaf
Let’s face it—no one wants a dry loaf. The key to getting that bakery-quality texture is in the balance of moisture and spice. First off, don’t skip the molasses. It adds not only flavor but also richness and moisture that sugar alone can’t provide. Using buttermilk helps tenderize the crumb and gives the loaf a slight tang that balances the sweet, spicy flavors.
Make sure not to overmix the batter—this is a common mistake that can lead to a dense or rubbery texture. Once the wet and dry ingredients are just combined, stop mixing. And don’t overbake! Start checking your loaf at the 50-minute mark. Remember, the loaf continues to cook a little as it cools in the pan.
Another pro tip? Let the loaf rest for a few hours—or even overnight. The flavors deepen over time, making that second-day slice even more delicious.
Common Mistakes to Avoid
Even experienced bakers run into issues sometimes. Here are a few common gingerbread loaf mistakes and how to avoid them:
- Using the wrong molasses: Always use unsulphured molasses. Blackstrap is too bitter for baking.
- Skipping room temperature ingredients: Cold eggs or butter won’t mix evenly, which can mess with texture.
- Opening the oven too early: It’s tempting to peek, but doing this before the 40-minute mark can cause your loaf to sink.
- Not measuring flour correctly: Spoon flour into your measuring cup and level it off—don’t scoop directly, or you’ll pack too much in.
- Cutting before cooling: Warm gingerbread loaf can fall apart if sliced too soon. Let it rest completely for best results.
Avoiding these pitfalls can make all the difference between a good loaf and a great one.
Serving Suggestions
So you’ve got your perfectly baked gingerbread loaf—what now? There are plenty of ways to serve it. Here are a few crowd-pleasing ideas:
- Simple & classic: Slice and enjoy with a hot cup of coffee or chai.
- Dessert-style: Warm it up slightly and serve with a scoop of vanilla ice cream or whipped cream.
- Breakfast treat: Toast a slice and slather with cream cheese or butter.
- Holiday presentation: Drizzle with white glaze and top with sugared cranberries or crushed peppermint for a festive vibe.
- French toast: Yes, really—dip slices in egg mixture and pan-fry for a spiced French toast breakfast.
Whether you’re serving it at a brunch, dessert table, or as an afternoon snack, this loaf fits right in.
How to Store Gingerbread Loaf
Proper storage is crucial if you want to keep your loaf fresh for days. After it’s completely cooled, wrap the loaf tightly in plastic wrap or aluminum foil. Then place it in an airtight container or resealable bag.
Stored at room temperature, it will stay moist and tasty for up to 4 days. If you live in a hot or humid climate, refrigeration is a better option—just be sure to bring the loaf to room temperature before serving for the best texture.
Want to prep ahead? You can also make the loaf a day before serving; it actually tastes better the next day as the flavors have more time to blend and mellow.
Can You Freeze Gingerbread Loaf?
Absolutely! Gingerbread loaf freezes beautifully. Once completely cooled:
- Wrap the loaf tightly in plastic wrap.
- Then wrap it again in foil or place it in a freezer-safe bag.
- Label it with the date and freeze.
It will last in the freezer for up to 3 months. When ready to enjoy, thaw it overnight in the fridge or on the counter at room temperature for a few hours. For a freshly-baked feel, warm slices in the oven or microwave before serving.
Freezing individual slices is also a great idea—you can grab one whenever you’re in the mood for a cozy treat without thawing the entire loaf.
Best Drinks to Pair With a Slice
Pairing your gingerbread loaf with the right drink can turn it into a full experience. Here are some top drink matches:
- Coffee: The robust flavor of black coffee or a spiced latte complements the gingerbread’s spices perfectly.
- Tea: Try a cup of chai, Earl Grey, or even peppermint tea for a refreshing balance.
- Hot chocolate: A creamy, rich hot cocoa makes this duo taste like a holiday in a mug.
- Mulled wine or cider: For festive occasions, warm spiced drinks like cider or mulled wine add extra coziness.
- Milk: Good old-fashioned cold milk is great if you’re serving the loaf to kids or want to tone down the spice.
These pairings can enhance the flavor and overall enjoyment of every bite.
Gingerbread Loaf for Holidays and Gifting
Gingerbread loaf is more than just a tasty bake—it’s also a thoughtful homemade gift. During the holidays, wrapping up mini loaves in festive parchment paper or a decorative box makes a lovely, heartfelt present. Add a little tag with ingredients or a handwritten message to make it personal.
It’s also a great addition to potlucks, holiday brunches, or even office parties. Want to get extra fancy? Bake the loaf in decorative pans or ceramic dishes that the recipient can keep.
Baking in mini loaf pans lets you turn one batch into several small gifts—perfect for teachers, neighbors, or coworkers.
Nutritional Value Breakdown (Approximate per slice)
| Nutrient | Amount |
|---|---|
| Calories | 250-300 kcal |
| Total Fat | 10g |
| Saturated Fat | 5g |
| Carbohydrates | 40g |
| Sugars | 20g |
| Protein | 3-4g |
| Fiber | 1g |
| Sodium | 200mg |
These values can vary based on ingredients and toppings. Use light molasses and skim buttermilk for a slightly lower-calorie version.
FAQs about Gingerbread Loaf Recipe
1. Can I make this gingerbread loaf gluten-free?
Yes! Just substitute the all-purpose flour with a gluten-free flour blend. Make sure it includes xanthan gum for the best texture.
2. What’s the best substitute for molasses?
If you’re out of molasses, dark corn syrup, maple syrup, or honey can be used. Keep in mind that it will slightly change the flavor and color.
3. Can I make muffins instead of a loaf?
Absolutely! Pour the batter into a lined muffin tin and bake at 350°F for 18–22 minutes, or until a toothpick comes out clean.
4. How do I know when it’s fully baked?
Insert a toothpick into the center of the loaf. If it comes out clean or with just a few moist crumbs, it’s ready. The top should spring back slightly when touched.
5. Can I reduce the sugar in this recipe?
Yes, you can reduce the brown sugar by 2–3 tablespoons if you prefer it less sweet. However, don’t reduce the molasses—it’s key to the loaf’s texture and flavor.
Final Thoughts
There you have it—a full, step-by-step guide to baking the most delicious, moist, and festive gingerbread loaf. Whether it’s for a cozy afternoon at home, a holiday brunch, or a heartfelt homemade gift, this recipe is the kind that brings warmth to both the kitchen and the table. Once you make it, don’t be surprised if it becomes a staple in your baking rotation every winter.
Go ahead—grab your mixing bowl, turn on some festive music, and let the magic of gingerbread fill your home.