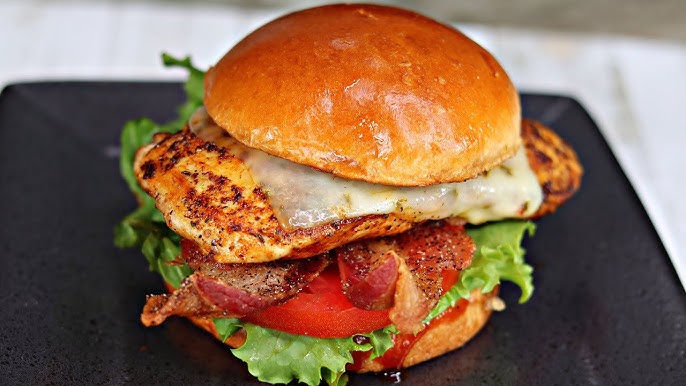
Funeral Sandwiches Recipe: Funeral sandwiches might sound a bit gloomy at first, but don’t let the name fool you. These little baked ham and cheese sliders are the ultimate comfort food, traditionally served at Southern gatherings. Whether it’s a potluck, party, or yes, even a funeral reception, these sandwiches always bring warmth and flavor to the table. They’re soft, buttery, slightly sweet, and packed with savory goodness—everything you want in a bite-sized sandwich.
The magic of funeral sandwiches comes from their simplicity and flavor-packed punch. A combo of Hawaiian rolls, ham, cheese, and a buttery glaze with tangy mustard and onion, baked until everything is melty and golden. They’re wildly addictive, and once you’ve tried them, you’ll want to make them for every occasion.
Why Are They Called Funeral Sandwiches?
The name might seem odd, but it’s rooted in Southern hospitality. Funeral sandwiches earned their name because they became a go-to dish for funeral receptions, especially in the South. Families and friends would bring trays of these sandwiches to comfort the grieving—a tradition based on the idea of showing love through food.
These sandwiches were perfect for those events. They’re easy to make in large batches, can be prepped ahead of time, and are always a crowd-pleaser. Over time, the name stuck, even though people now make them for everything from game day to holiday brunches. Don’t worry—despite the name, there’s nothing somber about how they taste.
The Southern Tradition Behind Funeral Sandwiches
Southern cooking is all about comfort and togetherness, and funeral sandwiches are a prime example. When families gather for emotional occasions, especially funerals, food becomes more than just nourishment—it’s a gesture of love and support. Funeral sandwiches are warm, hearty, and easy to share. They’re often made in big trays and passed around as everyone gathers, talks, and supports each other.
These sandwiches are deeply tied to the idea of bringing people together. Even outside of funerals, you’ll see them at church potlucks, Sunday dinners, baby showers, and tailgates. It’s the kind of recipe that feels like home, no matter where you are.
Why You’ll Love This Recipe
If you’ve never made these before, get ready to be obsessed. Here’s why:
- Simple ingredients – You probably already have most of what you need.
- Quick prep – Just 15 minutes to assemble.
- Make ahead friendly – Assemble the night before and bake when needed.
- Crowd-pleaser – Always the first thing to disappear at gatherings.
- Customizable – Swap out meats, cheeses, or add a little kick with jalapeños.
This recipe gives you everything you want in a sandwich: gooey melted cheese, savory ham, and soft rolls soaked in a tangy, buttery sauce. It’s sweet, salty, slightly tangy, and rich. Basically, it’s flavor heaven in every bite.
List of Ingredients You’ll Need
Here’s what you’ll need to whip up the perfect tray of funeral sandwiches:
Bread
- 1 package of Hawaiian sweet rolls (12-count)
- The sweetness of the rolls balances perfectly with the salty ham and tangy mustard.
Deli Meat
- 1 pound sliced deli ham (smoked or honey ham both work)
- You want thin slices so they heat up and melt together easily.
Cheese
- 12 slices of Swiss cheese
- Swiss has the perfect melt and slightly nutty flavor, but provolone or cheddar work too.
Butter Mixture
- 1/2 cup (1 stick) unsalted butter, melted
- 2 tablespoons Dijon mustard
- 2 tablespoons Worcestershire sauce
- 2 tablespoons finely minced onion (or onion powder for quicker prep)
- 1 tablespoon poppy seeds
- This sauce is the flavor bomb that takes these sandwiches from basic to unforgettable.
Optional but delicious additions:
- 1 tablespoon brown sugar (if you like a sweeter glaze)
- Dash of garlic powder or hot sauce for a kick
Kitchen Tools You’ll Need
Before you start, grab these tools:
- 9×13-inch baking dish
- Sharp bread knife
- Small saucepan or microwave-safe bowl
- Foil
- Pastry brush (optional, but handy)
- Spatula or serrated knife for serving
Having the right tools makes the prep smooth and quick—plus, cleanup’s a breeze.
Tips Before You Start
Want to nail it on the first try? Keep these pro tips in mind:
- Don’t separate the rolls before slicing. Cut the whole slab of rolls in half horizontally. It keeps them neat and makes assembly faster.
- Use parchment paper. It helps prevent sticking, especially if your glaze drips over the edges.
- Let them marinate. Even just 30 minutes in the fridge makes the flavors soak in more deeply.
- Cover with foil. This prevents the tops from browning too fast before the cheese is melty.
- Let them rest after baking. About 10 minutes makes slicing and serving cleaner.
Step-by-Step Guide to Making Funeral Sandwiches
Step 1: Prepping the Oven and Pan
Preheat your oven to 180°C (350°F). Lightly grease a baking dish or line it with parchment paper. This prevents sticking and makes cleanup easier.
Step 2: Cutting the Rolls
Keep the rolls connected and slice them horizontally through the middle using a serrated knife. Place the bottom half of the rolls into the prepared pan.
Step 3: Layering the Ingredients
Layer sliced cheese evenly over the bottom rolls, followed by a generous layer of deli meat such as ham, turkey, or roast beef. Add another layer of cheese if desired, then place the top halves of the rolls back on.
Step 4: Making the Sauce
In a bowl or small saucepan, mix melted butter, Dijon or yellow mustard, Worcestershire sauce, a little brown sugar, onion powder, and poppy seeds. Stir until well combined. This sauce is what gives funeral sandwiches their signature flavor.
Step 5: Pouring the Sauce
Slowly pour the sauce evenly over the tops of the rolls. Make sure some sauce seeps down the sides and between the layers so every sandwich is well flavored.
Step 6: Marinating for Flavor
Cover the dish tightly with foil and let the sandwiches rest for at least 30 minutes, or refrigerate for a few hours. This allows the rolls to absorb the sauce and deepens the flavor.
Step 7: Baking to Perfection
Bake covered for 15–20 minutes until the cheese is melted and the sandwiches are heated through. Uncover and bake for an additional 5–10 minutes until the tops are lightly golden. Serve warm for best taste.
These sandwiches are soft, savory, and perfect for feeding a crowd.
How to Store Funeral Sandwiches
Got leftovers? No problem. Funeral sandwiches store surprisingly well, and they’re just as delicious the next day.
- Refrigerate: Place leftovers in an airtight container or wrap them tightly in foil. They’ll last 3–4 days in the fridge.
- Reheat: Warm them up in the oven at 300°F for about 10–15 minutes. This helps the bread crisp up again and the cheese melt nicely. Avoid microwaving if possible, as it can make the bread soggy.
- Meal prep tip: If you know you’ll be storing them, slightly underbake the sandwiches. That way, when you reheat, they don’t dry out.
These sandwiches are perfect for lunches, quick snacks, or even breakfast. Yep, breakfast! Pair one with a fried egg for a savory morning bite.
Can You Make Them Ahead of Time?
Absolutely—and that’s part of the charm. You can prepare funeral sandwiches up to 24 hours in advance. Here’s how:
- Assemble the sandwiches completely.
- Pour the buttery glaze over the top.
- Cover the dish with foil and refrigerate.
When you’re ready to serve:
- Preheat the oven
- Bake as directed (adding 5 extra minutes if cold from the fridge)
This make-ahead method is ideal for parties, holidays, and—you guessed it—funeral receptions. It saves time, reduces stress, and lets the flavors really soak into the rolls. The longer they sit, the more they absorb that incredible sauce.
Freezing Funeral Sandwiches – Yes or No?
You bet! Funeral sandwiches freeze surprisingly well. Perfect for batch cooking or prepping weeks ahead of an event.
To freeze:
- Assemble the sandwiches and add the sauce.
- Wrap tightly in foil and place in a freezer-safe bag or airtight container.
- Freeze for up to 1 month.
To reheat:
- Thaw in the refrigerator overnight.
- Bake covered at 350°F for 25–30 minutes, removing foil for the last 5–10 minutes.
The texture is slightly softer after freezing, but the flavor is still spot-on. Just be sure to use fresh ingredients to start with—it makes all the difference after freezing and reheating.
Variations to Try
Want to put your own spin on this classic? Here are a few fun twists to make it your own.
Using Different Meats
- Turkey: A lighter flavor profile that pairs beautifully with cheddar or Swiss.
- Roast Beef: Hearty and rich. Try with provolone and horseradish mustard.
- Salami or pepperoni: For a pizza-inspired slider with mozzarella and marinara on the side.
Cheese Swaps
- Cheddar: Sharp and melty.
- Mozzarella: Milder but ultra-gooey.
- Pepper Jack: A spicy kick for those who love heat.
Sweet and Spicy Version
- Add a spoonful of hot pepper jelly or sriracha to the butter sauce.
- Sprinkle crushed red pepper flakes or drizzle with honey before baking.
- Use jalapeño cheddar rolls for added depth.
Get creative—this recipe is super flexible. Just keep the base idea (rolls + meat + cheese + sauce + bake) and customize the ingredients to suit your taste or occasion.
Pairing Suggestions – What to Serve With Funeral Sandwiches
These little sliders are tasty on their own, but here are some perfect sides to serve alongside them:
- Potato Salad: Classic, creamy, and filling.
- Coleslaw: Adds a fresh, crunchy contrast to the richness.
- Pickles and Chips: For a crunchy, salty balance.
- Tomato Soup: Great for colder days, and pairs beautifully with the melted cheese.
- Fruit Salad or Grapes: A light and sweet complement to the savory sandwiches.
Whether you’re hosting a party or just enjoying a casual meal, these sides make it a complete spread.
Mistakes to Avoid
Even simple recipes have some traps—here’s how to steer clear:
- Using cold butter sauce: If your glaze isn’t fully melted or warm, it won’t soak into the rolls as well.
- Overbaking: Dry bread and rubbery cheese are a no-go. Stick to the timing and cover with foil.
- Under-seasoning the sauce: The sauce is where the flavor lives! Don’t skimp on mustard, onion, or Worcestershire.
- Skipping the rest time: Letting them rest after baking makes them easier to cut and more cohesive.
- Overfilling with ham or cheese: It’s tempting, but too much filling can make them fall apart or bake unevenly.
Keep it balanced and simple—you’ll get perfect sliders every time.
Nutrition Information
Here’s a rough breakdown per sandwich (based on 12 servings):
| Nutrient | Amount |
|---|---|
| Calories | 280–320 |
| Protein | 12g |
| Carbs | 22g |
| Fat | 18g |
| Sugar | 5g |
| Sodium | 650mg |
Keep in mind, exact numbers will vary based on your choice of ham, cheese, and how much sauce you use. If you’re watching sodium or fat, try using reduced-sodium ham and lower-fat cheese.
FAQs about Funeral Sandwiches Recipe
1. Can I use regular dinner rolls instead of Hawaiian rolls?
Yes, but Hawaiian rolls give that signature sweetness. Regular rolls work fine but may not have the same flavor balance.
2. Can I make these vegetarian?
Absolutely! Swap ham for sautéed mushrooms or roasted veggies and use your favorite cheese.
3. What’s the best way to transport them for a potluck?
Bake them in a foil-lined, covered baking dish. They travel well and reheat easily at your destination.
4. Do they taste good cold?
Yes! While they’re best warm, they’re still tasty at room temperature or even chilled—great for lunchboxes.
5. Can I double the recipe?
Totally. Use two 9×13 pans or a larger baking tray. Just make sure your oven can fit everything evenly.
Conclusion
Funeral sandwiches are more than just a dish—they’re a comforting tradition, a Southern staple, and a guaranteed crowd favorite. With layers of savory ham, melted cheese, and a buttery, tangy glaze on soft Hawaiian rolls, they hit every flavor note you crave. They’re easy to prepare, totally customizable, and ideal for everything from solemn gatherings to spirited celebrations.
Whether you’re making them for a potluck, prepping for game day, or simply craving a cozy comfort food meal, this recipe delivers every single time.
So go ahead—grab that tray of rolls and start stacking. Once you make them, you’ll see exactly why these humble little sliders have such a legendary reputation.


