Flourless Cake Recipe: Flourless cakes are a beautiful contradiction—they’re light but dense, rich yet simple, and indulgent without requiring even a pinch of flour.
Whether you’re avoiding gluten, trying something new, or just craving a fudgy, intense dessert, a flourless cake hits all the right notes. What makes it even more magical is how easy it is to make once you understand the basics.
Ready to dive in? Let’s break down the ingredients, techniques, and secrets to baking the ultimate flourless cake.
Ingredients You’ll Need
Let’s talk about what you’ll need to whip up a classic flourless chocolate cake. One of the best things about this recipe is its simplicity. You’re working with fewer ingredients than a traditional cake, and every element plays a key role in flavor and texture.
Basic Pantry Ingredients:
- Chocolate (6 to 8 oz): Go for high-quality dark chocolate (60–70% cocoa). This is the star of the show. Avoid chocolate chips as they often have added stabilizers.
- Butter (1 stick or ½ cup): Unsalted is best, but salted can work if that’s all you have. It adds richness and a silky mouthfeel.
- Eggs (4 large): Eggs are crucial for binding and giving the cake its structure. Room-temperature eggs work best.
- Sugar (¾ to 1 cup): Granulated sugar is most common, but coconut sugar or a sugar alternative can work too.
Optional Add-ins for Flavor:
- Vanilla Extract (1 tsp): Enhances the flavor of the chocolate.
- Espresso Powder (½ tsp): Adds depth and intensifies the chocolate flavor.
- Salt (¼ tsp): A pinch balances the sweetness and boosts all the other flavors.
- Cocoa Powder (1 tbsp): Optional but can intensify the chocolate notes.
This ingredient list proves that you don’t need a lot to create something spectacular. The key is quality. When there’s no flour to mask mediocre chocolate or butter, you want each component to shine.
Types of Flourless Cakes
Flourless cake doesn’t always look the same. There are variations depending on ingredients and texture preferences.
Chocolate Flourless Cake:
The most popular type. It’s fudgy, rich, and often dense with a crackly top. This is what we’re covering in the step-by-step guide.
Nut-Based Flourless Cake:
Ground almonds, hazelnuts, or walnuts can replace flour for a nutty twist. These are popular in Mediterranean desserts.
Dairy-Free Variations:
Swap out butter for coconut oil or a vegan butter substitute to make your cake entirely dairy-free.
Whether you go classic or creative, the heart of any flourless cake lies in keeping it simple and rich in flavor.
Benefits of Flourless Cakes
Let’s be honest—flourless cakes aren’t just for people with gluten intolerance. They’re genuinely delicious and come with some pretty awesome benefits.
- Naturally Gluten-Free: Perfect for celiacs or those avoiding gluten. No complicated swaps needed.
- Richer Flavors: Without flour, the chocolate (or any main ingredient) becomes more intense.
- Decadent Texture: You get that perfect mix of soft, fudgy inside and crisp top layer.
And perhaps best of all? These cakes are less likely to dry out, meaning they stay moist and satisfying longer than traditional bakes.
Choosing the Right Chocolate
Don’t skimp on the chocolate—this is where most of the flavor comes from. Use bars of chocolate meant for baking or eating. Avoid chips unless they’re premium quality.
- Dark Chocolate (60%–70% cocoa): Best choice for a rich, bold taste.
- Milk Chocolate: Too sweet and soft for most flourless cakes.
- Unsweetened Chocolate: Can be used if you adjust sugar levels accordingly.
Look at the ingredients: the fewer, the better. Aim for brands with cocoa mass, cocoa butter, and sugar—no added oils or artificial flavors.
Choosing the Right Sweetener
Sugar isn’t just for sweetness; it affects texture too.
- White Granulated Sugar: Most reliable and consistent.
- Coconut Sugar: Adds a hint of caramel flavor.
- Maple Syrup or Honey: Adds moisture, but may change baking time.
- Sugar Substitutes (Erythritol, Stevia): Great for low-carb diets, but some may alter texture.
Stick to tried-and-true options unless you’re ready to experiment a bit.
Kitchen Equipment You’ll Need
You don’t need fancy tools, but a few essentials will make things easier and give you better results.
Essential Baking Tools:
- Mixing Bowls (2 or more): For separating wet and dry ingredients.
- Whisk or Electric Mixer: To beat the eggs to the right consistency.
- Rubber Spatula: For folding the mixture gently.
- Springform Pan (8-inch): Makes removal easy and keeps the structure intact.
- Oven Thermometer: Optional, but helpful for accuracy.
A cake is only as good as your prep—so having your tools ready is key.
Step-by-Step Guide to Making a Classic Flourless Chocolate Cake
This is where the magic happens. Follow these steps closely and you’ll end up with a show-stopping dessert that’s moist, chocolatey, and totally flour-free.
Step 1: Prepare the Pan
Grease an 8-inch springform pan with butter or line the bottom with parchment paper. This prevents sticking and ensures easy removal.
Step 2: Melt the Chocolate and Butter
Break the chocolate into pieces and combine with butter in a heat-safe bowl. Melt over a double boiler or microwave in short bursts (20–30 seconds at a time). Stir until smooth and glossy. Let it cool slightly before the next step.
Step 3: Whip the Eggs
In a separate bowl, crack the eggs and add the sugar. Use an electric mixer to beat them for 5–7 minutes on high speed until the mixture triples in volume and turns pale. This step is key for the cake’s structure and fluffiness.
Step 4: Combine and Fold
Pour the cooled chocolate mixture into the whipped eggs. Gently fold using a spatula. Don’t stir too fast—you’ll deflate the air bubbles. Mix just until combined.
Step 5: Bake the Cake
Pour the batter into your prepared pan and smooth the top. Bake at 325°F (160°C) for 25–30 minutes. The top should form a thin crust and a toothpick should come out with moist crumbs (not wet batter).
Step 6: Cool and Serve
Let the cake cool in the pan for 10 minutes, then run a knife along the edges and remove from the springform. Cool completely before serving for best texture and flavor.
How to Know When It’s Done
Baking a flourless cake is a bit different from traditional ones—it doesn’t rise much, and the usual “clean toothpick” test won’t work the same way. So, how do you know it’s perfectly baked?
Here’s what to look for:
- Set edges, soft center: The outer edges should be firm and slightly pulled away from the pan, while the center should still jiggle a bit when you gently shake the pan.
- Shiny, cracked top: A classic sign of a well-baked flourless cake is a shiny surface with thin cracks, kind of like a brownie.
- Thermometer check (optional): If you want to be precise, the center should register around 200°F (93°C) on an instant-read thermometer.
- Toothpick test: A toothpick inserted about 1 inch from the edge should come out clean, but from the center it should have moist crumbs—not raw batter.
Don’t overbake, or you’ll lose that fudgy texture we all love!
Decorating Your Cake
Now comes the fun part—decorating. Because flourless cakes have such a gorgeous rustic look, you don’t need a lot. But a few finishing touches can really elevate it.
Here are a few ideas:
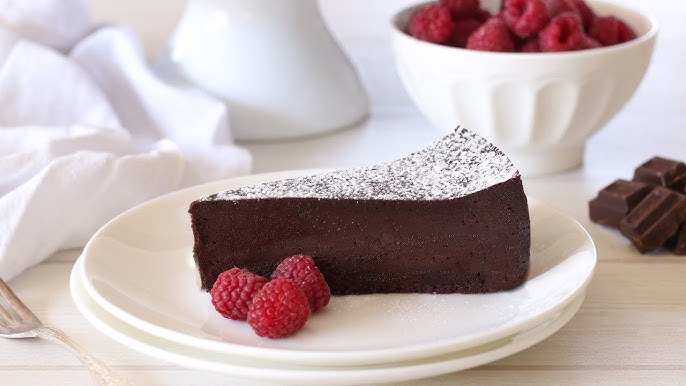
- Dust with powdered sugar: Use a fine-mesh sieve to dust the top. It adds a light sweetness and a pretty contrast to the dark cake.
- Drizzle with ganache: Make a simple ganache by melting equal parts chocolate and heavy cream, then drizzle or pour over the cake.
- Top with fresh berries: Strawberries, raspberries, or blueberries not only look great but add a pop of freshness.
- Add whipped cream or ice cream: A dollop of whipped cream or a scoop of vanilla ice cream turns this cake into a luxurious dessert.
- Use cocoa powder: Dusting with cocoa instead of powdered sugar makes it feel more sophisticated and intensifies the chocolate vibe.
Keep it simple or go big—it’s totally up to your style.
Serving Suggestions
You’ve baked and decorated your masterpiece—now it’s time to serve it. But did you know how and when you serve flourless cake can affect the taste and texture?
Serving Tips:
- Let it rest: Give the cake at least 2 hours to fully cool before slicing. Even better, refrigerate it overnight for a firmer texture.
- Use a sharp knife: Dip your knife in hot water and wipe it between slices for clean cuts.
- Serve at room temperature: Cold cake is firmer, but letting it come to room temp brings out the full flavor.
- Pair it well:
- Coffee or espresso enhances the chocolate richness.
- Red wine, like a Cabernet Sauvignon, complements the intensity.
- A scoop of ice cream balances out the richness.
This cake isn’t just dessert—it’s an experience.
Storage Tips
Believe it or not, flourless cakes age well! In fact, the flavor often deepens after a day or two. Here’s how to store it properly:
Refrigeration:
- Wrap the cooled cake in plastic wrap or place in an airtight container.
- Keeps fresh for up to 5 days in the fridge.
- Let slices sit at room temp for 20 minutes before serving.
Freezing:
- You can freeze the entire cake or individual slices.
- Wrap tightly in plastic wrap and then in foil.
- Store for up to 3 months in the freezer.
- Thaw in the fridge overnight before serving.
The dense, rich nature of flourless cake makes it one of the few desserts that truly improves over time.
Common Mistakes to Avoid
Even though it’s a simple recipe, a few missteps can throw off your cake. Let’s avoid the most common ones:
1. Overbaking:
It’s easy to think the cake is underdone because the center is soft. But it’s meant to be that way! Overbaking dries it out.
2. Skipping the egg-beating step:
This isn’t the step to cut corners. Whipping the eggs properly gives your cake lift and structure without any flour.
3. Using low-quality chocolate:
Your cake is only as good as your chocolate. Poor-quality chocolate results in a flat, overly sweet or waxy cake.
4. Not letting it cool:
It may be tempting to slice while warm, but you’ll ruin the texture. Let it firm up and rest before digging in.
5. Mixing too roughly:
Folding the chocolate into the eggs needs to be gentle. Stirring too aggressively deflates the air you just worked so hard to whip in.
Avoiding these will ensure your cake turns out perfect every single time.
FAQs about Flourless Cake Recipe
1. Can I make it dairy-free?
Yes! Swap the butter for coconut oil or a high-quality vegan butter alternative. Also, skip any dairy-based toppings like ganache or whipped cream.
2. Can I use cocoa powder instead of chocolate?
Not really. Cocoa powder lacks the fat and sugar in chocolate. If you’re set on trying it, you’ll need to adjust the other ingredients heavily. Stick with real chocolate for best results.
3. Can I use sugar substitutes?
Yes, especially if you’re on a low-carb or keto diet. Look for 1:1 sugar replacements like erythritol or monk fruit blends. Just be aware some substitutes may slightly change the texture.
4. Does it taste different from regular cake?
Absolutely—and in the best way. It’s denser, more chocolate-forward, and richer. Think of it more like a truffle or brownie than a sponge cake.
5. How long does it keep?
Refrigerated, it keeps for about 5 days. Frozen, it’s good for up to 3 months. Just be sure it’s well-wrapped to prevent freezer burn.
Conclusion
Flourless cake is proof that sometimes, less really is more. With just a handful of simple ingredients and a few easy steps, you can create a rich, fudgy dessert that feels luxurious with every bite. Whether you’re gluten-free or just in the mood for something deeply chocolatey, this cake is bound to become a staple in your kitchen. It’s the kind of recipe you make once and then never stop craving.
So grab your best chocolate, crack some eggs, and let your oven do the magic. Trust me, this is one of those desserts you’ll be proud to serve at any table.


