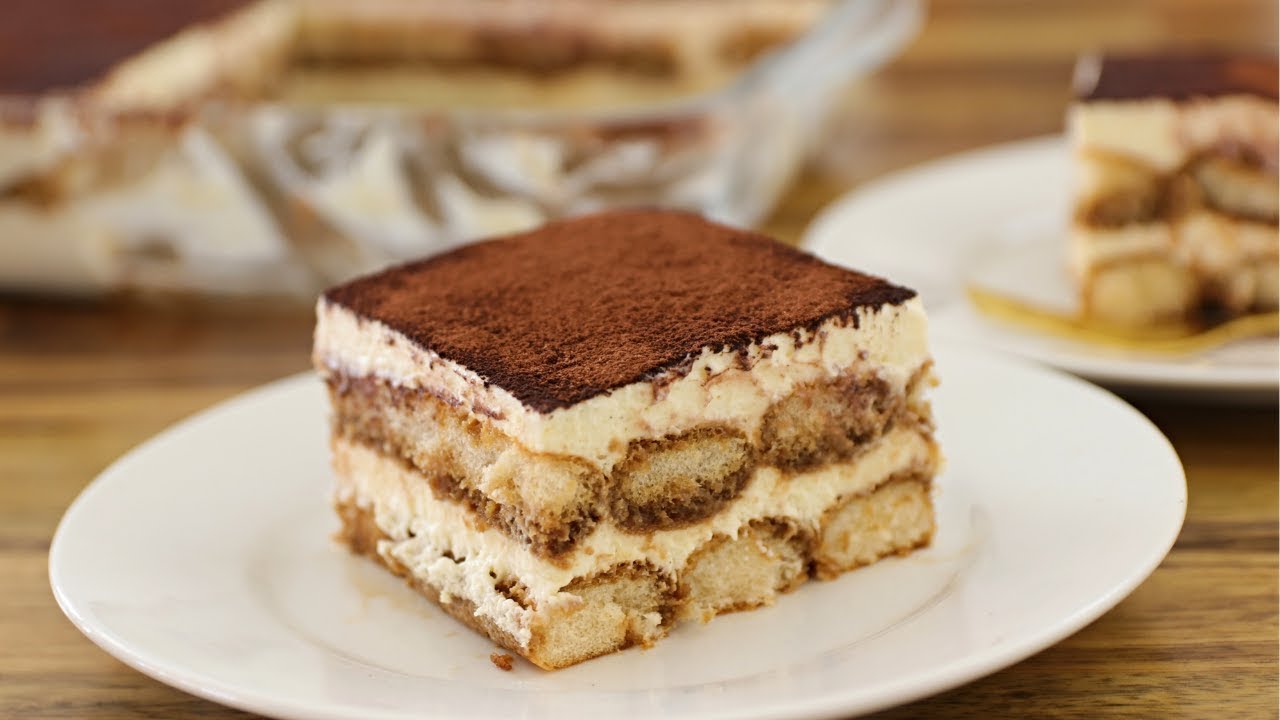
Famous Tiramisu Recipe: Tiramisu isn’t just a dessert—it’s an experience. Soft, spongy ladyfingers soaked in rich espresso, layered with a silky mascarpone cream, and dusted with bittersweet cocoa powder. It’s a treat that combines texture, taste, and elegance in every bite. Whether you’re making it for a dinner party or craving something sweet and indulgent, this famous tiramisu recipe will guide you from start to finish with clear, easy-to-follow steps.
So, what makes this tiramisu special? It’s authentic. No shortcuts, no substitutions unless you absolutely need them. You’ll get the classic Italian flavor that’s rich, creamy, and beautifully balanced—not too sweet, not too bitter.
Tiramisu’s roots date back to the Veneto region of Italy in the 1960s. Since then, it’s gained global fame for a good reason. The combination of coffee, cream, and cocoa is a match made in dessert heaven.
Ready to dive in? Let’s start with what you’ll need.
Ingredients You’ll Need
Let’s gather the ingredients for a perfect tiramisu. Here’s everything broken down to make it simple for you:
Classic Ingredients:
- 6 large egg yolks – for richness and body
- ¾ cup granulated sugar – to sweeten the yolks
- 16 oz mascarpone cheese (room temperature) – the soul of tiramisu
- 1 ½ cups heavy whipping cream (cold) – adds lightness and fluff
- 2 cups strong brewed espresso or coffee (cooled) – the foundation flavor
- ¼ cup coffee liqueur (like Kahlua or Marsala wine) – optional, for depth
- 2 packs of ladyfinger biscuits (savoiardi) – they absorb coffee beautifully
- Unsweetened cocoa powder – for dusting on top
- Dark chocolate shavings (optional) – adds a gourmet touch
Optional Substitutes:
- Cream cheese (only if you can’t find mascarpone, but use sparingly)
- Instant coffee (if you don’t have espresso, but brew it strong)
- Vanilla extract (adds warmth to the cream layer)
Where to Get Authentic Ingredients:
- Visit your nearest Italian grocery store for mascarpone and savoiardi.
- Many online shops sell premium cocoa powders and imported ladyfingers.
- Use fresh eggs and cream—they truly make a difference.
Essential Tools for Making Tiramisu
Before you jump into the mixing and layering, let’s talk tools. Having the right equipment makes this job smoother and more fun.
Must-Have Kitchen Tools:
- Mixing bowls (preferably glass or metal)
- Hand mixer or stand mixer
- Whisk (for combining mascarpone and yolks)
- Spatula (for folding mixtures gently)
- 9×13-inch baking dish or a similar deep tray
- Fine mesh sieve (for dusting cocoa powder)
- Espresso maker or coffee machine
Pro Tips:
- Chill your bowl and beaters before whipping the cream.
- Don’t use plastic bowls—they hold heat and may affect your cream texture.
- Pre-measure all ingredients for a smooth workflow.
Preparing for Tiramisu
Making tiramisu is all about timing and preparation. A little planning goes a long way in ensuring your dessert comes out flawless. Here’s how to get your kitchen and ingredients ready before diving into the recipe.
Setting Up Your Workspace
Before you touch a single ingredient, clear your counter space. Tiramisu involves multiple bowls, layers, and careful folding. A clutter-free setup helps you stay organized and relaxed. Set out all your tools, bowls, and ingredients in the order you’ll use them. This “mise en place” method (a French term for “everything in its place”) is used by chefs worldwide—and trust me, it works.
Chilling Bowls & Whisks
To get that perfectly fluffy whipped cream, chill your mixing bowl and beaters in the freezer for 10–15 minutes beforehand. Cold tools help stabilize the cream and whip it faster. This small trick makes a big difference in texture.
Ingredient Temperature Tips
- Egg yolks should be room temperature so they mix smoothly with sugar.
- Mascarpone cheese needs to be soft but not runny. Leave it out for 20–30 minutes before mixing.
- Heavy cream should stay cold until the moment you whip it.
These temperature tricks help ensure each part of your tiramisu is light, creamy, and rich without being soupy or dense.
Step-by-Step Guide to Making Tiramisu
Let’s break this down into manageable, foolproof steps. Whether this is your first time or your fiftieth, follow this process carefully for a perfect tiramisu every time.
Step 1: Brew Strong Espresso
Start by brewing 2 cups of strong espresso or coffee. You can use a traditional espresso machine, stovetop Moka pot, or even a French press. Let it cool to room temperature before using—hot coffee will ruin the ladyfingers.
Want to enhance the flavor? Add 1–2 tablespoons of coffee liqueur like Kahlúa or Marsala wine once it cools. It’s optional, but it adds complexity to the dessert.
Step 2: Whisk the Egg Yolks and Sugar
In a large mixing bowl, combine:
- 6 large egg yolks
- ¾ cup granulated sugar
Use a hand mixer or stand mixer to beat the mixture for 5–7 minutes, until it becomes thick, pale, and almost double in volume. This step is critical—it creates the base for your creamy mascarpone layer. The mixture should form ribbons when you lift the whisk.
Note: If you’re concerned about raw eggs, you can gently cook the yolks and sugar over a double boiler for 5–7 minutes while whisking continuously. Just don’t overheat, or you’ll scramble the eggs.
Step 3: Incorporate Mascarpone Cheese
Once your egg yolk and sugar mixture is thick and creamy, gently fold in 16 oz of mascarpone cheese using a spatula. Be patient and fold slowly—overmixing can break the mixture or make it grainy.
Mascarpone is the heart of tiramisu. It gives the cream its lush, velvety texture and rich flavor. Make sure it’s at room temperature so it blends smoothly without lumps.
Step 4: Whip the Heavy Cream
In a separate chilled bowl, pour in 1 ½ cups of cold heavy cream. Using your mixer (again, with chilled beaters), whip it on high speed for 3–4 minutes until stiff peaks form.
Be careful not to over-whip! Stop as soon as the cream holds peaks that don’t fall over when you lift the beaters.
Step 5: Combine the Mixtures Gently
Now comes the delicate part—fold the whipped cream into the mascarpone mixture. Do this in three parts, folding gently with a spatula after each addition. Don’t stir or beat—just fold until combined and smooth.
The result? A light, fluffy, dreamy cream base that’s ready to layer with espresso-soaked ladyfingers.
Step 6: Dip Ladyfingers in Espresso
Pour the cooled espresso (and optional liqueur) into a shallow dish. Quickly dip each savoiardi (ladyfinger) into the espresso for 1–2 seconds per side. Don’t soak too long—they’ll fall apart and turn soggy.
Pro tip: Dip, flip, and layer immediately. Work fast but carefully.
Step 7: Layer Cream and Ladyfingers
In your 9×13-inch dish, start with a layer of espresso-dipped ladyfingers. Arrange them snugly but don’t squish them.
Then spread half of the mascarpone cream evenly on top. Use a spatula to smooth the layer gently, making sure it fills the gaps between the ladyfingers.
Step 8: Repeat and Finish the Top Layer
Repeat the process with another layer of dipped ladyfingers, followed by the remaining mascarpone cream. Spread it evenly and smooth the top with your spatula.
At this point, it’s tempting to dive in—but hold on! The magic happens in the fridge.
Step 9: Chill for at Least 6 Hours
Cover the dish with plastic wrap and refrigerate for a minimum of 6 hours, but ideally overnight. This gives the flavors time to meld and the cream to set beautifully.
Patience pays off—don’t skip this step!
Decorating the Tiramisu
Once your tiramisu is fully set and chilled, it’s time to make it look as amazing as it tastes. This final touch adds that gourmet finish and makes it visually irresistible.
How to Add Cocoa Powder
Using a fine mesh sieve, dust the top layer generously with unsweetened cocoa powder. Hold the sieve a few inches above the tiramisu and gently tap it so the cocoa falls like snow. Cover the surface evenly but don’t overload it. You want a nice, light coating—not a thick powdery mess.
You can do this just before serving to keep the cocoa looking fresh and vibrant.
Garnishing Tips
Want to take it a step further? Here are some fancy-yet-easy ideas:
- Chocolate shavings – Use a vegetable peeler on a dark chocolate bar.
- Espresso beans – Add 4 or 5 on top for a bold coffee vibe.
- Fresh mint leaves – A pop of green adds a lovely color contrast.
- Powdered sugar designs – Lay a paper stencil over the top before dusting with cocoa to create hearts, stars, or swirls.
Presentation matters—especially when serving guests. Your tiramisu should look as rich and inviting as it tastes.
Serving Suggestions
Tiramisu is best served cold, right out of the fridge. It’s creamy, chilled, and incredibly refreshing. Slice it into squares and use a cake server or large spatula to lift out perfect portions.
Best Time to Serve
Tiramisu shines as a dinner party dessert or special weekend treat. It’s also perfect for romantic dinners, birthdays, or festive gatherings.
Let the tiramisu sit at room temperature for about 10–15 minutes before serving. This softens the cream slightly and enhances the texture.
Plating Ideas
Serve each slice with:
- A sprinkle of cocoa powder on the plate
- A drizzle of coffee syrup or chocolate sauce
- A dollop of whipped cream on the side
- A small espresso or cappuccino for the full Italian café experience
Tiramisu doesn’t need fancy tricks—it’s elegant in its simplicity. But a little extra love on the plate makes it unforgettable.
Tiramisu Variations
Want to switch things up? There are so many fun and delicious ways to put a twist on the traditional tiramisu while keeping the spirit of the dessert alive.
Tiramisu Without Eggs
Not a fan of raw eggs? You can skip them by:
- Replacing egg yolks with more whipped cream (just double the cream)
- Adding a bit of vanilla extract or cream cheese for flavor
You won’t get the same richness, but it’ll still be creamy and delicious.
Strawberry Tiramisu
Swap the espresso for strawberry syrup or purée, and layer with fresh sliced strawberries. Use a touch of lemon zest in the cream for added brightness.
It’s fruity, refreshing, and perfect for spring or summer.
Vegan or Alcohol-Free Tiramisu
For a vegan version:
- Use vegan whipped topping
- Substitute cashew or coconut-based mascarpone
- Use plant-based ladyfingers
- Brew decaf espresso or use coffee extract
For alcohol-free tiramisu, just skip the liqueur—your espresso is flavorful enough on its own.
Common Mistakes to Avoid
Even though tiramisu is easy to make, there are a few traps that can trip you up. Avoid these, and you’ll end up with a dessert to be proud of.
Over-Soaking Ladyfingers
This is the #1 mistake. Ladyfingers are delicate. Dunk them too long and they’ll turn into soggy mush. Just dip them quickly—1–2 seconds per side is plenty.
Using Imitation Ingredients
Stick with real mascarpone cheese and espresso. Substitutes like cream cheese or instant coffee can work, but they won’t give you that authentic flavor.
Not Letting It Set Long Enough
Tiramisu needs time in the fridge to firm up and develop flavor. Six hours is the minimum—overnight is even better.
Rough Mixing
Whether you’re folding in whipped cream or mascarpone, gentle is key. You want to maintain the airy texture. Overmixing knocks out the fluff and leaves you with a dense mess.
Storage & Shelf Life
If you’ve got leftovers (lucky you!), storing tiramisu properly ensures it stays fresh and safe to eat.
How to Store Tiramisu Properly
- Cover with plastic wrap or store in an airtight container
- Keep it in the refrigerator at all times
- Eat within 3–4 days
If your tiramisu starts to separate or smell off, it’s time to let it go.
Can You Freeze It?
Yes! Tiramisu freezes well. Just wrap it tightly and freeze for up to 3 months. Let it thaw in the refrigerator overnight before serving. Note that the texture may be slightly softer after thawing, but the flavor remains divine.
Tiramisu Pairing Ideas
Want to make your tiramisu moment even better? Try pairing it with something that complements its coffee-cocoa-cream magic.
Beverages That Go Well:
- Espresso or cappuccino – classic combo
- Red wine – like Marsala or a light Pinot Noir
- Sweet dessert wine – such as Vin Santo or Port
- Baileys or Kahlua on the rocks – for a boozy dessert pairing
Dessert Combos:
- Biscotti – for crunch contrast
- Chocolate truffles – if you want to go ultra-decadent
- Gelato – especially hazelnut or vanilla
Mix, match, and elevate the whole experience.
Nutritional Information
Tiramisu is a treat, no doubt. It’s rich, indulgent, and not exactly light. But knowing what’s in it can help you enjoy it mindfully.
Approximate Nutritional Breakdown (per serving):
- Calories: 450–550
- Fat: 30g
- Carbs: 35–45g
- Protein: 6–8g
- Sugar: 20–25g
Tips to Make It Lighter:
- Use low-fat mascarpone (if available)
- Skip the egg yolks and double the whipped cream
- Use stevia or erythritol instead of sugar
- Choose decaf coffee for a low-caffeine version
Remember, it’s okay to treat yourself—just enjoy it in moderation!
FAQs about Famous Tiramisu Recipe
1. Can I use store-bought sponge cake instead of ladyfingers?
Yes, in a pinch you can. Slice it thinly and dry it slightly in the oven so it absorbs coffee without getting soggy.
2. How do I fix runny tiramisu cream?
Let it chill longer, or try stabilizing with a bit of cornstarch in the mascarpone mix next time. Overmixing can also cause this issue.
3. Can I make tiramisu in individual cups?
Absolutely! Just layer the ingredients in small glasses or jars. It’s perfect for parties or portion control.
4. What’s the best cocoa powder to use?
Go for high-quality unsweetened Dutch-process cocoa. It has a smoother, more chocolatey flavor.
5. Can I make tiramisu gluten-free?
Yes! Use gluten-free ladyfingers (available online or at specialty stores) and double-check that your cocoa powder and mascarpone are certified gluten-free.
Conclusion
There you have it—a full, step-by-step guide to making the famous, authentic tiramisu right in your kitchen. From brewing the espresso to layering that velvety mascarpone cream and dusting on cocoa like a pastry chef, you now have everything you need to wow your guests—or yourself.
Whether you keep it classic or try a fruity, vegan, or alcohol-free twist, tiramisu never fails to impress. And now that you’ve mastered it, it’s a dessert you’ll want to make again and again.
So go on, take a bite of that chilled, creamy, coffee-soaked perfection. You’ve earned it.


